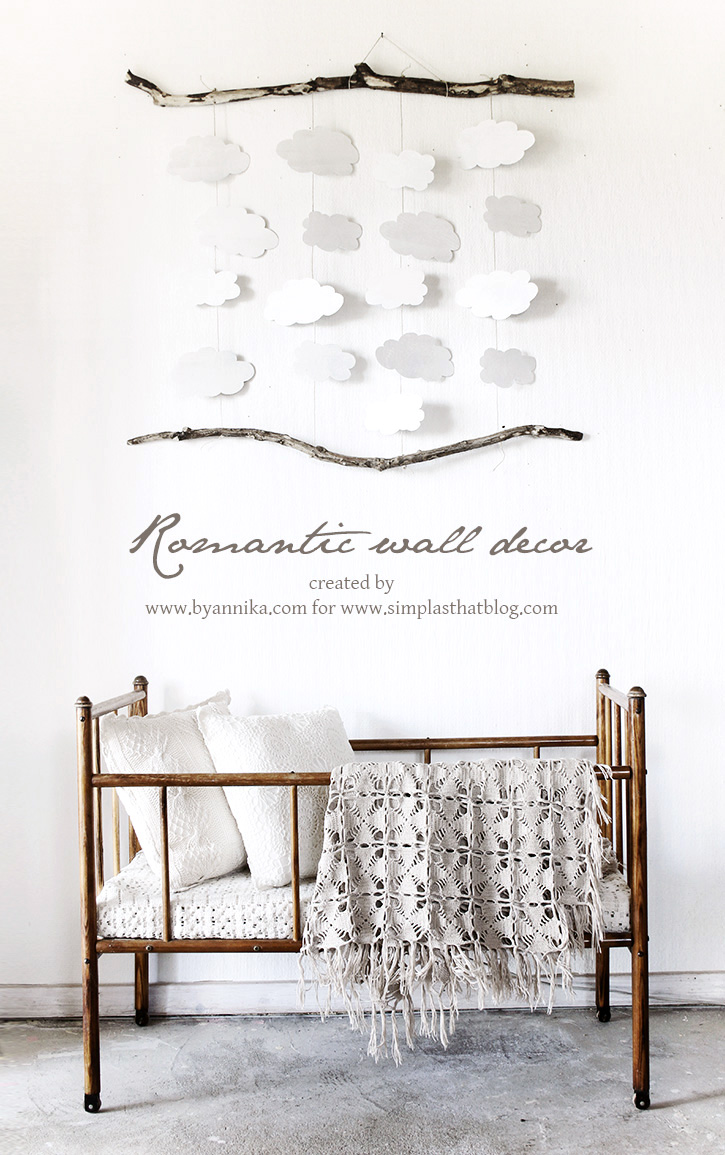
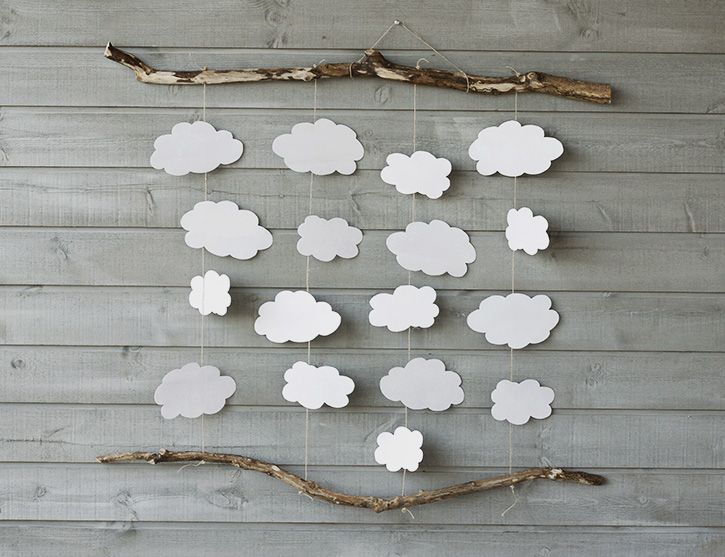
Hi everyone, how are you? It’s me, Annika, stopping by with a super easy, rustic, and romantic DIY project for you guys. This project was originally meant to be sort of a hanging wall frame/display, but when I was half-way through creating it, I just loved the look and simplicity of this romantic wall piece, so I decided to leave out the pictures. It has this bohemian feel to it, which I love and it would certainly fit any romantic nursery, but I think that if you enjoy the casual, airy beach style in your home, it would be a beautiful rustic decor addition for the bedroom or guestroom as well.
 For this project you will need the following tools and materials:
CLOUDS:
– thin cardboard
– paper
– white (acrylic)paint (or any color of your choice)
– foam roller or paintbrush
– newspaper or paper to cover, when painting
– glue gun
– scissor
– pen
BRANCH FRAME:
– 2 driftwood branches or dry found branches ( mine are approx. 1m in length)
– hemp cord
– drill
– sander tool
– small sharp knife
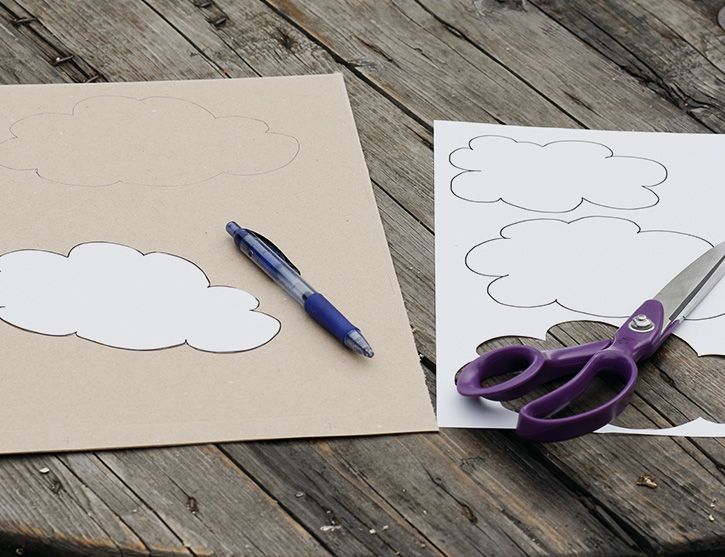
STEP 1:
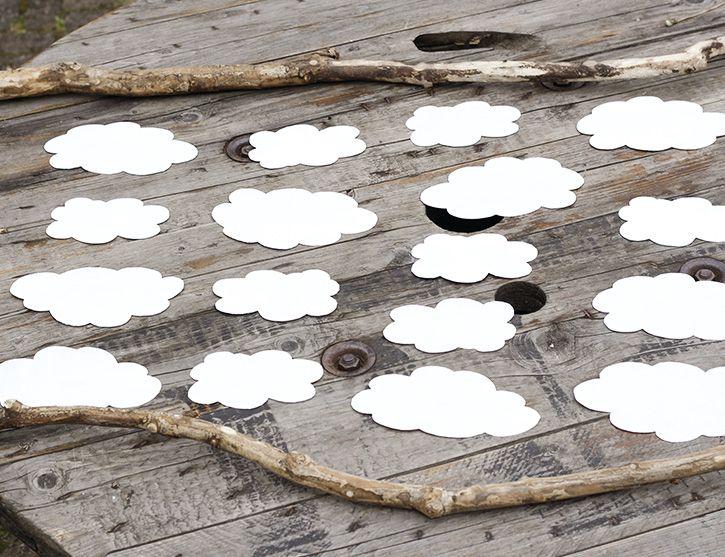
Take a sheet of paper and draw 3 different cloud shapes. Cut out the paper shapes and start outlining clouds on you cardboard paper. I choose to make 17 clouds. Take turns, using the three different clouds to get a variety of clouds. Cut them all out from the cardboard.
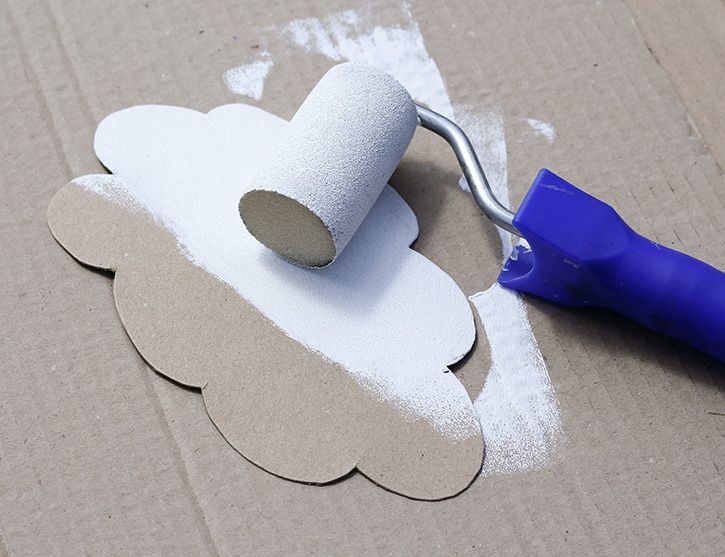
STEP 2:
Cover up your tabletop with newspaper and start painting all the cardboard clouds white. When dry, flip over and paint other side as well and let dry.
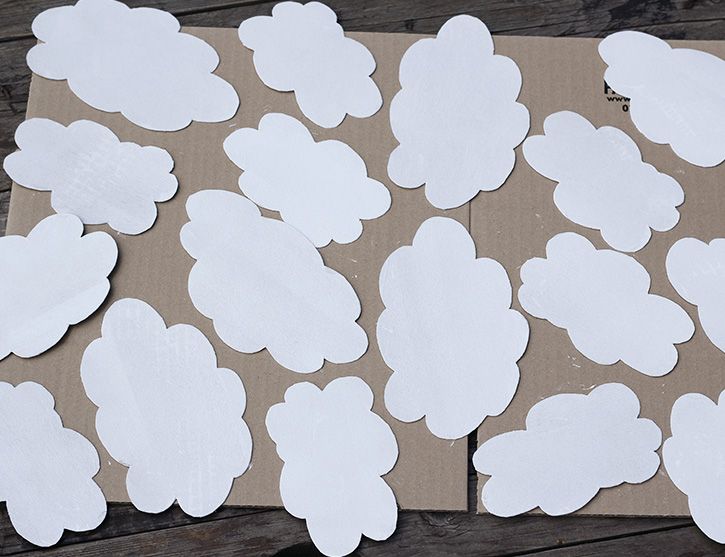
Now you should have a bunch of white clouds ready to go. Let’s move on to the frame.
STEP 3.
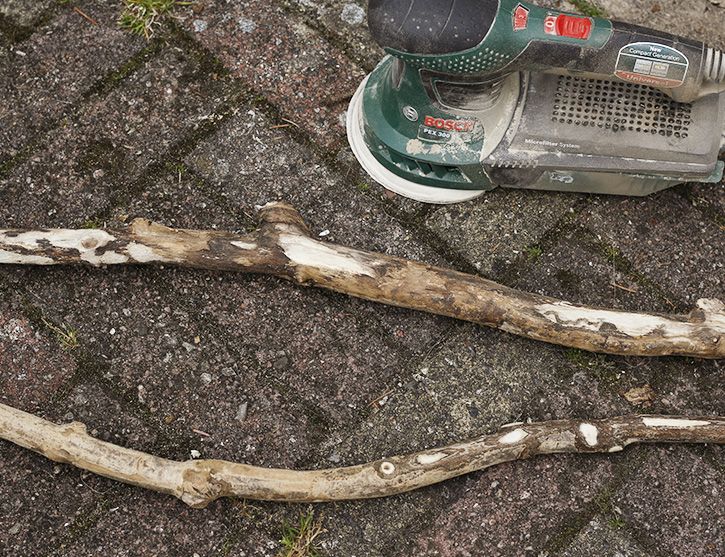
If you are using branches with bark, you might want to remove some of it to create a smoother surface. You can use a sharp knife to remove all loose bark. To finish off, take a sander tool and go over the branch surface to make the surface nice and smooth. If you are using driftwood, chances are your branches are already nice and smooth.
STEP 4
Place your branches and painted clouds on a tabletop, and map out how you want everything to be.Branches should make a top and bottom frame. Now imagine there will be running a cord through each row of clouds and the cord will be secured to each branch. Take a pen and mark on the branch where each cord will go through.
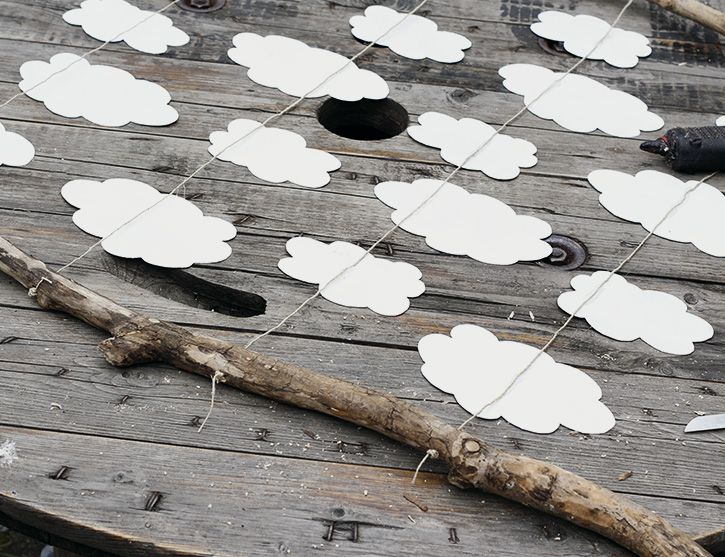
STEP 5:
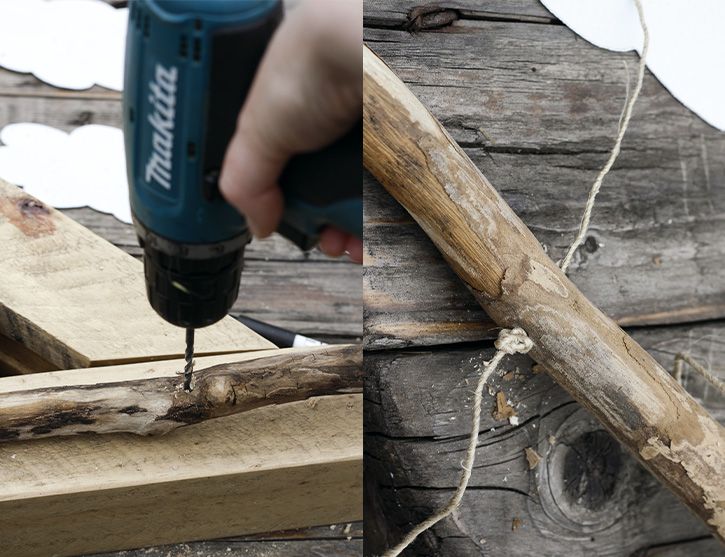
Now you drill holes in those marked spots. You should make holes in each branch, opposite one another.
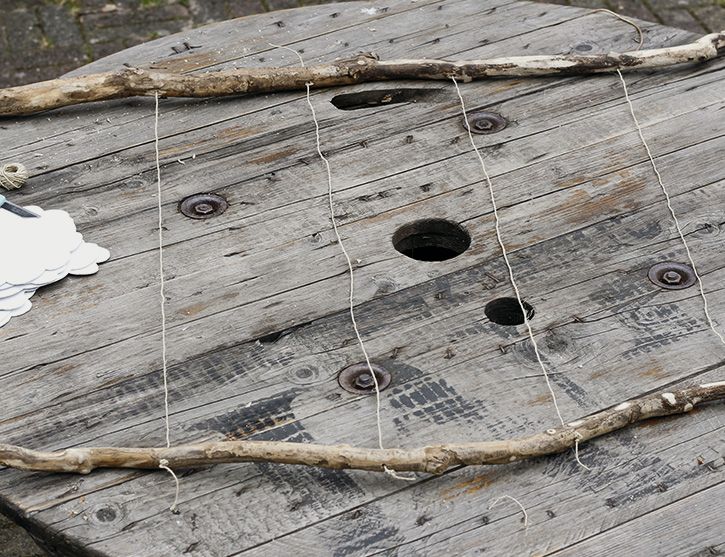
Take the cord end and pull through drilled hole in branch number 1 and make a couple of knots. Now take the second end of the cord, and pull it through the opposite hole in branch number two. Do this with all the holes and you should have a “frame” looking like the one in the picture below.
STEP 6:
Place out all the clouds again along the cords and glue them to the hemp cord. I glued the clouds slightly off center, alternating between right and left of the clouds in a row.
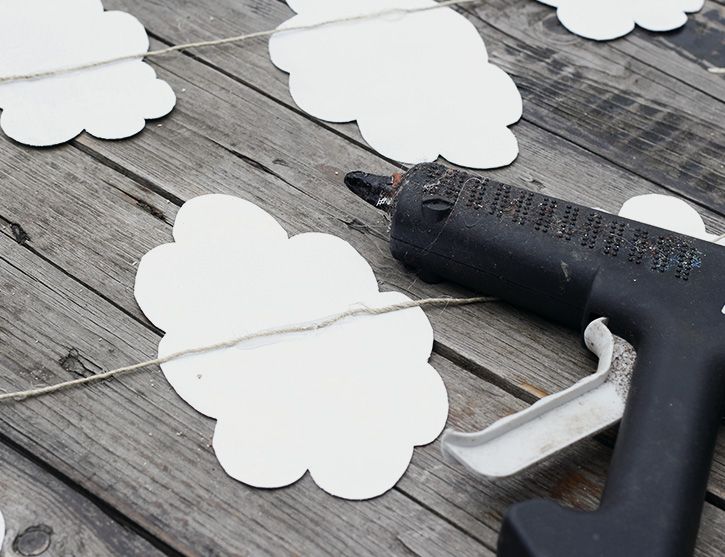
When you have glued every cloudto the cords, in each row, it will look something like in the picture below.
STEP 6:
Last but not least, you’ll need to hand your rustic wall piece. Take a bit of hemp cord and tie it around the top branch in two places and make knots. Now you can hang it on a simple nail and adjust for the imbalance of the weight of the branches.
I hope you enjoyed this tutorial on how to easily make a simple, yet very effect full decor piece for your home.
Let me know if you have any questions.
Have a beautiful start to the summer!
See you soon.
Annika
Latest posts by Annika Olsson (see all)
- The one reusable accessory you need to make your baby photos look stunning (tutorial) - Monday, June 12, 2017
- Create a beautiful personalized Mother’s Day gift - Wednesday, May 3, 2017
- Create a super quick last minute Easter (or any time of year) hostess gift. - Sunday, March 19, 2017

Leave a Reply