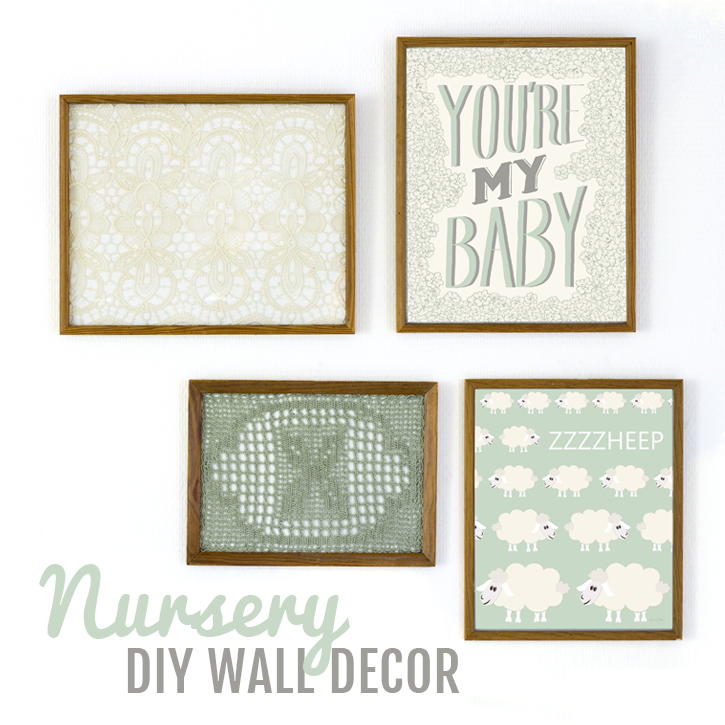
Beautiful DIY Nursery Wall Decor using free printables and thrifted finds! Follow the simple directions below to create your own!

Wow, have I been excited about this day! This is my first post here on Simple As That, as a new contributor to this amazing blog. Thank you Rebecca for letting me be a part of this awesome place you have created.
One of my absolute favorite things to do, is coming up with new ideas and purposes for things I have in my home and finds from the thrift store. I find great pleasure in reusing stuff, both to save money and not wasting too much, but also to exercise my creativity.
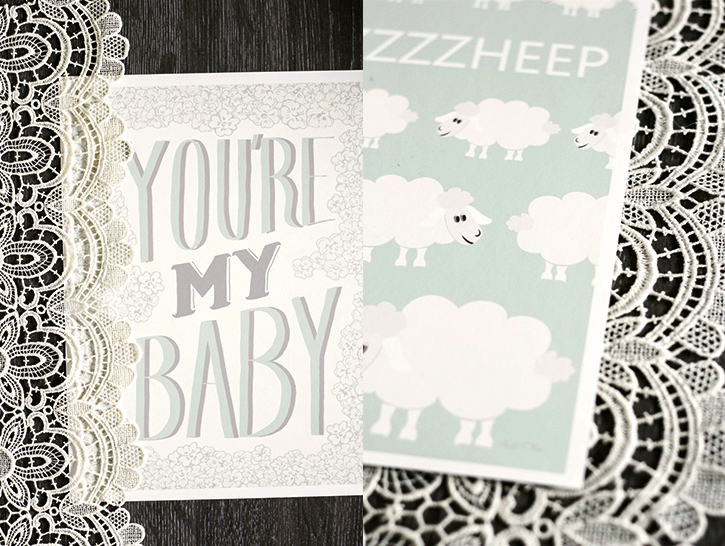
Today’s project can be used in any room , but since I’m lucky enough to be an aunt for the 7th time this summer, I thought I would help my dear sister-in-law out with some wall decor for her nursery. So I designed a couple of cute nursery prints I wanted to pair with a few family photos, and some framed pieces of lace for texture. All in soft colors, that will go well with either a boy or girl nursery.
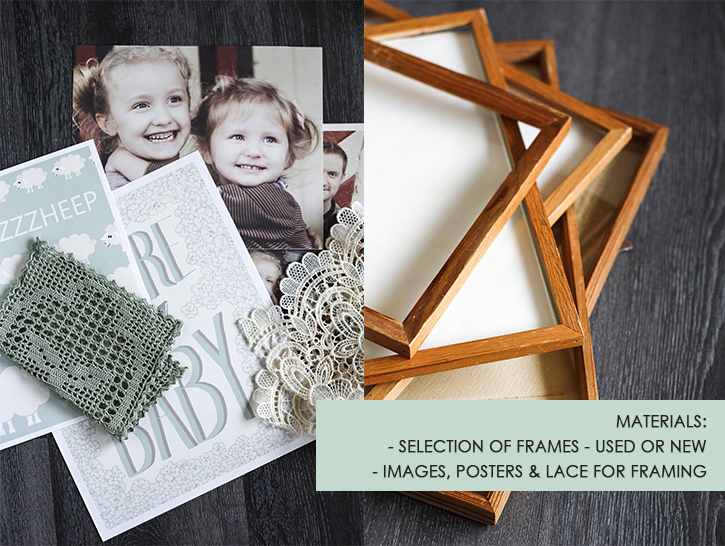
To make this wall decor, we are going to gather our supplies and materials. For this project you will need the following:
Tools used – Printer, paper for photos and poster, hobby knife, ruler, transparent glue (fx glue-gun), masking tape, cardboard.
1. Selection of frames – I have used 6 frames; 2 for posters, 2 for photos and 2 for fabric. I like old wood frames and I like to buy them from second hand stores. These are from a while back and I like the retro look.
Use whatever frames you have laying around, or go out and see if you can make a bargain at a thrift-store. Place all you frames on the floor, arrange them as you would on the wall and decide what you are going to put in each of them.
2. Printed posters – I have made the posters in two sizes; A4 and Letter size. If your frame is a bit different in size, the prints hold room for some trimming.
A4 size “Zzzzheep” & “You’re my baby” poster: DOWNLOAD HERE AND PRINT
Letter size “Zzzzheep” & “You’re my baby” poster: DOWNLOAD HERE AND PRINT
3. Printed photos – Collect and print some family photos, to match your frame sizes.
(you could also match your frames to your photos, but if you are reusing old frames, it can be quite hard to find the exact sizes)
4. Pieces of fabric – You could pretty much use any kind of fabric for this. I love texture and I thought lace would be really cute in a nursery and when I was looking through my fabric piles, I also found a small crocheted piece in a lovely green color. It was such a perfect match for the posters. Both pieces are from thrift stores.
When you have found your fabric, printed your photos and poster, you are ready for framing.
Posters are fairly easy to frame; you might have to trim the edges, but that is doable with a hobby knife and a ruler. Just measure your frame and trim poster to match the size of that frame. You go about framing your photos the same way as the posters.
The fabric or lace needs to be cut to match the size of the frame, and you will need a suitable backing to attach and stiffen the fabric. If you are using lace or any see-through fabric, you need to be aware of the color of the backing, as it will show. I tried out a couple of different choices of backing, since I was using lace with quite big holes.
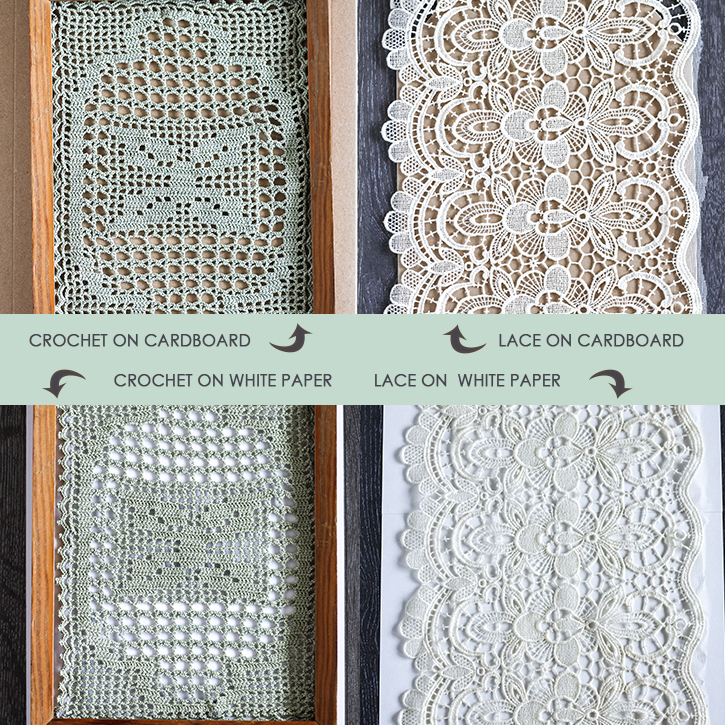
While I was very much in love with lace on cardboard (I think i’m going to have to use that for another project), I went with the white paper background. I felt it matched the posters and photos better than the cardboard.
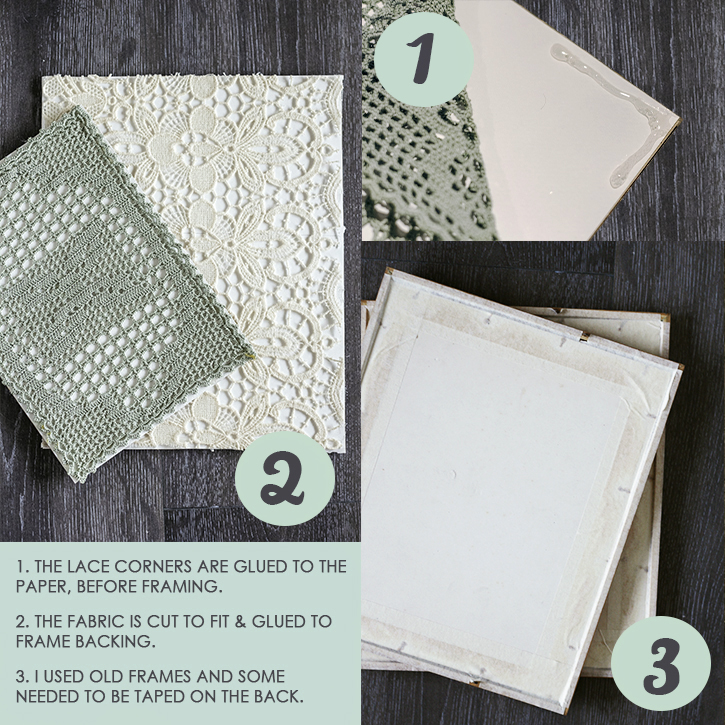
I secured my fabric/lace by attaching the corners to the backing with a glue-gun. It’s easy to handle, dries quickly and the glue is transparent.
If you are working with really old frames, you’ll learn that they often lack a proper locking mechanism on the back of the frame. I solve this by using masking tape around all the edges of the frame onto the backing. It doesn’t really look nice, but it’s easy and it works, and you don’t really look at the back anyway.
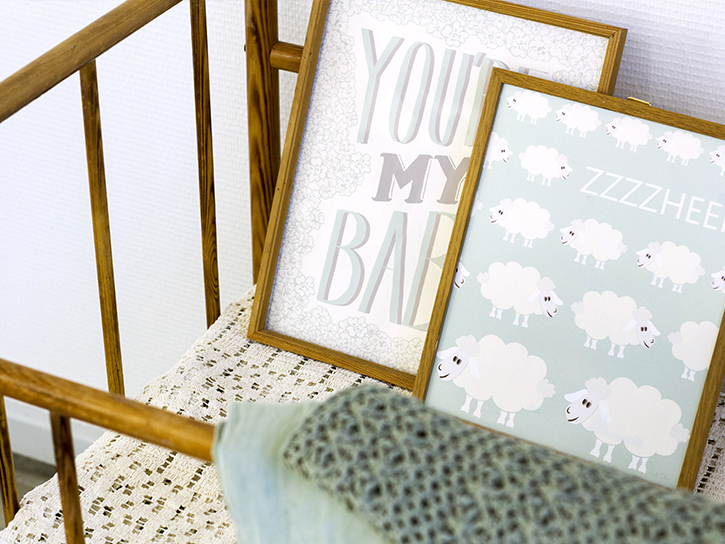
All that is left now, is for you to hang your frames and enjoy your creations. I’m going to go wrap all of this up and ship it to my darling sister-in-law. She has no idea I’m making this for her. I sure hope she likes green ![]()
I hope you had fun with this project….till next time. See you soon!

Latest posts by Annika Olsson (see all)
- The one reusable accessory you need to make your baby photos look stunning (tutorial) - Monday, June 12, 2017
- Create a beautiful personalized Mother’s Day gift - Wednesday, May 3, 2017
- Create a super quick last minute Easter (or any time of year) hostess gift. - Sunday, March 19, 2017

Darling gender neutral nursery ideas! Love those printables!
Beautiful! Love the framed crochet! We’re shared with our Twitter followers