 Hope you all had a wonderful summer!
We are making the most of the late summer, and this weekend we’ll be going to a craft fair where we will bring our handmade goods. My hubby is bringing his recycled wood creations- like trays, crates, and shelves, and I will be bringing my hand lettered work.
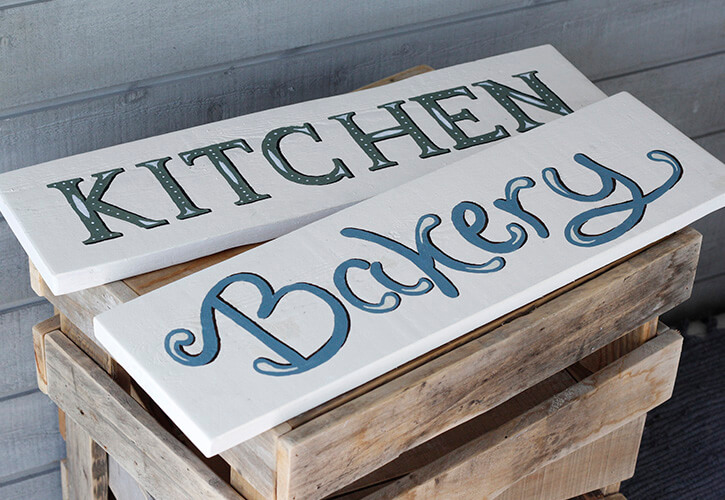
So while prepping some new pieces for this fair, I thought I would bring you along while making a couple of my handpainted signs for the kitchen. I have described the steps, turning it into a small tutorial, which could maybe help you to make your own. These simple one-word signs are really lovely, and they could easily be a fun decor addition for your home, or maybe suit when decorating for some of the holidays coming up this fall.
Alright, let’s get started.
I always start off with some inspiration. Pinterest is one of my favorite browsing places, where I usually find a couple of images, referencing color and style I like. If lettering or drawing is not your strong suit, just find a font you like and copy that. You can even make print-outs and trace directly. See my lettering board for inspiration.
MATERIALS:
1 – Wood board (I used scrap wood pieces, measuring 15 x 55 cm)
NOTE: You’ll need a wood board, raw or painted. Anything could do, but I encourage you to sand down the surface on which you are painting, to make it easier to paint on.
2 – Pencil, eraser, paper and tape
3 – Piece of chalk/charcoal
4 – Paint and paintbrushes (I simply used acrylic paint)
5 – Name or word to paint
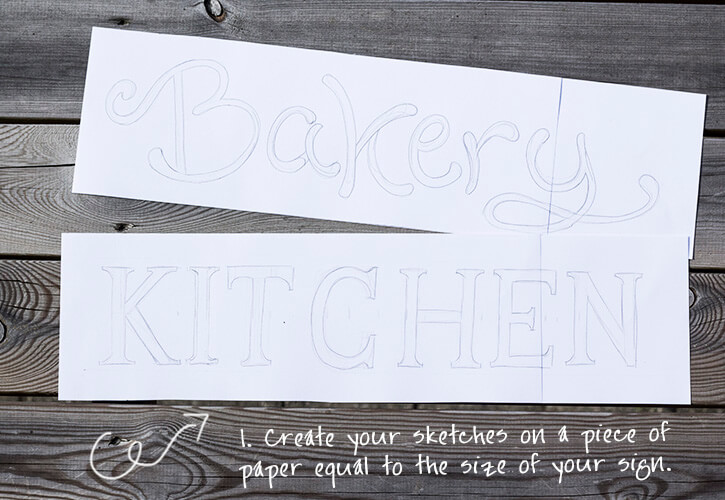
1) STEP ONE:
Cut a piece of paper equal to the size of your board.
Draw/ sketch your design on the paper.
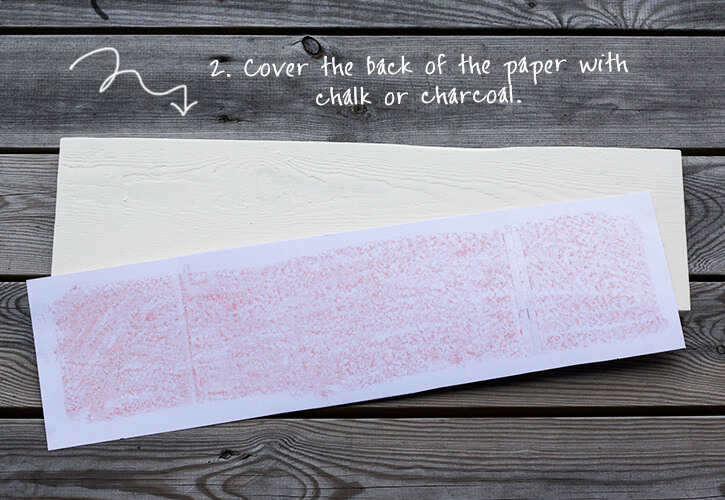
2) STEP TWO:
Flip the paper and take a piece of charcoal and smudge the entire area of the back of the paper.
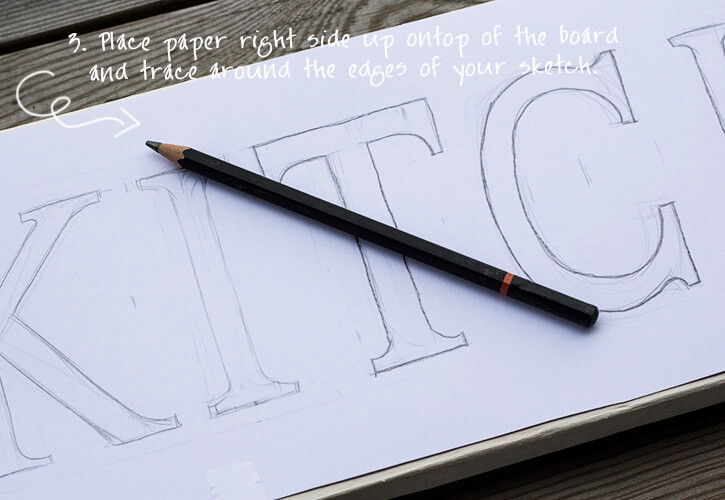
3) STEP THREE:
Place your design face up on top of your board. Secure with tape in a few places around the edge.
Trace your design outlines with a pencil. Make sure to press firmly with the pencil.
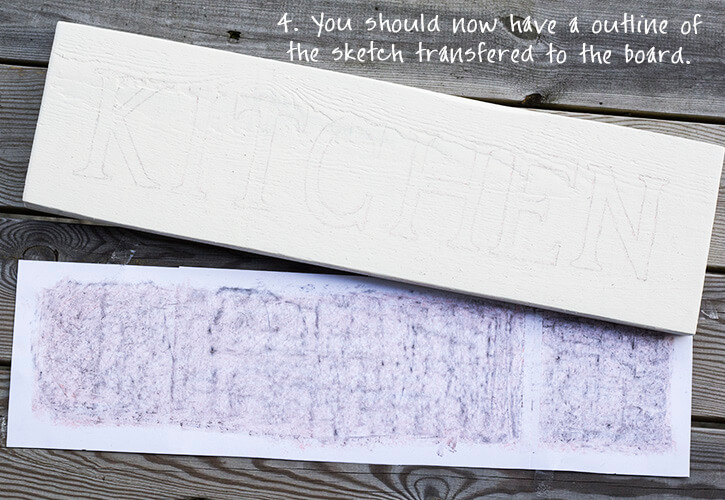
4) STEP FOUR:
Removing the paper, and you should see an outline of your design transferred to the board.
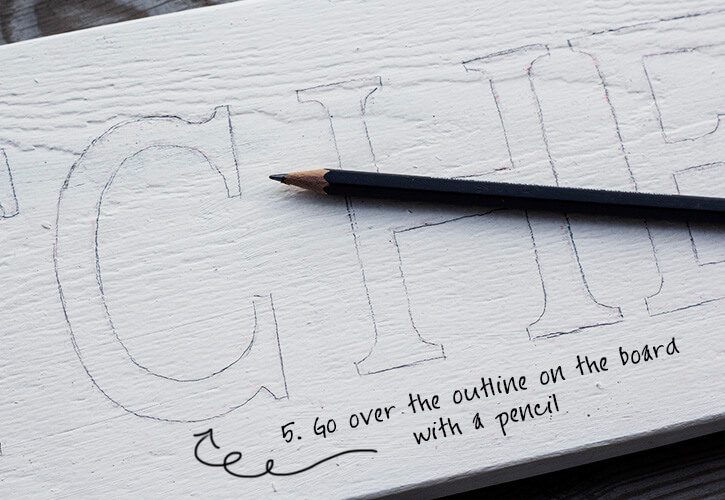
5) STEP FIVE:
Go over the transferred outline you just made on the board with a pencil, to clear up the lines of the design.
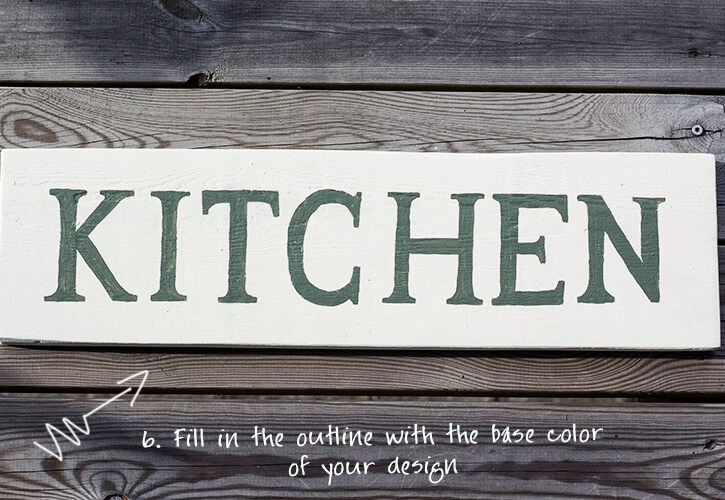
6) STEP SIX:
Now you are ready to paint. Start by filling in the design with your chosen base color. I recommend using a rather small brush for the edges, depending on the detail of your design of course. Now let it dry.
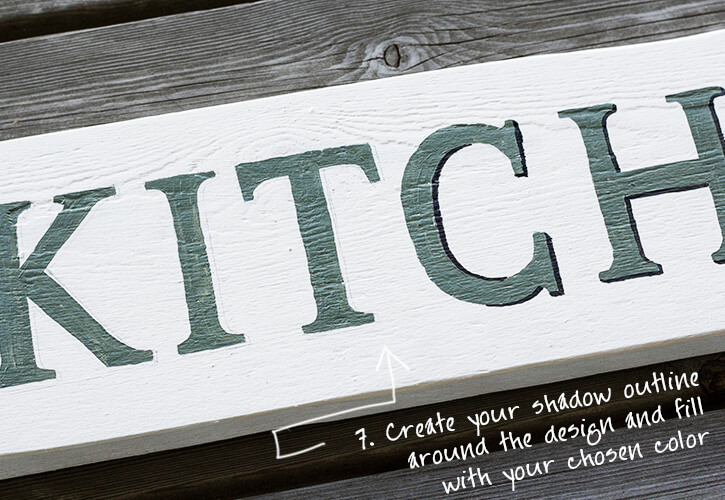
7) STEP SEVEN
Create a shadow outline with a pencil around your painted design and fill it with a second color to give your letters depth.

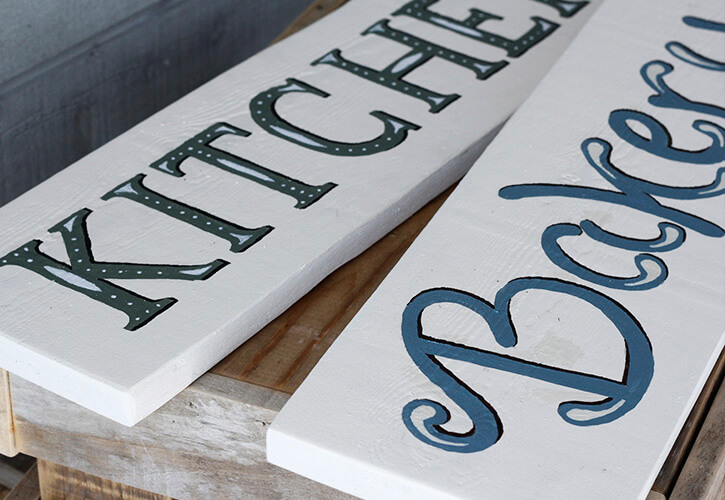
8) STEP EIGHT
The last step is to decorate your painted design with swirls, lines, dots or whatever you can come up with. You can do this by first outlining your ornaments with a pencil or you can go free hand. Remember, as long as you keep inside the design, you can always easily do some touch ups, by using the other paint colors. If your board is painted, touch up can be done outside the design as well, with corresponding board color.
Yay, that’s it! You should now be holding a pretty cool and fun sign you can decorate your home with.
I hope you enjoyed this simple sign tutorial. Let me know if you have any questions.
Have a wonderful week.
/Annika

Latest posts by Annika Olsson (see all)
- The one reusable accessory you need to make your baby photos look stunning (tutorial) - Monday, June 12, 2017
- Create a beautiful personalized Mother’s Day gift - Wednesday, May 3, 2017
- Create a super quick last minute Easter (or any time of year) hostess gift. - Sunday, March 19, 2017

What a wonderful tutorial! Thank you so much for each step-by-step instruction. Can’t wait to make a cute sign! Blessings, Kristy
Thanks Kristy, I’m so glad you like it and found it useful.
Best tutorial I’ve seen for a sign ~ thank you!