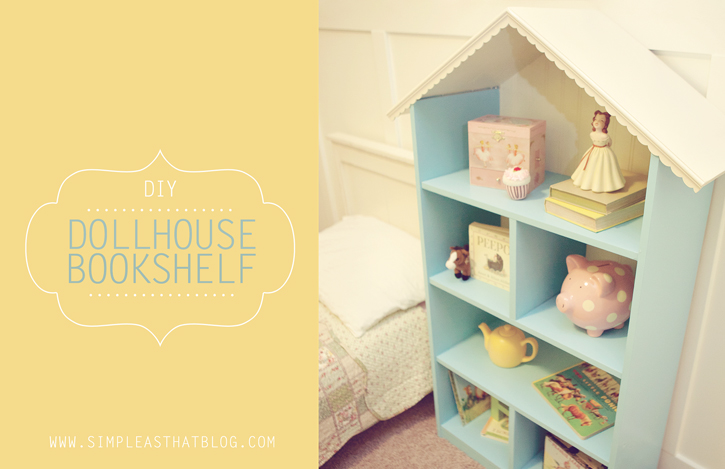
I’ve been so excited to share this little project that my husband and I have been working on for the past week. We converted this bookshelf from Wayfair into a dollhouse/bookshelf for our two youngest girls for Christmas and I just love how it turned out! We’ll be adding dollhouse furniture to it and they’ll use it as a dollhouse, but I think it looks so great as a bookshelf too!
As part of the Wayfair DIY blogger challenge we were given our choice of three different products to transform and we chose this 3 tiered bookshelf. I new exactly what I wanted to do with it before it even arrived and I was super excited to get to work!
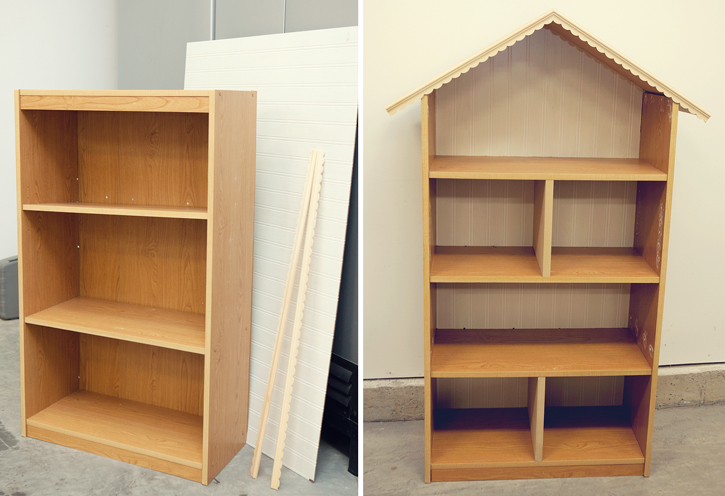
We loosely assembled the bookshelf as we decided exactly how to go about transforming it into a dollhouse. Once we’d decided on a plan of action we got to work and in just a couple of hours we went from this, to this:
Here’s how we did it
We moved each of the shelves on the bookshelf down a few inches so there wouldn’t be any wasted space between the roof and the first shelf. This was a great way to add one more level to our dollhouse creating some extra play room. Use wood glue and spax screws or brad nails to attach shelves.
We then used some scraps of MDF to create the roof and inside partition walls and attached some scallop edging that I purchased at Michael’s to finish off the edge of the roof. We switched out the original backing of the bookshelf with a sheet of wainscot panel.
To save yourself some work taping and masking things off when it comes to final painting, I’d recommend painting the backing and the shelf separately before assembling. I just might be speaking from experience here.

After filling all the holes and lots of sanding, we were ready to give it a coat of primer. We masked off the top of the laminate shelves because I thought they’d look cute as faux hardwood floors in our little dollhouse. We used KILZ primer and it worked great! After some more sanding we were then ready to move on to painting. We used Rust-Oleum satin spray paint on the whole dollhouse and I’m really happy with the finish.
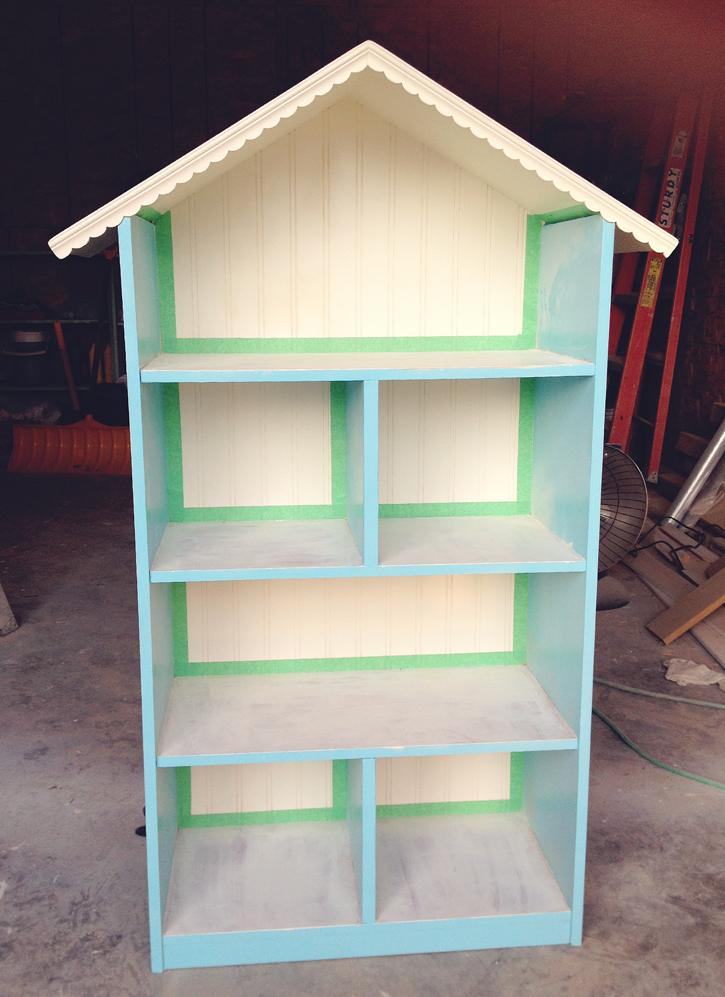
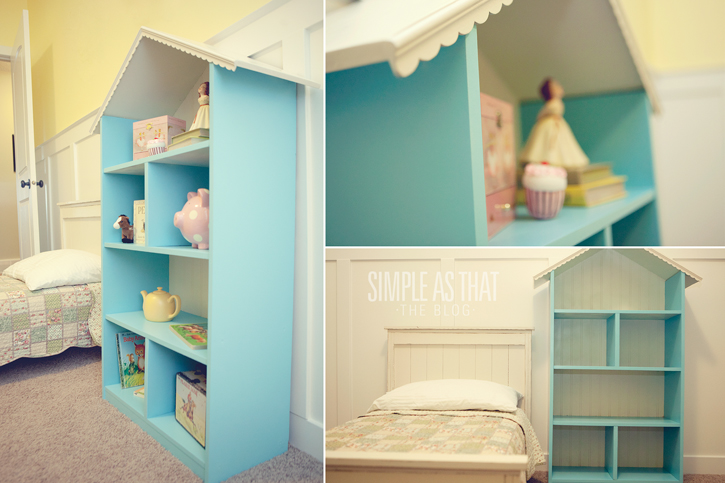
We used aqua for the shelves, antique white for the backing and grey for the roof. Once we were done it just didn’t look quite right. Those faux laminate floors that I thought would look so cute, didn’t, and the grey roof was just too dark for the rest of the house so we gave it another try. After sanding down the top of the shelves and roof we masked things off aga in and began repainting. We painted the roof antique white and all of the shelves aqua. It turned out so much better and I’m really glad we took the time to repaint even though it took us much longer than anticipated to finish the project because of it. After our painting mishap I learned that its best to keep your colour palette simple.You can scroll down for a few pictures of the final product. I’ve photographed it as a bookshelf, but as mentioned, we’re going to be giving it to our girls for Christmas along with some darling little furniture
so they can use it as a dollhouse. Either way it is cute, cute, cute and our painting mishap aside, it was a relatively straight forward project that can be put together in a week or less. With the repainting on our dollhouse it took us 1 week + 1 day to finish. Total cost {minus the extra paint we had to buy} was the cost of the bookshelf + $50.00 in supplies {spray paint, primer, scallop edging, wainscot panelling} not including things we already had on hand {MDF scraps, wood filler, wood glue, nails/screws, sand paper}.
so they can use it as a dollhouse. Either way it is cute, cute, cute and our painting mishap aside, it was a relatively straight forward project that can be put together in a week or less. With the repainting on our dollhouse it took us 1 week + 1 day to finish. Total cost {minus the extra paint we had to buy} was the cost of the bookshelf + $50.00 in supplies {spray paint, primer, scallop edging, wainscot panelling} not including things we already had on hand {MDF scraps, wood filler, wood glue, nails/screws, sand paper}.

If you enjoyed this post you might like these other craft + DIY projects from Simple as That:

DIY Christmas bunting | reindeer hairdo


simple, inexpensive Christmas gift wrapping ideas | turtle bar recipe + packaging

anna white farmhouse table + benches | DIY pocket travel journal

Rebecca Cooper is a 42-year-old wife and mother of four from Alberta, Canada. As a photographer, crafter, author, and blogger, she finds joy and fulfillment in celebrating everyday moments. She loves to read and eat chocolate, and is a firm believer in afternoon naps. Rebecca shares her family’s adventures, photo tips, simple craft projects + more right here at Simple as That.
Latest posts by Rebecca (see all)
- Printable 2023 Calendar - Monday, December 5, 2022
- SMART Goal Setting Bookmarks - Sunday, June 12, 2022
- Free Printable 2022 Calendar - Thursday, September 9, 2021

that is so cute, what a wonderful Christmas gift!
So, so cute! I used to pick up FP Loving Family pieces in the US (before they were available here) and added them to our daughter’s doll house. They are so sturdy – and cute. Your girls are going to love this! 🙂
This is adorable. I wish my little girl were younger. I would so be making this. I am your newest GFC follower. I’d love for you to stop by Posed Perfection for a visit and maybe even a follow back. Have a wonderful Thanksgiving week!
Blessings,
Nici
Adorable…and soooo creative! Love it!
I can’t believe you have the Peepo! book on your bookshelf. I love it, it is practically a replica of my Granny’s house from during the war. Happy memories. Love the blog by the way from a very wet and windy Ireland.
Rebecca, this is SO, SO darling! It’s my favorite of all the DIY Wayfair projects!
So sweet and beautiful color and details. Definitely something very “heirloom-y” about it. I’m sure they’ll love it!
That’s adorable! We are doing the same thing for our daughter and I love the way you painted it. Where do you plan to get furniture? I have had a hard time finding anything cute.
so so so CUTE!!
It’s beautiful! Great job!
This is so beautiful! I just love the idea and with two girls (6 months and 3 years) we are definitely adding this to out to-do list! Love your blog- thanks for sharing!!!
I’m not too sure yet what we’re going to do for furniture…I’d love to hear anyone’s suggestions. 🙂
I’m not too sure yet what we’re going to do for furniture…I’d love to hear anyone’s suggestions. 🙂
I’m not too sure yet what we’re going to do for furniture…I’d love to hear anyone’s suggestions. 🙂
I’m not too sure yet what we’re going to do for furniture…I’d love to hear anyone’s suggestions. 🙂
So, adorable! It really could be a bookshelf or doll house. Love it! As far as furniture goes, I would end up making some out of plastic canvas. Do let me know if you find something elsewhere.
That could not be cuter! I just love it … the scalloped roof adds so much!
This is so adorable!! Definitely pinning this for future use 🙂
Your bookcase/dollhouse is adorable. I will need to add it to the “to do list” for the grand daughters.
Terri
One Promise
Soul Wishes
It came out beautiful Rebecca!!!! I’m thinking I might be able to convince my girls to tun their giant doll house into shelves like this since they hardly use it anymore. I love this.
Adorable!!!
Hi Rebecca!
This is really a cute dollhouse bookshelf and a wonderful idea for Christmas! Thank you for mentioning SPAX. If you have more projects to be realized with SPAX, please feel free to present them on our Facebook page (facebook.com/SPAX).
Best wishes from Germany,
your SPAX team
Nicely done!!
Your newest follower.
That is adorable! You are so creative! I’m hosting a craft/recipe party and would love for you to submit this! 🙂
http://sew-licious.blogspot.com/2012/11/show-licious-craft-showcase-9-blog-party.html
Marti
This is so dang cute! I wish I had a little girl so I could have one! We’d love for you to link this up at our party…http://housewivesofriverton.blogspot.com/2012/11/riverton-housewives-round-up-42.html
I loved this! And I have the same doll. In fact I have two of them, the other is a brunette. I bought them from etsy, do you have any information about it, like age, label, origin?
Congratulations for this amazing work! Actually, I am planning to do a similiar doll-house as a Christmas present for my daughter too. Can I ask you how did you manage to put the roof together? What you you use to attach it to the bookshelf? Thank you so much!
Love the paint colors you chose. I was wondering what kind/brand of paint did you use??
How did you tape it off to spray paint the two different colors?
This is beautiful. I love it. The colors are perfect.
So pretty. I love it. I have an ugly shelf that I was planning on tossing out but now I can’t wait to bring new life to it. Thanks for sharing.
Nice, my daughter liked. She wants me to make one one for her too. Thanks for sharing with us..
J aime beaucoup c est vraiment superbe
C est vraiment superbe j adore
What a gorgeous bookcase and I am so impressed that you built it yourself–well done.
Very sweet, your doll house bookshelf turned out so pretty!!!
I love your project and just featured it on my blog: http://dollhouselove.com/blogs/news/16020183-repurposed-dollhouses-alternatives-to-the-traditional-wooden-dollhouse
Hi there!! I just posted a round-up of project ideas using classroom supplies and included your fantastic repurposed bookcase- I seriously wish I had had this as a tot! Thank you so much for such an awesome idea- please find the full round up here: http://www.sadieseasongoods.com/upcycling-101-repurposed-school-and-classroom-items/
Thanks again and craft on!
Sarah (Sadie Seasongoods)
Hi, Rebecca. I really love what you did with this bookshelf, I’m pinning it into my to do list because I know my girls would love it.
It would be great if you could share it at the 2usesTuesday party http://sweethings.net/two-uses-tuesday-53/
Have a great week!
Hugs,
Pili