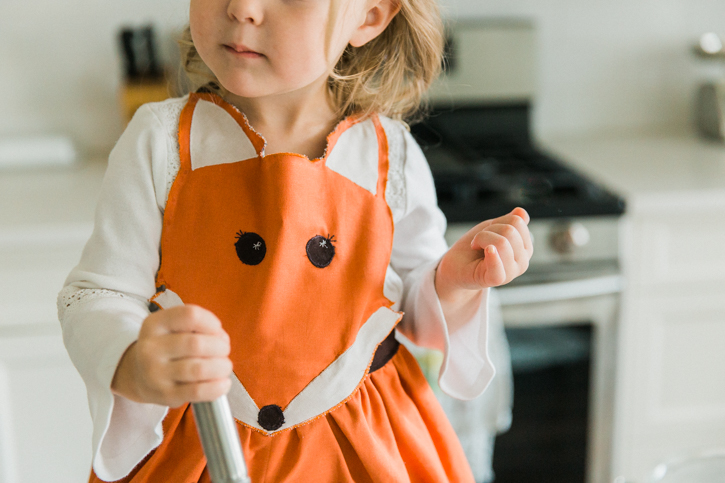
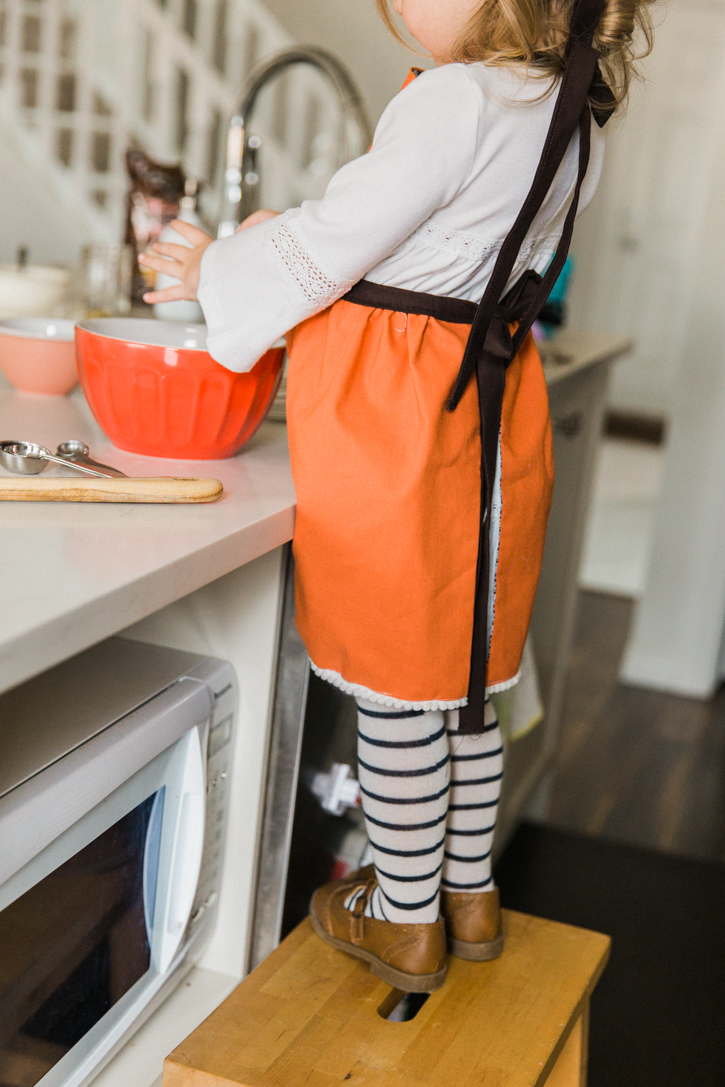
Hello! It’s Jennie again from The Lovely Little Nest with a free tutorial and pattern to make a little Fox Apron. I’m so excited about this project, because it is adorable! My two-year-old was as happy with it as I was.
There is some sewing involved but it’s fairly simple, and there are some (life changing) sewing tricks I learned while making this that I can’t wait to share with you. Let’s dive in, and if you haven’t sewn much before, don’t be scared! This is a great project with simple stitching to get you into the swing of things.
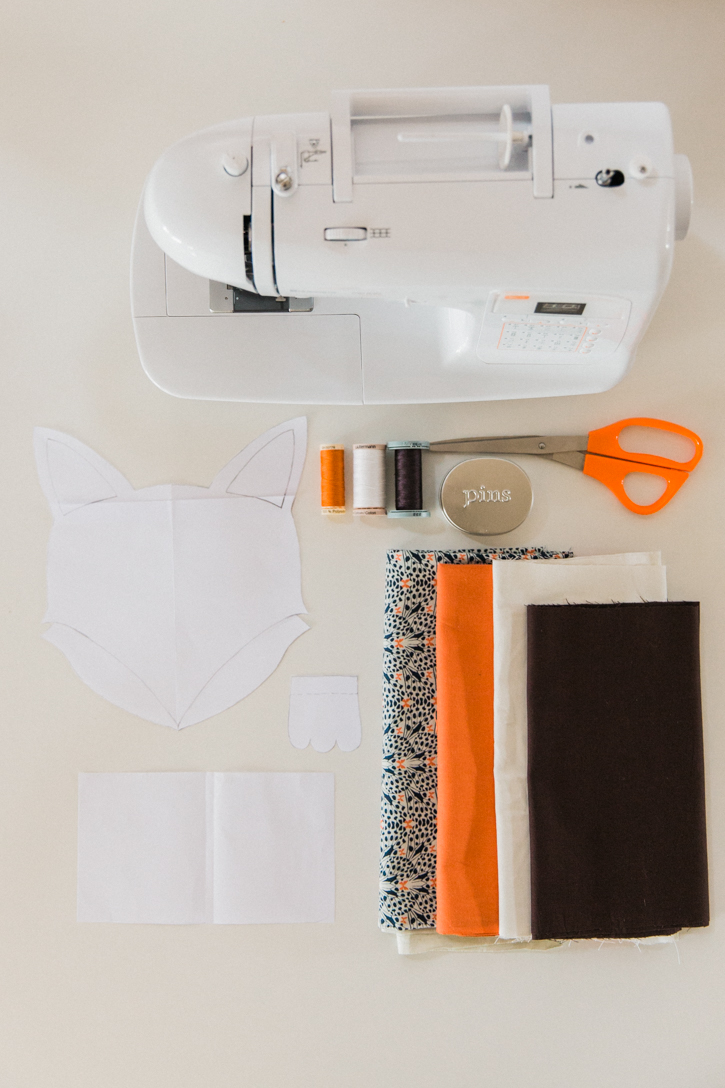
Supplies:
Sewing Machine
Fabric Scissors
Straight Pins
White School Glue
Thread to match fabric
Fabric (based on 44″ width):
24″ Orange Broadcloth
24″ Backing Fabric
10″ Dark Brown Broadcloth
6″ Cream Broadcloth
Instructions:
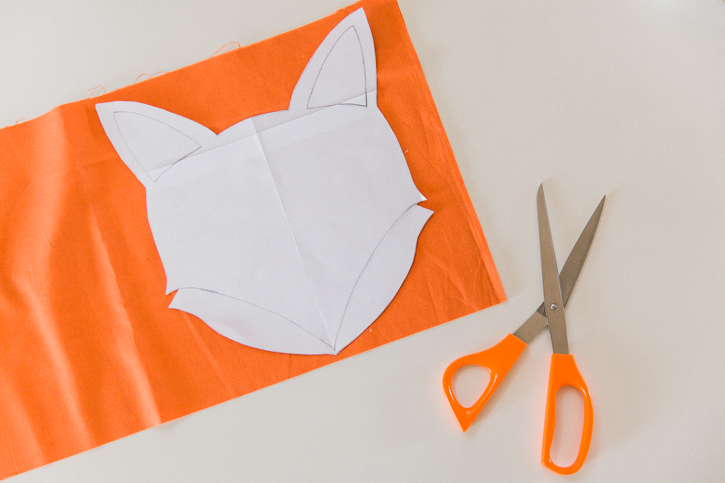
1. Print off two copies of the pattern here, tape it together, and cut them out. Cut apart the ears, eyes, nose, paws and cheeks from the second copy of the pattern so that you have all of the pieces.
2. Cut all of your fabric pieces out:
Orange: 13″ x 41″ Rectangle, 4.5″ x 7″ Rectangle, Fox Head
Backing: 13″ x 41″ Rectangle
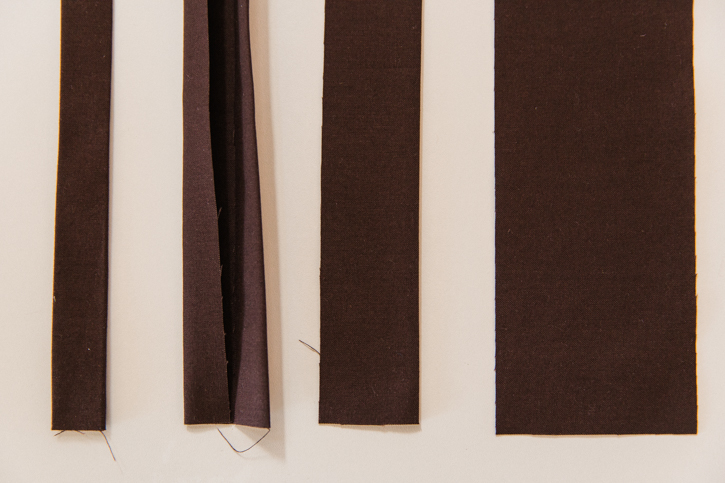
Brown: 1 Nose, 2 Eyes, 2 Paws, 2 3″ x 30″ Rectangles, 2 3″ x 21″ Rectangles
Cream: 2 Ears, 2 Cheeks
Skirt:
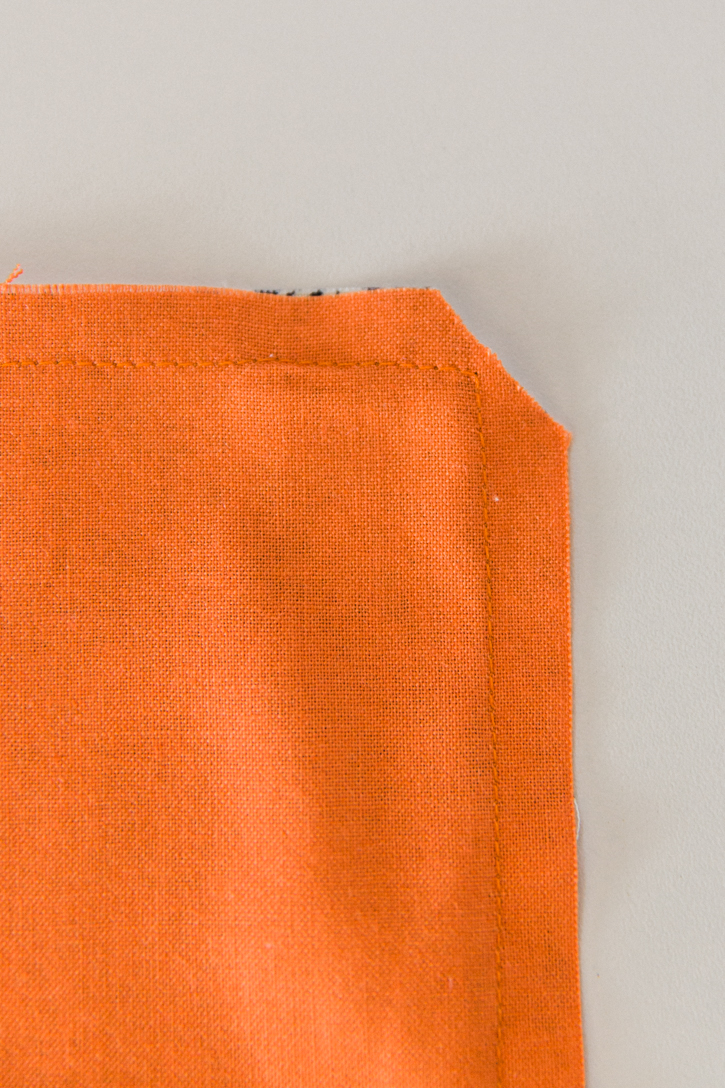
1. Layer the two 13″ x 41″ rectangles one on top of the other, right sides together. Stitch along the sides and bottom of the rectangles, using a 1/2″ seam allowance.
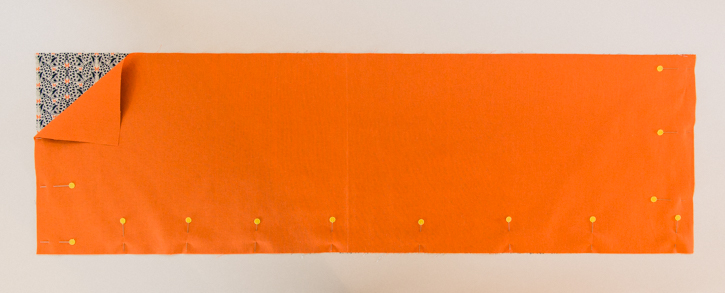
2. Trim the two bottom corners and turn the rectangle right side out, using something pointy to turn the corners out. Iron all of the seams flat.
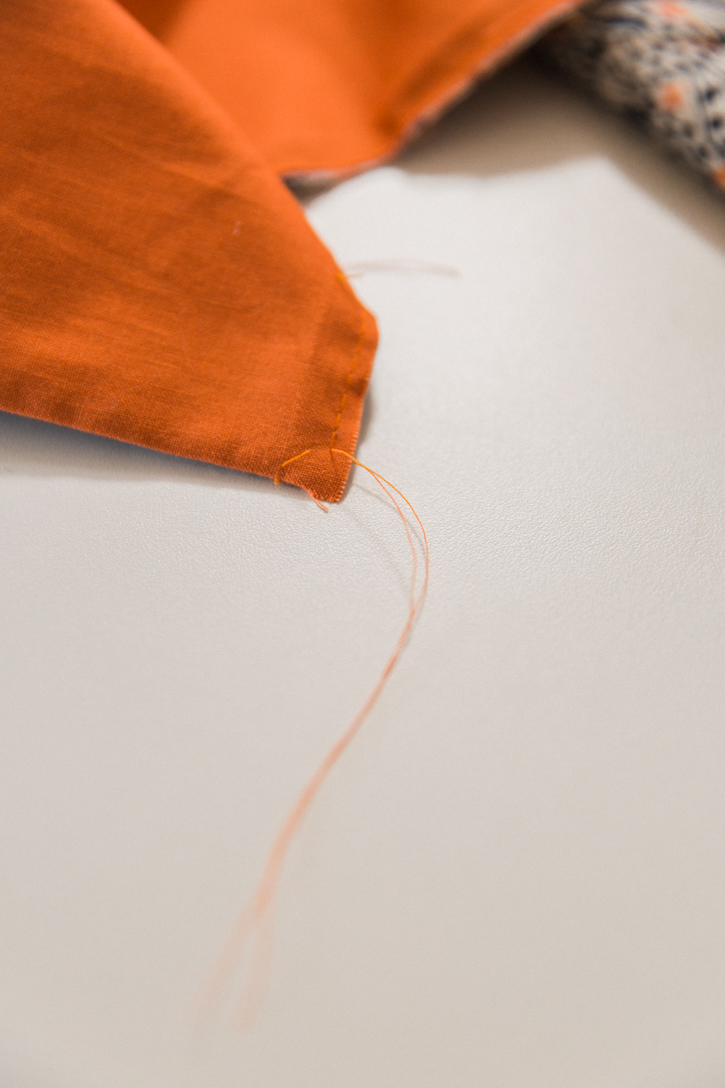
3. Adjust the stitch length on your machine to a basting length (typically between length 4 and 6). Sew along the top of the rectangle, leaving long threads on each end. Do not use a secure stitch on this seam, as it is to gather the top of the skirt.
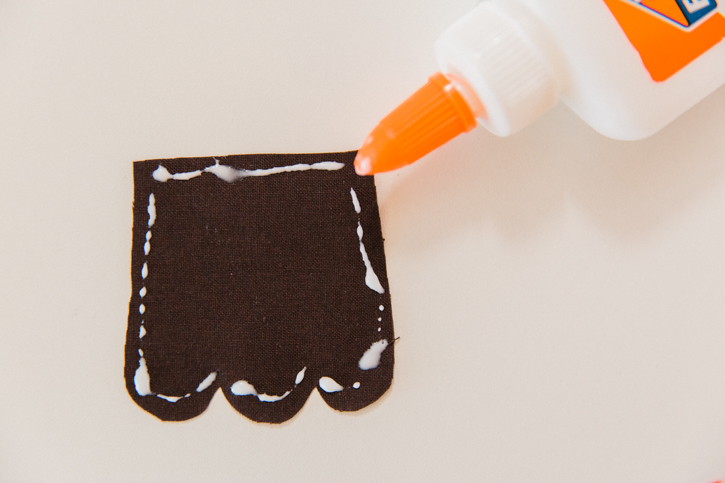
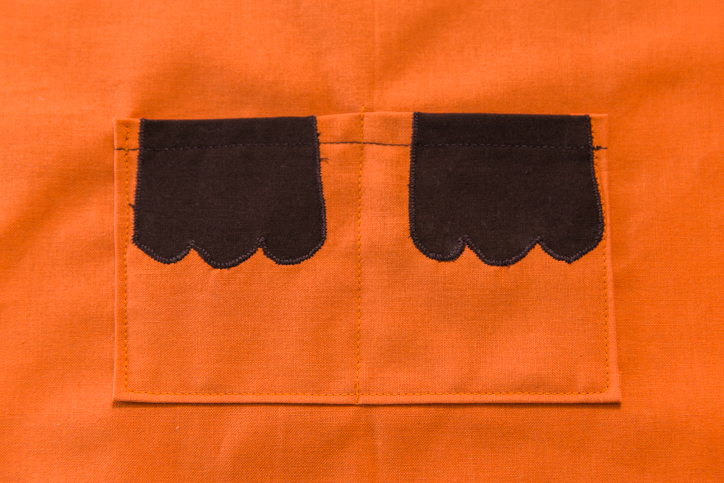
4. It’s time to start work on the pocket, and learn that amazing trick I was talking about. Use a thin layer of white school glue around the edges of the backside of your two paws, and then stick them onto the 4.5″ x 7″ rectangle that will become your apron pocket. Place them 1″ from the sides. The glue is water-soluble and means you don’t have to try to pin tiny bits of fabric on top of one another; you can just glue them, wait until the glue dries (or use an iron to hurry the process), sew and throw it in the wash to dissolve the glue! Life changing, right??

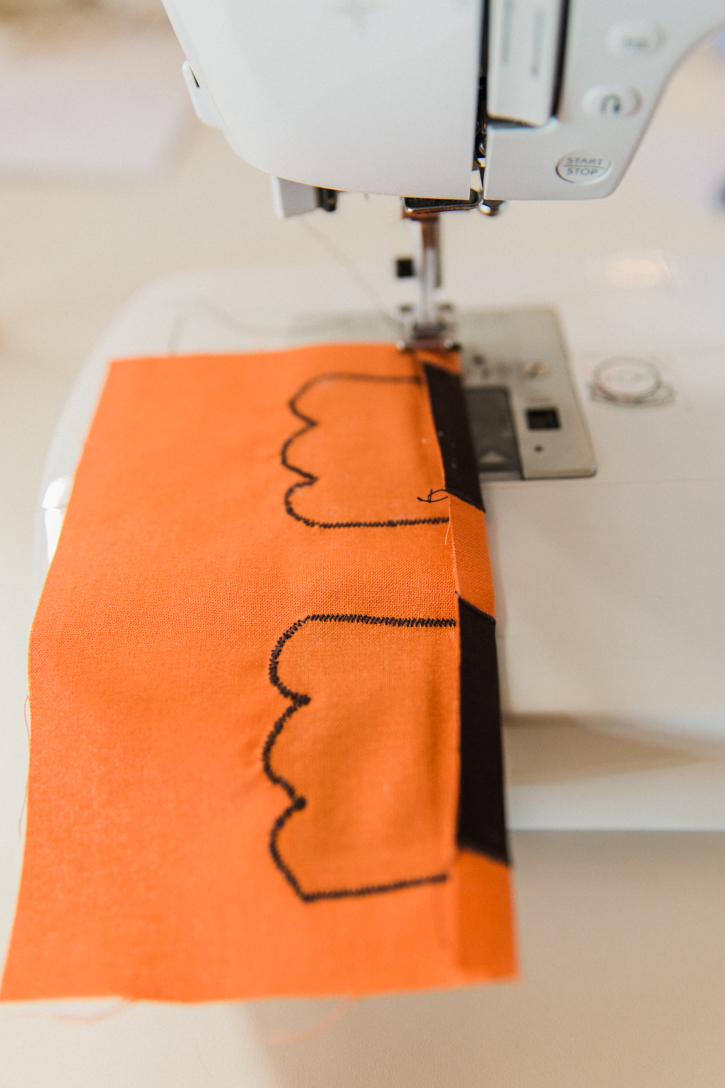
5. Once the glue is dry, use a tight zig-zag stitch around the edges of the paws to secure them in place and keep them from fraying. Fold down the top edge of the pocket 1/2″, iron, and stitch it with a straight stitch.
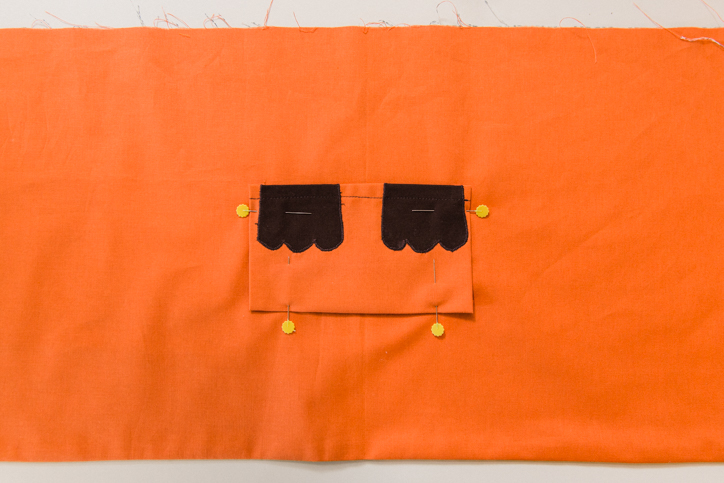
6. Fold the rest of the sides in 1/2″, iron them down, and pin it to the front and centre of your large skirt rectangle. Sew down all of the edges but the top. I chose to stitch an additional line down the centre of the pocket to split it into two pockets.

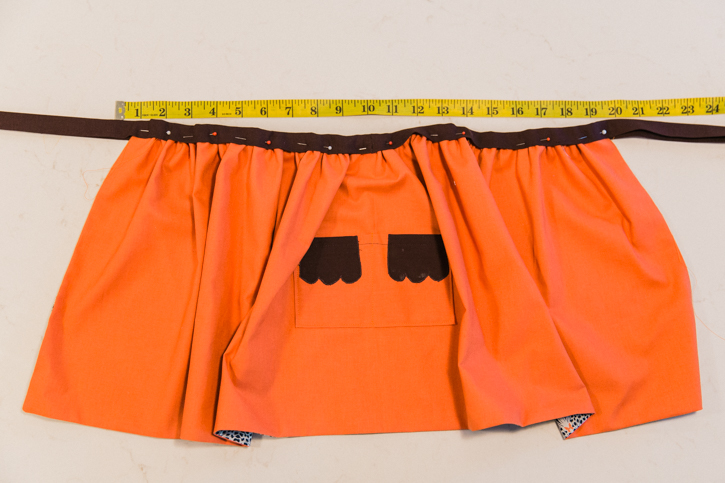
7. Now gather the top of the skirt by pulling the threads you left hanging on each end and pushing the fabric to the centre. Adjust the fullness so that it is distributed evenly. You will need to end up with 20″ at the top from side to side.
Ties:
1. Take each tie strip (your 4 skinny rectangles) and press in half together, right sides facing out. Open up the strip and fold each of the outer edges in towards the centre and iron again.
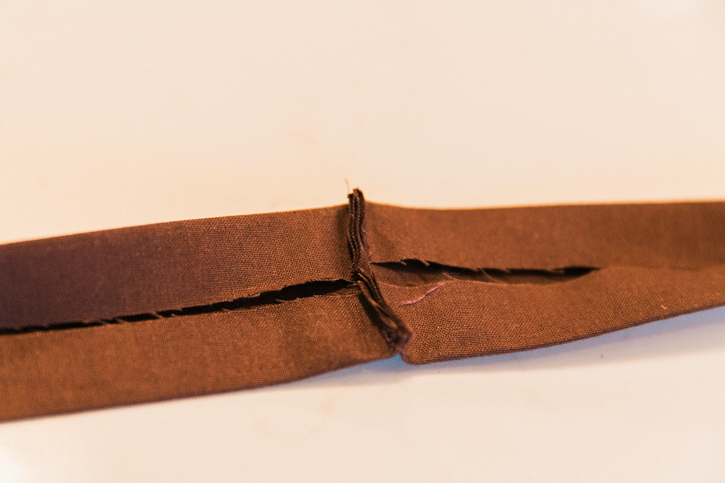
2. Take the two shorter (21″) strips, tuck in the ends of them, and sew together all three open sides. For the remaining two strips, sew the two short ends together to create one long strip for the waistband.
3. Centre the long strip along the top of the gathered skirt and fold it over, sandwiching the skirt top inside the brown strip. Pin it in place, fold the ends of the strip in, sew them closed and across the bottom of the waistband, securing the strip to your gathered skirt.
Fox Head:
1. Place a thin line of glue around the edge of all the features for the Fox Face, place them on the orange fox head, and iron them to dry the glue.
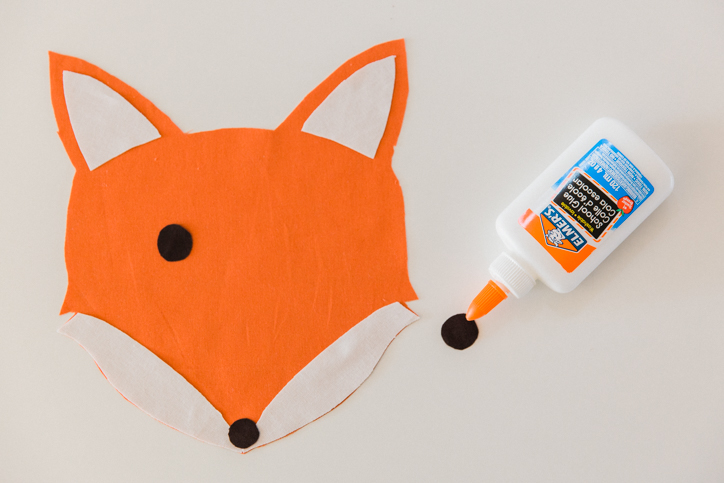
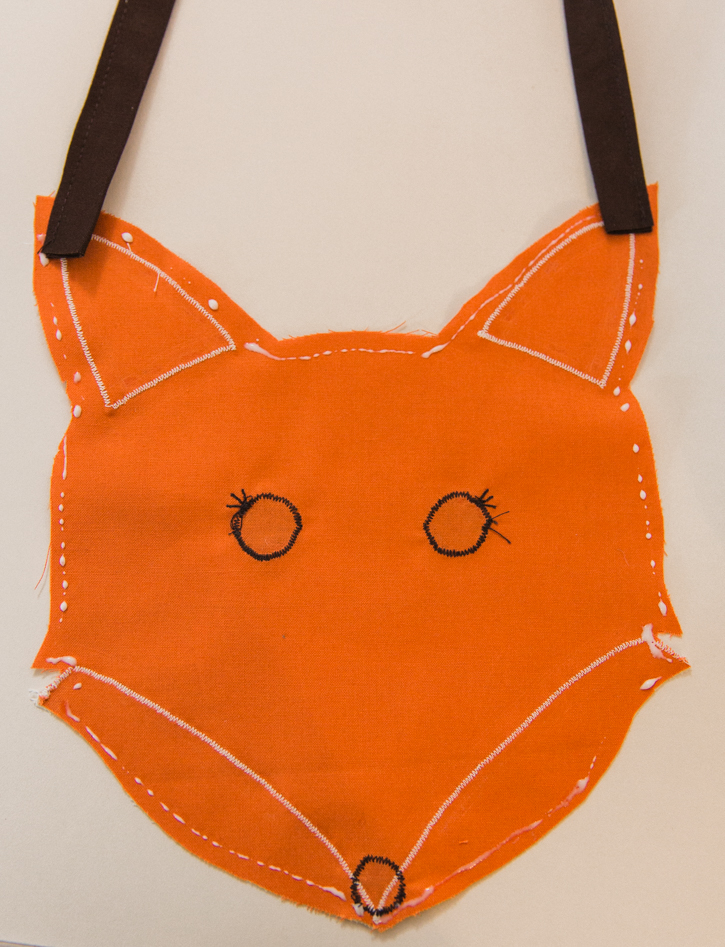
2. Coordinate the color thread to match the feature you are sewing, and zig-zag stitch around each piece to secure them in place. I used a few stitches to add eyelashes and a white highlight to the fox’s eyes.

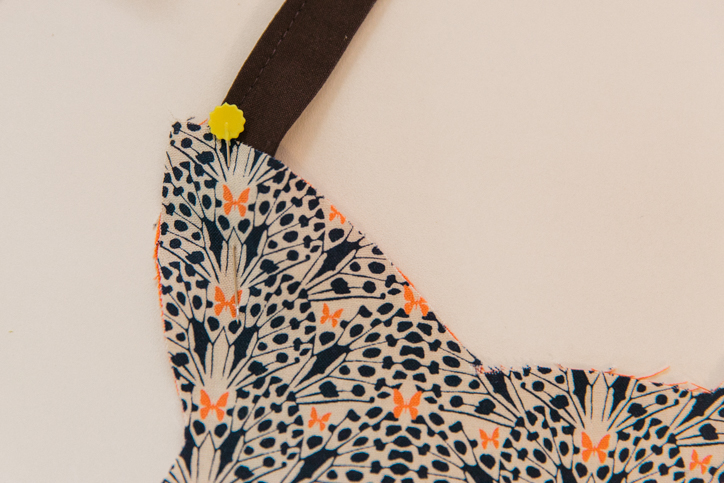
3. Place the face on top of the same shape backing piece, right sides facing out. Glue them together with another thin line, and pin the two shorter tie pieces inside the ears, as pictured below. Use a zig-zag stitch around the entire edge to secure the front and back of the head together. Use a straight stitch and go over where the ties attach to the head, to secure the straps on strongly.
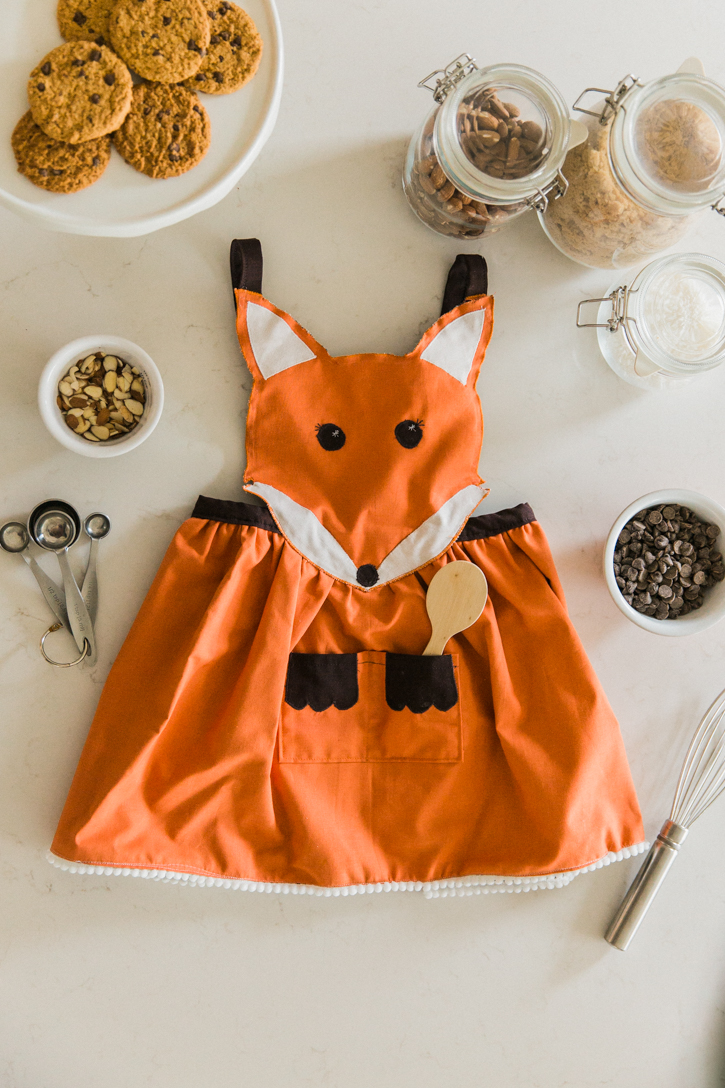
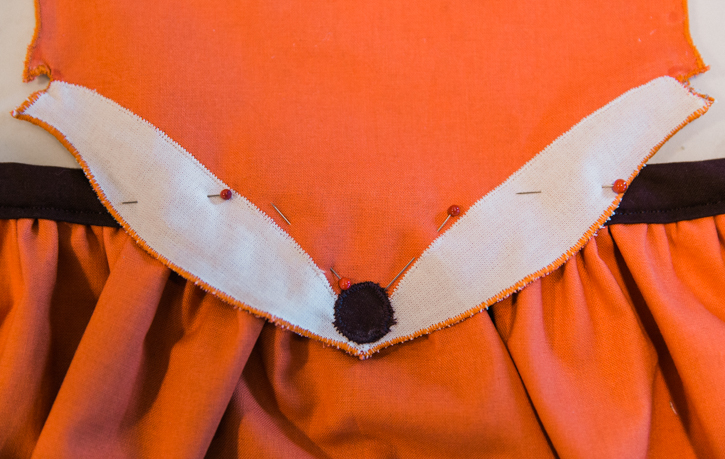
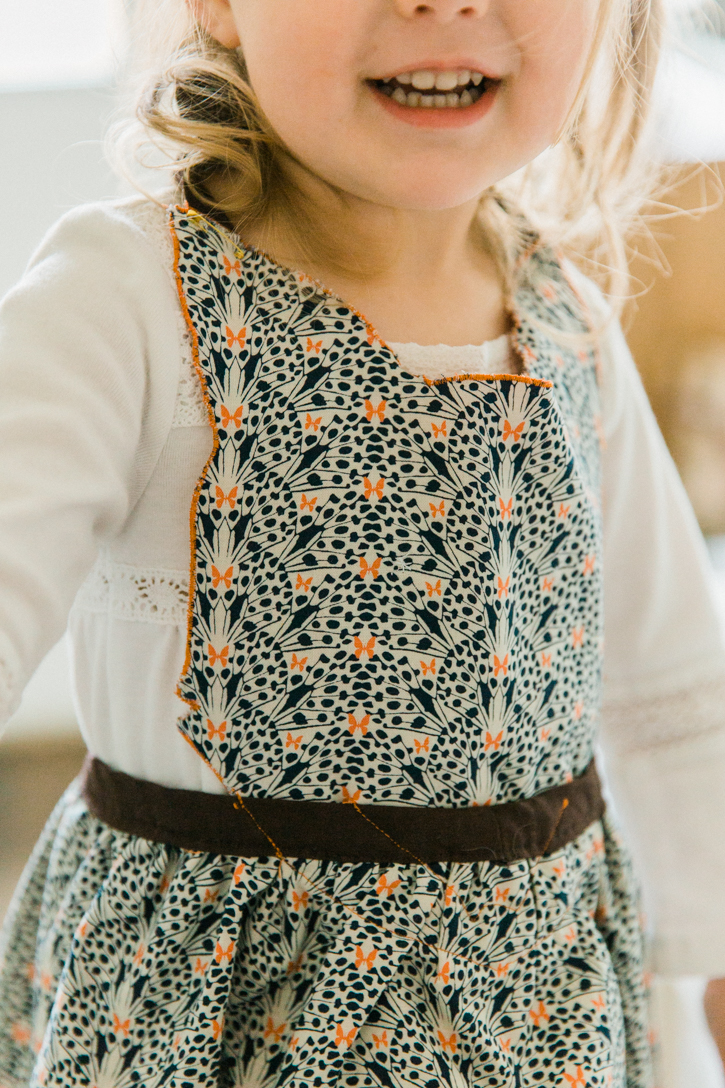
4. Place the finished fox head on top of the skirt with the chin over the waistband. Pin it in place and, using a straight stitch, sew around all the edges of the white cheeks, just inside the orange, to hide the seams and secure the face to the skirt. You can see the stitches better from the backside, pictured in the second photo below.
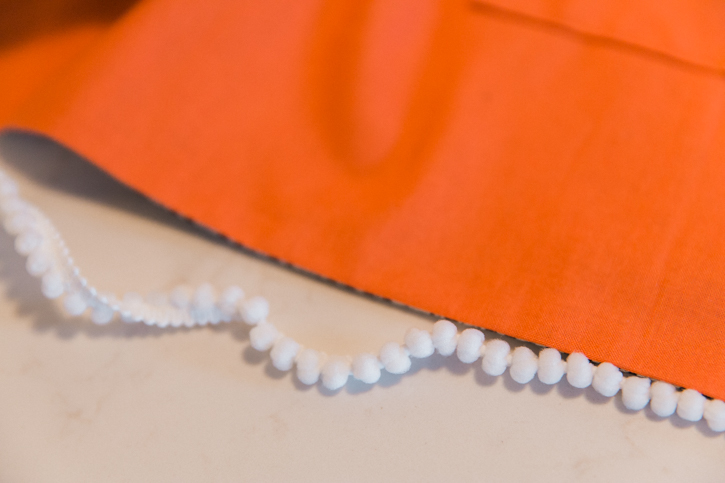
5. I decided to add some cute trim to the bottom of the skirt after I was finished. It’s optional, and there are many different types of embellishments, so choose what works best for you.
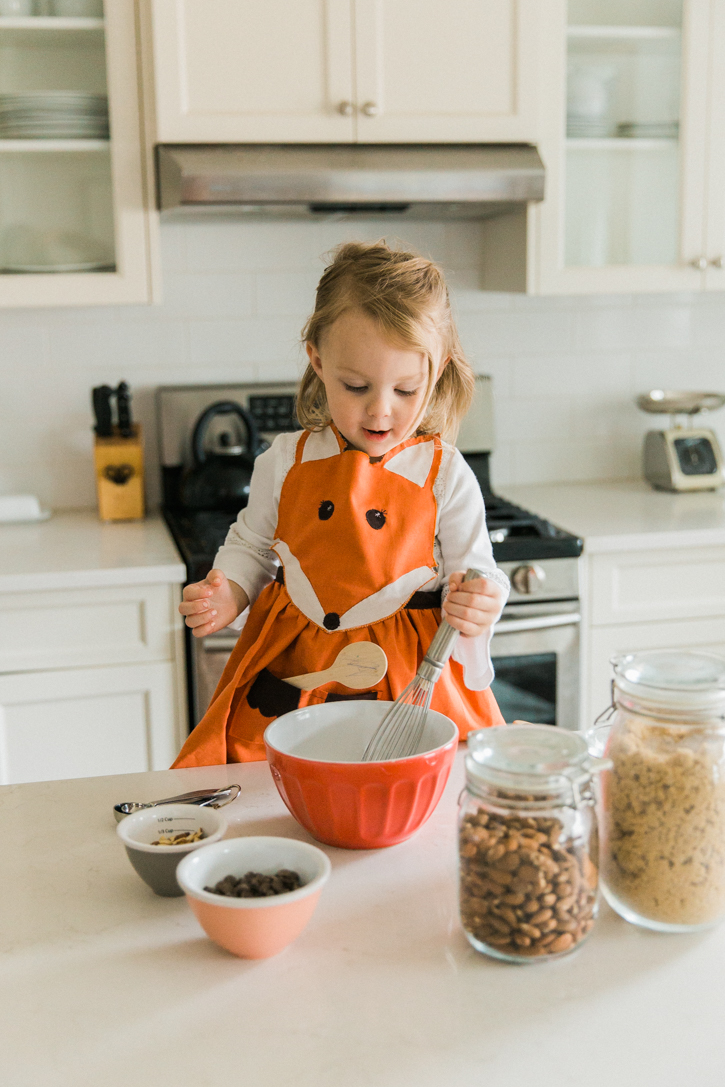
Now stand back and look at your beautiful work!
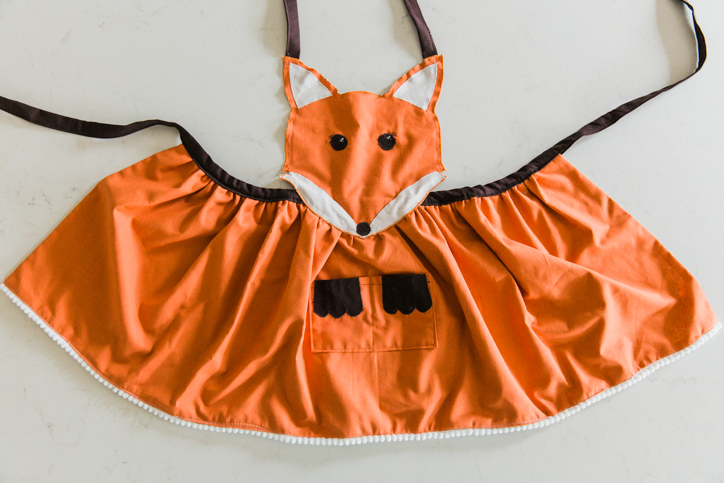
I am in love with this adorable apron, it is so cute!
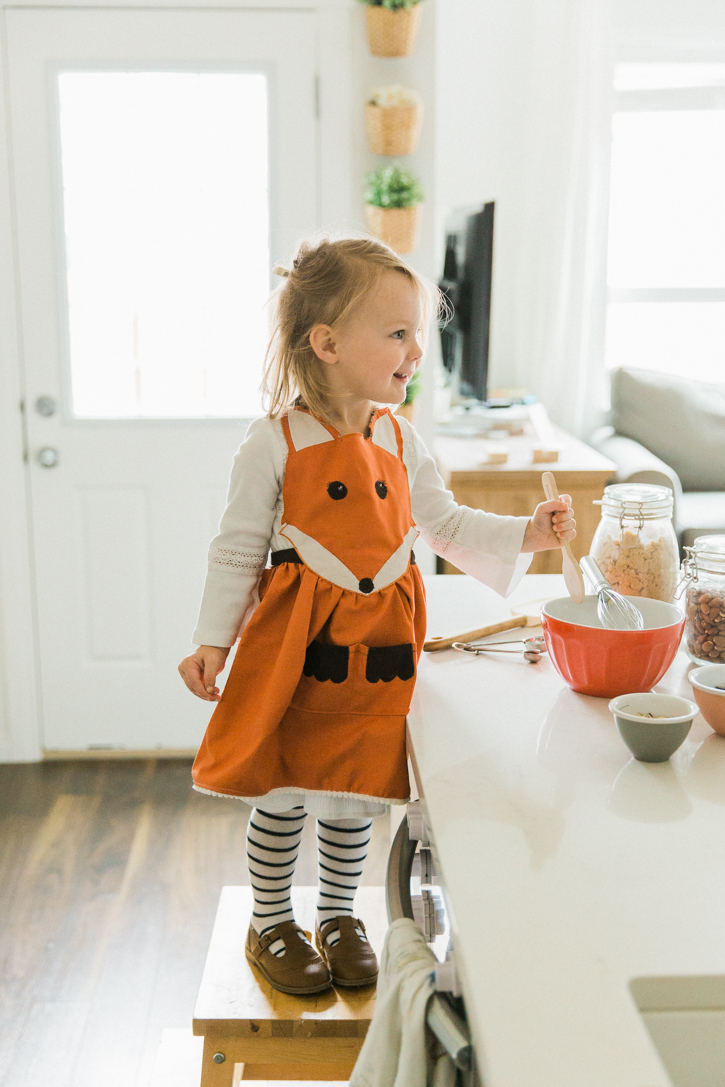
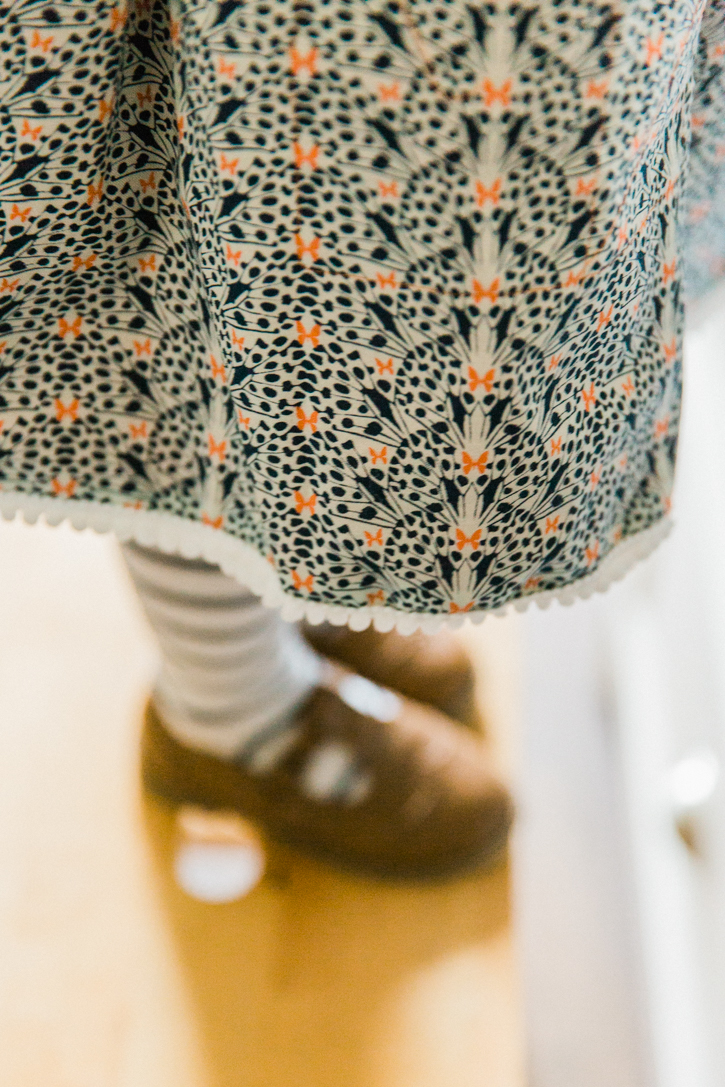
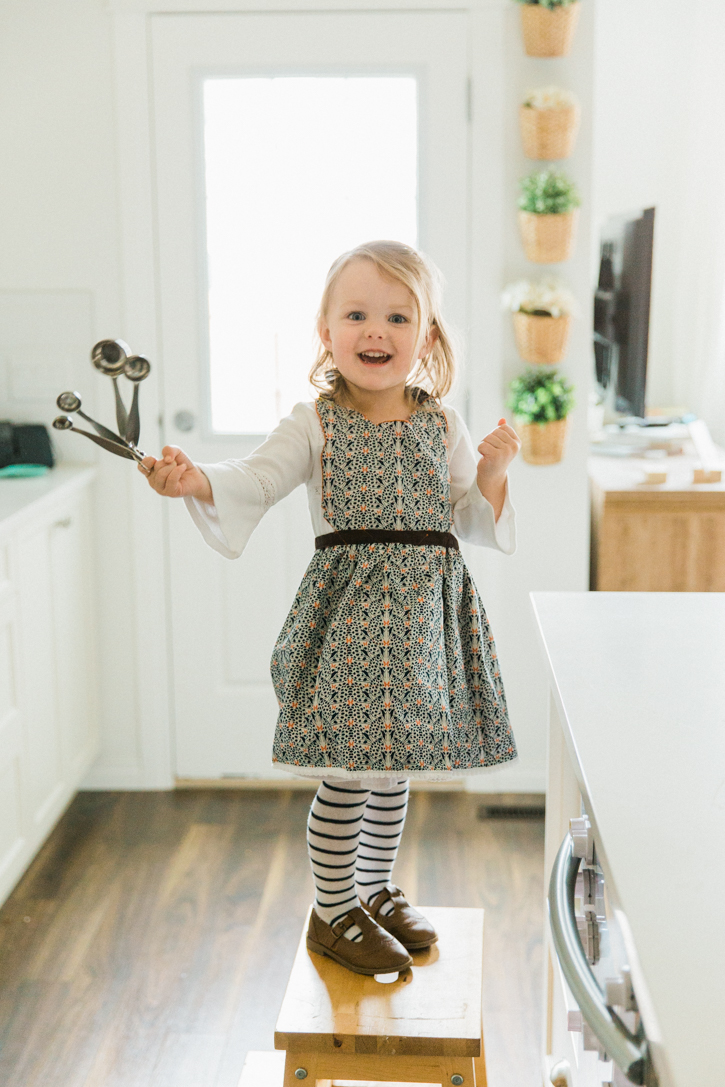
And don’t forget, it’s reversible!
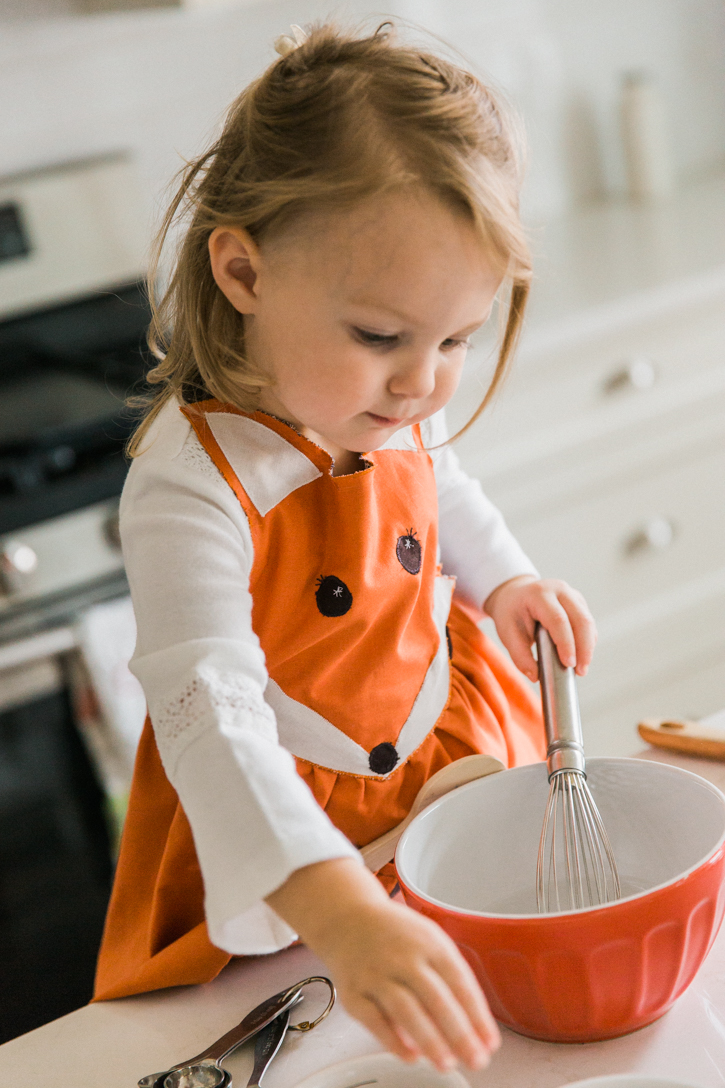
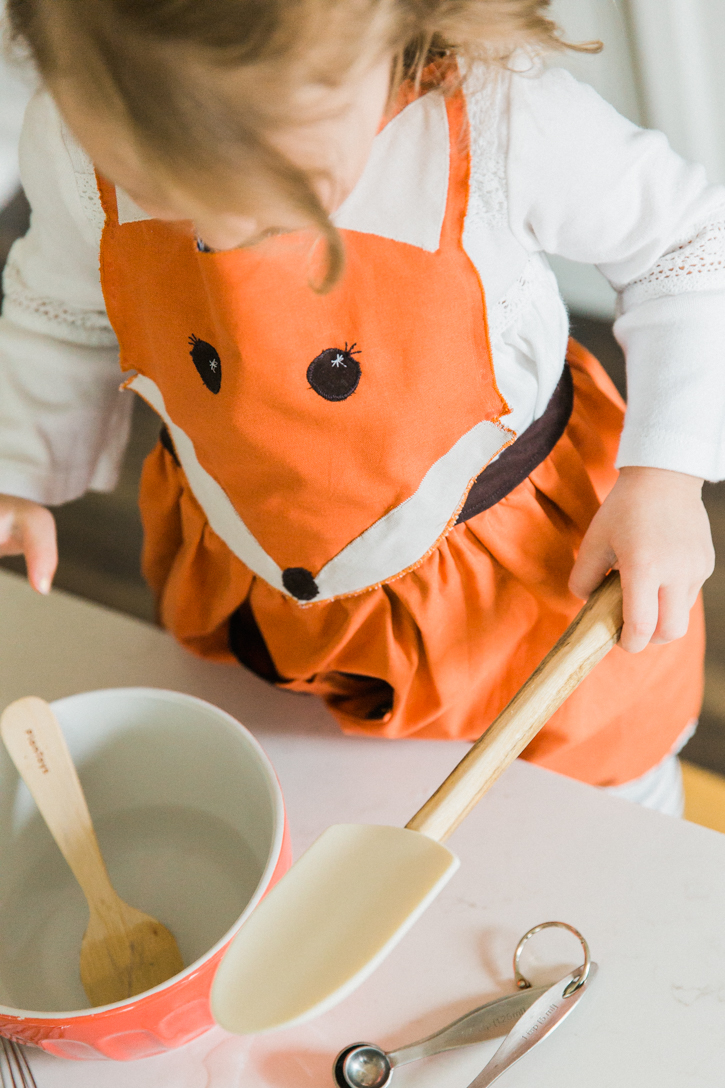
Now go and bake something delicious with your little fox helper.

If you enjoyed this DIY tutorial you may also like…
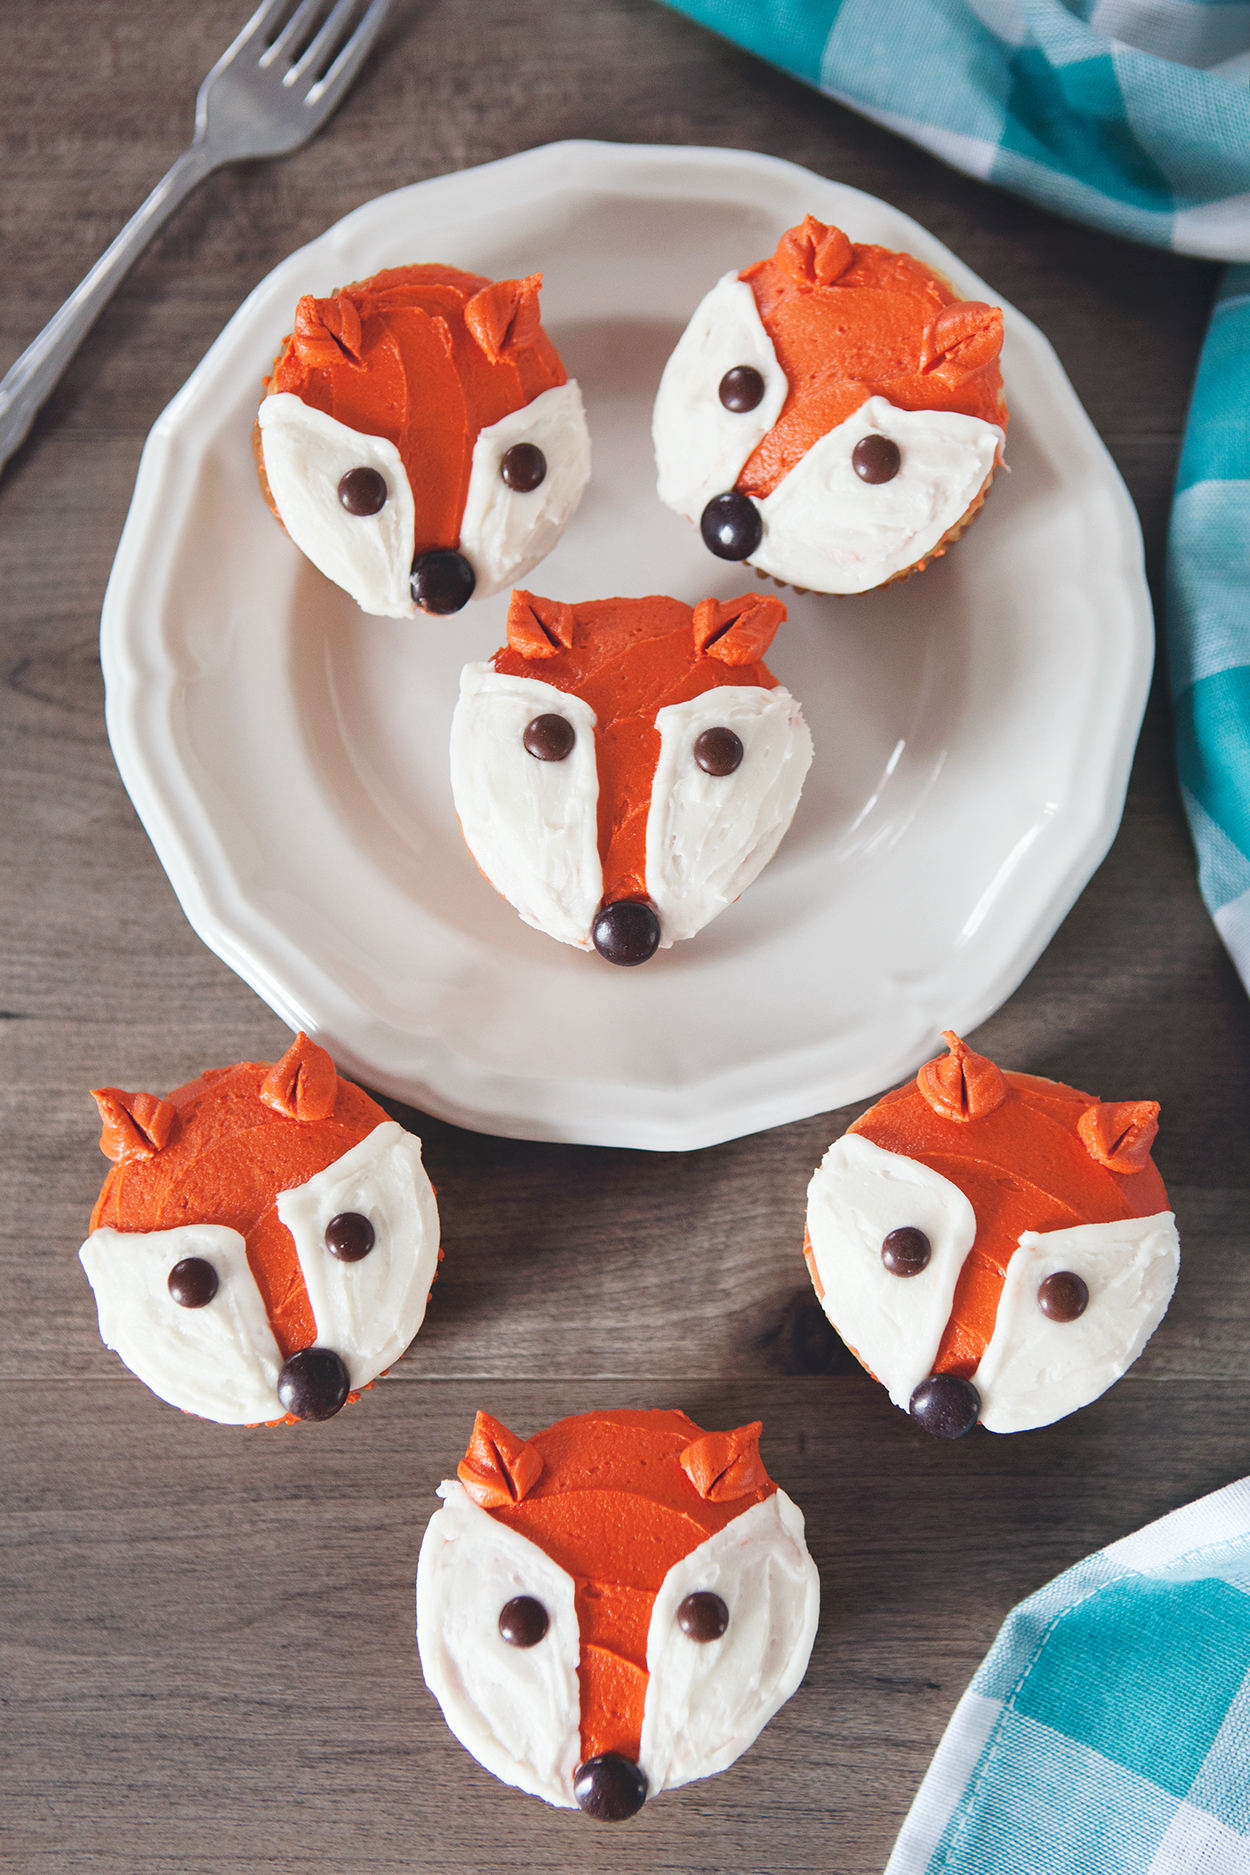
Woodland Creature No-Carve Pumpkins
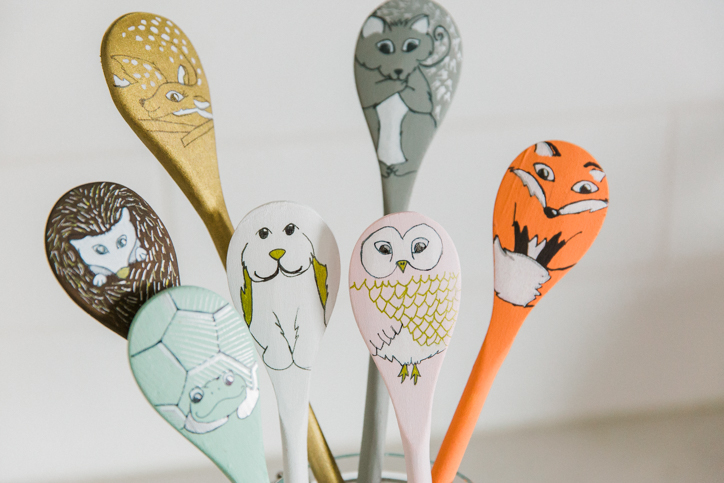
Woodland Creature Wooden Spoon Puppets
Latest posts by Jennie Guenard (see all)
- DIY Old Fashioned Kite - Monday, September 11, 2017
- Recycled Fabric Coiled Baskets DIY - Monday, July 31, 2017
- Woodland Creature Pet Rocks Tutorial - Monday, June 19, 2017

How adorable! I need to make one for myself in grown up size!
You totally do @CondoBlues!! 🙂
So cute! A few things I would use instead of things you used…..
quilters wash out tape instead of the white glue- no dry time and it works just like tape and washes out. It’s a bit more expensive but no dry time and no glue to deal with.
instead of making a waist band- use brown bias binding like you would for a quilt. They have it in 1″ and it would be perfect for your neck band and waistband as it’s already made and in a nice long length.
🙂
I love Heat-n-Bond lite for applique – it’s better even than quilter’s tape, IMHO.
Love this! Going to make this for my neice’s second birthday! Can I ask you where you found the adorable coordinating fabric and broadcloth?
Thanks again for this wonderful tutorial!
If only I could sew! This is the cutest /cleverest Apron ever! I think any age girl would love this. Do you see these on Etsy?
Another way to hold small pieces for appliqué is using quilters spray. Very cute
Hi! Thanks for the great tutorial. I used your template and added that to an existing apron pattern that I used a few times now and I am really pleased with the results.
I lined all my pieces, turning them right way round and then overstitching (this caused me with a bit of a headache with the foxes face but it all worked out in the end).
I also used bondaweb for the paws.
In order to get really crisp white cheeks I used a collar from a polo shirt which worked well.
Thanks again!!
This is the cutest apron EVER! and I love how it is reversible and the fabric you chose for the back is just beautiful. I can’t wait to make one for my own daughter!! Thanks so much for the beautiful tutorial!!
Thank you for this Tutorial, I love it and would love to make one for a Christmas present! The link to the pattern doesn’t work anymore, though, would it be possible to fix it, please? Thank you! <3
Yes, please! I want to do the same thing!
This apron is so cute!!! Do you still have the pattern? It says the website didn’t work. I would love to try to make it!
Love this but link to template doesn’t work. Is it possible to have it please. Thank you.
Is this pattern still available? I would love to make it!
The link for the pattern doesn’t work. Would you be able to e-mail it to me?
Could the link to the pattern be fixed? I would love to make these for my kids, but the link doesn’t seem to be working.
The link for the pattern doesn’t work. Would you be able to e-mail it to me?
thank you
Hello, did anybody found the pattern ? thank’s !
NO!!! I wish I could find it though. Such a cute pattern
Has anyone come across the pattern? I just bought all of the fabric… ack!!!
What a cute little apron. And what a fun day this must have been! I love it.
I am wondering if the pattern could me emailed directly to anyone wanting it ? I’m also Inlove with this and I’d love to make it!
I am also looking for the pattern! Please!
I couldn’t print the pattern but had a go at drawing the head, it was quite easy to copy (I only did half and cut it on the fold). I followed the instructions for the rest!
I could not print the pattern either, I was sent to Google Chrome and told I had to download Chrome and switch my browser to Chrome before I could download the pattern. Needless to say I refused that command. Is there another way to get the pattern without having Google track everything that I do on the internet? Really cute apron!