5 Tips For Photographing In Low Light
As the days get shorter and darker, there will often be times when you are taking pictures indoors in low light. It can be really challenging to get good pictures when there is limited light, but definitely not impossible! Here are my tips for getting good pictures even when there isn’t too much light around.
1) Turn off your flash
It does seem counter-productive I know, but turning off your camera’s pop-up flash is one of the best things you can do for your photographs – even in low light. Images taken with flash tend to look washed out and are just generally unflattering to anyone in the frame, so it’s definitely one to avoid if you can. If you are on AUTO, you will definitely need to go into your settings and do this manually, as the camera will probably automatically use flash in dark scenes. This one simple step will have the biggest impact on how your images turn out!
2) Add more light
Another tip is to try to add more ambient light to the room. During the day, try opening up the blinds a little more or pulling back the curtains. I’m always amazed how much more light can come in this way! If you are photographing during the evening with artificial light, you could try turning on an extra lamp to help add more light to the room. However, avoid using overhead lighting – a desk or table lamp will give you a much softer light to work with, and is much more flattering.
3) Put your Subject next to the light
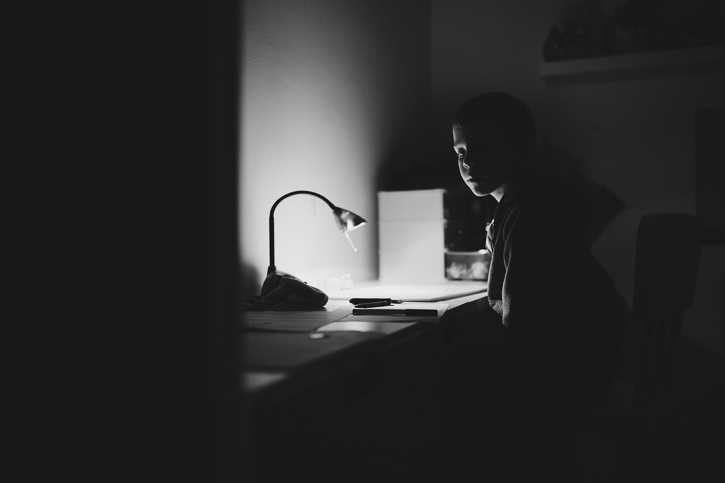
A great way to make sure you have enough light on your subject is simply to get them to sit near to a light source. If this is during the day and you have natural light, have them set near a window or door. When the sun has gone away for the day, have them sit near to a lamp. If you like moodier images, have just one light on and have your subject sit in the pocket of that light – it creates a really interesting “high contrast” image like the one below.
4) Watch your settings
Getting good pictures in AUTO can be very difficult because you don’t get any control over your settings, so I strongly suggest that you switch over to Aperture Priority Mode. This a good way to introduce you to taking a little bit more control over your camera but still leaves the camera to do a lot of the hard work for you. Not sure how to do this? Don’t worry, I’ve got you covered ? Hop on over to read this article on How to Shoot in Aperture Priority Mode which gives you a step by step guide.
When choosing your settings, make sure that you have a high enough shutter speed, of at least 1/125. This will stop you from getting a blurry image due to motion blur. You should also choose a smaller aperture number so that you get more light into the camera.
5) Be careful with focus
Cameras can sometimes find it more difficult to lock focus when there is not much light around. Try to focus on an area where there is contrast if this is the case. Contrast is an area where you can have both light and dark, for example in the pupil of the eye. This little trick can help the camera find something to latch onto and therefore make it is easier to focus.
Now go get comfortable shooting in low light!


Leave a Reply