I’ve invited some incredibly talented photographers to join us for our simple things party each week and today I’m thrilled to welcome Anna Jones of Indie Art Photography! I’ve long admired Anna’s beautiful photos and it’s such an honour to have her guest posting today!
Keep reading to find some great tips on making the most of natural light in your photos and be sure to scroll down to the very bottom of the post where you can find Anna’s photo picks from the STS party along with a special discount on Anna’s Indie Actions!
Keep reading to find some great tips on making the most of natural light in your photos and be sure to scroll down to the very bottom of the post where you can find Anna’s photo picks from the STS party along with a special discount on Anna’s Indie Actions!

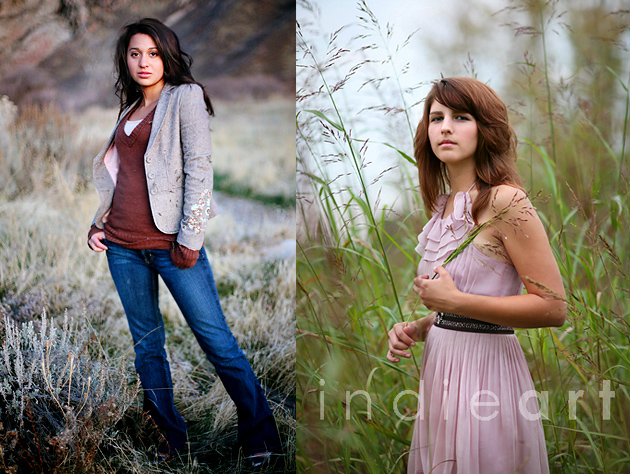
Hi! My name is Anna Jones, and it’s so fun to post here on Rebecca’s blog! I love portrait photography and especially High School Seniors! I have three little sisters, and when we were young I would dress them up and do “photoshoots” all the time [you should see the home videos, ha!] Fast forward 15 years and not much had changed. I started taking photos when my baby sister was a Senior in High School, and I took her Senior pictures [see below] and then her friends asked me to take theirs, and it grew from there. I did paid sessions for several years and also developed Indie Actions, but a couple years ago my boys started school and I started working and haven’t had the time I used to. I still love it and do Senior sessions once in a while. My photo editing has remained pretty consistent – I really love Photoshop, but I try not to go overboard.
My two favorite things about photography are: finding sweet light and shooting wide open. They make me giddy, and I think these two things are the secret to any good picture I’ve taken. The first key to beautiful photographs is using only available, natural light.
Every time I take pictures it’s like a light hunt experiment, and there are many forms of “good” light, not just one. If you’ve ever wondered how someone gets that clarity/rich color/beautiful skin tones/beautiful black and whites/you name it – it’s my opinion the answer is light. Photoshop helps, as does a good lens and camera, but you can do so much just using light and get incredible pictures no matter your equipment. Here are 3 of my favorite “sweet light” go-to’s:
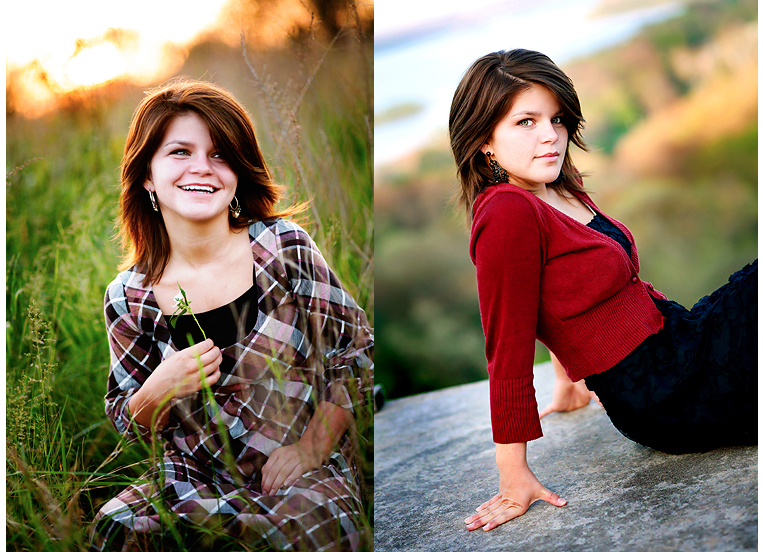
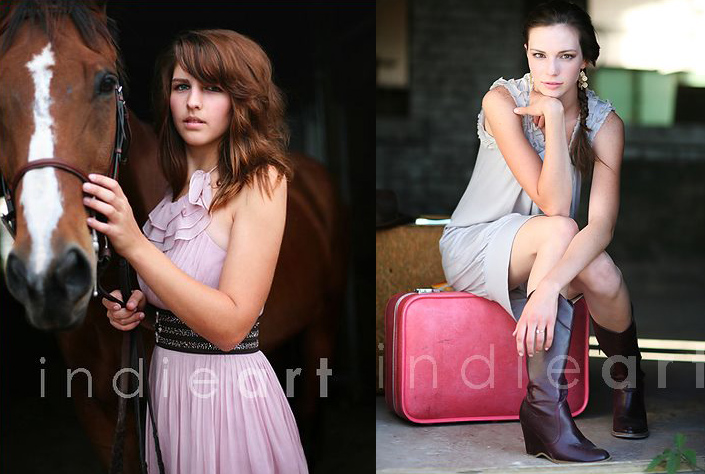
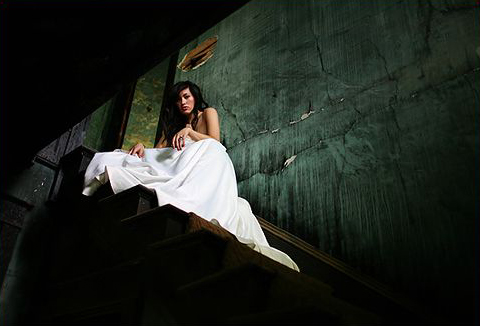
Sweet light type #1 = Edge of shade in doorways/alleyways:
I hold out my hand and find the “edge of the shade” in a doorway/alleyway where natural light is reflecting in, and then position my subject very particularly there. Usually the sun is behind me. There’s a line where the sunlight meets the shade, and I position my subject right on the edge of that boundary, where light bounces up on them.

Doorways force the light into that space and creates beautiful, sweet light. That’s the secret to these images below; in both, they are positioned carefully on the edge of shade in a doorway:
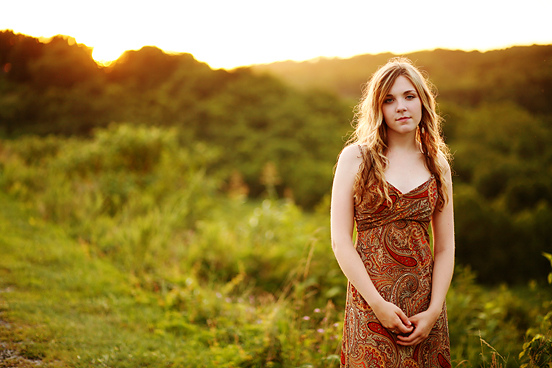
Sweet light type #2 = Backlight/sun flare:
When the sun is coming from behind your subject and you’re facing it, it’s called back light. I usually do this when the sun is about to set and is low on the horizon. There are two different effects you can try to do: silhouette or sun flare. Silhouette is when there’s a kind of glow around them or a line of light around them. Sun flare is when you get these kind of colored rings of light that show up or rays of light.

When I take backlit pictures, it’s typically a big experiment, where I’m moving around a ton – up, down, side to side, looking through my camera and trying to figure out what’s going to work. My subjects usually have to be patient while I try to get what I’m after. A lot of the time I have to squat down really low to get the angle right, but I always have to figure it out on the spot and it usually takes me a minute.
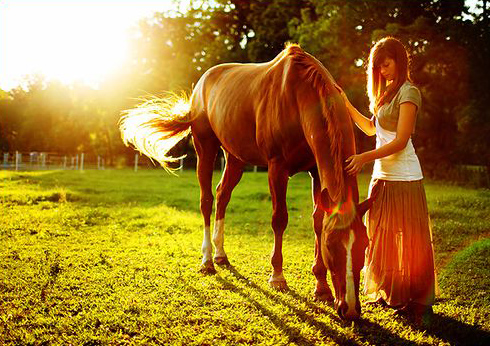
My tip is that, first of all, be apprised that a lot of the time you’re looking right into the sun through your camera and almost can’t see at all! In my experience, that’s normal. So if the sun is so bright that the camera can’t even “find” your subject, then what I have to do is, as I hold the camera with my right hand, shade the top corner of my lens with my left hand in order to slightly block the sun momentarily while I lock focus on my subject’s eye by holding the button down half-way. Then, I quickly remove my left hand and take the shot. Hope that makes sense!
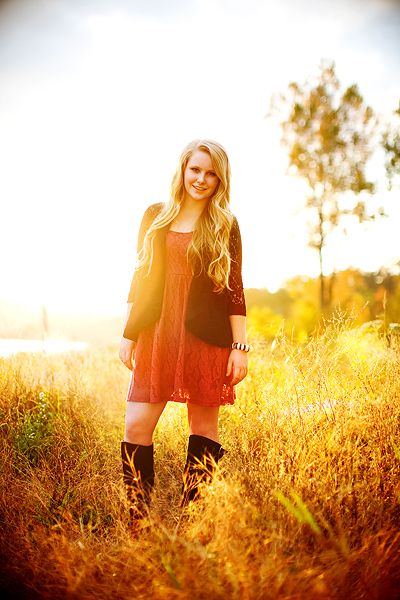
Another tip is that I find I can usually only get those flares when there is something I can use as a partial sun obstruction. For example, the horizon line, trees, the edge of a tall building, etc. If you look at the examples, there’s usually only flare rings where there’s something that can act as an obstruction. It usually takes several tries, and my backlit settings are just kind of normal, usually around f/1.4, iso 200, shutter 1/100 for silhouette and f/1.4, iso 200, shutter 1/300 for flare, just to give you an idea.

Sweet light type #3 = Low-light/almost completely dark:
Try shooting when it’s almost totally dark. I think these example shots have an interesting look to them, and the secret to the color is that it was so dark when they were taken.
You have to shoot super wide open and push the limits of your camera, using as low f-stop as you can, as high an iso as you can and as slow a shutter as you can. You will experience some grain.
I shoot at f/1.4 probably 99% of the time. Choosing lenses is so hard and also very personal, but I found that I prefer “fixed” lenses, because they enable you to shoot at wide-open apertures, and I’m addicted to that super-blurred background look! If you’re feeling sad right now because your lens doesn’t go that wide, you could ask Santa to bring you the 50mm 1.8 lens available for Nikon and Canon and costs just over $100! I highly recommend that lens. I usually buy from B&H Photo Video online.
Shooting wide open with that lower f-number allows more light into the camera, so you can shoot in very low light conditions…like by the Christmas tree! Using only the light from the tree usually means you have to use a very low f-stop number (like f/1.8) so that as much light as possible can flow into the lens through as large of an opening as you can get in your lens.

I usually have to also have a very high iso and a very, very slow shutter speed. So my example settings would be something like f/1.8, ss 1/15, and iso 800. If you can’t figure it out, try shooting in auto first to get a starting point on your camera and adjust from there.
And my final tip is that Photoshop can be a lot of fun and enhance your images:
I try really hard not to go overboard with Photoshop, but it is a lot of fun to play around in. Every image is different, for example, the image below I felt needed some color adjustment, but that’s not usually the case.
Here’s a before and after with my processing steps:
1. Ran Indie Subtle Color action, which i use as a basis for my ps’ing (that or Color Foundation).
2. Re-touched skin very slightly – I make a duplicate layer & use the healing tool [looks like a
band-aid.] When i’m done re-touching with the healing brush, I turn the opacity down on the top layer anywhere between 70-90% to restore the original texture a little – it’s magic!
band-aid.] When i’m done re-touching with the healing brush, I turn the opacity down on the top layer anywhere between 70-90% to restore the original texture a little – it’s magic!
3. Added red and yellow in “Color Balance”
4. Did a slight s-curve
5. Re-size and sharpen for web (crop around 600 px on long side & then Filter>Sharpen>Unsharp Mask using my favorite numbers: 500, .2, 0
BEFORE:

AFTER:
Hope that helps and have fun experimenting!
– – – – – – – – – – – – –
– – – – – – – – – – – – –
Thank you SO much Anna for all the fabulous tips! When I first started photography Anna’s photoshop actions were some of the first I purchased! Lucky us, she is offering an amazing discount for all Simple as That reader. Purchase her Indie Action Set for only $10 {normally $30}! To purchase visit the Indie Actions site HERE and on the “Purchase” tab send PayPal payment to Anna at [email protected] and with “Simple As That” in the subject line to get the discount. That’s both of her sets for $10!! Thanks so much Anna!
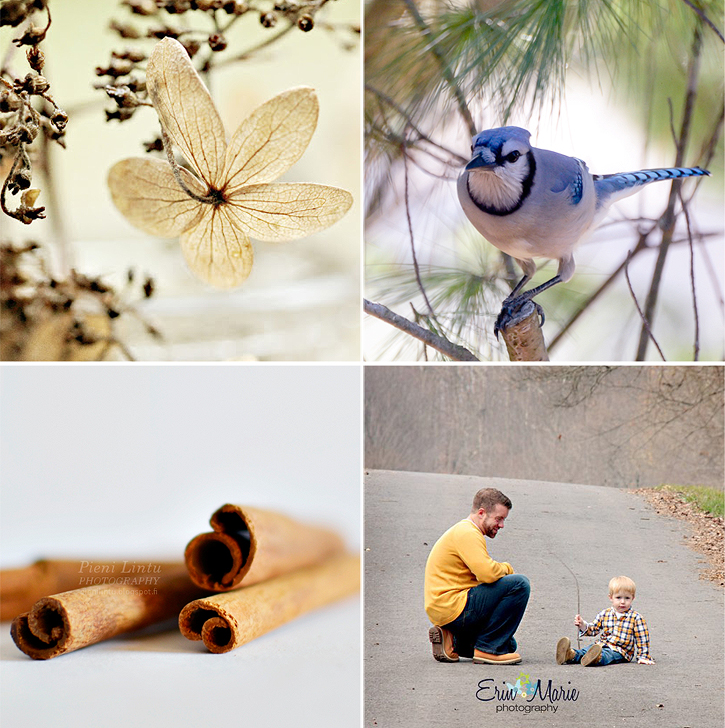
Here are just a few photos of YOUR photos that caught Anna’s eye as she browsed through the links in our simple things party this past week. You can read her comments and find links to these ladies lovely blogs below!
missing flowers | mona
love the tones and depth of field. It seems I’m always drawn to weeds, dead foliage, neutral earth tones, etc., too!
simply blue | kerri
What a beautiful shot! Again, love the depth of field and the composition, and nice capture of what I’m guessing was a very fleeting moment!
winter flavors | pieni
I always love simple shots like these, with lots of white and simple subject, color and composition!
fall in NY | erin
Sweet capture of a Fall moment! What a cute little boy and I like the tones and simple composition.
If your photo was featured be sure and grab yourself a button!
Thank you as always to everyone for linking up each week! I can’t wait to see your photos tomorrow at our 109th Simple things Sunday party! I will be announcing the winners of my holiday card template and Real. Life. Photography. eBook giveaway, so stay tuned! 🙂

Rebecca Cooper is a 42-year-old wife and mother of four from Alberta, Canada. As a photographer, crafter, author, and blogger, she finds joy and fulfillment in celebrating everyday moments. She loves to read and eat chocolate, and is a firm believer in afternoon naps. Rebecca shares her family’s adventures, photo tips, simple craft projects + more right here at Simple as That.
Latest posts by Rebecca (see all)
- Printable 2023 Calendar - Monday, December 5, 2022
- SMART Goal Setting Bookmarks - Sunday, June 12, 2022
- Free Printable 2022 Calendar - Thursday, September 9, 2021

That was a fun read!
Adding yellow and red to an outdoor photo – genius!
Oh – thank you so much!!! I’m glad you liked my simple photos! 🙂
My hubby is getting me a fixed lens for Christmas (yay!) but he is very worried about getting a 50 f1.8 because he is worried that it is “too zoomed in” especially if we are trying to take pictures indoors or of groups of people. He wants to get the 35 f1.8 instead… any advice???
Thanks for the awesome tips 🙂
If you have a crop sensor body, I would go with a 35mm. I have the 50 and a crop sensor body and indoors it is much, much to zoomed in. We have a small house and I practically have to stand in the other room to shoot wide open.
My hubby is getting me a fixed lens for Christmas (yay!) but we are kind of stuck! I want to get the 50 f1.8 but he is really worried that the lens will be “too zoomed in” especially when we are trying to shoot in doors or small groups. He has suggested the 35 f1.8 instead but I am super worried I may not be able to get the same effect with the 35… any advice!??
Thanks for the awesome lighting tips 🙂
Her photos are amazing! Love this because this is how I want my photography direction to go. I am all about sunflares and back lighting. And can’t wait to get those actions!
Christy, He might be right actually. I tried many lenses [rented, borrowed, bought] in order to decide which ones I preferred most. You might think about what you tend to use the most with whatever lens you have currently. For example, if you have a kit lens [the one that comes with the camera when you buy it], think about if you tend to prefer the zoom function and/or do you tend to use certain ranges more than others. I hope that helps!
Oh oh OH I love the girl and horse picture…..
Thank you Anna for all the advice! Do you know of any tutorials on how to use actions? I’ve downloaded some free actions and have had trouble trying to use them. Just purchased your set and can’t wait to give them a try.
PS. Read the comment from Christy and wanted to throw in that if you are shooting on a cropped camera you want to make sure you take into account the cropping factor. A 35mm views more like a 50mm.
Anna or Rebecca – do you know of any good tutorials on how to use actions?
Love Anna’s photography… I have followed her for years. She’s is one of the best photographers that I have seen using natural light. She has such a gift and talent – each picture is a work of art!!! Thanks for all the good advice!
Great tips! So fun to read…and beautiful pictures!
Thanks so much for the compliments. And to Lucy Jane – I sent some tips/instructions in an email when I sent you your action set, so I hope those help. I don’t know of any tutorials besides that, but I’m sure there are some out there. That’s a good question!
Gorgeous photos!! I have a quick question: on the first photo with the boys in the alley, it looks like they are sitting a few feet back from the line where the sunlight meets the shade as opposed to right next to the line? Or did you clone in or decrease the exposure on the sunlight in front of them/the line? Thanks!!!
I shared a few tips on using actions in this post Lucy Jane, hope they help: http://www.ellapublishing.com/ezine/2009-sep/3-minute-makeovers
🙂
Mama Monkey- You’re right, they are just slightly back from the edge. In that particular example, if they’d been right on that edge, their faces would have had harsh light on it. I used the back of my hand as a test for how the light would bounce up on their faces, and when you do that, you can see how there’s a “sweet spot” of light that looks really good on your hand, and it’s different every time, because it all depends on the angle of the light which always changes. So by using my hand instead of my boys to test the light, I have a better chance of not losing their interest in picture taking!
Thanks for your advice Anna!
What great use of lighting, and great tips! I’m gonna try these!
She IS AMAZING!
thanks for the response to my questions Anna 🙂 FABULOUS tips! Can’t wait to try them out 🙂 I just learned a few months ago to use a larger, solid colored dark marble to find the catch lights. I love learning new tips 🙂
How long does it take to receive the actions? I purchased this morning and have checked my email & spam awaiting them…