A few years ago, I got my very first DSLR camera, and I remember being so excited and terrified in equal measure! There were so many different buttons, dials and functions that I didn’t quite now where to start.
That’s what I want to help YOU with today. I’m going to tell you about some quick and simple changes you can make that will help you take better images with your new DSLR.
Here are my recommend first steps with your new camera:
1) Move Your Subject Closer to the Light
Yup, that’s right, your first step has absolutely nothing to do with your camera and more to do with the light that you use with it.
That’s because many people when they are starting out forget the very basic principle of photography – that you need light to take a photograph.
If you are shooting indoors all you need to do is move your subject closer to a window or a door. To keep things simple for now, the easiest way to take a picture is to have your subject face into the light. This means you, as the photographer, will have the window at your back and your subject will be facing you. This will give you a nice, simple, even light on your subject that is flattering for everyone and is easy to work with.
As you progress through your photography journey you will want to light your subject in many different ways, but this is a great way to start out!

2) Turn off Your Flash
Now that you have light on your subject, you won’t need to use your flash.
Using your camera’s pop-up flash is deeply unflattering to your subjects – it will make them look drained, washed out, and will give you the dreaded red eye.
For this reason, go into your camera’s settings and turn off your flash – and if you can, never turn it on again. Always try to seek out more light rather than resorting to flash.
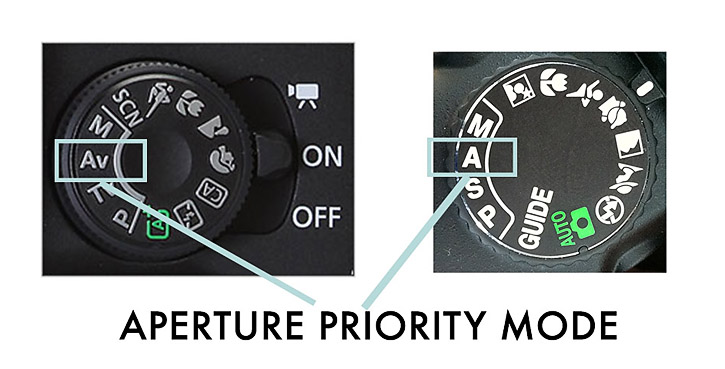
3) Move to Aperture Priority Mode
The next step is to move away from the Auto Mode in your camera, and start to take a little bit of control by switching to Aperture Priority Mode. On the top of your camera you’ll see that you have either an “A” or an “Av” – that’s Aperture Priority Mode!
This means that you set the Aperture, and the camera will set the other two remaining aspects of exposure (shutter speed and ISO) for you. I’ve written another post for As Simple As That that goes into this in depth (and you can snag yourself a free cheat sheet whilst you’re at it!) Read the post on how to shoot in Aperture Priority Mode right here.
Making this simple change is going to allow you to blur out your background, which is a great little trick for making your images look more professional by helping bring more attention to your subject.
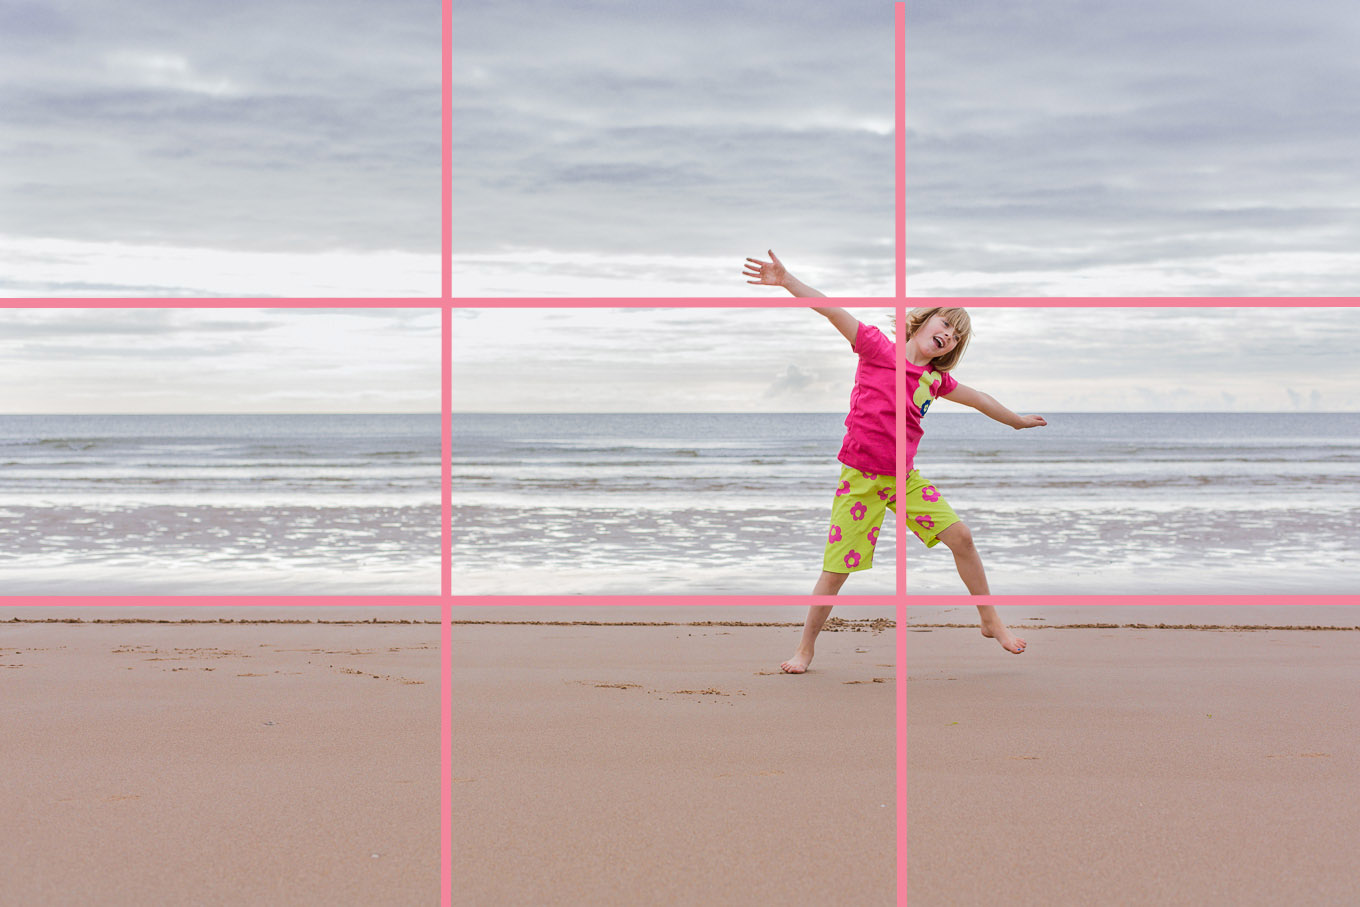
4) Turn on the Rule of Thirds Grid
Another way to add more impact to your images is to think about the composition of the photo. Composition is simply how the various elements within your image are arranged, to help make the photo more engaging. The most commonly used composition technique is the rule of thirds.
The rule of thirds imagines that your image is divided into nine equal sections using two horizontal and two vertical lines, as shown by the pink lines on the image below. When taking a picture you simply want to make sure that your subject is along one of the lines, or at a point where the two lines intersect.
Now, that can be tricky to do when you are first starting out, so a useful trick is to turn on the rule of thirds grid overlay feature in your new camera. This will allow you to see the grid in your viewfinder so that you can position your subject along one of the lines when you are taking the photo.
You will need to check your own manual to see exactly how to do this, as it is different for each camera model. However, in most cases, you simply need to go into to your camera settings menu, where you should see an option for “Grid Display”. Turn that on and you should see a rule of thirds overlay when taking your picture! You can turn this feature off as you progress, but it’s a great little tool for when you are first starting out.
That’s it! Of course, you will want to expand your knowledge and learn everything you can to help you take great photos, but following these four simple steps will have you taking better images from the get go. Enjoy your new camera!
If you enjoyed this post you might also like…
The Secret to Getting Eyes that Pop in Portraits
How to Start a Photography Blog

4 Ways to Get a Blurred Background in Photos
Audrey
Latest posts by Audrey (see all)
- 5 Ways to Improve Your Photography Skills - Tuesday, September 26, 2017
- 3 Tips To Help You Get Flattering Light For Portrait Photos - Tuesday, August 15, 2017
- 4 Photography Projects to Document Summer - Tuesday, July 4, 2017

Leave a Reply