Templates can be such a valuable tool when it comes to creating personalized cards, digital scrapbooking or even blogging. I’ve been keeping things quick and simple in photoshop by using templates for years and after releasing my 2012 Christmas card templates yesterday, I thought it would be handy to share a quick tutorial on how to use these fun, time saving tools!
After downloading your template you’ll open it up in PS or PSE and this is what it will look like. The blank grey boxes are where you’ll add your photos, the text is all in layers so you can change as needed and you can even change the colour or backgrounds if you’re feeling adventurous.
I’m working in PS CS5.

Let’s start with adding your photos. You’ll need to open up the photos you plan to use in your template and then drag and drop or copy and paste them into the template. When you do this they will automatically create a new layer within the template.
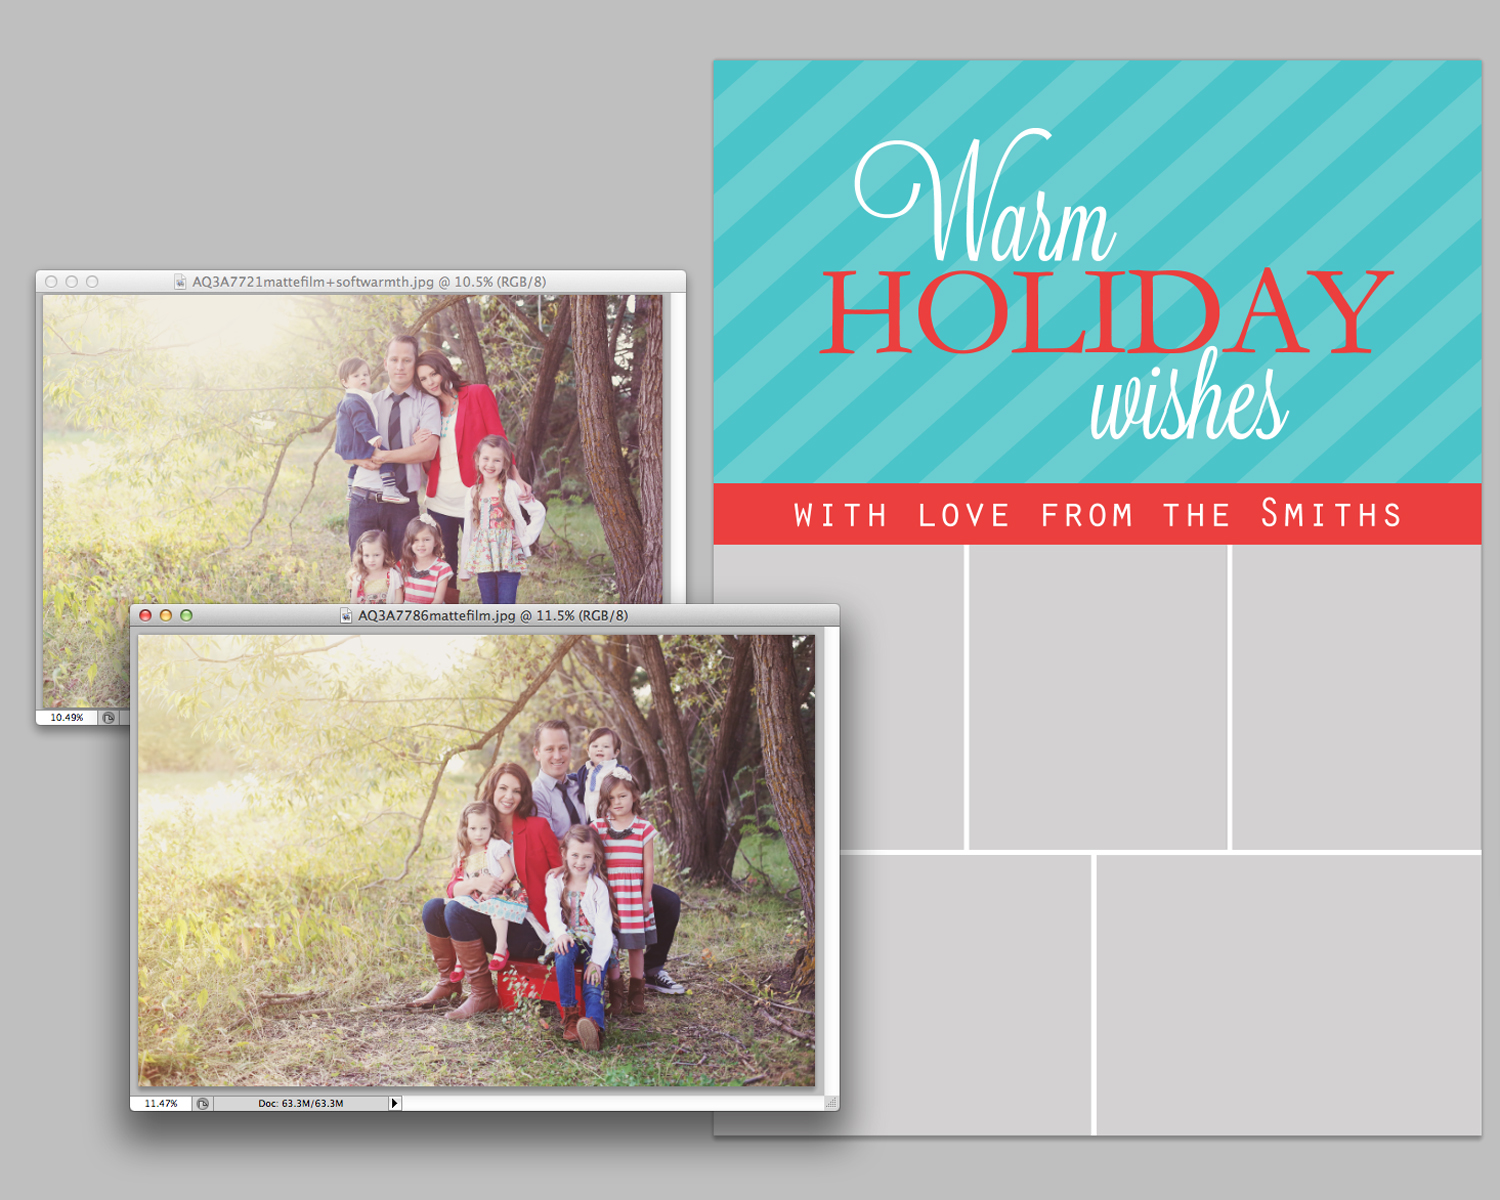
You can see the new layer pictured in the image below. Now you’ll position this photo where you’d like it to go in the template. Each grey square is a location where a photo can be placed and you can see little thumbnail versions of each one in the layer palette.

Within the layer palette, drag your photo layer directly above the grey square where you’d like the photo positioned. While still on your photo layer, in the upper right corner of the layer pallette click the little downward arrow which will open a drop down menu. Scroll down to CREATE CLIPPING MASK. This will link your photo and the template photo layer so that your photo will become the same shape as the template layer.

You’ll need to resize your photo to fit within the given shape. Click Cntrl-T and while holding down the shift key to make sure there’s no distortion, drag your photo to make it smaller or larger as needed.

Here’s a closer view of what the grouped layers now look like in the layers palette:

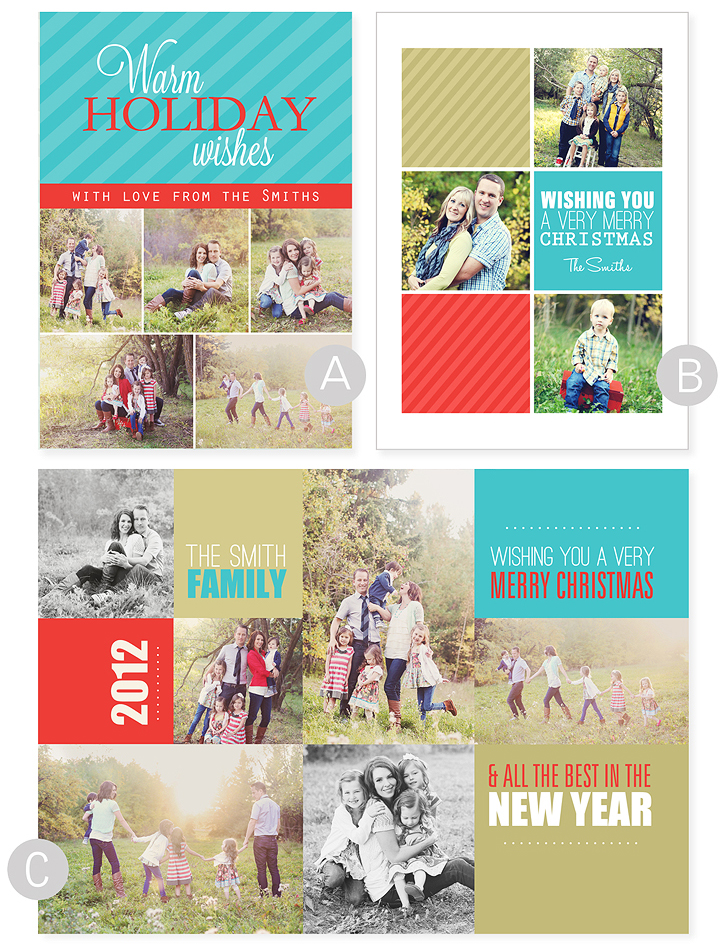
Continue doing this until you’ve added all your photos being sure to create clipping masks with the corresponding photo layers within the template. Flatten your image and save as a JPEG to order prints at your favourite photo lab. Here’s what my card looked like when I was all done:

I chose to leave the colours and fonts as is but those are easily changed as well. Simply click on the font layers you wish to change and you can change the font, the colours and the wording. To change coloured backgrounds you can drag and drop your favourite patterned paper into the template and use a clipping mask with the colour block layer. You can also change the colour blocked layers by clicking on the layer you wish to change within the layers palette, going to SELECT –> LOAD SELECTION. With the layer highlighted, go to EDIT —> FILL and from the colour palette select the colour you wish to change it to.
That’s it. Super simple and fast – I just love using templates for this exact reason! Most of the collages you see me share on the blog are created with templates I’ve made to help make photo sharing online quick and easy for myself. Templates are so versatile and a great time saver!
To help save you time and money this Christmas I’ve created some FREE holiday photo card templates for download here. There are also three new sets for 2012 available for purchase and you can check out my designs from 2010 and 2011 as well! I hope you enjoy!! 🙂
Tips for using templates:
-You will need photoshop or PSE to use my templates which are layers PSD files.
-When adding your photos don’t place them too close to the edge to leave room for cropping when printed.
-When you’re ready to print your cards always order a test print first to make sure your photo lab is printing colours to your liking, no cropping occurs that you don’t want, etc. When you’re happy with the printing resulsts place your full order.

Rebecca Cooper is a 42-year-old wife and mother of four from Alberta, Canada. As a photographer, crafter, author, and blogger, she finds joy and fulfillment in celebrating everyday moments. She loves to read and eat chocolate, and is a firm believer in afternoon naps. Rebecca shares her family’s adventures, photo tips, simple craft projects + more right here at Simple as That.
Latest posts by Rebecca (see all)
- Printable 2023 Calendar - Monday, December 5, 2022
- SMART Goal Setting Bookmarks - Sunday, June 12, 2022
- Free Printable 2022 Calendar - Thursday, September 9, 2021

Great tutorial, though I remember your tutorial for the “month in photos” to be a tad more keyboard-shortcut friendly, which I love. This is a great one for those that like menus. 😀
Hello!!! Thank you for the great templates. Question: What font did you use? I would like to stay with the same format but it kicks them out to standard fonts.
I’ve just added links within the original post. 🙂
Thank you. Also, I plan to purchase some of the other items. I am looking for the 2012 number font and script font. Do you provide those or are we to pick new ones? I want to make sure they look exactly the same. Not sure if that is possible. Sorry for all the messages. Wasn’t sure how to contact you.
Yes, they’re available upon purchase. 🙂
Just purchased. I could not figure out where to put comments for the 2012 Set 2 – I wanted the B. Sorry for not putting it in the notes. Thank you. Should I send you an email with the font questions so you know it is me?
How do we get templates once we have purchased them?