Hi all, Annika here from annikaolsson.com checking in. Has everyone been enjoying their summer? I hope so. The hubby and I have been busy doing lots of projects here on the farm, so no vacation really, but that’s okay. When you love what you do, you feel blessed and happy. Plus we have a really beautiful place, with gorgeous surroundings, that pretty often makes me feel I’m renting a farmhouse in France 🙂
I quickly have to show you our biggest project this summer. We opened a B&B and are so excited about it, and it turned out so much better than we had hoped for. So if you are ever visiting Denmark and our beautiful city Aarhus, come stay with us. We would love to meet you. You can see our cute cottage B&B here on Airbnb.com and maybe bookmark it for later 😉
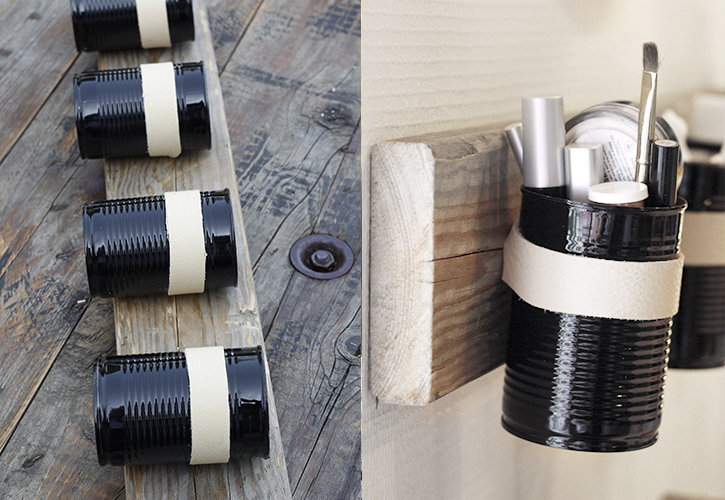
Alright, back to the project I have for you today. You all know I love to recycle and give new purpose to things, and this is one of those projects. I needed some handy storage in my bathroom for all my daily things, and I wanted to build something without it really costing me much. Since my hubby does a lot of woodwork, we have loads of scrap pieces of wood laying around, and I like to recycle tin cans, glass jars and so on, so that became my starting point.
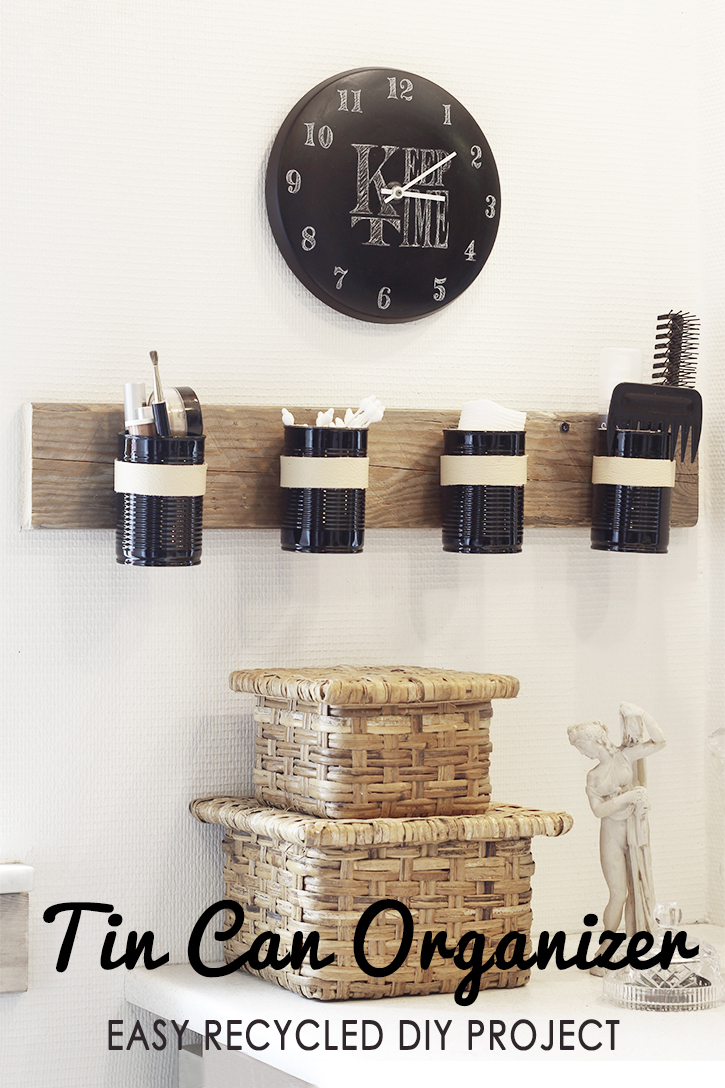
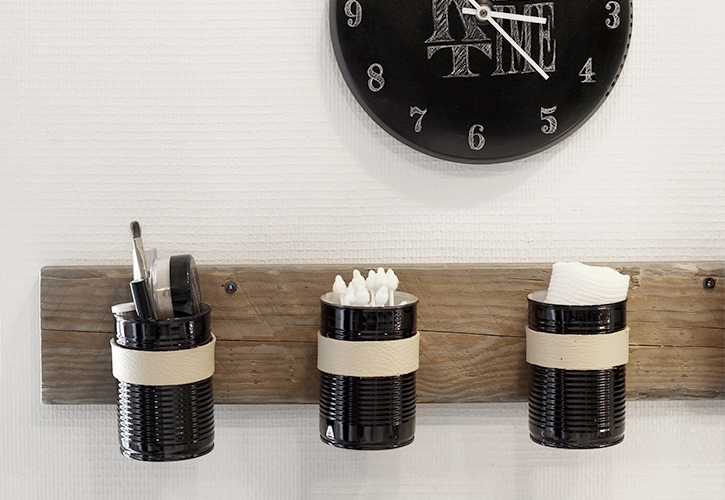
And this is what I made, a cute little recycled wall organizer. Now lets make one for you too:
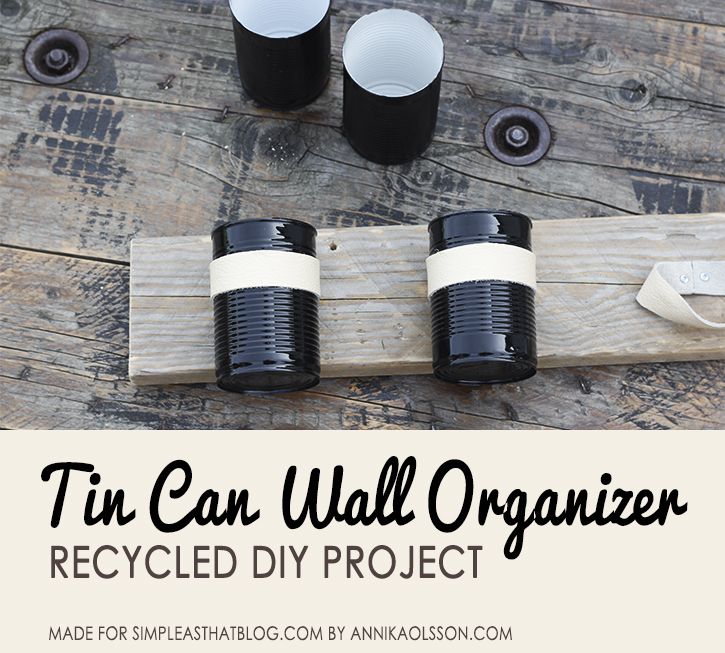
In the picture below, you’ll find the instructions on putting this little wall organizer together, but first I’ll list the materials and tools needed for this project:
MATERIALS:
- Tin cans. I used 4, but you can use as many as you like.
- Wood board. I used a piece of scrap wood, measuring about 100 cm.
- Leather scraps. I used a soft tanned leather. I’m pretty sure any thick, durable piece of fabric will hold the cans in place.
- Paint. Spray paint or any hobby paint to brush on.
- Screws…. double amount of screws as the number of cans you are using.
- Screws or nails for hanging.
TOOLS:
- Saw
- Sandpaper (+) sandpaper woodblock
- Scissor/rotary cutter
- Smooth edged can opener (If you don’t mind jagged edges on your tin cans, you don’t need a can opener).
- Drill and screw power tool
Notes on tools:
This is a fairly straight forward project, but a few things are easier done with the right tools.
If you like recycling cans for your craft projects, I will recommend getting a can opener, that creates a smooth edge, when opening it. This way you won’t have to worry about you or your kids cutting your self, when making projects using tin cans. The Tupperware can opener I have, is able for purchase on Amazon right here. I think it’s fairly priced too, and it’s durable for sure.
Another great tool for when you cut leather for example, is the Fiskars Rotary Cutter. You can pretty much cut anything with this, but I like that it cuts thicker materials like leather and cardboard really well. In fact, you can cut both ways, unlike with a knife, that you always drag towards you. The rotary knife lets you cut away from yourself too. You’ll find it on Amazon here.
Continues below picture…

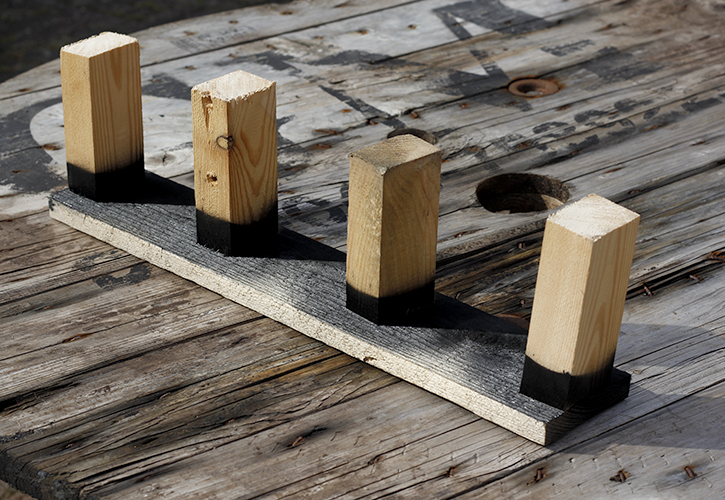
I you are really serious about recycling tin cans for projects like this, or other craft pieces, you’ll enjoy creating an easy way of painting and drying your cans for future projects. My hubby made this very simple stand, so I could easily spray paint the tin cans without having to touch them.
Basically, get a piece of wood for the base and then cut 4 equal sized(that will fit the diameter of the can) pieces of wood, and screw them on the longer piece of wood. You screw it on from the bottom and it will pretty much look like this picture below. Now you have both a painting- and drying stand, that is reusable for every tin can project you make.
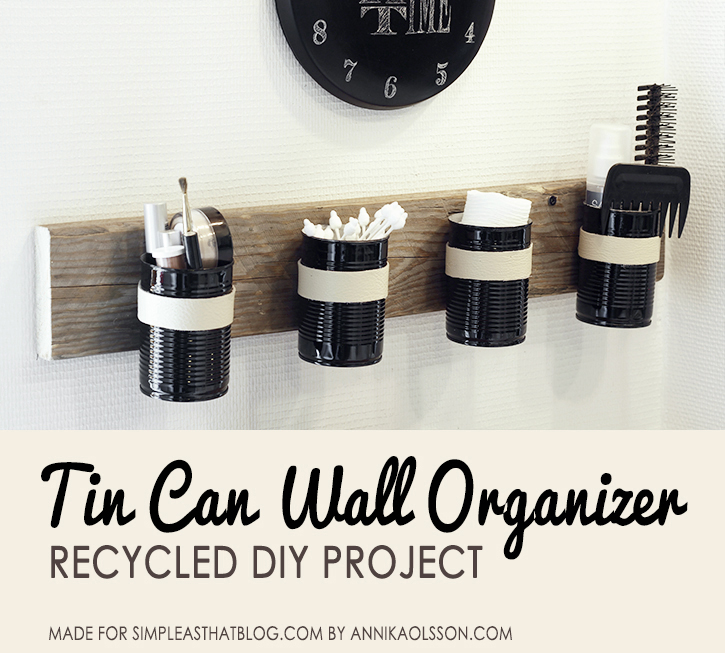

This is a versatile project and you could use this organizing idea throughout your house. I think it would make a nice item holder for the office and childrens room as well.
I hope you enjoyed this project. May you have a beautiful August ! See you soon!
PS. if you are wondering about the chalk painted clock in the background, that is one of my older DIY recycled projects. You’ll find it on my blog here.

Latest posts by Annika Olsson (see all)
- The one reusable accessory you need to make your baby photos look stunning (tutorial) - Monday, June 12, 2017
- Create a beautiful personalized Mother’s Day gift - Wednesday, May 3, 2017
- Create a super quick last minute Easter (or any time of year) hostess gift. - Sunday, March 19, 2017

I’ve always wanted to make one of these but there are so many DIY projects I still have to do.
I know the feeling 🙂 With so many fun and fantastic ideas out there, there’s always projects to be made. I try not to get too discouraged about not getting to do them all. In the end it’s about creating when you feel the need to, and because it makes you happy.
I love how you have used leather strips to hold the cans in place. It looks great.
Thank you, Claire
Can’t believe I didn’t think of this! Retro handmade lamps from repurposed tin cans!