• About
    • About Rebecca
    • Meet the Team
    • Media Kit
    • FAQ
  • Photography
  • Holidays
  • Recipes
  • Printables
  • 2019 Calendar
  • Write for Us
  • Beyond Snapshots

Simple as That

Making Everyday Beautiful

Blog

My Favorite Christmas Books

Monday, December 19, 2016

A sampling of the best Christmas books for kids to go along with our favorite Christmas tradition, reading Christmas books throughout the season. 
best Christmas books for kids

Last year I wrote about our Christmas book tradition that I started 12 years ago on my oldest son’s first Christmas. It is a very simple tradition, and one that is a favorite for me (the book buyer) and my children (the book readers).

The gist is that each year I buy each child a Christmas or holiday book and write them a note inside with the year and a short message. I also buy a “house” book, and I also write the year inside. The intention is that when my children have families of their own, they will take their set of Christmas books to their own homes to share with their family, and the house book will be at my house to enjoy with my grandchildren (if we are blessed to have some). 12 years into this tradition, we have a lot of beautiful and special holiday books to enjoy throughout the holiday season.

best Christmas books for kids

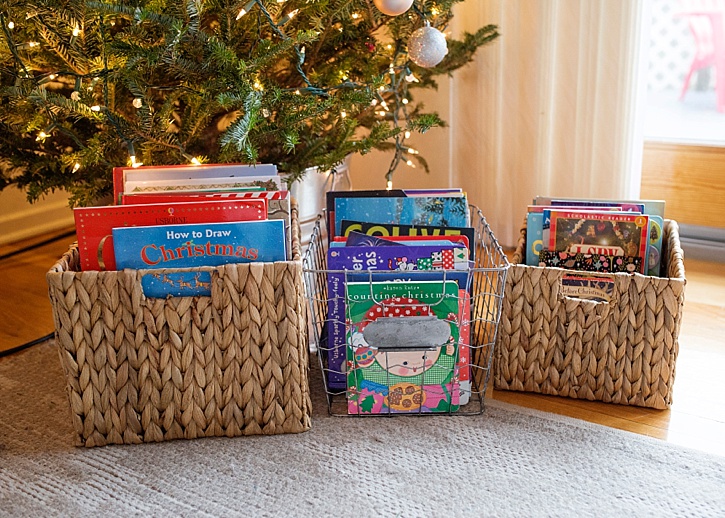
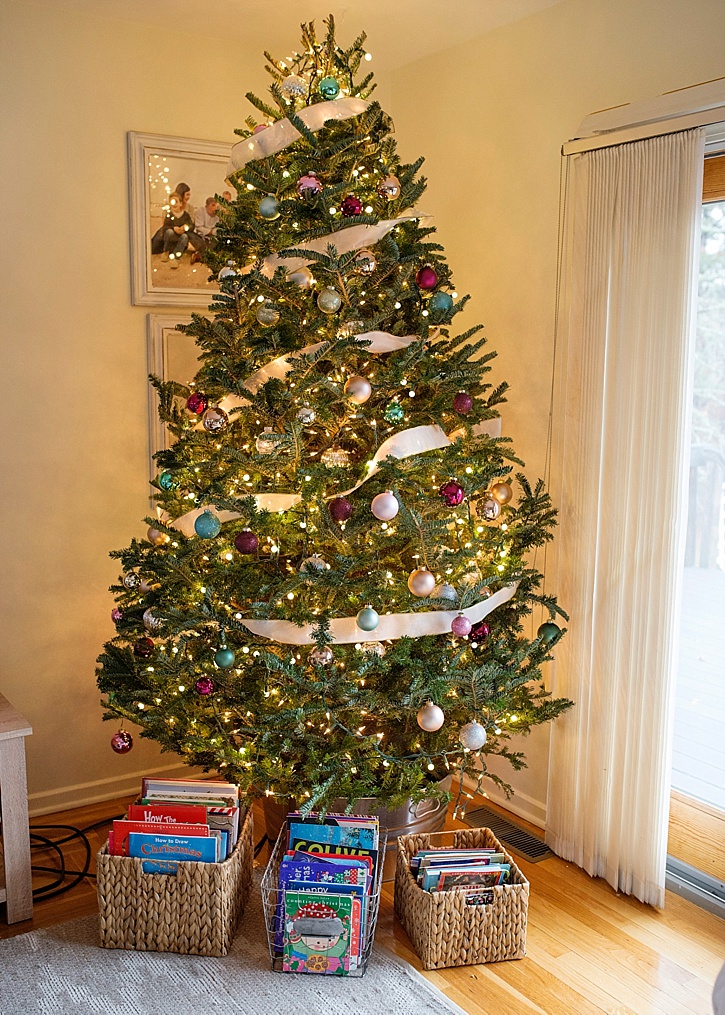
The Christmas books come out the evening that the Christmas tree goes up. And they go back into storage when the tree comes down. They are special and are treated as such. Christmas book night is one of the kid’s favorite nights of the year. They love looking through the stacks of books and reminiscing about Christmas past. When picking the books, I try to match the book with either the place where we are living at the time (we are a military family, so we move a lot), something about the year, or an interest they have at the time. It is like walking back in time with them.

Over the years, we have collected quite a few books and I am often asked about which books are our favorites. I chose a few to share with you, but there are so many. Each year, there are new books published and as my children grow and so does their reading level – the options are plentiful. I keep a running list using my Amazon wish list and often buy them from a local bookstore if I see something that I think that they will like.

best Christmas books for kids

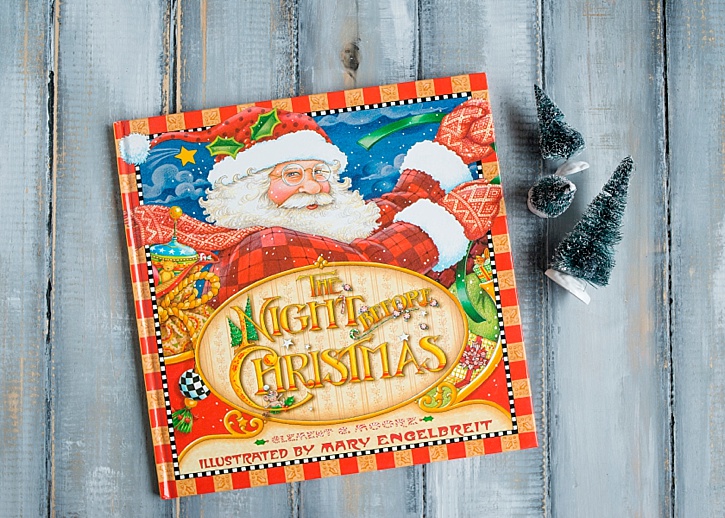
The Night Before Christmas by Mary Engelbreit – You cannot have a Christmas book collection without a copy of this classic. I love this one because of the incredible illustrations.

best Christmas books for kids

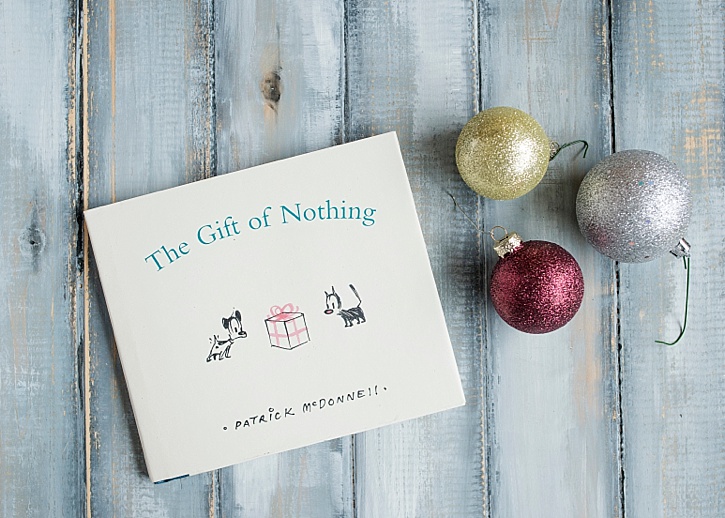
The Gift of Nothing by Patrick McDonnell – A sweet story about what to buy someone who has everything. Spoiler – the greatest gift to give is friendship.

best Christmas books for kids

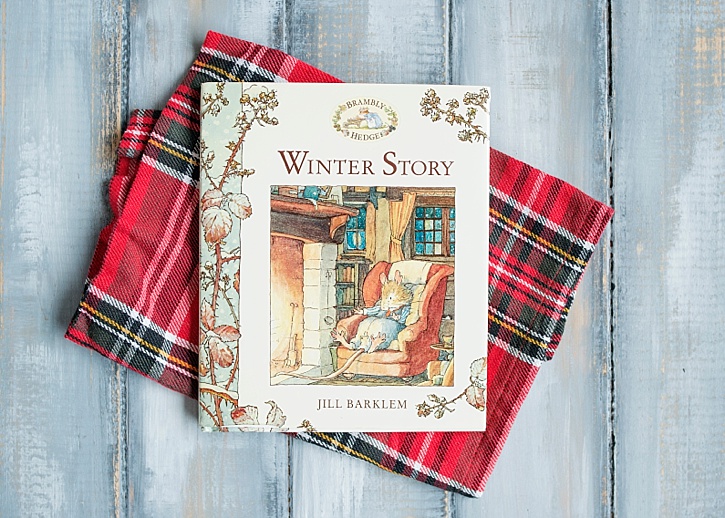
Winter Story by Jill Barklem – A classic from the Brambly Hedge series. This book is out of print, but I found a new copy from a reseller. Beautiful illustrations and a sweet story.

best Christmas books for kids

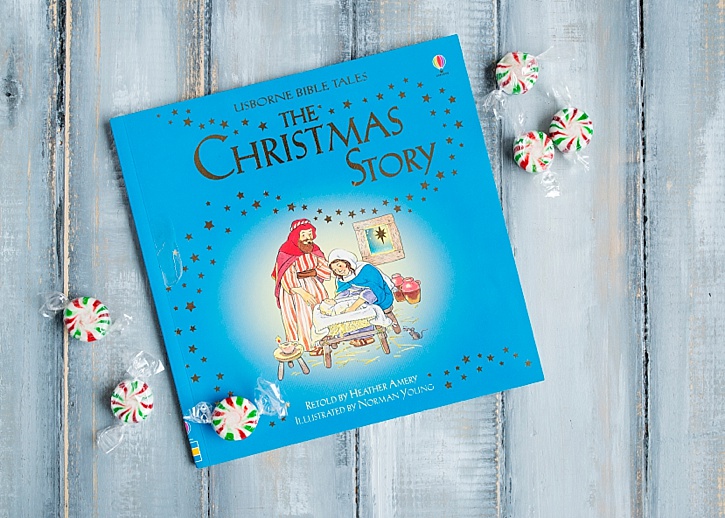
The Christmas Story retold by Heather Amery – I happen to love Usborne books, and they really have an extensive collection of Christmas ones. This is a simple retelling of the nativity story.

best Christmas books for kids

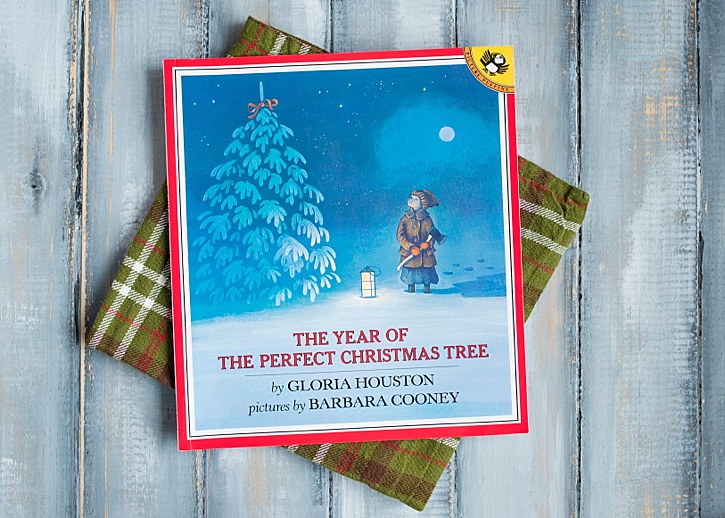
The Year of the Perfect Christmas Tree by Gloria Houston – Waiting for her father to come home from war, Ruthie and her mother find the tree that he and Ruthie tagged in the spring to donate to the town. A book about courage and family.

best Christmas books for kids

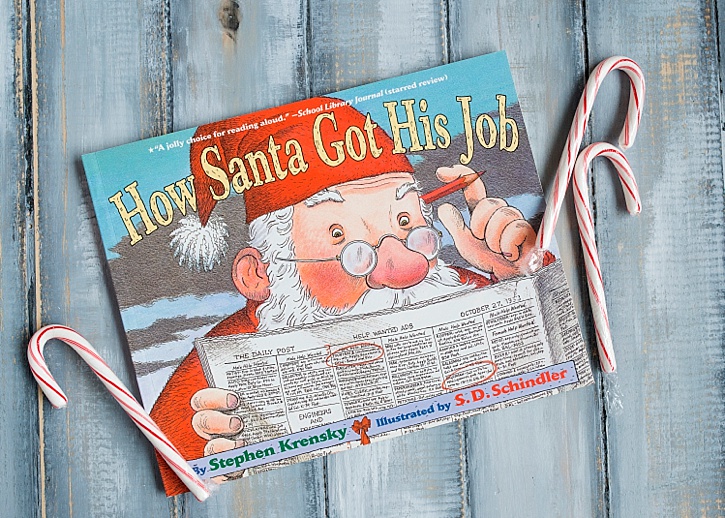
How Santa Got His Job by Stephen Krensky – Just how did Santa get this job? A cute story about how your special talents can help other people.

best Christmas books for kids

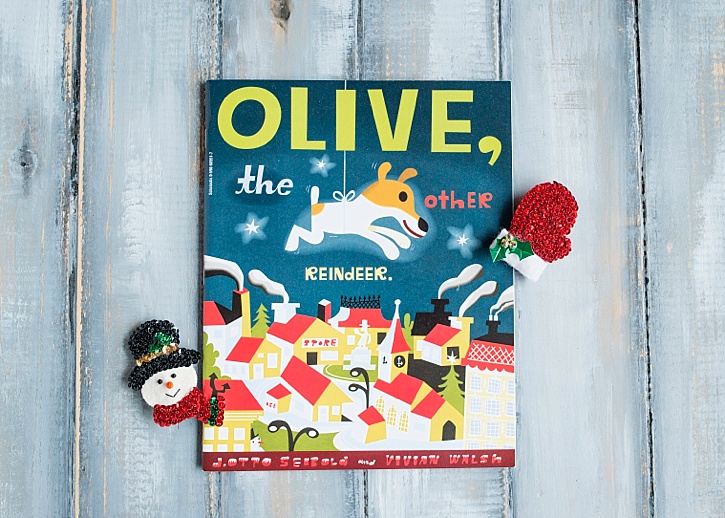
Olive, the Other Reindeer by J. Otto Seibold and Vivian Walsh – My daughter’s favorite of all of the Christmas books. Olive is a dog that wants to be a reindeer.

best Christmas books for kids

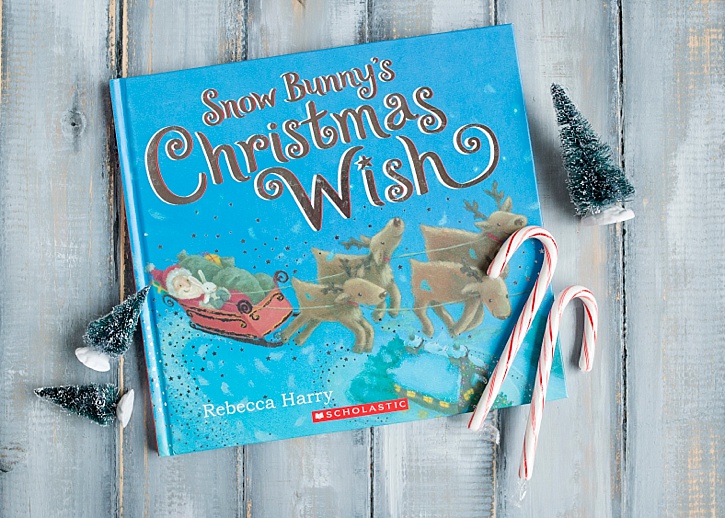
Snow Bunny’s Christmas Wish by Rebecca Harry – Snow Bunny wants to give her letter to Santa, but realizes she needs to deliver it to him in person. Her adventure to the North Pole meets other animal friends that need help.

best Christmas books for kids

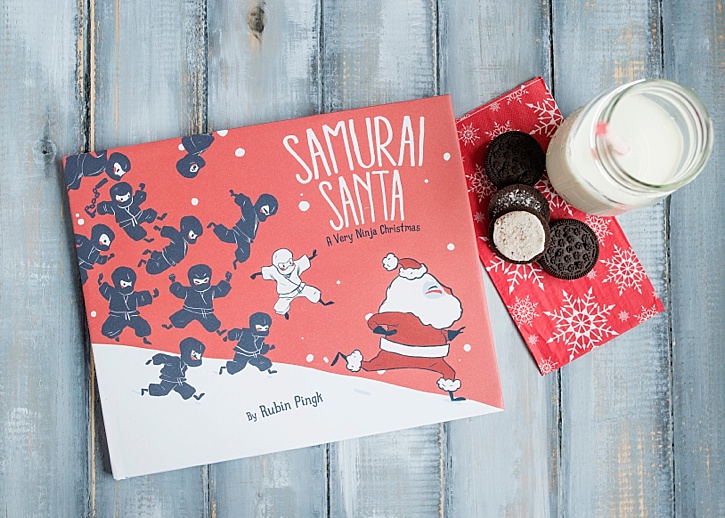
Samurai Santa by Rubin Pingk – When you want to have a snowball fight, but fear of being on the naughty list means no one will play with you. Boys love this one.

best Christmas books for kids

How to Catch Santa by Jean Reagan – There is not a child alive that hasn’t wanted to see if they can catch Santa in the act. A super cute story with beautiful pictures.

best Christmas books for kids

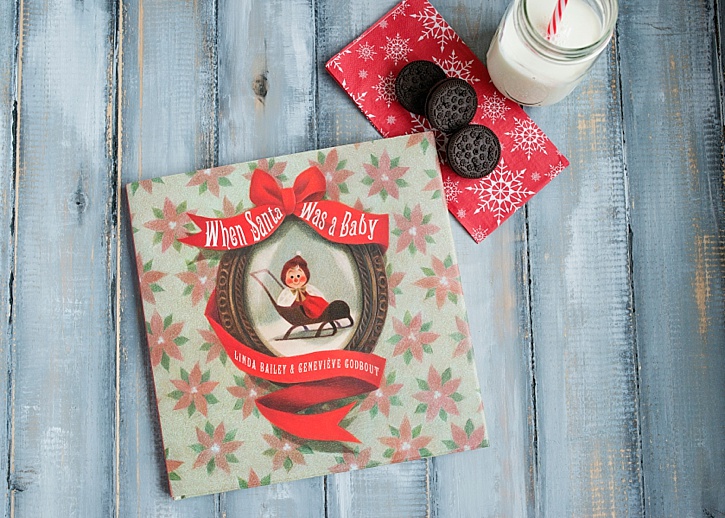
When Santa Was A Baby by Linda Bailey and Genevieve Godbout – Santa was born to be Santa. His early interest in chimneys, giving his toys away, and other clues about what was to come for him.

best Christmas books for kids

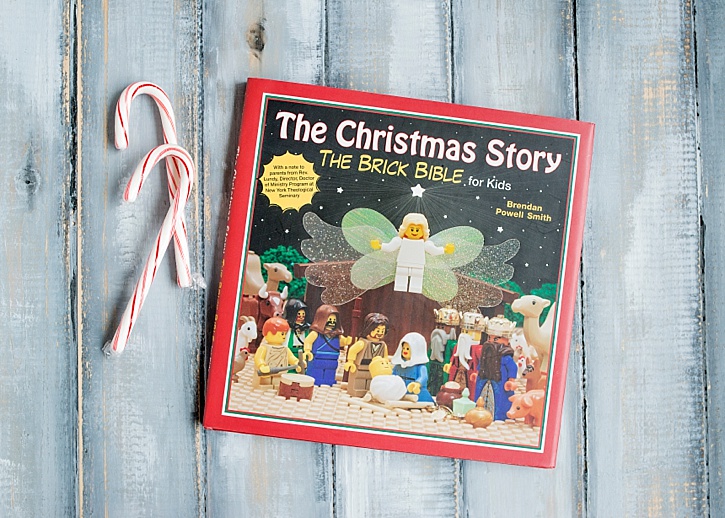
The Christmas Story: The Brick Bible for Kids by Brendan Powell Smith – If you have any Lego lovers, then this is a must have book. My boys love this retelling of the Christmas Story.

best Christmas books for kids

These are just a few of our favorites. I’m sure as the collection grows, so will our choice of favorites. Each year, I discover new ones that I love, and we read them nightly throughout the holiday season. I hope this tradition finds its way into your home as well.

There are affiliate links included in this post. 

How to Make Rustic Twig Christmas Ornaments

Thursday, December 15, 2016

Bring a touch of nature indoors this year as you decorate your tree – learn how to make rustic twig Christmas ornaments! They’re simple, inexpensive and look beautiful!

Bring a touch of nature indoors this year as you decorate your tree – learn how to make rustic twig Christmas ornaments! They're simple, inexpensive and look beautiful!

This year we put together an Outdoor Adventure themed Christmas tree and we love it so much! From the DIY Photo keepsake ornaments, to the buffalo check accents, to the faux wood-burned ornaments – this tree has been a handmade labour of love.

We took our inspiration for the tree from nature and decorated it in a way that emphasized our families love for spending time outdoors together. Each ornament is a nod to our love of National Parks, hiking and exploring outside!

Bring a touch of nature indoors this year as you decorate your tree – learn how to make rustic twig Christmas ornaments! They're simple, inexpensive and look beautiful!

Today I wanted to share a final how-to for some of my favorite ornaments on the tree. These rustic twig ornaments were a lot of fun to make. When creating an outdoor themed Christmas tree, what else can you do but bring some elements from nature indoors! Right?

These ornaments add just the right touch to our outdoorsy tree and below you’ll find instructions and a short video showing you exactly how I made them.


Bring a touch of nature indoors this year as you decorate your tree – learn how to make rustic twig Christmas ornaments! They're simple, inexpensive and look beautiful!

*All supplies for this project can be purchased at your local Michaels Craft Store.

Supplies

  • Thin branches or twigs
  • Garden shears
  • Glue gun and glue sticks
  • Twine
  • Sharpie
  • Buttons
  • Sprigs of faux pine / berries

Bring a touch of nature indoors this year as you decorate your tree – learn how to make rustic twig Christmas ornaments! They're simple, inexpensive and look beautiful!

Instructions

To make the star ornament trim 5 twigs to equal length with your garden shears.

Bring a touch of nature indoors this year as you decorate your tree – learn how to make rustic twig Christmas ornaments! They're simple, inexpensive and look beautiful!

Begin with two twigs, over lap them in an upside down “V” shape. Using hot glue attach the two twigs at the top as pictured.

Bring a touch of nature indoors this year as you decorate your tree – learn how to make rustic twig Christmas ornaments! They're simple, inexpensive and look beautiful!

Get another twig and attach on top of the first two twigs going across diagonally.

Bring a touch of nature indoors this year as you decorate your tree – learn how to make rustic twig Christmas ornaments! They're simple, inexpensive and look beautiful!

Continue adding your twigs until the star is complete.

Bring a touch of nature indoors this year as you decorate your tree – learn how to make rustic twig Christmas ornaments! They're simple, inexpensive and look beautiful!

To reinforce the point of each star, take a short length of twine. Hot glue it to the back side of the ornament at one of the points. Wrap around 3-4 times then hot glue the end of the twine to the back of the ornament. Trim any excess.

Bring a touch of nature indoors this year as you decorate your tree – learn how to make rustic twig Christmas ornaments! They're simple, inexpensive and look beautiful!

Take another small length of twine, form a loop and hot glue the two ends to the top point of the star at the back. This will be for hanging the ornament on the tree. Trim any excess.

Bring a touch of nature indoors this year as you decorate your tree – learn how to make rustic twig Christmas ornaments! They're simple, insanely inexpensive and look beautiful!

To make the Snowflake ornament begin with 1 long twig and 6 shorter twigs of equal length. Lay the long twig up and down. Arrange smaller twigs around longer one to form snowflake. Begin attaching smaller twigs to large one in the center.

Bring a touch of nature indoors this year as you decorate your tree – learn how to make rustic twig Christmas ornaments! They're simple, insanely inexpensive and look beautiful!

Once all the twigs have been glued to the center of the longest twig cut 16 tiny pieces to add embellishments to the end of each point on the snowflake. Attach these with hot glue.

Bring a touch of nature indoors this year as you decorate your tree – learn how to make rustic twig Christmas ornaments! They're simple, insanely inexpensive and look beautiful!

Wrap twine around the center of the snowflake to reinforce. Next decorate the center of the snowflake using sprigs of pine and berries and buttons.

Cut a short length of twine, form a loop and glue to the back of the snowflake at the top for hanging the ornament.

Bring a touch of nature indoors this year as you decorate your tree – learn how to make rustic twig Christmas ornaments! They're simple, inexpensive and look beautiful!

To make the tree ornament start with one longer twig. You can make these as large or as small as you want – I didn’t do any exact measuring here.

Next you’ll want to trim some twigs in graduating lengths. I used a sharpie to mark the length of these. You’ll want a smaller twig for the top of the tree and each twig will get longer as you move to the bottom of the tree. 8-10 twigs should be enough to form the tree.

Bring a touch of nature indoors this year as you decorate your tree – learn how to make rustic twig Christmas ornaments! They're simple, inexpensive and look beautiful!

Once you have all your twigs trimmed, attach them to the longer twig with hot glue. Add a button to the top of the tree for a star. Cut a short length of twine, form a loop and glue to the back of the tree at the top for hanging.

Bring a touch of nature indoors this year as you decorate your tree – learn how to make rustic twig Christmas ornaments! They're simple, inexpensive and look beautiful!

That’s all there is to it. These ornaments really are very simple to make. They’re great to get the kids involved with too! Head out on a short nature walk to collect stick and then make these ornaments together. You can help younger ones with the hot glue or let older children work independently using a low temperature glue gun.

If you need more instruction follow the short video below that will show you how each ornament was put together.

If you enjoyed this post you might also like…

  • Faux Wood Burned Christmas Tree Ornaments
  • 10-Minute Photo Keepsake Ornaments
  • Outdoor Adventure-Themed Christmas Tree
  • Free Buffalo Check Plaid Christmas Printables


Mini Monkey Breads

Monday, December 12, 2016

Mini Monkey Breads – Start a holiday tradition with these little cups of goodness. They’re ready in half the time of a traditional monkey bread, but with ALL the delicious flavor!

Mini Monkey Breads

Growing up, it was the job of my Dad and I to wait in line for fresh, hot, sticky cinnamon buns on Christmas Eve. We’d bring them home and the smell would taunt us with the promise of sweet things to come, but no one was allowed a taste until after all of the presents had been opened on Christmas morning. Once that last present was opened, us kids would race to the kitchen and fight over who got the biggest one and the most icing. Lucky for me, I was the oldest and usually made out pretty well in the end…

Those cinnamon buns were such a delicious tradition and sweet childhood memory. 

Mini Monkey Breads

Now that I’m grown, that bakery is closed, but I’ve carried on the sticky, cinnamon-flavored tradition for my family with homemade Christmas morning monkey bread. During previous years I’ve made one large monkey bread in a bundt pan. It always turned out delicious, but my complaint has always been that it takes too long to bake (almost an hour). In our home, Christmas morning is busy, as we engage in all of our family traditions before we pack up the car and make our way to visit the grandparents.

That’s why this year I developed this recipe for Mini Monkey Breads.

They take about 10 minutes to prep and 15 minutes to cook, which means a tasty, Christmas morning cinnamon treat is ready for the kids (and Mom and Dad) to dig into in under half an hour!

Making Mini Monkey Breads Adding Sticky Sauce to Monkey Bread Baked Mini Monkey Breads

Now, if you like smothering monkey bread in frosting, head over to my blog Simple Seasonal for my recipe for Copycat Cinnabon Frosting. According to my sisters, who each have an excellent sweet tooth, it tastes just like the real thing. A combination of butter and cream cheese, and not to mention that secret ingredient!

Homemade Mini Monkey Breads

Mini Monkey Breads
 
Print
Ingredients
  • ⅓ C granulated sugar
  • 1 tsp cinnamon
  • 1 can 8 count flakey biscuits (Immaculate)
  • 5 Tbsp butter
  • ¼ C packed dark brown sugar
  • ¼ tsp vanilla
Instructions
  1. Combine the granulated sugar and the cinnamon in a ziplock bag. Cut each of the biscuits into 9 pieces, add them to the bag, and shake to coat with the cinnamon and sugar mixture. Line a muffin tin with 12 cupcake liners and evenly fill each with the cinnamon and sugar biscuit pieces.
  2. In a small saucepan melt together the butter, dark brown sugar, and vanilla, but don’t allow it to begin to bubble. Stir to evenly combine. Spoon about a tsp of the butter mixture onto each muffin.
  3. Bake in a 350ºF oven for 15-17 minutes. Best if served warm.
3.5.3226

Mini Monkey Breads

Want some frosting for your Mini Monkey Bread??? Check out my recipe for Copycat Cinnabon Frosting on my blog, Simple Seasonal

Copycat Cinnabon frosting

10 Low-Input, High-Yield Ways to Simplify Your Life

Thursday, December 8, 2016

For my husband’s graduate degree, we moved to the Midwest. After four years of college on the bench of the Rocky Mountains, we found ourselves surrounded by miles and miles of cornfields, not a hill in sight—much less a mountain.

It wasn’t long before we felt the pull.

The tug toward an elevated point of view. We’d gotten used to being able to hike or drive to amazing vista points. But now, the highest view we could find was from the tiny, awkwardly placed windows of the Notre Dame campus library. 😉

There’s just something about being higher than normal that makes you see your life with fresh eyes. Most of our big decisions as a couple had been made from that vantage point.

Should we get married? Where should we go to grad school? When should we have kids? 

Get us to a mountain, and bam—decision made!

My husband and I recently went hiking north of the Golden Gate Bridge. We’ve come a long way since our newlywed days spent pining away for a decent view while surrounded by fields of endless white snow.

We held hands with our three children and argued about how to safely get our 3-year-old up the steepest section. 😉 But once we made it—once we were finally watching the sun melt into a fog-covered ocean—the feeling we got while taking in the view was just the same as it has always been.

Always and forever, getting a view will be one of the best ways I know of to simplify my life, because it helps me click my priorities back into place.

But of course, dashing up a mountain isn’t always an option. And sometimes the stress and busyness of life build until you know you need to do SOMEthing or lose your marbles once and for all.

For those times, here are 10 low-input, high-yield ways to simplify your life (and keep your sanity):

10 Low-Input, High-Yield Ways to Simplify Your Life

1. Know your values

Admittedly, this is more of an investment than anything else on this list. But I couldn’t not include it because of how essential it is to living a simplified life. When you know your values (your why), it is exponentially easier to let other good things fall to the side. If you’re not immediately clear on what you prioritize over everything else, I suggest writing a personal or family purpose statement.

2. Do a thought download

Write out everything bouncing around in your head. You don’t have to address all of the problems or correct your negative thought loops; you just need to get it all out. It’s a simple exercise to much clearer thoughts.

3. Practice the 1-minutes rule

Anything you can get done in one minute, do. Pick up the stray Lego you keep passing on the stairs, put a digital file into the right folder, etc.

4. Learn to prioritize quality over quantity

Both with belongings and experiences.

“Owning less is far more beneficial than organizing more.” Joshua Becker

5. Use things up and wear them out before buying a replacement 

Not only is this mindful of earth’s resources and the pull consumerism has on us, it’s also a time saver. The more use you get out of something, the less time you’ll spend shopping for something new.

5. Make a designated place in your home for items to be donated

You might be surprised at what a difference this small trick makes.

6. Clean up your inbox and desktop

Why does this clear up so much room in my head?! I don’t know, but it works.

7. Set alarms on your phone for any positive habits you want to develop

Taking vitamins or medication, drinking water, stepping on the scale… A simple alarm lets you to keep things OUT of your mind until the reminder pops up.

8. Streamline your wardrobe. 

Buy only what you love, keep only what you really wear, etc.

9. Believe that your worth isn’t based on your productivity

You don’t need to run as fast as the mom next-door. Productivity isn’t everything; your worth is inherent.

10. Get a view

“Everything seems simpler at a distance.” Gail Tsukiyama

I hope this list helps you live a little more like you would from the top of a mountain. (Even if you’re surrounded by cornfields or snow.)


For more, check out my 52 obtainable ways to simplify your life, which includes ideas under topics like mental clarity, health & food, home organization, technology, and more. (If you want to really go BIG, you could choose one item per week to focus on during 2017!)

Rudolph the Red-Nosed Reindeer Cinnamon Rolls

Wednesday, December 7, 2016

This is a sponsored post written by me on behalf of Pillsbury. All opinions are entirely my own.

These Rudolph the Red-Nosed Reindeer Cinnamon Rolls will help make the holidays a bit more magical with minimal effort required!

These Rudolph the Red-Nosed Reindeer Cinnamon Rolls will help make the holidays a bit more magical with minimal effort required!

These cinnamon rolls really are the perfect Christmas breakfast – the kids will think they’re adorable (and of course delicious) and they’re so easy that mom doesn’t have to worry about the time it takes to make them!

These Rudolph the Red-Nosed Reindeer Cinnamon Rolls will help make the holidays a bit more magical with minimal effort required!

I love to make the holidays extra special for my kids but annual traditions and holiday baking can quickly take my focus away from what matters most at Christmas unless I’m mindful of keeping my to-do’s in check. It’s so easy for life to get overwhelming when we add to much to our plate this time of year.

These Rudolph the Red-Nosed Reindeer Cinnamon Rolls will help make the holidays a bit more magical with minimal effort required!

When it comes to holidays baking, finding ways to keep my time in the kitchen to a minimum so I can enjoy more time making memories with my family is a high priority for me. Thanks to Pillsbury, we were able to enjoy this yummy breakfast together in a snap and make some special Christmas memories along the way!


Ingredients

Pillsbury Grands Cinnamon Rolls

Red Gumballs

Wilton Candy Eyeballs

Non-stick baking sheet

Cooked Bacon

These Rudolph the Red-Nosed Reindeer Cinnamon Rolls will help make the holidays a bit more magical with minimal effort required!

Instructions

Make cinnamon rolls on non-stick pan according to package directions.

Once cooled, spread icing on the top of each roll.

Place one red gumball and two candy eyes on the top of each roll to make the reindeers face.

Slice cooked bacon in half. Place two half slices of bacon in the top of the cinnamon rolls for the reindeers antlers.

I hope you enjoy these cute and yummy reindeer cinnamon rolls as much as the kids and I did! I can see these cinnamon rolls becoming a new holiday tradition in our house. Here’s to spending less time in the kitchen and more time with the ones we love most this holiday season.

For more fun and simple holiday baking inspiration here

These Rudolph the Red-Nosed Reindeer Cinnamon Rolls will help make the holidays a bit more magical with minimal effort required!

If you enjoyed this post you might also like…

Chocolate Covered Reindeer Pretzels

Silly Reindeer Hairdo

Simple Christmas Treat Cups

25 Simple Ways to Serve this Christmas Season #LighttheWorld

Tuesday, December 6, 2016

The holidays never feel warmer or more satisfying than when we’re giving of ourselves. Join our family and thousands of others as we #LighttheWorld with 25 simple ways to Serve this Christmas Season.

The holidays never feel warmer or more satisfying than when we’re giving of ourselves. Join myself and thousands of others as we #LighttheWorld with 25 simple ways to Serve this Christmas Season.

As we turn our hearts and minds towards the true meaning of Christmas let us remember the Savior and His life of service.

25 Ways to Serve this Christmas Season

Since a new star first appeared above Bethlehem, Christmas has been a season of light, reminding us that Jesus Christ is the light of the world. Together, we can celebrate His birth by making the world a brighter place. All we have to do is follow Him—His life, His example, and His teachings. In doing so, we can help #LIGHTtheWORLD.

The holidays never feel warmer or more satisfying than when we’re giving of ourselves. Join myself and thousands of others as we #LighttheWorld with 25 simple ways to Serve this Christmas Season.

This initiative to perform one small act of service each day in December isn’t meant to one overwhelming by adding more to-do items to an already busy season.

As we’ve tried to focus on enjoying a Simpler Holiday Season this year we’ve worked hard to fill our days with less chaos and more love. Less to-do’s and more stillness.  More love, more quiet moments and leave more room for service.

The holidays never feel warmer or more satisfying than when we’re giving of ourselves. Join myself and thousands of others as we #LighttheWorld with 25 simple ways to Serve this Christmas Season.

I’m honored to be a part of the #LighttheWorld initiative this December as my family and thousands of people around the world join in giving service to others. Together, one small act of service at a time, we can #LighttheWorld.

The holidays never feel warmer or more satisfying than when we’re giving of ourselves. Join myself and thousands of others as we #LighttheWorld with 25 simple ways to Serve this Christmas Season.

We Rise by Lifting Others

“We rise by lifting others.” – Robert Ingersoll

There are no truer words. The holidays never feel warmer or more satisfying than when we’re giving of ourselves. I love the idea of focusing on serving this Christmas season and have already felt so blessed as I watch my children experience first hand the joy of serving others.

The holidays never feel warmer or more satisfying than when we’re giving of ourselves. Join myself and thousands of others as we #LighttheWorld with 25 simple ways to Serve this Christmas Season.

Serving others does not need to involve elaborately planned projects or costly gifts.  Lifting another can be as simple as giving a smile or saying thank you for all you do.

The Savior Cared for His Mother and We Can Too

We all know that a note of appreciation can mean so much. Letting someone know how thankful we are for their efforts and their presence in our lives is one simple way we can give service this Christmas.

Who is more deserving of our thanks and appreciation than mom. Our Savior honored and cared for his mother and we can too. I’ve designed this simple stationary set for you to use to write a quick note to mom to let her know how much you love her and appreciate all she does.

In the printable PDF file you’ll find a coordinating thank you card, stationary sheet, envelope and envelope liner.

Download THANK YOU Stationary Set

Download the 25 Day Service Calendar here

I invite you to download the 25 Day service calendar using the link above and join us as we #LighttheWorld this December.

The holidays never feel warmer or more satisfying than when we’re giving of ourselves. Join myself and thousands of others as we #LighttheWorld with 25 simple ways to Serve this Christmas Season.

5 Tips For Photographing In Low Light

Tuesday, December 6, 2016

low-light-1

5 Tips For Photographing In Low Light

As the days get shorter and darker, there will often be times when you are taking pictures indoors in low light.   It can be really challenging to get good pictures when there is limited light, but definitely not impossible! Here are my tips for getting good pictures even when there isn’t too much light around.

1) Turn off your flash

It does seem counter-productive I know, but turning off your camera’s pop-up flash is one of the best things you can do for your photographs – even in low light.   Images taken with flash tend to look washed out and are just generally unflattering to anyone in the frame, so it’s definitely one to avoid if you can. If you are on AUTO, you will definitely need to go into your settings and do this manually, as the camera will probably automatically use flash in dark scenes. This one simple step will have the biggest impact on how your images turn out!

satb-low-light-2

2) Add more light

Another tip is to try to add more ambient light to the room.  During the day, try opening up the blinds a little more or pulling back the curtains. I’m always amazed how much more light can come in this way! If you are photographing during the evening with artificial light, you could try turning on an extra lamp to help add more light to the room. However, avoid using overhead lighting – a desk or table lamp will give you a much softer light to work with, and is much more flattering.

3) Put your Subject next to the light

A great way to make sure you have enough light on your subject is simply to get them to sit near to a light source.  If this is during the day and you have natural light, have them set near a window or door. When the sun has gone away for the day, have them sit near to a lamp.  If you like moodier images, have just one light on and have your subject sit in the pocket of that light – it creates a really interesting “high contrast” image like the one below.

low-light-1-3

4) Watch your settings

Getting good pictures in AUTO can be very difficult because you don’t get any control over your settings,  so I strongly suggest that you switch over to Aperture Priority Mode.  This a good way to introduce you to taking a little bit more control over your camera but still leaves the camera to do a lot of the hard work for you. Not sure how to do this? Don’t worry, I’ve got you covered ? Hop on over to read this article on How to Shoot in Aperture Priority Mode which gives you a step by step guide.

When choosing your settings, make sure that you have a high enough shutter speed, of at least 1/125.   This will stop you from getting a blurry image due to motion blur. You should also choose a smaller aperture number so that you get more light into the camera.

low-light-1-4

5) Be careful with focus

Cameras can sometimes find it more difficult to lock focus when there is not much light around.  Try to focus on an area where there is contrast if this is the case. Contrast is an area where you can have both light and dark, for example in the pupil of the eye. This little trick can help the camera find something to latch onto and therefore make it is easier to focus.

Now go get comfortable shooting in low light!

10 Minute Photo Keepsake Ornaments

Thursday, December 1, 2016

Trim the tree with these 10 minute photo keepsake ornaments. They take no time at all to make and it will mean so much to fill the tree with family memories!

Trim the tree with these 10 minute photo keepsake ornaments. They take no time at all to make and it will mean so much to fill the tree with family memories.

Easy to Make Photo Keepsake Ornaments

When putting together our Outdoor Adventure-themed Christmas tree this year I wanted to include some handmade photo ornaments that showcased a few of our favorite moments in the great outdoors.

These photos mean so much to me and represent some amazing experiences we’ve shared together as a family so I wanted them to have a special place on our tree.

As always, when I take on a craft project, it has to be simple and these ornaments are exactly that. You’ll have them put together and hanging on your tree in minutes! Follow along as I show you exactly how to make them.

Trim the tree with these 10 minute photo keepsake ornaments. They take no time at all to make and it will mean so much to fill the tree with family memories.


*All supplies for this project can be found at Michaels Stores.

Supplies

Round distressed wood ornaments

Twine

Matte Mod Podge

Foam Brushes

Scissors

Printed Photos

Photo Editing program or PicMonkey

Hole Punch

Trim the tree with these 10 minute photo keepsake ornaments. They take no time at all to make and it will mean so much to fill the tree with family memories.

Instructions

The first thing to start with is choosing the photos you will use for your ornaments. I picked out a handful of photos taken in our favorite National Parks that we’ve visited and from hikes we’ve done as a family over the years.

I cropped the photos into circles using my photo editing program and chose to add some simple text telling where and when the photos were taken. You can do this in your favorite photo editing program (I use photoshop or photoshop elements) or you can do it online using PicMonkey’s free text editor.

Trim the tree with these 10 minute photo keepsake ornaments. They take no time at all to make and it will mean so much to fill the tree with family memories.

Print your photos at home or at your local photo lab. To print as a standard size simply copy and paste your circular photo onto a blank 4×6 canvas (in your photo editing program) and save as a JPG file. You can then upload this 4×6 to your favorite online photo lab and have it printed as a standard 4×6 size.


Purchase distressed round disc ornaments. If you can’t find these at your local Michaels craft store, I did find these wood ornaments that you could paint white and distress yourself.

Trim the tree with these 10 minute photo keepsake ornaments. They take no time at all to make and it will mean so much to fill the tree with family memories.

Cut out your circular photos and punch a small hole at the top in line with where the hole is on the ornaments. I used a sharpie to mark this.

Now apply a generous layer of Mod Podge to the top of the wood ornament. You’ll need to work quickly here, making sure your mod podge coats the surface of the ornament entirely and that you have an even layer.

Trim the tree with these 10 minute photo keepsake ornaments. They take no time at all to make and it will mean so much to fill the tree with family memories.

Next apply a quick layer of mod lodge to the back of your photo. Place the photo on the wood ornament making sure it’s centered. Apply a final layer of mod podge on top of the photo to seal it. Make sure you apply this layer evenly and that your brush strokes and even and are all going in the same direction.

Trim the tree with these 10 minute photo keepsake ornaments. They take no time at all to make and it will mean so much to fill the tree with family memories.

Once the mod podge is completely dry thread a length of twine through the hole at the top of the ornament and tie in a knot. Now hang them on your tree and enjoy looking at some of your favorite photo memories throughout the Christmas season.

Trim the tree with these 10 minute photo keepsake ornaments. They take no time at all to make and it will mean so much to fill the tree with family memories.

More Simple Handmade Ornaments to Check Out

Faux Wood Burned Christmas Tree Ornaments

Create faux wood burned Christmas tree ornaments without any special tools. Complete how-to instructions including printable templates to make these easy, nature-inspired keepsakes.

Kids Sharpie Art Ornaments

Turn your child’s beautiful artwork into a simple keepsake ornament.

Silhouette Keepsake Ornaments

These simple, DIY, silhouette keepsake ornaments may not help you freeze time, but they will at least allow you to capture it—as you display your children’s profiles year after year on your Christmas tree.

DIY Wooden House OrnamentsDIY White and Gold Wooden House Ornaments

12 Images to Help You Simplify Your Holiday Season

Wednesday, November 30, 2016

Because less really is more –12 Images to help you simplify your holiday season.

Enjoying a calm, unhurried holiday season filled with more memories and less overwhelm is what I truly want this year for myself and my family.

As I hold on to vision I have for holidays I will be drawing on these quotes and images to inspire me along my journey towards a simpler Christmas.

12 Images to Help You Simplify Your Holiday Season

Use these image quotes for inspiration, as gentle reminders, or to invite others to simplify their holiday season, too.

Pin your favorites to an inspiration board, share them on Facebook, post them on Instagram, tweet a message to your friends, or just enjoy them in your own office.

We hope they help remind you to simplify your holiday season.

(Click on each image to open in new window and download full-size.)

1. Live less out of habit and more out of intent.

Simplify the Holiday Season

2. All is calm, all is bright.

Simplify the Holiday Season

3. Be still, and still moving.

Simplify the Holiday Season

4. You can do anything, but not everything.

Simplify the Holiday Season

5. Identify the essential, eliminate the rest.

Simplify the Holiday Season

6. It’s not how much we give, but how much love we put into giving.

Simplify the Holiday Season

7. We rise by lifting others.

Simplify the Holiday Season

8. Keep it simple.

Simplify the Holiday Season

9. It’s not what’s under the Christmas tree, it’s who’s around it.

Simplify the Holiday Season

10. White space is where the magic happens.

Simplify the Holiday Season

11. The root of joy is gratefulness.

Simplify the Holiday Season

12. The future is now.

Simplify the Holiday Season

No Bake Pumpkin Spice Cookies

Friday, November 25, 2016

No Bake Pumpkin Spice Cookies are quick and easy to make with delicious pumpkin spice pudding mix, pumpkin puree, oats, and classic ingredients.

If you love pumpkin flavored food, then you are going to love this cookie recipe!

No Bake Pumpkin Spice Cookies are quick and easy to make with delicious pumpkin spice pudding mix, pumpkin puree, oats, and classic ingredients

Hello there!  This is Katie from The Casual Craftlete blog.  No bake cookies are probably my all time favorite cookie recipe to make and eat.  These beloved cookies go way back to my childhood.  Today, I am putting a fun and tasty spin on the classic recipe.  These No Bake Pumpkin Spice Cookies turn up the flavor and will surely become a fall favorite.

Today, I am putting a fun and tasty spin on the classic recipe.  These No Bake Pumpkin Spice Cookies turn up the flavor and will surely become a fall favorite.

No Bake Pumpkin Spice Cookies are quick and easy to make with delicious pumpkin spice pudding mix, pumpkin puree, oats, and classic ingredients

This recipe starts out with the original ingredients in a classic no-bake cookie recipe like butter, sugar, and milk.  I do substitute almond milk for dairy milk, but that is my preference.  To make these cookie pumpkin flavor, I added dry pumpkin spice pudding mix, pumpkin puree, and pumpkin pie spice.

Obviously, these cookies are going to explode with pumpkin goodness.

No Bake Pumpkin Spice Cookies are quick and easy to make with delicious pumpkin spice pudding mix, pumpkin puree, oats, and classic ingredients

These No Bake Pumpkin Spice Cookies do take longer to set than regular no bakes.  I would say it takes a couple of hours, so if you are wanting to eat these cookies right away you will need to make them ahead of time.  They will and should set just like the classic.  You should get 18 to 20 cookies using a heaping tablespoon or a heaping small cookie scoop.

These cookies are seriously so good!

No Bake Pumpkin Spice Cookies are quick and easy to make with delicious pumpkin spice pudding mix, pumpkin puree, oats, and classic ingredients

No Bake Pumpkin Spice Cookies
 
Print
A quick and easy no bake cookie recipe made with delicious pumpkin spice pudding mix, pumpkin puree, oats, and classic ingredients
Recipe type: Dessert
Cuisine: American
Serves: 20 cookies
Ingredients
  • ½ cup unsalted butter (1 stick)
  • 2 cups granulated sugar
  • ½ cup milk
  • 1 3.4-ounce package dry instant pumpkin spice pudding mix
  • ½ cup pumpkin puree
  • 2 teaspoons vanilla extract
  • ¼ tsp pumpkin pie spice
  • 3½ to 4 cups quick cooking oats
Instructions
  1. Add butter, sugar, and milk in a saucepan and bring to a rolling boil. Boil for 2 minutes.
  2. Remove from heat and stir in pudding mix, puree, vanilla extract, pumpkin pie spice, and quick cooking oats until well combined.
  3. Drop cookies on to wax or parchment paper using a heaping tablespoon or heaping small cookie scoop. Let cool until completely set.
3.5.3226


« Previous Page
Next Page »

Primary Sidebar

Rebecca Cooper — Founder, Simple as That Blog

Hello, I'm Rebecca. Welcome to my blog, Simple as That. Come along as we embrace simplicity in crafting, photography, travel, and family life. Read more about me.

Newsletter

Get the latest updates from Simple as That delivered to your inbox.

Join for Free

Beyond Snapshots: Mastering the Art of Mobile Photography

Connect

  • Bloglovin
  • Facebook
  • Instagram
  • Pinterest
  • Twitter

Follow On Pinterest

Visit Rebecca - Simple as That Blog's profile on Pinterest.

Categories

  • Crafts / DIY
  • Holidays
  • Motherhood
  • Organization
  • Photography
  • Printables
  • Recipes
  • Simple Living
  • Travel
  • Wellness

Our Privacy Policy

Follow on Instagram

Instagram has returned invalid data.

Printable 2023 Calendar

Our printable calendars and organizational pages have been essential in keeping our home and my life in order and I guarantee they will be a help to you too!

Click here to learn more

© Simple as That Blog, 2017 · Design by Brian Gardner

Simple as That Blog

Facebook / Instagram / Pinterest / Twitter / Contact