• About
    • About Rebecca
    • Meet the Team
    • Media Kit
    • FAQ
  • Photography
  • Holidays
  • Recipes
  • Printables
  • 2019 Calendar
  • Write for Us
  • Beyond Snapshots

Simple as That

Making Everyday Beautiful

Blog

When Simple Living is Anything But

Tuesday, April 28, 2015

When simple living is anything but. It’s in the starting again, day after day, that we learn to live with more focus—and more grace. For others and for ourselves.

When Simple Living is Anything But Simple | "It's money, it's friendship, it's our reputations—sometimes it's even our self-worth—on the line. But it's the tension that helps us know our core."

The truth is, sometimes I watch my children with envy.

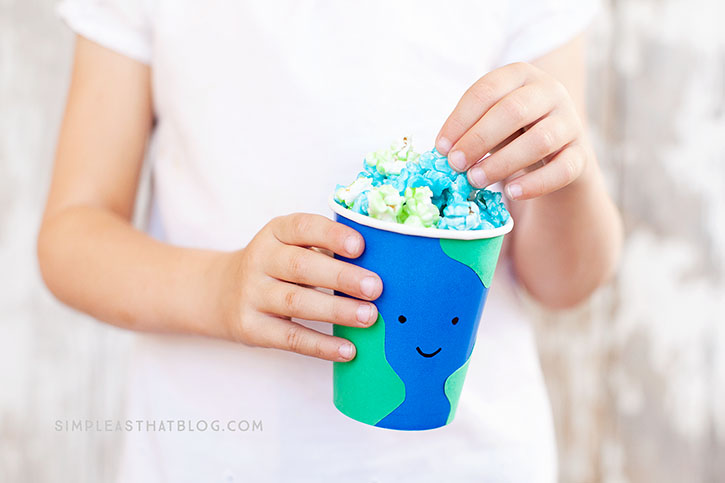
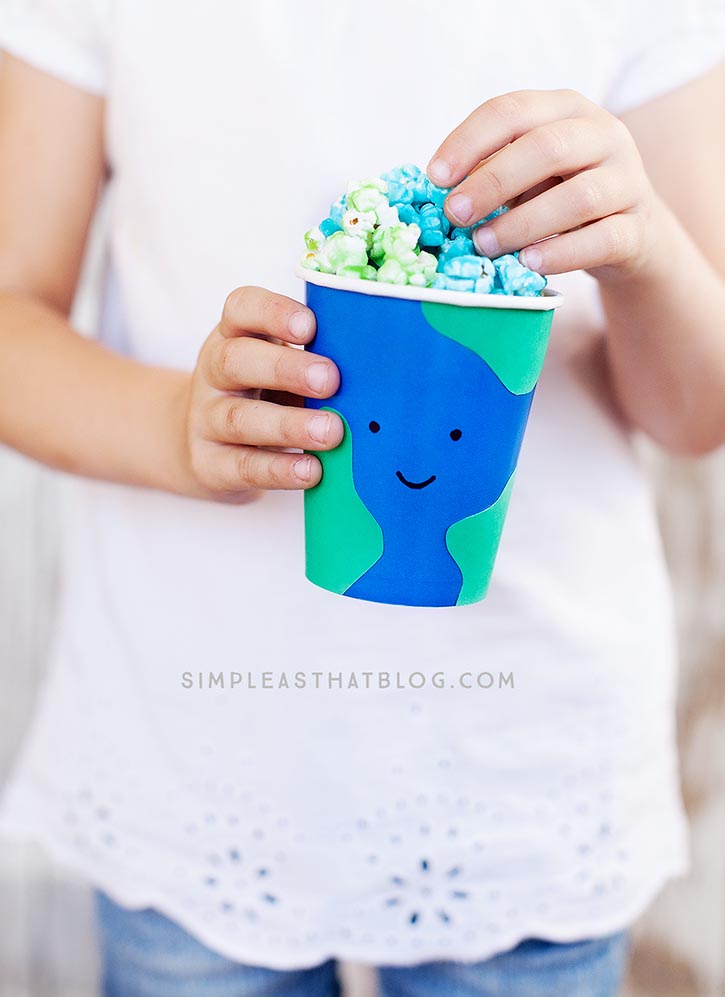
They eat popsicles on sunny days and drink hot cocoa on cold ones. They explore muddy orchards after rainstorms and build Roxaboxen-style homes while they keep one eye out for Indians.

Their biggest problems are remembering to flush the toilet so Mom doesn’t bust them and finding all the darts they lost in the yard.

When Simple Living is Anything But

(There they are, staking out the neighbor kids, dart guns in hand.)

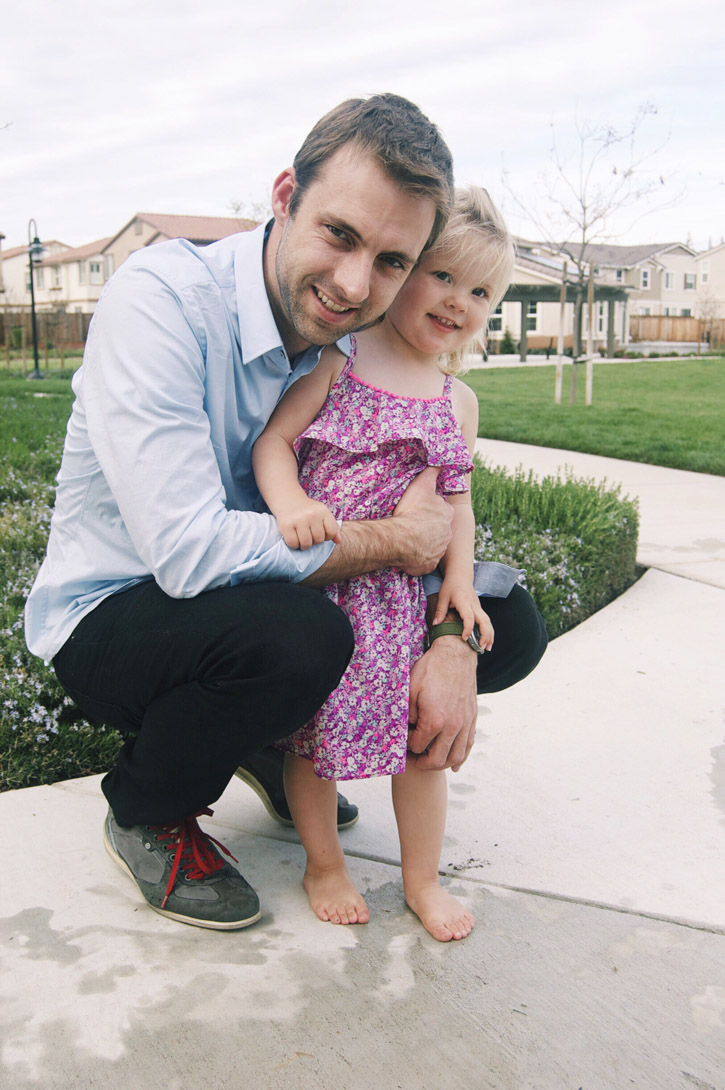
As their mom, I get to do all of it with them, and I’m so grateful for that.

Not long ago, I stood with my kids on the edge of the ocean, barking at sea lions until the big things got so curious they swam over to see what all the noise was about. Last week, I lost a shoe in the sleeper mud pit right alongside my son. (RIP, purple Nikes.) Just yesterday, I got to hear them squeal and see them streak across the grass when their daddy surprised us by coming home early. (I may have squealed too.)

When Simple Living is Anything But

But there’s one impossible-to-miss differentiator between them and me: My mind is racing at any given point, while their minds are still.

Even though I know what I want to go big on in life (family, creativity, and faith) and I believe deeply that knowing your why helps you tune out noise, sometimes…

When Simple Living is Anything But

Sometimes living simply is anything but. 

In a world that moves quicker than we can blink, the concept of simple living might just be a myth. An alluring apparition that hardly anyone really catches.

Because—

Is it ever simple when signup sheets are flying, when no one has stepped up to be the room parent for the year, or when good, better and best are as confused as your toddler when he’s awoken from a nap?

It is ever simple when your brain screams “say yes!” while your heart whispers (all too quietly) “say no.”

Is it ever simple when you realize you’ve overextended yourself but for really, really good reasons, you can’t set any of the balls you juggle down?

It’s money, it’s friendship, it’s our reputations—sometimes it’s even our self-worth—on the line.

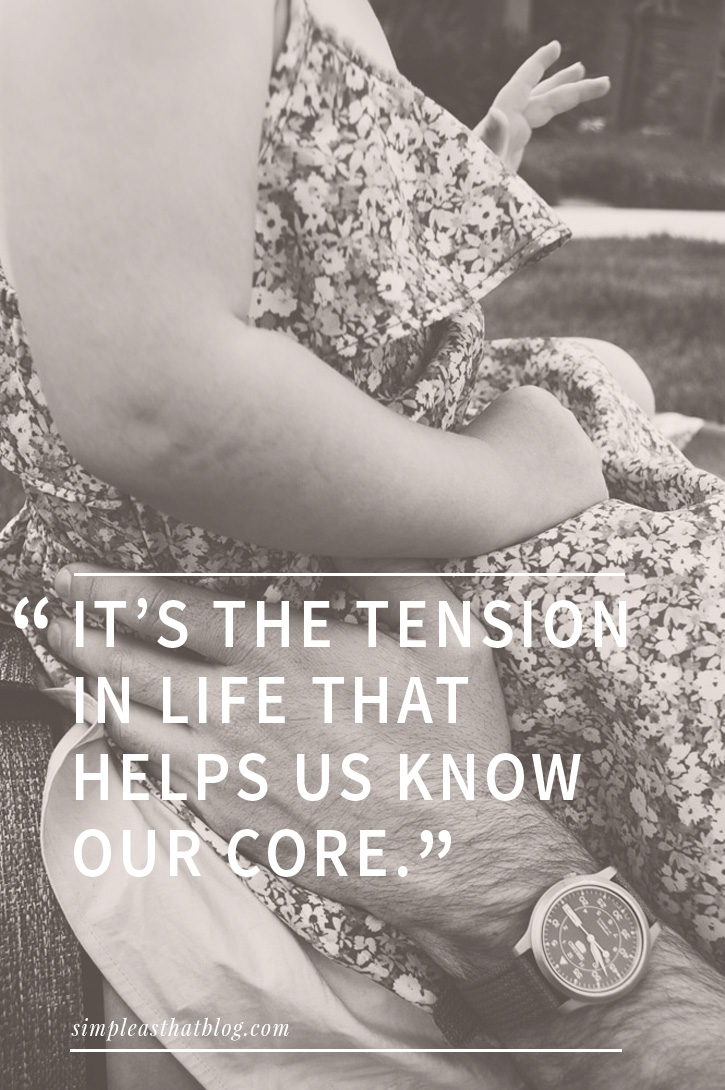
Simple living isn’t simple.

But it’s the tension that helps us know our core.

When Simple Living is Anything But Simple | "It's money, it's friendship, it's our reputations—sometimes it's even our self-worth—on the line. But it's the tension that helps us know our core."

We may not get it right half the time. Tension is uncomfortable, and the answers aren’t always clear. At the end of the day, we may long to hole ourselves up in the bedroom with a plate of lemon bars and an episode of Downtown. (Now that sounds simple, right?)

But it’s in the starting again, day after day, that we learn to live with more focus—and more grace. For others and for ourselves.

Which makes me think… Maybe we’re catching the vision after all.

Simple Cacti Embroidery Box

Thursday, April 23, 2015

Hello Simple As That readers! I’m Amy from Delineate Your Dwelling, a craft DIY blog. I am so excited to guest post today and am sharing one of my new favorite projects. Today I am sharing a how to create a Simple Cacti Embroidery Box.

Simple Cacti Embroidery Box, Delineateyourdwelling.com

Supplies:
Wooden Embroidery Box (I found mine at Target)
Embroidery Thread or Yarn
Embroidery Needle
Small Scissors
Paint in similar colors of thread

Simple Cacti Embroidery Box supplies
Before starting this project, I quickly drew out on the inside cover of the Embroidery box what my design would be. This helped me keep track of where my next stitch would be. (I highlighted in color for you all to see the design a little better.)

Cacti Embroidery Box design

I also painted the basic colors on the front of the cover. However, if you use yarn for this project, instead of thread, it will fill in the space a bit better and this step is unnecessary.

I mostly used a simple Back Stitch for the outlines of each shape and then to fill in the spaces, I used a Satin stitch.

Simple Cacti Embroidery Box sew
The last little detail for my Embroidery Box was to add a few orange flowers to the cacti.

Simple Embroidery Box
I did another simple Back Stitch in a light orange for the main flower and for the center I used a French Knot.

Simple Cacti Embroidery Box sewing
Once the embroidery cacti was completed, I painted the bottom portion of my box with white acrylic paint.

Simple Cacti Box
I love how this easy project turned out and already have my box put to good use in my office area!

Simple Cacti Embroidery Box2
I hope this has inspired you to dig out your embroidery thread and get started on a fun project!

If you’d like to see more creative ideas like this, be sure to stop by and say hello at Delineate Your Dwelling. You can also follow me on Pinterest or Instrgram.
intro graphic

Healthy Earth Day Snack Cups

Monday, April 20, 2015

Healthy Earth Day Snack Cups – create these easy Earth Day snack cups and go green this Earth Day with these 10 healthy snack ideas! When you’re done crafting and snacking don’t throw these cute cups out! Use them to hold pencils and crayons or plant something in them!

Go green this Earth Day! Make these easy Earth Day snack cups and enjoy 10 healthy, green snack ideas!

One item I always keep on hand for crafting with the kids – PAPER CUPS! They come in lots of fun colors and they’re so inexpensive! Last week I shared how to make these Easy Earth Day Cups. You can get the quick how-to here.

Go green this Earth Day! Make these easy Earth Day snack cups and enjoy 10 healthy, green snack ideas!

Not only are these cups perfect for Spring crafting, they also help encourage kids to eat healthy! Anything to make fruits and veggies fun and exciting for kids is a win in my book – this is an easy way to do just that!

What you’ll need to make Earth Day Treat Cups

  • Blue paper cups
  • Black sharpie
  • Scissors
  • Green Construction paper
  • Gluesticks

There are so many things you could use these fun cups for! Snacks are just more fun when you eat out of a cute cup! Here are a few more healthy things you could put in these Earth Day cups!

Go green this Earth Day! Make these easy Earth Day snack cups and enjoy 10 healthy, green snack ideas!

Healthy, Green Snack Ideas

  • Snap Peas
  • Cucumbers
  • Green Peppers
  • Brocoli
  • Pistachios
  • Green Apples
  • Celery
  • Green Grapes
  • Green Smoothie
  • Honey Dew Melon

Go Green!

Don’t throw those cute Earth Day cups away when you’re done snacking! Reuse your Earth cups to hold pencils or crayons, plant some herbs or small flowers in them or go on a scavenger hunt collecting nature treasures and keep them in your cup! There are all kinds of creative ways to use these cups for Earth day or ANY day!

Go green this Earth Day! Make these easy Earth Day snack cups and enjoy 10 healthy, green snack ideas!

In case you haven’t noticed, we’ve been busy creating all kinds of fun paper cup crafts! We just can’t get enough of them! Paper cups come in such a wide range of colors and are available at craft stores, party supply shops or the dollar store. I always have them on hand because they’re so fun to craft with. Check out our Christmas, Halloween and Spring paper cup crafts!

crafting paper cupsWEB

If you enjoyed this post you may also like…

25 Recycled Tin Can Crafts and Projects

Summer Photo Scavenger Hunt for Kids

5 Ways to Protect Kids Hair from the effects of Chlorine

Printable “Let’s Pop it!” Popcorn Boxes

Watercolor Art Lesson for Kids

Easy Earth Day Treat Cups

Thursday, April 16, 2015

Easy Earth Day Treat Cups – quick and inexpensive fun for the kids for Earth day! These cute cups are perfect for party favours, classroom treats and double as a super easy Earth Day craft!

Easy Earth Day Treat Cups

Earth day is right around the corner – April 22nd in fact – and we thought making these easy little treat cups would be a fun way to celebrate this beautiful world we live on! Scroll down for a quick how-to and the recipe for this simple and delicious kool aid flavored Earth Day popcorn!

Easy Earth Day Treat Cups

What you’ll need to make Earth Day Treat Cups

  • Blue paper cups
  • Black sharpie
  • Scissors
  • Green Construction paper
  • Gluesticks

Easy Earth Day Treat Cups

How to make Earth Day treat cups

Draw two eyes and a mouth on the front/center of a blue cup. Use googly eyes to make these little Earth cups extra fun!

Next, cut miscellaneous shapes out of green paper. Glue randomly around the cup to create the “land” on your earth.

If you don’t have green construction paper you could use green paint to paint the green spots on your blue cup.

Easy Earth Day Treat Cups

That’s it – so easy! Perfect for little hands to make! Now you’re ready to enjoy your treat cup! Fill it with your favorite drink, some healthy snacks or find the recipe below for this fun Earth Day colored popcorn!

Go Green!

Don’t throw those cute Earth Day cups away when you’re done snacking! You could reuse your Earth cups to hold pencils or crayons, plant some herbs or small flowers in them or go on a scavenger hunt collecting nature treasures and keep them in your cup! There are all kinds of creative ways you cold use these cups for Earth day or ANY day!

Crafting with Paper Cups

In case you haven’t noticed, we’ve been busy creating all kinds of fun paper cup crafts! We just can’t get enough of them! Paper cups come in such a wide range of colors and are available at craft stores, party supply shops or the dollar store. I always have them on hand because they’re so fun to craft with. Check out our Christmas, Halloween and Spring paper cup crafts! 

Earth Day Popcorn

For an exciting Earth day treat give this Kool-Aid flavored popcorn a try in Earth Day colors! You’ll find the recipe below.

Earth Day Popcorn

You will need to double this recipe to make the Earth Day popcorn in blue and green. I used white popcorn so the color would be nice and bright. I used lemon-lime for the green color and Berry Blue for the blue popcorn. If you find that the color isn’t very intense after adding the kool aid use a few drops of food coloring to give it a little boost!

Earth Day Popcorn
 
Print
Author: Simple as That Blog
Recipe type: Popcorn
Ingredients
  • 12 cups popped popcorn
  • ⅓ cup butter
  • ½ cup light corn syrup
  • 1 cup sugar
  • 1 package of Kool-Aid
  • ½ tsp baking soda
Instructions
  1. Preheat oven to 225 degrees.
  2. Place it in a pot over medium-low heat. Add corn syrup and sugar and stir until butter is melted. Bring mixture to a boil. Reduce heat and continue to simmer. Stir continually for 3 minutes.
  3. Remove pot from stove and stir in Kool-Aid and baking soda. Add a few drops of food coloring if needed. Mix week and pour over popcorn. Stir until popcorn is evenly coated. Spread popcorn out onto a baking sheet and cook at 225 degrees for 40 minutes. Stir every 10 minutes. Cool completely and then break into pieces.
3.2.2885

Go green and make healthy eating fun for Earth Day! Tomorrow I’ll be sharing some healthy snack ideas that you can use to fill yours Earth Day cups with! Stay tuned!

If you enjoyed this post you may also like…

25 Recycled Tin Can Crafts and Projects

Summer Photo Scavenger Hunt for Kids

5 Ways to Protect Kids Hair from the effects of Chlorine

Printable “Let’s Pop it!” Popcorn Boxes

Watercolor Art Lesson for Kids

Easy Earth Day Treat Cups


Kid Friendly Bread and Peanut Butter Bird Feeder

Thursday, April 16, 2015

Kid Friendly Bread and Peanut Butter Bird Seed Feeder – easy, safe and inexpensive craft for Spring!  These cute bird seed feeders are fun for the kids to make and give as a gift for Mother’s Day or for a Spring craft project.

Kid Friendly Bread and Peanut Butter Bird Seed Feeder - a fun Spring craft

Hello there!  It’s Katie from The Casual Craftlete blog.  I don’t know about you but my daughter and I are tired of being cooped up inside all winter.  Now that the weather is warming up, Spring is right around the corner.  I thought this bread and peanut butter bird seed feeder would be a fun Spring craft project for my three year old to make .  I think we are going to make some for Grandma and give to her for Mother’s Day.

Kid Friendly Bird Seed Feeders with bread and peanut butter - a fun Spring craft

Here are the supplies needed to make the feeders:

Bread

Peanut Butter

Cookie Cutters

Bird Seed

Twine or string

Kid Friendly Bird Seed Feeders

First we started by placing slices of bread on a cutting board.  I placed the cookie cutter on the center of the bread, then had my daughter push down.  You might have to help your child push the cookie cutter all the way through the bread, depending on how old your child is.

How to make bird seed feeders

After we cut out the shapes, I poked a small hole at the top of each cut out using a paper straw.  This is where the twine will go through, so you can hang your feeders outside.  Next, we let the cut outs dry on the cutting board overnight.  This allows the bread to harden.  I flipped the bread over just once, so that both sides of the bread would harden evenly.

Safe and Easy Bird Seed Feeders for kids to make

Once the bread has hardened, use a butter knife to spread the peanut butter on to the bread.  This is the messy and fun part for the kids.  My daughter said the peanut butter was her favorite part.

Bread and Peanut Butter Bird Seed Feeder is a great Spring craft for the kids to make

After you have spread peanut butter on both sides of the bread cut outs, roll the bread in bird seed until completely coated.  I had to use the paper straw again to remove any peanut butter and bird seed that got inside the holes.  Next, cut a piece of twine and tie in a knot.

Kid Friendly Bread and Peanut Butter Bird Seed Feeder - a fun Spring craft

Hang your feeders on a tree branch, bush or shepard’s hook and enjoy!

Hope you all have a lovely Spring and Mother’s Day!

5 Ways to Protect Kids Hair from Chlorine

Wednesday, April 15, 2015

5 Ways to Protect Kids Hair from Chlorine – Summer will be here before we know it and that means lots of time spent at the pool! My kids love to swim A LOT and we’ve dealt with our fair share of crunchy, damaged, sometimes even green, pool hair! Chlorine can cause all kinds of hair damage, especially with kids, who are in the pool so much during the Summer months. Today I’m sharing a few tried and true ways to help protect kids hair from chlorine damage while swimming.

chlorine1

I have three girls and two of them have light colored hair that is easily damaged when swimming. We live in Arizona and my kids all love to swim – so it’s safe to say we spend a lot of time at the pool in our free time. You gotta love Spring in Arizona – we’ve already been to the pool a few times this year! We’ve tried a few ways to prevent and deal with chlorine damaged to the kids hair and below you’ll find some things you can try yourself this Summer! This post contains affiliate links.

1. Soak your hair. Number one thing to try when it comes to preventing chlorine damage is soaking your hair before you enter the pool. If you’re hair is already wet from a quick shower, it won’t be able to absorb as much chlorine in the pool. Always have children rinse hair after exiting the pool as well to rinse off any lingering pool chemicals.

2| Pretreat with Conditioner. I recently started doing this with my girls hair and it has worked wonders! Pretreat the hair with conditioner BEFORE getting in the pool. The conditioner acts as a barrier to the pool water to protect the hair. I usually slather a small amount of conditioner on the girls hair at home before we leave to the pool and when they get out I’ve been noticing their hair doesn’t have that crunchy, post-swim feel. It washes out easily and has made such a difference in preventing my little blondies hair from going green!

3| Coconut Oil. Along the same lines as pretreating with conditioner, you can apply a small amount of coconut oil to the hair to protect it while swimming. We haven’t tried this ourselves but many people I’ve talked to swear by this method.

4| Chlorine Removal Products. Always wash hair after swimming. There are specialty products available that strip hair of chlorine and other pool chemicals. I took a poll on the Simple as That Facebook page and these were some of the products people have used and loved:

Suave Kids Swim and Sport

L’oreal Kids Swim and Sport

Malibu Treatment

Ultra Swim Shampoo and Conditioner

Arbonne Fortifying Hair Mask – I use this religiously on my own hair and get amazing results. Aside from the damage caused from swimming, this deep conditioning mask is something I use weekly to combat the effects of hair coloring, blow drying and product use. It leaves my hair feeling softer, fuller and healthy!

5| In the Kitchen. A few at home remedies that have been said to correct chlorine damage including dawn dish soap, vinegar, tomato paste or baking soda.

  • Blue Dawn Dish Soap is said to strip hair of chlorine. Wash hair with it then condition as normal.
  • Use apple cider vinegar as a natural way to remove pool chemicals from hair. Use one part apple cider vinegar and four parts water and apply to hair.
  • Try tomato paste. Apply to the hair, using as much as needed depending on the length and thickness of your hair. Comb through hair, let sit for 30 minutes. Rinse out then wash with shampoo and condition as normal.
  • Make a baking soda solution with one tablespoon baking soda to one cup water and lather through hair. Follow up with shampoo and conditioner.

Two Healthy Breakfast Ideas Using Eggs

Tuesday, April 14, 2015

Two Healthy Breakfast Ideas Using Eggs – These recipes offer a twist on the traditional way of cooking eggs to help you start your morning off right!

Two Healthy Breakfast Ideas Using Eggs
Hi Simple As That readers! Carissa Miss here. It’s been awhile since I’ve popped up here and I’m super excited to share 2 of my healthy go-to breakfast meals that are packed with protein and that you can make in 5 minutes. I recently released a 30 day Paleo meal plan that you can subscribe to HERE as I endeavor to help all my friends benefit from healthy eating choices like I did. I suffered from chronic migraines and thought I had tried everything. Turns out, my migraines are triggered especially by dairy and grains together. Fortunately, making the switch and focusing on what I was putting inside my body, helped me feel so much more energized that it became easier and easier. These recipes are two of the breakfasts that are a part of my meal plan.
Two Healthy Breakfast Ideas Using Eggs

First up is Eggs with Sausage and Mushrooms. I’ve tried to come up with a more creative name, but alas. Cook your sausage and then dice up some mushroom, onion and pepper and throw in a hot skillet. Cook until the onion is translucent.

Two Healthy Breakfast Ideas Using Eggs

Add your eggs and cook until eggs are no longer runny. You can scramble them, steam them, fry them, omelet them, really, the options are endless.

Two Healthy Breakfast Ideas Using Eggs

I decided to top a cooked sweet potato with my eggs. Grab a fork and dig in!

Two Healthy Breakfast Ideas Using Eggs

 The next variation is my Chicken Fajitas Eggs

Two Healthy Breakfast Ideas Using Eggs

 Dice up some red and green pepper, onion, and grab your favorite salsa.

Two Healthy Breakfast Ideas Using Eggs

 Cook the peppers and onion until translucent

Two Healthy Breakfast Ideas Using Eggs

 Add your eggs and cook as an omelet or steamed, or, you get the idea.

Two Healthy Breakfast Ideas Using Eggs

 Layer with some chicken or pork and you have Eggs Fajita style! I added my salsa with some hot sauce cause I like it sparingly.

Two Healthy Breakfast Ideas Using Eggs
 
Sausage and Mushroom Eggs
 
Ingredients: 
3 eggs
1/2 cup sausage, cooked
3 mushrooms, diced
1 Tbs onion, diced
1/2 sweet potato, cooked

Directions: 

Heat skillet on medium heat. In a small bowl, crack eggs and mix with fork. Chop vegetables and add to egg. When skillet is hot, pour in egg and cook until no longer runny.

Chicken Fajita Eggs

Ingredients: 

3 eggs grilled chicken 

1/4 green pepper  

¼ yellow pepper

1 Tbs onion

fresh salsa

Directions: 

Heat skillet on medium heat. In a small bowl, crack eggs and mix with fork. Chop vegetables and add to egg. When skillet is hot, pour in egg and cook until no longer runny

I talk a little bit more about my journey to Paleo in this short video and you can SIGN UP for my meal plan HERE


Thanks for having me!

EOS You’re the Balm Teacher Thank You Tags

Monday, April 13, 2015

EOS You’re the Balm Teacher Thank You Tags – Teacher appreciation week is quickly approaching (May 4-8) and today I’ve joined some blogging friends to share a collection of free printables to help say thank you to the teachers that are so important in your child’s life!

EOS You're the Balm Teacher Thank You Tags

Attach one of the free printable “you’re the balm” gift tags to an EOS lip balm and you have a quick gift! You only need a handful of supplies and I’ve got the tags ready for you to download and print – can’t get much easier than this!

What you need

  • EOS lip balm
  • Small Cellophane Bags
  • Bakers twine
  • hole punch
  • scissors OR paper trimmer
  • You’re the ‘balm’ gift tags

EOS You're the Balm Teacher Thank You Tags

We’ve purchased these EOS lip balms on Amazon when they were on sale, but I’ve seen a great deal on a multi-pack at Costco – there are so many fun flavors in pretty Spring colors right now! We’re obsessed with the Lemon Drop and Honeydew flavors right now!

EOS You're the Balm Teacher Thank You Tags

How to Make EOS You’re the Balm Teacher Thank You Gifts

To package your EOS lip balm you can attach the tag directly to an individually packed lip balm or if you buy them in bulk, place them in a 3 3/4″ x 4″ cellophane bag and attach the tag using bakers twine.

EOS You're the Balm Teacher Thank You Tags

You can even turn the EOS lip balm into a cute little candy by cutting out a small piece of cellophane wrap big enough to wrap around the lip balm leaving room enough on each end to twist and wrap. Tie each end with a small piece of bakers twine. See how to do that here.

EOS You're the Balm Teacher Thank You Tags

This is just a small way to say thank you to those teachers who play such an important roll in our children’s lives. Download the EOS ‘you’re the balm’ thank you tags using the link below and keep scrolling for 3 more fun teacher appreciation ideas!

Click to Download –> EOS You’re the Balm Gift Tags

EOS You're the Balm Teacher Thank You Tags

If you liked this post you might also enjoy…

  • We APPreciate you Gift Card Holder from The 36th Avenue
  • Thank you for Blowing My Mind Printable from LandeeLu
  •  I have to Ad-MITT you’re a Sweet Teacher Gift Idea from the girls at Eighteen25

Free Printable Thank You Cards

Friday, April 10, 2015

Free Printable Thank You Cards – taking the time to send a handwritten thank you note means so much. These printable cards make it easy! Simply download and print at home on white cardstock so you’ll have them on hand for any occasion. These cards would be perfect for Teacher Appreciation week coming up!

Taking the time to send a handwritten thank you note means so much and these printable cards make it easy!

I love a good thank you card. It always seems like I am needing one too. From that sweet neighbor who drove my daughter to an activity, or a friend who knew just the right thing to say. I am so grateful for the many people who bless my life everyday.

Taking the time to send a handwritten thank you note means so much and these printable cards make it easy!

I have a hard time keeping cute thank you cards on hand. So, why not just create one that I can print out whenever the need arises? And, that is just what I decided to do. Now, when that dear friend surprises me with something sweet, I can quickly return the favor with one of these cards.

Download the free printable thank you cards here.

Taking the time to send a handwritten thank you note means so much and these printable cards make it easy!


Cheesy Cauliflower Bake

Thursday, April 9, 2015

Cheesy Cauliflower Bake – this healthy vegetable side is loaded with flavor and low on carbs! This tried and tested recipe is a new family favorite and I’m not kidding when I say it makes the perfect side dish for any meal!

Cheesy Cauliflower Bake - this healthy vegetable side is loaded with flavor and low on carbs!

I’m always on the look out for vegetable sides to add to our meals that are healthy and that my kids will actually eat! When I came across this delicious cheesy cauliflower bake recipe I new I had to give it a try – my kids all enjoy cauliflower and my husband is currently trying to lower his carb intake, so I thought this might be the perfect combination – and boy was I was right!

Cheesy Cauliflower Bake - this healthy vegetable side is loaded with flavor and low on carbs!

This dish is absolutely delicious! I’ve made it twice in the past few weeks and the kids have gobbled it down on both occasions. I can’t get enough of it either! Just something about the texture of the cauliflower, that yummy cheese and let’s face it – the bacon seals the deal!

Cheesy Cauliflower Bake
 
Print
Prep time
30 mins
Cook time
30 mins
Total time
1 hour
 
Recipe type: Side
Ingredients
  • 2 medium size heads of cauliflower or 2 bags of frozen cauliflower florets
  • 1 - 8oz cream cheese
  • ½ cup of butter
  • 1¼ cups shredded cheddar cheese
  • 6 slices cooked bacon, chopped
  • Chopped green onions
  • Salt and Pepper to taste
Instructions
  1. Cook cauliflower in lightly salted water until softened.
  2. Cook bacon until crispy and chop into small pieces.
  3. Drain water from cauliflower, return to pot.
  4. Add cream cheese, butter and mash until creamy.
  5. Pour into a baking dish.
  6. Top with shredded cheese, chopped green onions and bacon.
  7. Bake in oven at 350 for 20-30 minutes.
3.2.2885

Recipe adapted from the Trim Healthy Mama.

When I made this dish I used fresh cauliflower but to make it even easier buy frozen cauliflower florets or a bag of precut cauliflower – I know I’ve seen it at Costco.

To mash the cauliflower after it was cooked I used our hand mixer making it really easy. Just add the butter and cream cheese while the cauliflower is still warm and mix it up until it’s the consistency you’d like.

When cooking your bacon I’d recommend getting it a little crispier than usual. It will take on moisture when baked with the dish and you’ll want it to keep its crunch.

That’s all there is to it! I love this dish and am having to hold myself back from making it every single week – it’s THAT good!  What I love even more than it’s delicious flavor is the fact that it’s loaded with all those veggies minus the carbs.

Looking for more easy, family-friendly recipes, check out these posts:

Quick and Easy Taco Soup

Moist and Fluffy Cornbread Muffins

Easy Chicken and Stuffing Casserole

Pizza Buns for School Lunches

All-Time Favorite Chocolate Chip Cookies

Applesauce Muffins

I link up here.

« Previous Page
Next Page »

Primary Sidebar

Rebecca Cooper — Founder, Simple as That Blog

Hello, I'm Rebecca. Welcome to my blog, Simple as That. Come along as we embrace simplicity in crafting, photography, travel, and family life. Read more about me.

Newsletter

Get the latest updates from Simple as That delivered to your inbox.

Join for Free

Beyond Snapshots: Mastering the Art of Mobile Photography

Connect

  • Bloglovin
  • Facebook
  • Instagram
  • Pinterest
  • Twitter

Follow On Pinterest

Visit Rebecca - Simple as That Blog's profile on Pinterest.

Categories

  • Crafts / DIY
  • Holidays
  • Motherhood
  • Organization
  • Photography
  • Printables
  • Recipes
  • Simple Living
  • Travel
  • Wellness

Our Privacy Policy

Follow on Instagram

Instagram has returned invalid data.

Printable 2023 Calendar

Our printable calendars and organizational pages have been essential in keeping our home and my life in order and I guarantee they will be a help to you too!

Click here to learn more

© Simple as That Blog, 2017 · Design by Brian Gardner

Simple as That Blog

Facebook / Instagram / Pinterest / Twitter / Contact