• About
    • About Rebecca
    • Meet the Team
    • Media Kit
    • FAQ
  • Photography
  • Holidays
  • Recipes
  • Printables
  • 2019 Calendar
  • Write for Us
  • Beyond Snapshots

Simple as That

Making Everyday Beautiful

Blog

No Bake Chocolate Energy Bites

Thursday, June 30, 2016

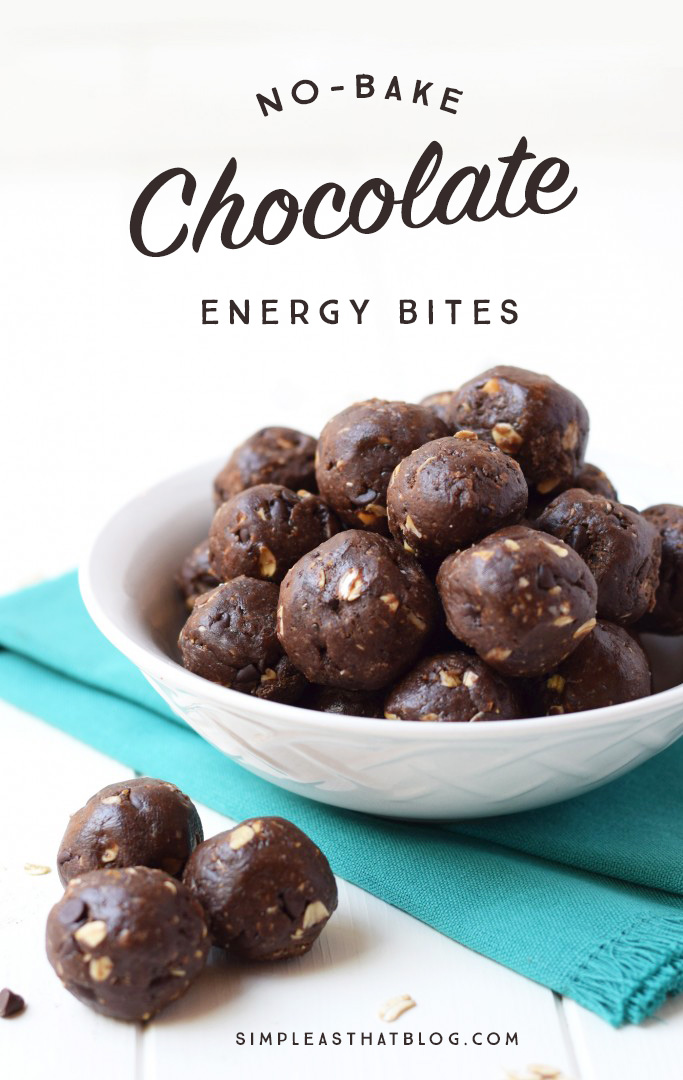
No Bake Chocolate Energy Bites – The perfect healthy, high protein, low sugar snack that tastes like dessert!

No Bake Chocolate Energy Bites - The perfect healthy, high protein, low sugar snack that tastes like dessert!

Hello!! Tiffany from Feel Great in 8 back again! I am so excited to share this recipe with you today!

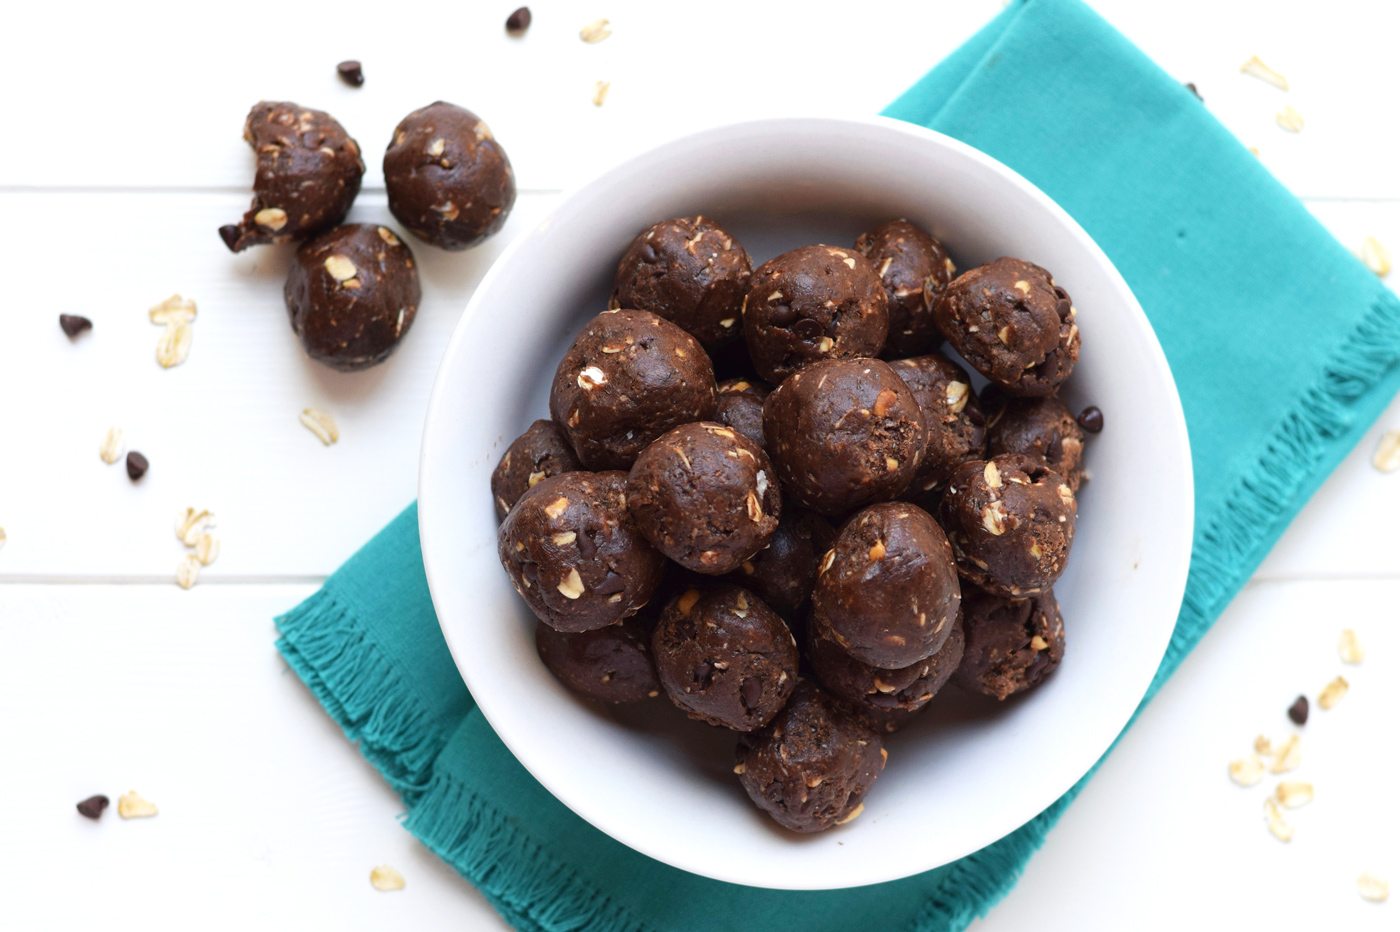
No bake energy bites are officially the perfect snack. They are quick and super easy to make and perfect for grabbing on the go or packing along to the pool or the park.

But, they aren’t all created equal. I’ve tried healthy recipes that taste nasty, and recipes that were delicious, but made with so much sugar they were really more of a treat. Don’t worry though, THIS recipe is perfection. Loaded with healthy ingredients so you get lots of protein, fiber, and healthy fats and low in carbs and sugar.

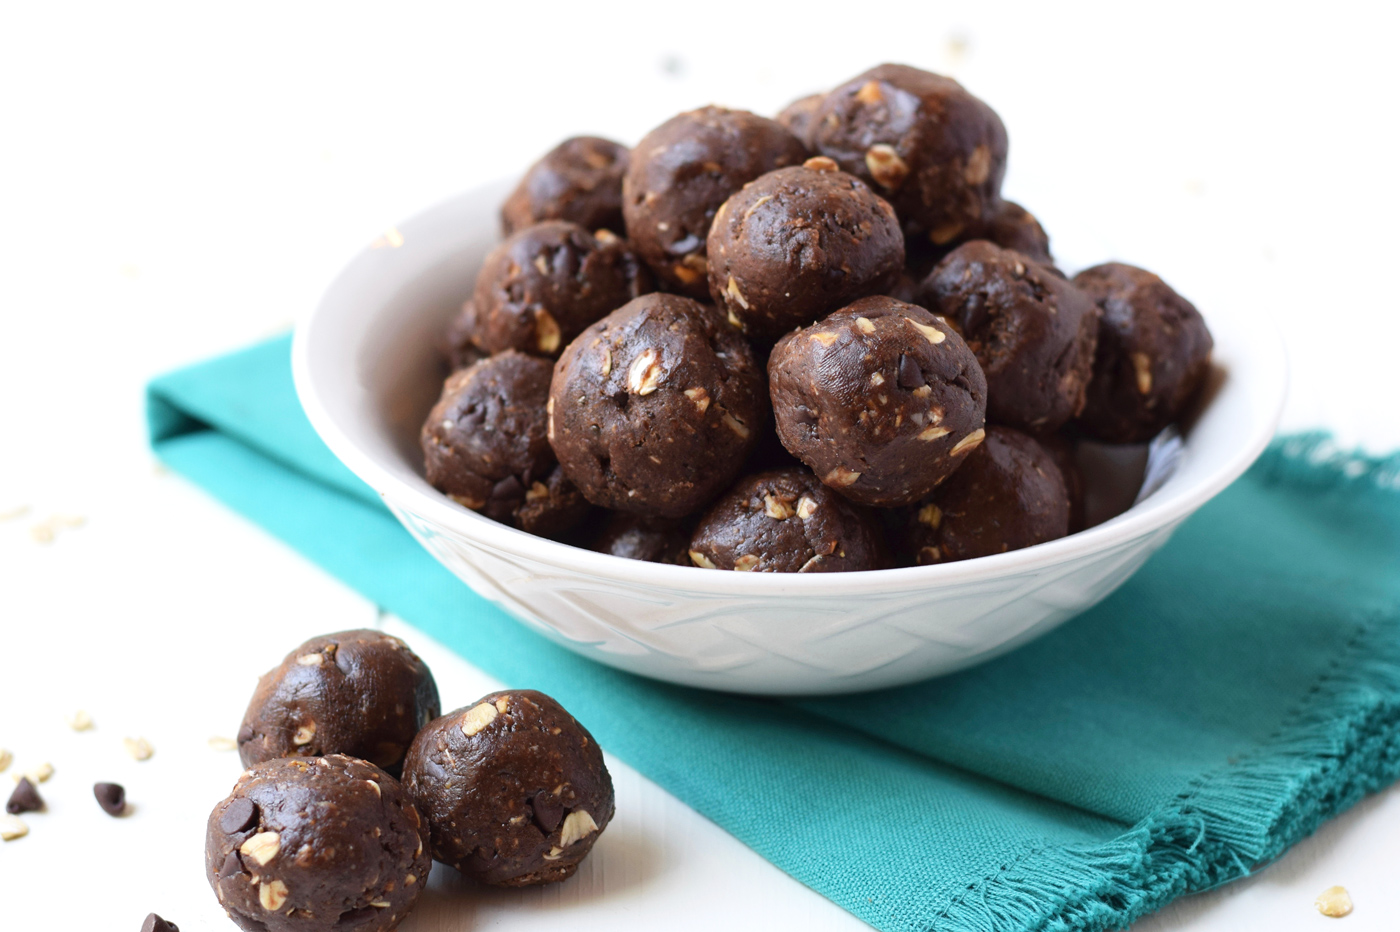
And, they really do still taste like a treat. Who doesn’t love a healthy snack that tastes like dessert?

No Bake Chocolate Energy Bites - The perfect healthy, high protein, low sugar snack that tastes like dessert!

I like to make a big batch on Saturday and keep them in the fridge for the coming week. My husbands grabs a handful as a quick breakfast on his way to work and the kids and I sneak a few almost every afternoon to help keep us feeling full until dinner.

My kids would never even guess that they are healthy. My youngest calls them cookie balls and even my daughter who doesn’t love peanut butter loves these.

I hope you’ll give these ones a try. I bet you and your family will love them as much as we do!

4.5 from 2 reviews
No Bake Chocolate Energy Bites
 
Print
No Bake Chocolate Energy Bites - The perfect healthy, high protein, low sugar snack that tastes like dessert!
Serves: 65 small bites
Ingredients
  • 1 cup old fashioned oats, divided
  • ⅓ cup chia seeds
  • ⅓ cup flax seeds
  • ⅓ cup whole almonds
  • 2 tablespoons unsweetened cocoa powder
  • 1 cup mini chocolate chips, divided
  • ½ cup natural peanut butter
  • ⅓ cup honey
  • 1 teaspoon vanilla
Instructions
  1. In a blender or food processor combine ½ cup oats, chia seeds, flax seeds, almonds, cocoa powder and ½ cup chocolate chips. Blend until mixed into a course flour texture.
  2. In a large bowl or a stand mixer combine the flour mixture with the peanut butter, honey, and vanilla. Mix well and then add in the remaining ½ cup of oats and ½ cup chocolate chips. Stir gently until combined.
  3. Use a heaping teaspoon measuring spoon to scoop out each serving and form into a ball.
  4. Store bites in an airtight container in the refrigerator for up to a few weeks.
3.5.3208

No Bake Chocolate Energy Bites - The perfect healthy, high protein, low sugar snack that tastes like dessert!

Looking for more healthy and delicious snacks?

Healthy Homemade Trail Mix

Chocolate Peanut Butter Apples

Strawberry Salsa & Baked Cinnamon Chips

14 Tips to Help You Enjoy a Slow Summer

Tuesday, June 28, 2016

Even during summer, the demands of life creep up on us unless we’re careful to set and keep our priorities. I hope these 14 tips help you enjoy a slow summer—the kind of summer you and your kids won’t soon forget. 

14 Tips to Help You Enjoy a SLOW Summer | Because our days are meant to be LIVED, not just counted.

Photo courtesy of Apple of Our Eye Photography


The end of the school year couldn’t come fast enough for me this year. I think I’m tired. Tired of the busyness, the running around, the homework—tired of being stretched thin and not having enough time for what really matters to us.

I’m feeling so ready for summer, for the end of the rush out the door in the morning and a break from the routine. For time to reconnect, slow down, and make memories together as a family.

Besides the noble art of getting things done, there is the noble art of leaving things undone. The wisdom of life consists in the elimination of non-essentials. – Lin Yutang

Growing up on a farm meant that I spent my childhood summers helping in the yard and with the animals, building forts outside with my siblings, and looking forward to our annual family camping trip. Days were slow and I loved it that way—there was plenty of time to read a favorite book, draw, craft, help my dad with chores, and ride with him in the tractor. There was room to get bored.

14 Tips to Help You Enjoy a SLOW Summer | Because our days are meant to be LIVED, not just counted.

We’ve had the opportunity to spend the last two summers back in Canada on my parents’ farm. Giving my kids a taste of the slow summers I enjoyed as a child has been such a joy for me.

I’ve seen them experience those same things I did—watching a nest of robin eggs hatch into baby birds, roasting marshmallows in the backyard fire pit, helping Grandpa feed the cows and bottle-feed the calves, laying out under the stars on quiet summer nights…

14 Tips to Help You Enjoy a SLOW Summer | Because our days are meant to be LIVED, not just counted.

But no matter where you spend your summer—whether you’re on a farm or simply at home—the joys of summer are simple to create. It’s the lack of schedule, the slow mornings and carefree days. It’s taking a break from the busyness to explore outdoors, splash in the pool, and read stories in the afternoon sun.

The catch, of course, is that even during summer, the demands of life creep up on us unless we are very careful to set—and keep—our priorities.

If a carefree, slow summer is at the top of your priority list, I hope you enjoy this collection of tips designed to help you keep your summer slow and meaningful.

1. Be present.

A slow summer isn’t just for your kids; it’s for you too. Be all in.

2. Learn to say no.

You don’t have to do it all.

3. Double the amount of time you spend outdoors.

With our family, getting outdoors helps us eliminate distractions and build connections like nothing else. And in the summer, with fewer obligations to meet, we have more time than ever to spend outdoors.

14 Tips to Help You Enjoy a SLOW Summer | Because our days are meant to be LIVED, not just counted.

4. Be adventurous.

This is as much about the spirit of your adventures as it is the adventures themselves. Even a simple outing to watch squirrels at a park or climb a big, knobby tree your kids have been eyeing can feel like a grand adventure with the right framing.

5. Limit structured activities.

For our family, it has felt right NOT to schedule sports in the summer months. We like to leave these weeks open so that we’re free take a spontaneous day trip… or never change out of our pajamas. 🙂

6. Design a loose schedule.

You still want to make the most of your summer—it flies by too quickly! A flexible routine gives kids some predictability and helps you ensure that you make room for outings and activities that matter to you. (Just don’t forget the white space!)

14 Tips to Help You Enjoy a SLOW Summer | Because our days are meant to be LIVED, not just counted.

7. Set screen time limits.

Conveniently, limiting screen time often opens the door for more time spent outdoors. 🙂

8. Journal your favorite summer memories, big and small.

Journaling helps me be more mindful, to focus on the small joys. And I appreciate how it helps my children do the same.

9. Don’t let boredom scare you.

In fact, it’s good for kids to get bored. It compels them to get creative, to problem solve, and to take some accountability for making their summer the best it can be!

Check out our “I’m Bored” checklist.

Besides the noble art of getting things done, there is the noble art of leaving things undone. The wisdom of life consists in the elimination of non-essentials. - Lin Yutang

10. Learn for the sake of learning.

We don’t do anything rigorous as far as learning goes in the summer, but we do fit in some learning activities that we don’t have as much time for in the school year. Think: science experiments, baking, reading, visiting a local zoo or museum, etc.

11. Give simple service.

I love to do a few things each summer that remind our kids to look outward in every season. {22 kid-approved acts of kindness you can do this week}

12. Stay up late.

What’s summer without the occasional delayed bedtime? Leave time to snuggle up and tell the kids a story from when you were their age.

14 Tips to Help You Enjoy a SLOW Summer | Because our days are meant to be LIVED, not just counted.

13. Experiment with and create some summer traditions.

Over the years, we’ve tried out dozens of activities and noted which ones made the biggest impression on our kids. These have become our traditions—things we do every summer, things our kids look forward to all year.

Need some ideas?

  • A trip to the lake
  • A campout with friends
  • A water balloon fight in the backyard
  • A color run
  • A lemonade stand
  • Dinners on the patio
  • Ice cream cones on the first official day of summer (June 20th this year)

14. Let go of the guilt.

It’s so easy as parents to fixate on the things we’re not doing when we choose to take a slower pace. But an unhurried, no-pressure summer isn’t a waste of time; it’s a way to reconnect as a family and to remind ourselves that our days are meant to be lived, not just counted.

If you enjoyed this post you might also like…

  • How to Make Time for What Matters Most
  • 30 Simple Ways to Immerse Kids in Nature
  • One Quick Tip to a Better Summer

An unhurried, no-pressure summer isn’t a waste of time; it’s a way to reconnect as a family and to remind ourselves that our days are meant to be LIVED, not just counted.

One Pot Bacon-Wrapped Chicken with Sugar Snap Peas and Pasta

Sunday, June 26, 2016

One-Pot Bacon Wrapped Chicken with Sugar Snap Peas and Pasta – Fun, kid-friendly veggies, pasta, and savory meats combine to create a simply amazing and easy one-pot dish that the whole family will love!

One-Pot Bacon Wrapped Chicken with Sugar Snap Peas and Pasta

Hello, Simple As That readers! This is Rachel from Simple Seasonal with another recipe using fresh, seasonal ingredients. In my home we’ve been all about garden-fresh sugar snap peas. If you don’t have the garden-fresh option, no worries… I’ve been seeing crisp, bright, green peas at the grocery store, too.

Whether you’ve never cooked with sugar snap peas before, or you’ve had the utter disappointment of an inedible, stringy end result, just keep reading. I’ll show you how to master the intimidating, stringy pea pod like a pro!

The reason mastering fresh peas is worth your effort is that kids rarely object to them. It’s one of the few vegetables that kids can totally get into. They’re sweet, they’re crunchy, and oh… Mom… It’s so much fun to dissect the pod and flick the little peas nestled inside at your little brother. Just don’t let said little brother stick any peas up his nose… Seriously… Don’t.

Sugar Snap Pea Pod

 I’ve spent all this time rambling about pea pods that I forgot to tout the other charms of this dish. First, it’s a one-pot meal. Enough said. After all, what busy home cook wants to spend half the night washing dishes? Oh, and I’ve wrapped the chicken in BACON! Imagine a creamy chicken, pasta, and sugar snap pea dish with the flavor of bacon through and through, all cooked in one tidy pot. YUM and easy!

Now as promised: How to String a Pea Pod.

1. One pea at a time, snap the top of the pea towards the side where the peas attach to the pod.

2. Pull the stem towards yourself so that the string is pulled off as you go (see the picture below).

How to String a Pea Pod

That’s it! You’re a pea snapping, de-stringing master… Now, if only you could get the kids to stop playing with their peas…

One-Pot Bacon Wrapped Chicken with Sugar Snap Peas and Pasta

One-Pot Bacon Wrapped Chicken with Sugar Snap Peas and Pasta

One Pot Bacon-Wrapped Chicken with Sugar Snap Peas and Pasta
 
Print
Fun, kid-friendly veggies, pasta, and savory meats combine to create a simply amazing and easy one-pot dish that the whole family will love!
Author: Rachel Hanawalt
Recipe type: Entree
Cuisine: Italian
Serves: 4
Ingredients
  • 4 small boneless chicken breasts (about 1¼ lbs)
  • 12 slices uncured bacon (thinly sliced is best)
  • toothpicks (about 12)
  • 8 oz pre-cooked Strozzapreti, Campanelle or other short 100% durum wheat semolina pasta with lots of nooks for holding yummy sauce
  • 1 Tbsp finely chopped white onion
  • 1 clove minced garlic
  • ¾ lb sugar snap peas
  • ½ C white wine or chicken broth
  • ¾ C heavy cream
  • 2 tsp dijon mustard
  • ¼ tsp black pepper
  • ½ tsp salt or to taste
  • garnish with freshly grated parmesan
Instructions
  1. Wrap each chicken breast in 3 slices of bacon, and secure with toothpicks. On the stove top, brown the bacon-wrapped chicken for about 5 minutes on each side over medium-high heat. Bake in a 400º F oven for 20 minutes. Once cooked, remove the chicken from the pan and set aside on a plate covered with aluminum foil.
  2. While the chicken is in the oven, cook your pasta per package instructions. I recommend going for the al dente cook time listed on the box. Also, chop the white onions, grate the parmesan, and de-string your sugar snap peas by snapping the top towards the side where the peas attach to the pod and pulling the stem towards yourself so that the string is pulled off.
  3. Cook the white onions over medium-high heat for 3 minutes, add the sugar snap peas and cook for an additional 2 minutes, then finally add the minced garlic and cook for 1 more minute. Add the white wine or chicken broth along with the heavy cream, dijon, and pepper to the pan. Salt to taste. Bring to just below a simmer and then stir in the pre-cooked pasta. Be sure to not let the sauce get too hot so that the heavy cream doesn’t curdle. Reheat and then remove from the heat. Add the chicken, turning it to coat it in the sauce. Garnish with freshly-grated parmesan and serve immediately.
3.5.3208

 One-Pot Bacon Wrapped Chicken with Sugar Snap Peas and Pasta

 One-Pot Bacon Wrapped Chicken with Sugar Snap Peas and Pasta Nutrition Facts

Like this recipe? Check out what else I’ve been cooking-up…

Italian Meatballs with Beef and Pork

Philly Style Italian Sausage and Pepper Sandwiches

For Moms: One Quick Tip to a Better Summer (and Happier Life)

Thursday, June 23, 2016

One Quick Tip to a Better Summer (and Happier Life)I gently pushed open the door and stepped soundlessly inside the room our two sons share.

6:30am on a Tuesday morning. One boy still sleeping heavily on the top bunk; the other boy posed at the window—shirtless (for no apparent reason) and proud, watching over the neighborhood.

He hadn’t noticed me slip in, so I took advantage of the early morning stillness and just watched him.

He placed one hand on each side of the window and hinged himself slightly forward at the waist, leaning in as if for a better view of the quiet street two stories below.

Slow down your world this summer with this one simple but powerful tip. | For Moms: One Quick Tip to a Better Summer (and conveniently, a happier life)It feels like the world goes slower when I watch my kids. Tunnel vision kicks in, and I suddenly see them in a way that is nothing like the way I usually see them.

A lot of the time, I see them as little people who need reminders to go to the bathroom, to change their dirty socks, and to (please) stop arguing over such important things as whether the community pool is 12 feet or 12PLUS feet deep. (Literally, that happened just today.)

I see them as miniature humans who need taken from one activity to the next, who need fed at least four times a day, and who have the strangest taste in television shows.

One Quick Tip to a Better Summer (and Happier Life)But when I actually watch them—when I put down my to-do’s, my phone, my own pressing wants and needs—I see the kids I always dreamed of having.

Kids who act like a ladybug is THE COOLEST thing they’ve ever seen.

Kids who pose for the camera just to humor me.

Kids who love each other—and their parents—more than anything else.

So this is my one quick tip to ensure a GREAT summer: Watch your kids. Stay still long enough to watch them in their element. Watch them play with their friends, watch them climb that tree they never stay out of, watch them eat, sleep, or breathe.

Just slow down long enough to watch.

Essential Outdoor Family Adventure Gear

Tuesday, June 21, 2016

Before you set off on your next outdoor family adventure take a peek at our list of essential outdoor gear. These are products that have been recommended to us or that we’ve tried and tested ourselves and that we never leave home without when we’re headed outdoors!

You’ll find a variety of different types of products from camping must-haves, to hiking essentials, to photography equipment best suited to the outdoors. Have a look at our list of essentials before investing in your own. These products are sure to help your outdoor adventures go off without a hitch!

Campfire Pie Iron

It just isn’t a camping trip without campfire pies! Mmmmm! They’re our favorite. Who’s made them before? What’s your favorite filling?

Campfire Pie Iron // Essential Outdoor Family Adventure Gear

Kid-O-Bunk Bunk Beds

These portable bunk beds are so versatile and easy to pack. They can be used as single cots, a sitting bunch or stacked like a bunk bed. They’re especially handy when it comes to saving room in our tent! We love our Kid-O-Bunk beds!

Portable Bunk Beds // Essential Outdoor Family Adventure Gear

Guide Gear Teepee Tent

We have the Guide Gear 18ft. tent and it is BIG. It sleeps our family of 6 with room to spare. It’s also available in 10ft and 14ft sizes.

What we love about this tent

1. The size. We love how roomy it is.

2. Easy set up. It doesn’t get much easier than this! Stake it down, insert the center pole and up it goes! Putting it up and down takes no time at all.

3. My husband loves that he can stand up to his full height inside the tent.

4.The price is right! For the quality and the size you can’t beat it! We’ve been using this tent for 3 years now and it’s still holding up well!

Take a quick video tour of our tent here.

Guide Gear Teepee Tent // Essential Outdoor Family Adventure Gear

Hiking Camera Backpack

Manfrotto is a brand I’ve used and trusted for years, and last summer, my Off Road Backpack barely left my side as we adventured throughout Banff National Park, Waterton Lakes National Park, and the Grand Canyon as a family. It’s the perfect hiking backpack for moms! Read my full review here.

Hiking Camera Backpack // Essential Outdoor Family Adventure Gear

Gorilla pod Tripod

I love my Gorilla Pod! It’s so important for me to get in photos with my family and this portable tripod has been instrumental in helping me to do just that when we’re traveling. It can be mounted to just about anything and used in conjunction with the self timer on my phone so I’m able to hop in a shot or two.

Portable Tripod // Essential Outdoor Family Adventure Gear

Portable Tripod // Essential Outdoor Family Adventure Gear

Keen Shoes

These are the shoes we trust for the kids for hiking! They’re so durable and are great for adventurous feet! We bought a pair for all our kids back in 2010 and they’re still being passed down as each child outgrows them – they just last and last!

Keen Shoes // Essential Outdoor Family Adventure Gear

Spot It Gone Camping

Entertainment on-the-go is so important! This is one of our favorite games for camping. Here are a few more favorite family games that are always a hoot on camping trips.

Spot It Camping Game // Essential Outdoor Family Adventure Gear

Headlamps

Don’t struggle with a flashlight when you can go hands free! Move around after dark confidently on your outdoor adventures with a comfortable headlamp. My kids love these and we take them with us on every camping trip, along with extra batteries of course!

Headlamp // Essential Outdoor Family Adventure Gear

Headlamp // Essential Outdoor Family Adventure Gear

Lifeproof Case

I can’t always bring my big camera along on our Outdoor Family Adventures, but no matter what, I always have my phone with me thanks to Lifeproof!

My husband and I bring our phones with us on all our outdoor adventures and we keep them protected in our  Lifeproof cases. They allow us to take beautiful phone photos and have protected our phones while hiking, swimming, caving and more!

Life proof Phone Case // Essential Outdoor Family Adventure Gear

BioLite Wood Burning Campstove

We’ve heard great things about these portable wood burning stoves. We backpacked in to Havasupai last summer with our 3 oldest (ages 12, 10 and 8) and took a portable stove with us. It was light weight and did exactly what we needed it to do – cook some simple meals. I love that the BioLite stove also has the option to charge your portable devices.

Billet Wood Burning Stove // Essential Outdoor Family Adventure Gear

Outdoor Adventure Book

This is such a fun book with lot’s of inspiration to get the kiddos outdoors. Bring it along on your next nature walk or camping trip to encourage to get out and explore in nature.

The Kids' Outdoor Adventure Book // Essential Outdoor Family Adventure Gear

Portable Phone charger

I am always sure to have a fully charged portable phone charger with us when we’re outdoors away from civilization. I want my phone charged in case of an emergency and so I can take photos on our adventures.

Portable Phone Charger // Essential Outdoor Family Adventure Gear

Water bottle

Water is so important! The Hydroflask is our favorite water bottle because it keeps water cold and tasting fresh, and these bottles don’t sweat!

Hydroflask Water Bottles // Essential Outdoor Family Adventure Gear

Water BackPack

We love our Water BackPacks for hiking! They’re a lifesaver when it comes to carrying enough water to sty hydrated. I especially love water backpacks because the kids can carry their own drinking water. With it on their backs there’s no asking mom or dad to carry their water bottles or misplacing them along the trail as we hike.

Camelbak Hydration Pack // Essential Outdoor Family Adventure Gear

Hand warmers

These are essential for cold weather camping and they’re also great to keep in your car in case of an emergency situation.

Hand Warmers // Essential Outdoor Family Adventure Gear

Binoculars

Our kids LOVE binoculars! In fact, they tend to fight over the one pair we own. We keep them in the car so that we can pull them out and observe things from a distance when we hike, drive, etc.

Binoculars // Essential Outdoor Family Adventure Gear

Ergo carrier

This carrier is so great for hiking or everyday use. It’s comfortable and sturdy for the babies / toddlers and places their weight evenly on your hips so that it’s comfortable for the wearer as well. We got years and years of use out of our ERGO carrier and it went on many an outdoor adventure with our family!

ERGO Baby Carrier // Essential Outdoor Family Adventure Gear

On-the-Go Snacks

We like to keep a stash of family-friendly snacks—especially CLIF Kid bars or KIND Bars—in the car, so that we can fuel up on our way to a destination. I also always grab a handful and put them inside my backpack or camera bag, for easy access on the trail.

On-the-Go Snacks // Essential Outdoor Family Adventure Gear

Attmu Outdoor Survival Paracord Bracelet

I know my son would love this! This bracelet is actually a 3 in 1 survival kit that includes a whistle, flint fire starter and scraper that can also be used as a knife. If needed you can also disassemble the paracord bracelet and you have a 3.5 – 4 meters long rope at your disposal.

Paracord Survival Bracelet // Essential Outdoor Family Adventure Gear

Portable Highchair

I’ve heard great things about this portable highchair. I know my sister-in-law has one and it’s been a lifesaver when they’re eating outdoors! It weighs just 9 lbs so it’s extremely portable! Perfect for camping, the backyard or just picnicking at the park!

Portable High Chair // Essential Outdoor Family Adventure Gear

Water Purifier

A water purifier is always a good thing to pack along while hiking or camping. This one offers portability, fast filtration and easy use. We’ve also used these small survival straws – great for hiking!

Water Purifier // Essential Outdoor Family Adventure Gear Survival Straw // Essential Outdoor Family Adventure Gear

Hammock

A comfortable hammock makes relaxing out in nature so much easier! Relaxing at the end of an active day in the hammock is one of my favorite parts of our adventures!

Hammock // Essential Outdoor Family Adventure Gear

Outdoor Canopy

Protect your family from the elements with an easy to set up canopy! This canopy can be put up anywhere in about 10 minutes and its just as easy to take down!

Outdoor Canopy // Essential Outdoor Family Adventure Gear


What else would you add to this list? Any other cool gear or must-have gadgets that you don’t leave home without when you’re headed outdoors?

Essential Outdoor Family Adventure Gear

If you enjoyed this post be sure to check out….

What Families Gain from Time Spent Outdoors

Exploring vs. Observing: 6 Tips to Help Kids Explore Nature

30 Simple Ways to Immerse Your Kids in Nature

5 National Parks to Visit as a Family

The Secret to Getting Eyes That Pop In Portraits

Monday, June 20, 2016

We are thrilled to welcome a new contributor on the Simple As That team! Meet Audrey Ann, a photographer who loves to find and capture the beauty in the chaos of everyday life. In her blog, Live Snap Love, she shares tips, tricks and tutorials that will help you improve your photography skills and beautifully capture the people and moments that make your days special. Let’s give her a warm, SimpleAsThat welcome!

Find out the simple secret to getting eyes that pop and sparkle in your portraits!

A question I am frequently asked is how I get the eyes of my portrait subjects to “pop” and “sparkle” – where the eyes are bright and full of life. The good news is it’s incredibly easy to do! And I’m going to show you how 🙂

The most important part of getting eyes to pop is the LIGHT. We need to make sure that we have light hitting our subjects eyes if we want them to ‘pop’.

The easiest way to do this is to make sure that your subject is facing the light. If you are indoors, have your subject face into the window, either directly facing it, or at a slight angle to it (so you, the photographer, have the window at your back.) When you do this, you’ll start to see reflections of the light source in your subject’s eyes – these are called catch lights, and they are what gives that “sparkle” look to the eyes. To see bigger catch lights, move your subject closer to the window.

Find out the simple secret to getting eyes that pop and sparkle in your portraits!

For outdoor portraits, if it is a cloudy day, the best way to get amazing catch lights is to get slightly above your subject and have them look up at you- the result is amazing light in the eyes!

Find out the simple secret to getting eyes that pop and sparkle in your portraits!

On sunny days, your subject would be too busy squinting their eyes to get good catch lights in them, so instead of having your subject out in the strong sunlight, find an area of open shade instead. Open shade is simply an area that is not in direct sunlight – for example, the shadow caused by a wall or fence, or in a doorway, or even under a tree! Anywhere you can pop your subject so that they are in shade, but are looking out onto open light will give you great catch lights. Great places for this around the home are in the porch, in the garage or just standing at the front door!

Find out the simple secret to getting eyes that pop and sparkle in your portraits!

If you are struggling, have your subject move around in a circle, watching how the light hits their eyes as they move. You’ll see how the light catches the eye, and just stop them when you get the best light – you’ll know it when you see it!

You can visit Audrey on her blog, Facebook, Instagram, and on Pinterest!

Find out the simple secret to getting eyes that pop and sparkle in your portraits!

If you’ve ever considered showcasing your photography online—whether to connect with other women, to motivate you to hone your skills, or to launch a professional business—I’ve shared 5 simple tips for how to start a photography blog that will give you a solid foundation for building a beautiful photography site.

Whether you want to connect with like-minded women or to launch a professional photography business—5 simple steps to starting a photography blog you'll be proud of!

Summer Sun Food Art

Friday, June 17, 2016

Summer Sun Food Art – Looking for a fun way to celebrate summer with the kids!? This Summer food art idea is bright, cute and super sweet!

Sometimes it's ok to play with your food! Find more inspiration for having fun with food this Summer!

Hey there! My name is Carisa from Messes to Memories and I’m back with a fun summer idea for our Fun With Food Series here on Simple As That.

This is a sweet food art idea using all your favorite fruits! You choose what will work best. We went ahead and chose a variety of fruit so that we could have tons of colors! The fun thing about fruit is that you can make all kinds of shapes and sizes depending on how you cut it.

Sometimes it's ok to play with your food! Find more inspiration for having fun with food this Summer!

This means you can take this and make it your own. There is no right or wrong way to make words with fruit! We went with “HELLO” to welcome the summer sun! We wrote Hello using cheese strips, strawberry and mango slices and a round apple chip! It was round out with a big round slab of pineapple to make the perfect sun.

Summer Sun Food Art
 
Print
A bright and fun Summer food art idea using all kinds of fruit!
Ingredients
  • Slice of pineapple
  • Variety of fruit including: Mango, Strawberries, Apples, Raspberries, etc.
  • Cheese
Instructions
  1. Slice a big slab of pineapple for your sun. Cut off the outside layer so that it's all ready to grab and eat once you're done decorating!
  2. Slice and dice your fruit and cheese so that you have a variety of strips and chunks, etc. You want all kinds of shapes and sizes to make a fun word like HELLO!
3.5.3208

Check out more adorable food art in the Fun with Food series!

Fruity Owl Pancakes

Who says breakfast can't be healthy AND fun!? These fruity owl pancakes are a creative way to start your kiddos day off right, with an extra serving of fresh fruit!

Dinosaur Food Art

Dinosaur Quesadillas

Bunny Food Art

Bunny Food Art

Exploring vs. Observing: 6 Tips to Help Kids EXPLORE Nature

Thursday, June 16, 2016

Have you ever taken your kids on a hike only to run into something on the trail that captures their interest even more? A fallen log, a natural dam in the creek, a beautiful collection of wildflowers?

For families who would like to leap from observing to exploring, here are 6 tips to help kids EXPLORE nature with all of their senses.When we first started hiking as a family, my husband and I thought of these as distractions, deterrents from finishing our goal. (To be honest, on occasion we still do!)

But it didn’t take many outings for us to realize that kid-directed outdoor adventures are exactly that: adventures.

For families who would like to leap from observing to exploring, here are 6 tips to help kids EXPLORE nature with all of their senses.Once my husband and I adjusted our mindsets, we found that if we hung back and let the kids take the lead, they experienced nature in a way that they never would if we focused single-mindedly on the adventure we planned.

We began to watch them immerse themselves in nature—exploring it with their hands, not just their eyes and the soles of their feet.

For families who would like to leap from observing to exploring, here are 6 tips to help kids EXPLORE nature with all of their senses.

For families who would like to leap from observing to exploring, here are 6 tips to help kids EXPLORE nature with all of their senses.

6 Tips to Help Kids EXPLORE Nature

1. Hang back and let go of your end goal.

This doesn’t mean every outing needs to be child-directed; some outings are best suited for reaching a destination or improving a skill. We do want our kids to practice setting a goal and following through, even when it gets hard.

That said, we’ve found that for our family, variety is key. Just know that sometimes letting go of the end goal or the vision you had for that activity can be incredibly relieving—even liberating!

For some amazing new places to adventure in, check out these posts: 5 National Parks to Visit as a Family and 5 Family-Friendly Hiking Trails in Banff National Park.

For families who would like to leap from observing to exploring, here are 6 tips to help kids EXPLORE nature with all of their senses.

2. Communicate your hopes for each adventure to your kids.

When they know what you have in mind, from skill-building to free-form exploring, they will be much more likely to take things in stride.

For families who would like to leap from observing to exploring, here are 6 tips to help kids EXPLORE nature with all of their senses.

3. As motivation, know the research.

This book {The Last Child in the Woods} and this article {Why Kids Need to Spend Time in Nature} are great places to start.

For families who would like to leap from observing to exploring, here are 6 tips to help kids EXPLORE nature with all of their senses.

4. Think of “invitations to play.”

Most of the time, nature does the inviting in our family. All our kids need is a pile of big rocks and their imaginations are off and running. But occasionally, depending on the moods of the kids (and when the last time they ate was!), they need a little nudge.

For that reason, it’s great to have a few “invitations to play” in your back pocket.

  • Challenge your kids to see how many different shapes (or colors) of leaves they can find.
  • Tell them you definitely DO NOT THINK they could make it across the creek without getting wet. 🙂
  • If your family is familiar with the book Roxaboxen, casually start outlining your “home” with rocks.
  • Start counting squirrels or deer.
  • If you’re at the beach, walk over to a tide pool, gather driftwood to build a small shelter, or start digging a trench in the sand that runs from the waterline up.

For families who would like to leap from observing to exploring, here are 6 tips to help kids EXPLORE nature with all of their senses.

5. Keep all five senses in mind. 

On your family adventure, challenge yourself to help your kids engage all of their senses. Point it out when you notice the smell of wildflowers (or a skunk!) on the breeze. Point out the different textures of moss of the trees. Some feel wet to the touch, while others are brittle.

Sight, smell, touch, sound, taste—see if you can engage them all.

For families who would like to leap from observing to exploring, here are 6 tips to help kids EXPLORE nature with all of their senses.

6. As always, keep the kids hydrated and well-fed so their imaginations are easy to ignite. 

I can always tell when our kids are getting sluggish between water or snack breaks.

One of them, in particular, hits a wall whenever she’s hungry. It’s so obvious to my husband and me that it’s almost comical. She might not put a finger on what it is that’s affecting her, but I see her arms start to hang heavy, and if we’re hiking, she starts to lag behind. A simple snack later, and she’s back at the front of the line, ready and eager to explore whatever is around the next bend.

We like to keep a stash of kid-friendly snacks—especially CLIF Kid bars—in the car, so that we can fuel up on our way to a destination. I also always grab a handful and put them inside my backpack or camera bag, for easy access on the trail. I picked up the newest CLIF Kid bar, the Zbar Fruit & Veggie, at Target, and it was our kids’ top choice of snacks on our most recent trip to Waterton Lakes National Park.

These organic, soft and chewy bars are available in three flavors: Awesome Orange (carrot, mango and orange), Keen Green (apple, sweet potato and spinach) and Purple Power (sweet potato, beet and berry). The bars fit well with CLIF Kid’s larger mission to encourage kids to “come out to play.” Join me in tagging your Zbar adventures with hashtag #OutToPlay!

For families who would like to leap from observing to exploring, here are 6 tips to help kids EXPLORE nature with all of their senses.

I’d love to hear—Do your kids tend to hike with a destination in mind, or are they wanderers like mine? And what are YOUR tips for getting them to ready explore?

This is a sponsored conversation written by me on behalf of CLIF Kid. The opinions and text are all mine.

Carrot and Orange Coconut Smoothie

Tuesday, June 14, 2016

This vegan and gluten free smoothie is full of carrots and oranges that mix with a little other fruit and coconut butter to make a delicious and vibrant nutrient rich drink packed with vitamin C, beta carotene and fiber!

This vegan and gluten free smoothie is full of carrots and oranges that mix with a little other fruit and coconut butter to make a delicious and vibrant nutrient rich drink packed with vitamin C, beta carotene and fiber!

Hey there! This is Sarah from The Nourished Seedling, here to share an incredibly simple smoothie that has multiple servings of fruit AND veggies all in one delicious drink! My recipes focus on whole foods that nourish the body, mind and soul, with an extra requirement of being kid-approved!

There are 3 kiddos in my house, all of whom make me feel lucky to be their mom. Although, with kids around, it’s sometimes hard to eat healthy, especially with crazy schedules that put a time crunch on things. So, it is a challenge I have gladly accepted to try to find delicious (and quick) ways to eat healthy!

Just as visual appeal is important to adults, it is crucial to kids, and this smoothie is no exception.

This vegan and gluten free smoothie is full of carrots and oranges that mix with a little other fruit and coconut butter to make a delicious and vibrant nutrient rich drink packed with vitamin C, beta carotene and fiber!

First off, the color of this smoothie just makes it irresistible to the eye, and when you get a taste, it becomes just as irresistible to the palate. Speaking of color, my little ones gulp down this Cherry and Almond Flaxseed Smoothie, as the antioxidant rich cherries bring a beautiful hue of light pink. I use raw coconut butter because one, it is rich and buttery, yet is completely vegan.

Two, it is full of nutrition, everything from healthy fats to iron and protein. I always like to add a fat to my smoothies to help balance out the sugar rush to the body, even if the sugar comes from fruit.

This vegan and gluten free smoothie is full of carrots and oranges that mix with a little other fruit and coconut butter to make a delicious and vibrant nutrient rich drink packed with vitamin C, beta carotene and fiber!

And yes, these do make wonderful popsicles! The kiddos were fighting over the last one, so we ended up mashing it up in a bowl to eat as a pseudo ice cream slushy! Another favorite popsicle full of nutrition and irresistible chocolate taste are my Vegan Coconut Date Fudgy Pops – no refined sugar and sweetened with dates!

Carrot and Orange Coconut Smoothie
 
Print
Prep time
10 mins
Cook time
10 mins
Total time
20 mins
 
This vegan and gluten free smoothie is full of carrots and oranges that mix with a little other fruit and coconut butter to make a delicious and vibrant nutrient rich drink packed with vitamin C, beta carotene and fiber!
Recipe type: Smoothie
Serves: about 3 cups
Ingredients
  • 1 cup orange, peeled and diced (about 1 cup)
  • 1 small banana (about ½ cup)
  • 1 large carrot, peeled and diced (about ½ cup diced)
  • ½ cup frozen pineapple pieces
  • ¾ cup water
  • 2 tablespoons raw coconut butter
  • 4 ice cubes
Instructions
  1. Place all ingredients in a high-speed blender and blend until pureed.
  2. Serve immediately or place into popsicle molds for later!
3.5.3208


Feel free to hop on over to The Nourished Seedling for more nourishment for the mind, body and soul!

Easy and Cute Cactus Embroidery Hoop Art

Sunday, June 12, 2016

Cute Embroidery Cactus Hoop Art

Summer is such a great time to try a new craft and this easy and cute cactus embroidery hoop art is the perfect project for a beginner, if you’ve never tried embroidery before!

Simple and Cute Cactus Embroidery Hoop Art

 I grew up in Arizona and when we moved away, I was very happy not to see a cactus on every corner. But lately I’ve been loving them – and these little embroidered cactus plants with their sweet little smiles were so fun to stitch up! Embroidery is a great project for taking on the go, too – you can stitch away on road trips or take along camping!

Cactus Embroidery Hoop Art

 This cute embroidery is made up with basic stitches so anyone can do it! I had to add a little silliness, too – so I’m channeling my inner MC Hammer with the “Can’t Touch This”. 🙂

Cant Touch This Cactus Embroidery

 Here’s the tutorial for this easy and cute Cactus Embroidery Hoop Art:

Materials:

  • 8″ embroidery hoop
  • 10″ x 10″ white linen or other light colored fabric
  • DMC Floss: Colors 413, 704
  • DMC Pearl Cotton: Colors – 310, 550, 336, 701, 3801, 742, 703, 906
  • Disappearing Ink Marking Pen
  • Hot Glue
  • Can’t Touch This Cactus Embroidery Pattern

Using the disappearing ink pen, trace the embroidery pattern onto the white fabric. You can do this by taping the pattern in a window, then taping the fabric over it. This will allow the light to show through the pattern so you can trace the design.

Tracing Cactus Embroidery Pattern

Stitch the pattern using a back stitch for all the cactus designs. If you need instructions for the stitches, check out my Embroidery Tips page.

Stitching Cactus Embroidery

For the eyes and mouths of the cacti, use 2 strands of gray embroidery floss. Stitch french knots for the eyes and backstitch the mouth.  The flowers on top of the little cactus on the left side are made with lazy daisy stitches.

Cute Cactus Embroidery

Stitch the lettering with back stitch as well.

Fun Cactus Embroidery Hoop Art

Once your embroidery is all finished, remove any marking pen lines that show with a damp paper towel. Trim the fabric to 1/2″ around the hoop on the back side.

Trim Back of Embroidery

Glue the edges to the inside of the hoop on the back side. You can also finish the hoop by gluing a circle of felt to the back side of the hoop.

Glueing Back of Embroidery Hoop Art

That’s it! You have a cute new embroidery hoop to show off – or to give as a gift!

Cute Cactus Embroidery Hoop Art

Free Cactus Embroidery Pattern

I’d love to see it if you make one up!

« Previous Page
Next Page »

Primary Sidebar

Rebecca Cooper — Founder, Simple as That Blog

Hello, I'm Rebecca. Welcome to my blog, Simple as That. Come along as we embrace simplicity in crafting, photography, travel, and family life. Read more about me.

Newsletter

Get the latest updates from Simple as That delivered to your inbox.

Join for Free

Beyond Snapshots: Mastering the Art of Mobile Photography

Connect

  • Bloglovin
  • Facebook
  • Instagram
  • Pinterest
  • Twitter

Follow On Pinterest

Visit Rebecca - Simple as That Blog's profile on Pinterest.

Categories

  • Crafts / DIY
  • Holidays
  • Motherhood
  • Organization
  • Photography
  • Printables
  • Recipes
  • Simple Living
  • Travel
  • Wellness

Our Privacy Policy

Follow on Instagram

Instagram has returned invalid data.

Printable 2023 Calendar

Our printable calendars and organizational pages have been essential in keeping our home and my life in order and I guarantee they will be a help to you too!

Click here to learn more

© Simple as That Blog, 2017 · Design by Brian Gardner

Simple as That Blog

Facebook / Instagram / Pinterest / Twitter / Contact