• About
    • About Rebecca
    • Meet the Team
    • Media Kit
    • FAQ
  • Photography
  • Holidays
  • Recipes
  • Printables
  • 2019 Calendar
  • Write for Us
  • Beyond Snapshots

Simple as That

Making Everyday Beautiful

Blog

5 Simple Ways to Spend More Time Outside as a Family

Sunday, October 29, 2017

We have a child who, to put it mildly, can be difficult at times. She’s the middle child (although just by 15 minutes – she’s a twin), intense, opinionated, stubborn, and argumentative. She’s always been this way, and I love her for it. Her spunk will serve her well in life, but right now it’s a challenge. We recently discovered, however, that she’s not always this way. She has an alter ego when she’s in the great outdoors.
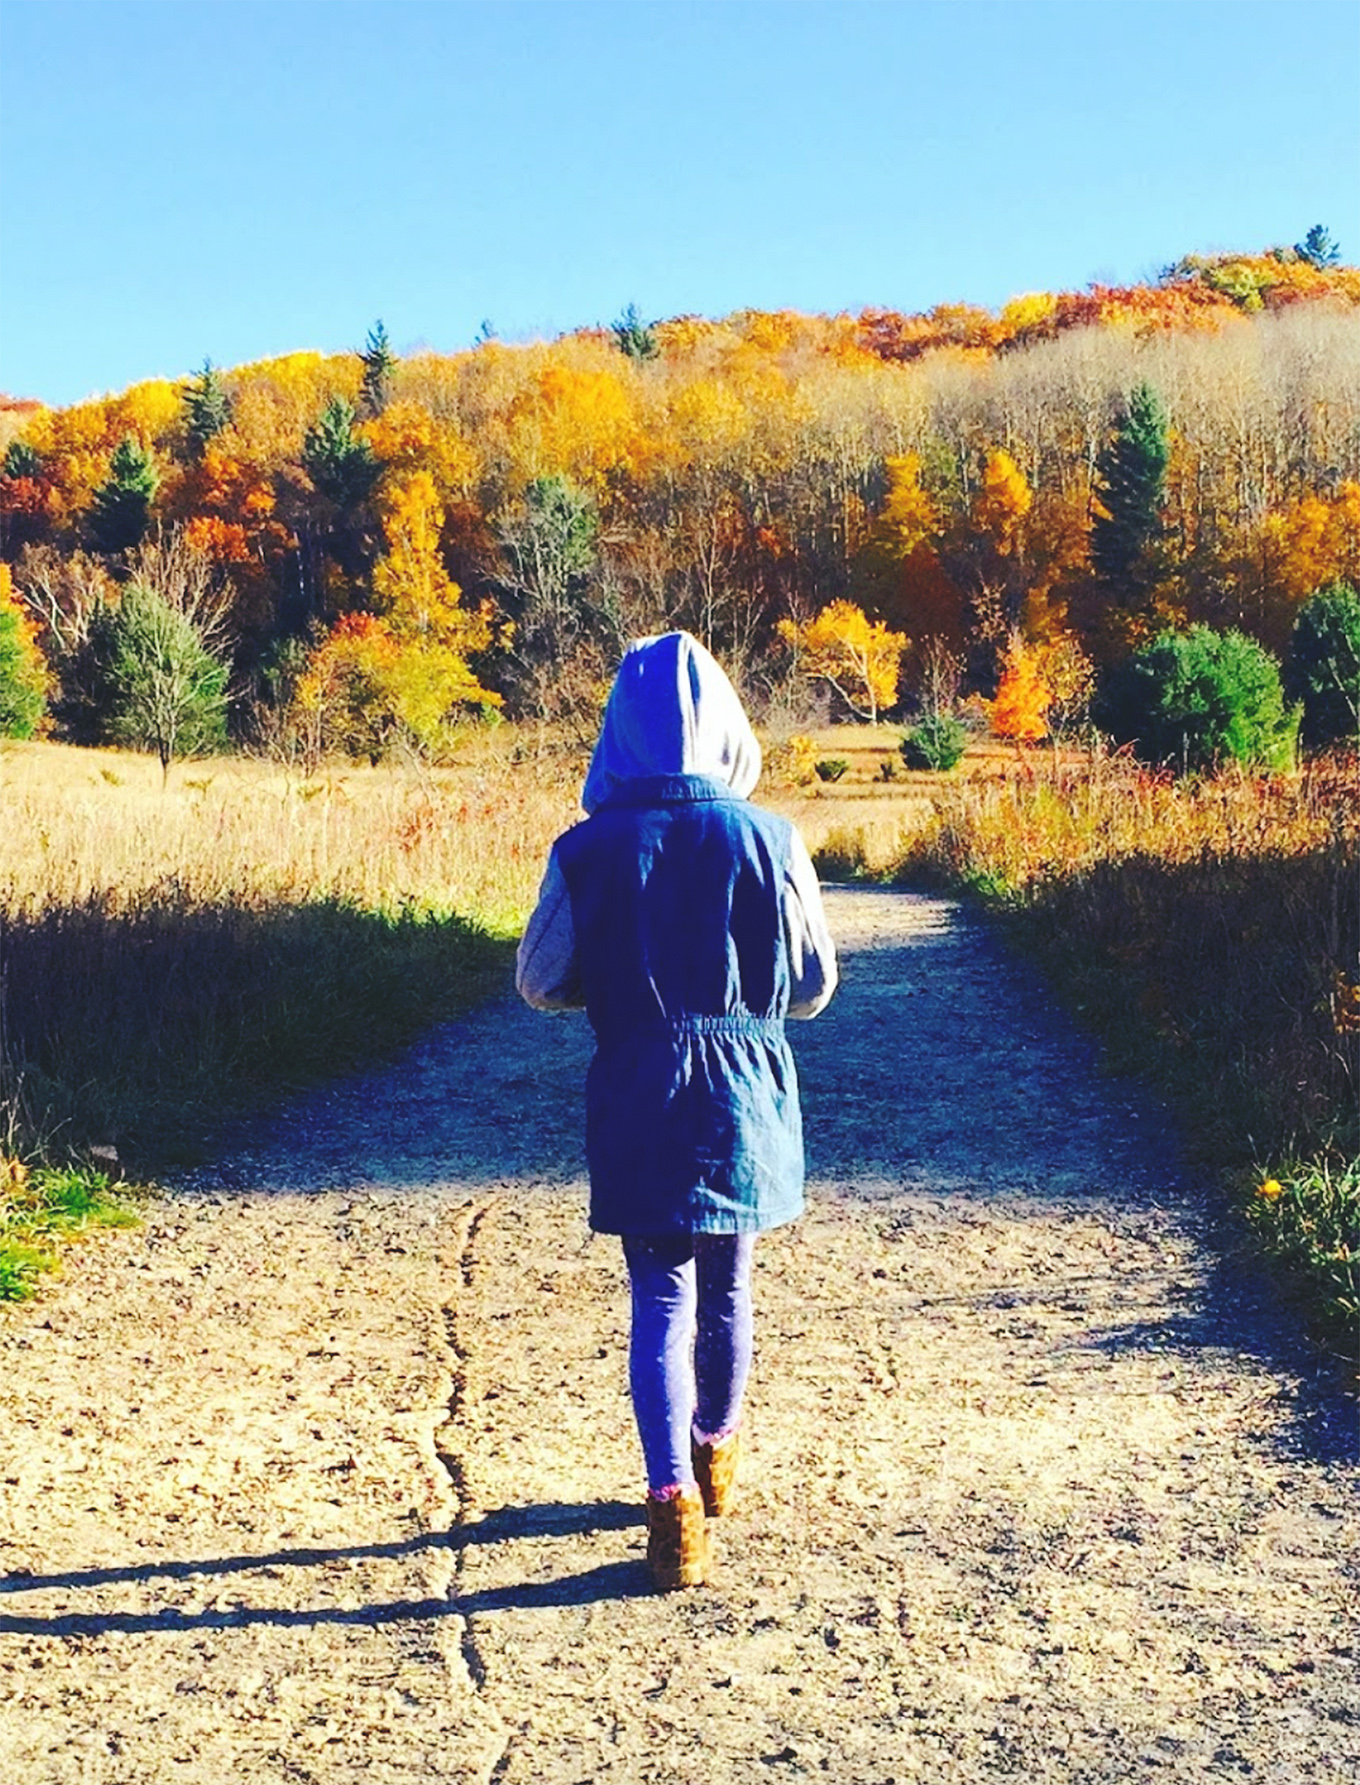
When kids spend time outside they build confidence, become more creative, and grow closer to their families. Here are 5 tips to get your kids out in nature.

When she’s outside, she’s light and carefree; still determined but playful. When I say outside, I don’t mean in the backyard or at the local playground. She’s at her best in forests, on sand dunes, and in other wide open spaces. It’s like she’s breathing in contentment, and breathing out frustration, as she navigates trails, and ambles along the beach hunting rocks at the edge of the surf. This brings my wife and I great pleasure: it’s exactly the sort of transformation we sought when we made the decision to uproot everything in search of a slower, meaningful, purposeful and intentional life.

Two years ago our family moved from the suburbs of a large metropolitan area to Traverse City, Michigan. It was a difficult decision to make, as we had to move not just our family, but our business as well. It was a voluntary move made on a bit of a whim, but we’ve never looked back.

Traverse City is a small town in northern Michigan on the shores of Lake Michigan. People who live here ski in the winter and boat in the summer. They hike and bike, swim and SUP – regardless of their activity of choice, and no matter the season or the weather, they spend as much time outside as possible. In other words, it’s a great place to live an outdoor lifestyle.

When kids spend time outside they build confidence, become more creative, and grow closer to their families. Here are 5 tips to get your kids out in nature.

That lifestyle is what drew us here. We wanted to provide a different type of upbringing for our three young girls: one that focused on adventurous time spent in nature. So for the past two years we’ve been committed to finding fun and imaginative ways to spend as much time as possible out in nature. Over time we’ve grown from a family that considered a trip to a local park an adventure, to one that hikes and camps, fishes and skis.

We’ve grown closer as a family as we’ve grown to embrace our new lifestyle. And our difficult daughter? Well, we still have our moments, but almost never outside.

At first we didn’t know exactly why we wanted to raise outdoor loving kids – it just instinctively seemed like a good idea. If we did have a specific motivation, it was the hope that by starting them early our girls would grow up physically strong and healthy, and with a lifelong love for outdoor activity. Over time we’ve come to learn that the emotional benefits of more time in nature probably outweigh the physical ones.
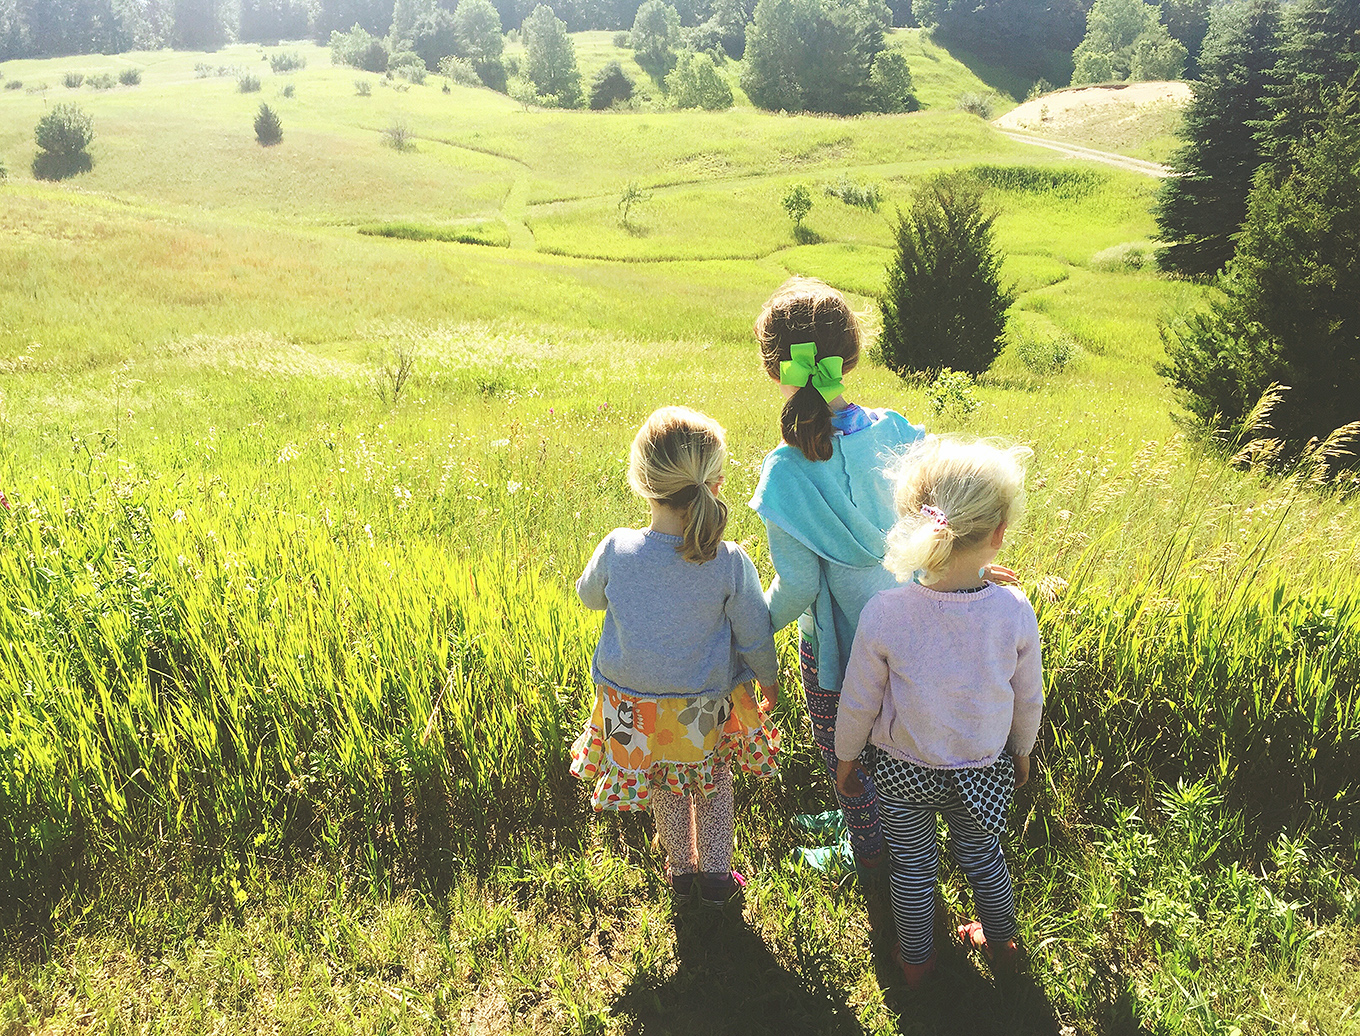
When kids spend time outside they build confidence, become more creative, and grow closer to their families. Here are 5 tips to get your kids out in nature.

Benefits of Spending More Time in Nature as a Family

It builds confidence. When we first started taking our girls out on hikes, for example, it was a struggle. We’d have to cajole them along, and they often wanted to be picked up and carried. Now we can hardly keep up with them. They’ve gained confidence in their own abilities, and increased their stamina, which has led them to want to embark on longer and more challenging adventures. Sure, there are some bumps and bruises along the way, but in the process they’ve learned what it takes to adapt and operate in different environments, and that they’re capable of more than they (or us, frankly) thought was possible.

It promotes creativity and imagination. Nature play is unstructured and adventurous. It requires kids to be in tune with their senses and aware of their surroundings. Whether we’re on a trail or a beach, exposure to the stillness and starkness of nature promotes a unique sense of wonder for kids that no other environment offers.

It fosters connection. Many of the distractions, from screens to toys, that are everywhere inside, are removed from the environment outside. Time outside is a time to test boundaries, create shared memories, and draw closer to one another so that when the tough times of adolescence come along, children know they can count on their family for support. Nature gives us time together, and that’s the biggest reward of all.

Spending more time outside as a family is great, but it’s not always easy. With all of the alternatives available to them, kids often resist the idea of a “boring” afternoon exploring with their parents and siblings. And it’s not always easy for parents to find the motivation or energy to pull things together for a family outing on the weekend.
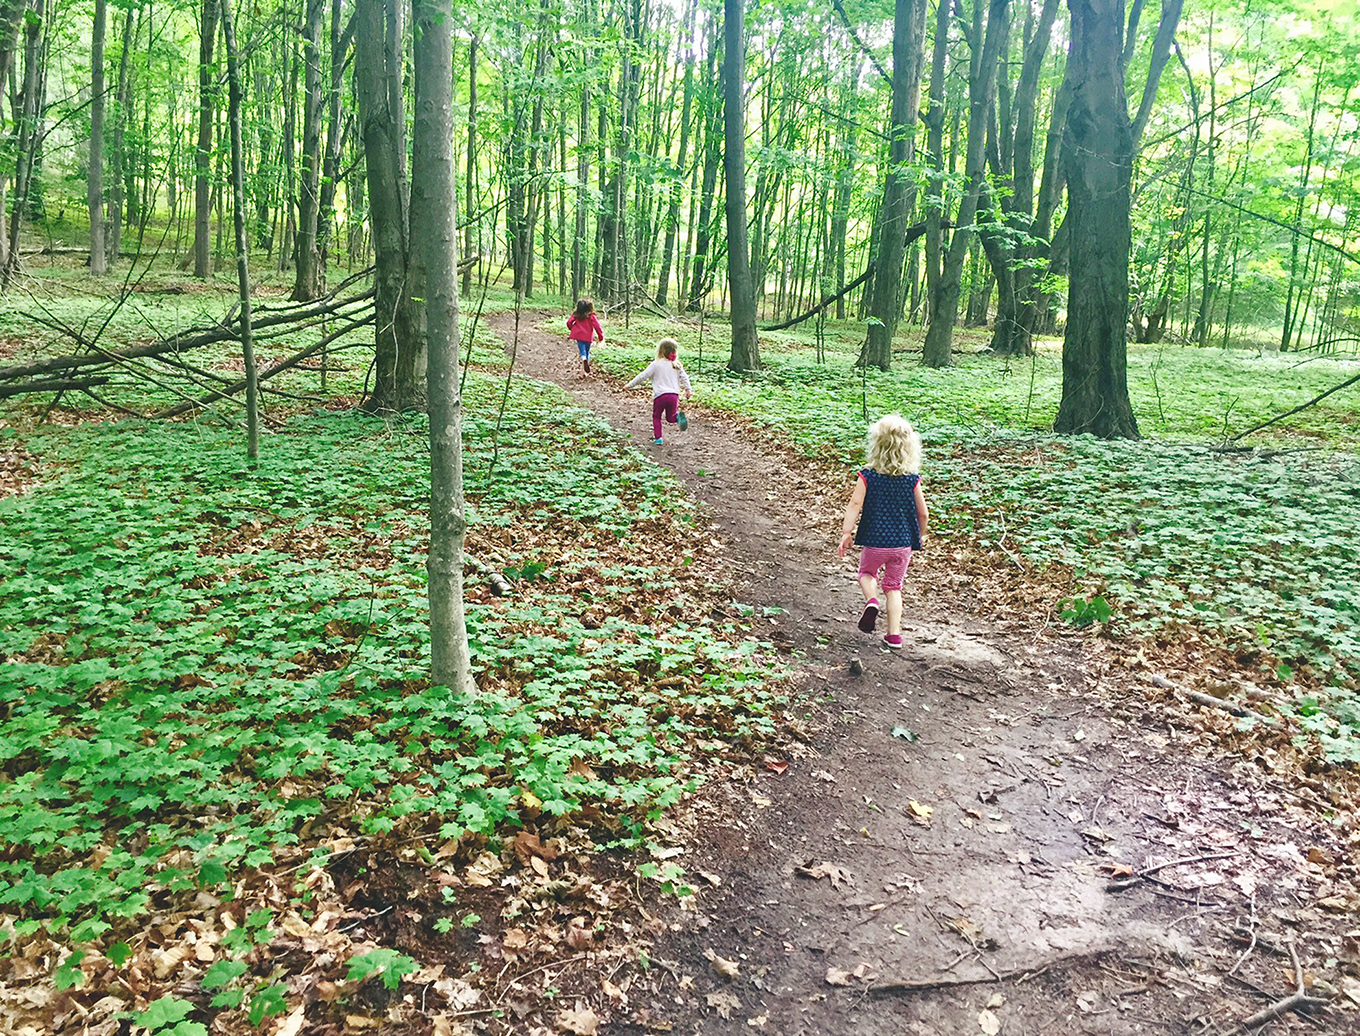
When kids spend time outside they build confidence, become more creative, and grow closer to their families. Here are 5 tips to get your kids out in nature.

Here are a handful of ideas to help you spend more adventurous time outside as a family.

5 Simple Ways to Spend More Time Outside as a Family

1. Schedule It.

Time is precious, and feeling the pressure of trying to plan something fun and adventurous while time slips away on a Saturday morning is not a good way to start the weekend. Just as you plan your shopping list, spend 30 minutes during the week mapping out your outdoor family activities. That way you can have a planned agenda, bags packed, and driving directions set in advance, so you and your family can get out the door and off to your adventure free of stress and full of anticipation.

2. Embrace all Weather.

Winter is almost upon us, so it’s time to start thinking about snow. Humor columnist Dave Barry once wrote, “The problem with winter sports is that – follow me closely here – they generally take place in winter.” I think we can all identify with that sentiment to some extent. Sure, it’s easy to curl up on the couch and binge on Netflix for hours on end when it’s cold out. Now that we’re living in northern Michigan, however, we’ve come to learn that a big part of beating the winter blues as a family is getting outside and being active regardless of the weather. As the old Scandinavian saying goes, “There’s no such thing as bad weather, only bad clothes.

When kids spend time outside they build confidence, become more creative, and grow closer to their families. Here are 5 tips to get your kids out in nature.

3. Create Something Together.

Some of the most rewarding time outside is spent building things with kids. For example, our girls look forward to planting a vegetable garden every spring, which pays outdoor dividends all summer, as they feel responsibility to tend to the garden as well. We’ve also built “sit spots” with our kids, which are special places in the yard for them alone, and we’re constantly building fairy houses in the wooded trails near our house. Creating something doesn’t require a table saw, ladder and carpentry skills – it just means working with your kids on something simple outside that your kids care about and, consequently, will care for.

4. Schedule Your Own Time.

If you’re motivated to raise kids that love the outdoors, you probably love the outdoors yourself. It’s important, therefore, to schedule your own time for outdoor recreation. It’s obviously more difficult to find that time once you have kids, but it’s necessary in order to stay motivated while nurturing your family’s love of nature. Plus, it’s good for kids to see their parents hurtling down the trail on a mountain bike, or cruising across the bay on a paddle board. It gives them something to be excited about as they become older and ready to take on new adventures.

5. Let Go.

As the parents of three young girls, we obviously want to keep them safe, but try not to hover too close when we’re out exploring. We want them to be creative, imaginative, adventurous, and to step outside of their comfort zones when they’re out on the trail. That’s what being a kid is all about.

Kids need the freedom to roam, gradually, in order to develop their own relationship with nature. For kids, the fun is off the trail, not within its groomed contours. Unfortunately, off the trail is where scrapes, bruises and dirty fingernails happen. But we know that if we don’t allow our kids the freedom to explore and test their own boundaries, then they won’t become the outdoor-loving kids that we’re hoping to raise. It’s tough to let go, but absolutely necessary; after all, that’s how our little ones grow up to be strong, confident, courageous adults.

Visit our website to download our free guide, “20 Ways to Spend More Active, Adventurous Time Outside as a Family,” which shares 15 additional ideas to help get your family outside and active.

If you liked this post you might also enjoy…

  • Collect Moments, Not Things
  • 12 Life Lessons Children Learn from Hiking
  • Exploring vs. Observing: 6 Tips to Help Kids Explore Nature

When kids spend time outside they build confidence, become more creative, and grow closer to their families. Here are 5 tips to get your kids out in nature.

Creamy Sun-Dried Tomato Pesto Gnocchi

Thursday, October 26, 2017

Creamy Sun-Dried Tomato Pesto Gnocchi is a easy and flavorful main dish or side dish recipe ready in just 20 minutes!

Hello there!  This is Katie from The Casual Craftlete blog.  Today I am sharing a super easy pasta recipe made with a creamy sun-dried tomato pesto, gnocchi, and fresh basil.  This recipe makes a great dinner for busy nights or a perfect side dish.  Ready in only 20 minutes, this is comfort food at it’s best.

When the weather gets chilly, I am all about comfort food.  There is just something about eating a warm hearty meal that satisfies the soul.  This creamy sun-dried tomato pesto gnocchi has a flavorful and rich sauce and paired with gnocchi it is so filling.

Gnocchi are little soft dough dumplings that are like pillows in your mouth.  If you have never tried them before I highly recommend this recipe.  Instead of using regular pesto, I used a jar of sun-dried tomato pesto from the store, which makes this recipe very easy to make and tastes great.  I like to add fresh garlic and basil to pump up the flavor and balance out the dish.  If you have 20 minutes you can totally make this recipe.


Creamy Sun-Dried Tomato Pesto Gnocchi
 
Print
Serves: 4
Ingredients
  • 2 tablespoons sun-dried tomato pesto (Prego)
  • 1 package potato gnocchi (17 oz)
  • 1 teaspoon corn starch
  • ¾ cup + 2 teaspoons heavy cream
  • 1 tablespoons unsalted butter
  • 2 tablespoons olive oil
  • 3 cloves garlic, minced
  • salt & pepper to taste
  • fresh basil, parmesan for topping (optional)
Instructions
  1. Bring a large pot of salted water to a boil. Cook gnocchi according to package instructions (about 2 minutes). Drain and set aside.
  2. While water is coming to a boil, place a pan on the stove over medium heat. Add butter, olive oil and garlic to the pan. Saute until butter is melted and garlic is fragrant.
  3. Combine corn starch and 2 teaspoons of heavy cream in a small bowl and whisk until smooth.
  4. Add remaining heavy cream, corn starch mixture and pesto to the pan. Stir until sauce begins to thicken. Turn heat off.
  5. Add cooked gnocchi, salt and pepper to the pan and stir to combine. Taste and adjust seasoning as needed.
  6. Serve with fresh basil and parmesan.
3.5.3228

AmazonFresh Cardboard Box Halloween Costume Tutorial

Wednesday, October 25, 2017

Thank you to Amazon for sponsoring this Boxtume tutorial. Make your own #Boxtumes and share it online!

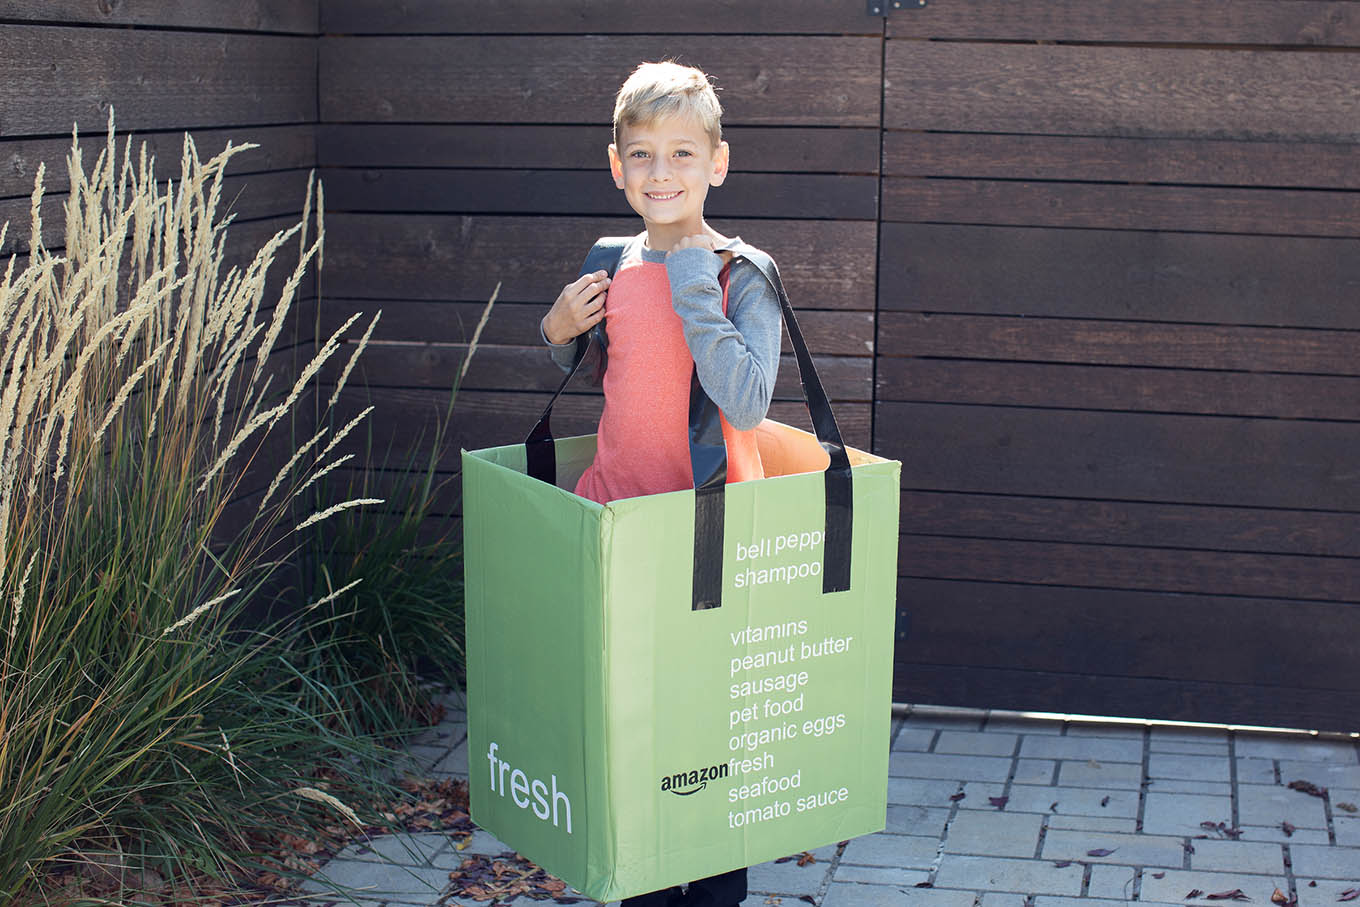
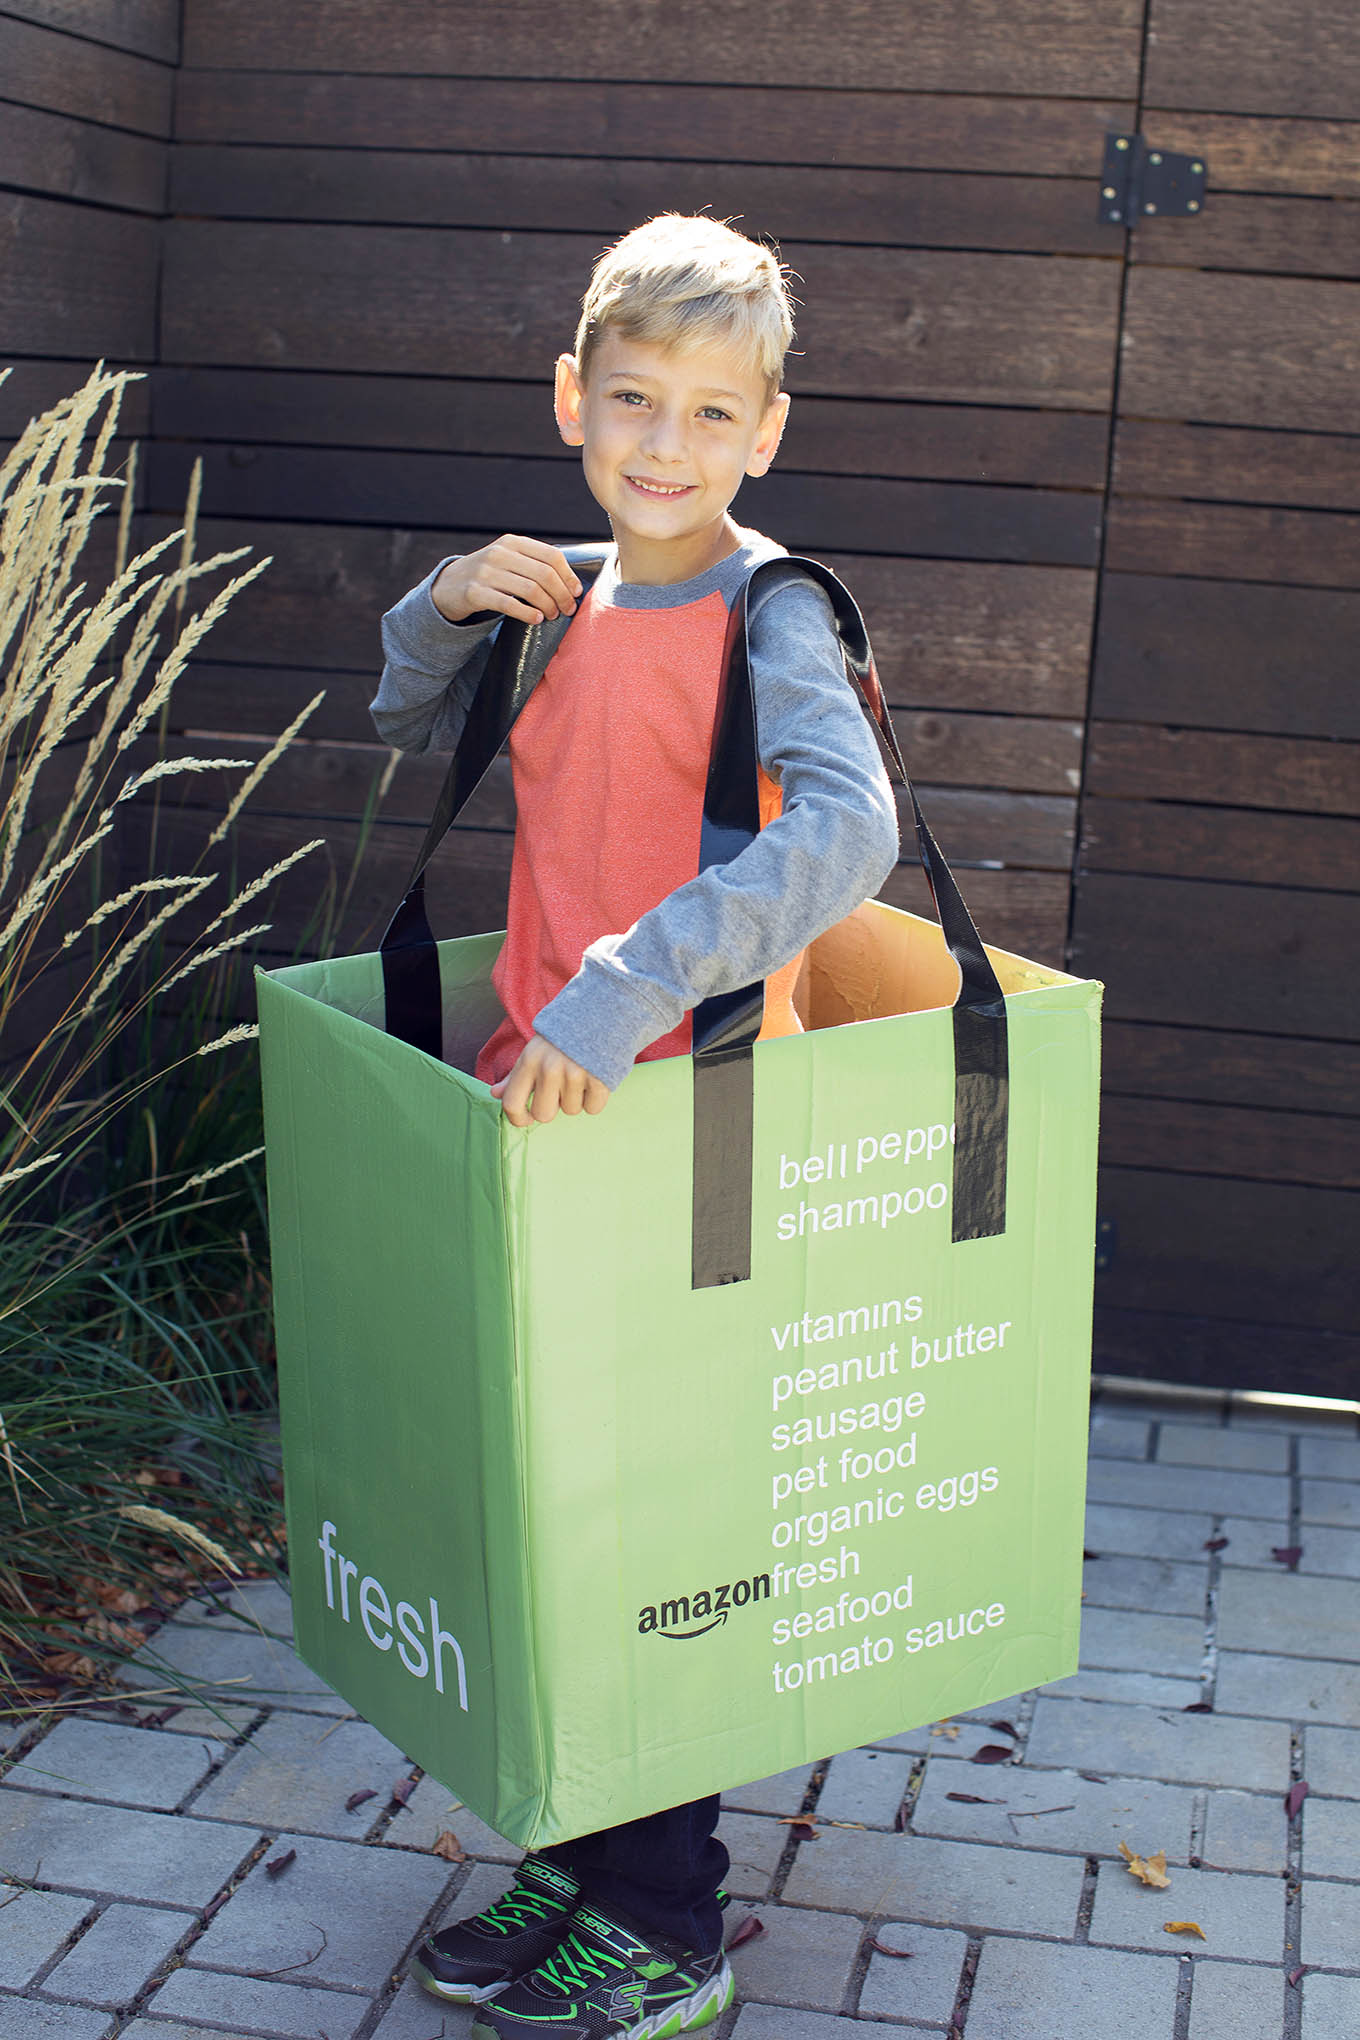
Helping your child stand out in the creative costumed crowd this Halloween is as easy as getting your DIY on, grabbing a cardboard box, and embracing the funny Halloween costumes spirit. In only seven short steps, this simple AmazonFresh DIY box tutorial will earn you parent of the year.

AmazonFresh DIY Cardboard Box Costume.

Supplies to Make an AmazonFresh Halloween Costume

Before diving in, you need to gather the following supplies

  • One Amazon box to represent the recyclable AmazonFresh grocery bag
  • Black duct tape for the straps
  • Custom vinyl lettering for the words and Amazon logo that go on the AmazonFresh bag
  • Green spray paint
  • White spray paint

AmazonFresh DIY Cardboard Box Costume.

Step-by-Step Process for Making Your AmazonFresh Funny Halloween Costume

With your supplies ready, follow these steps for this fun DIY box project:

Choose the right box. We used a medium-sized Amazon Smile box for this tutorial, but you can choose the size that best matches your child’s size.

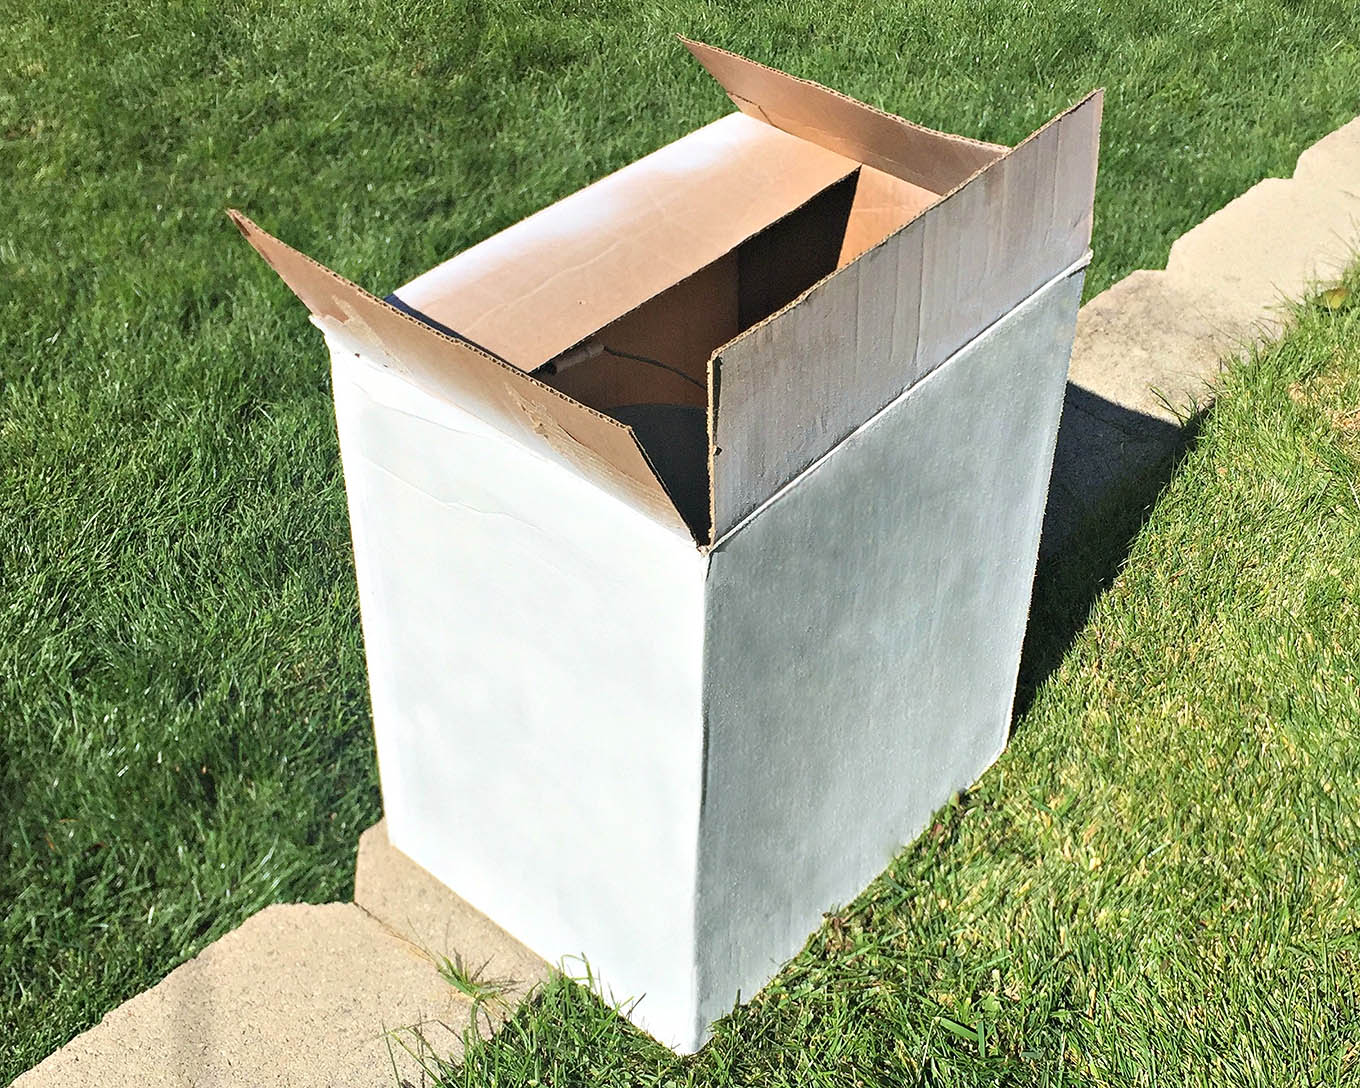
1. Paint the box white to prime it.

AmazonFresh DIY Cardboard Box Costume.

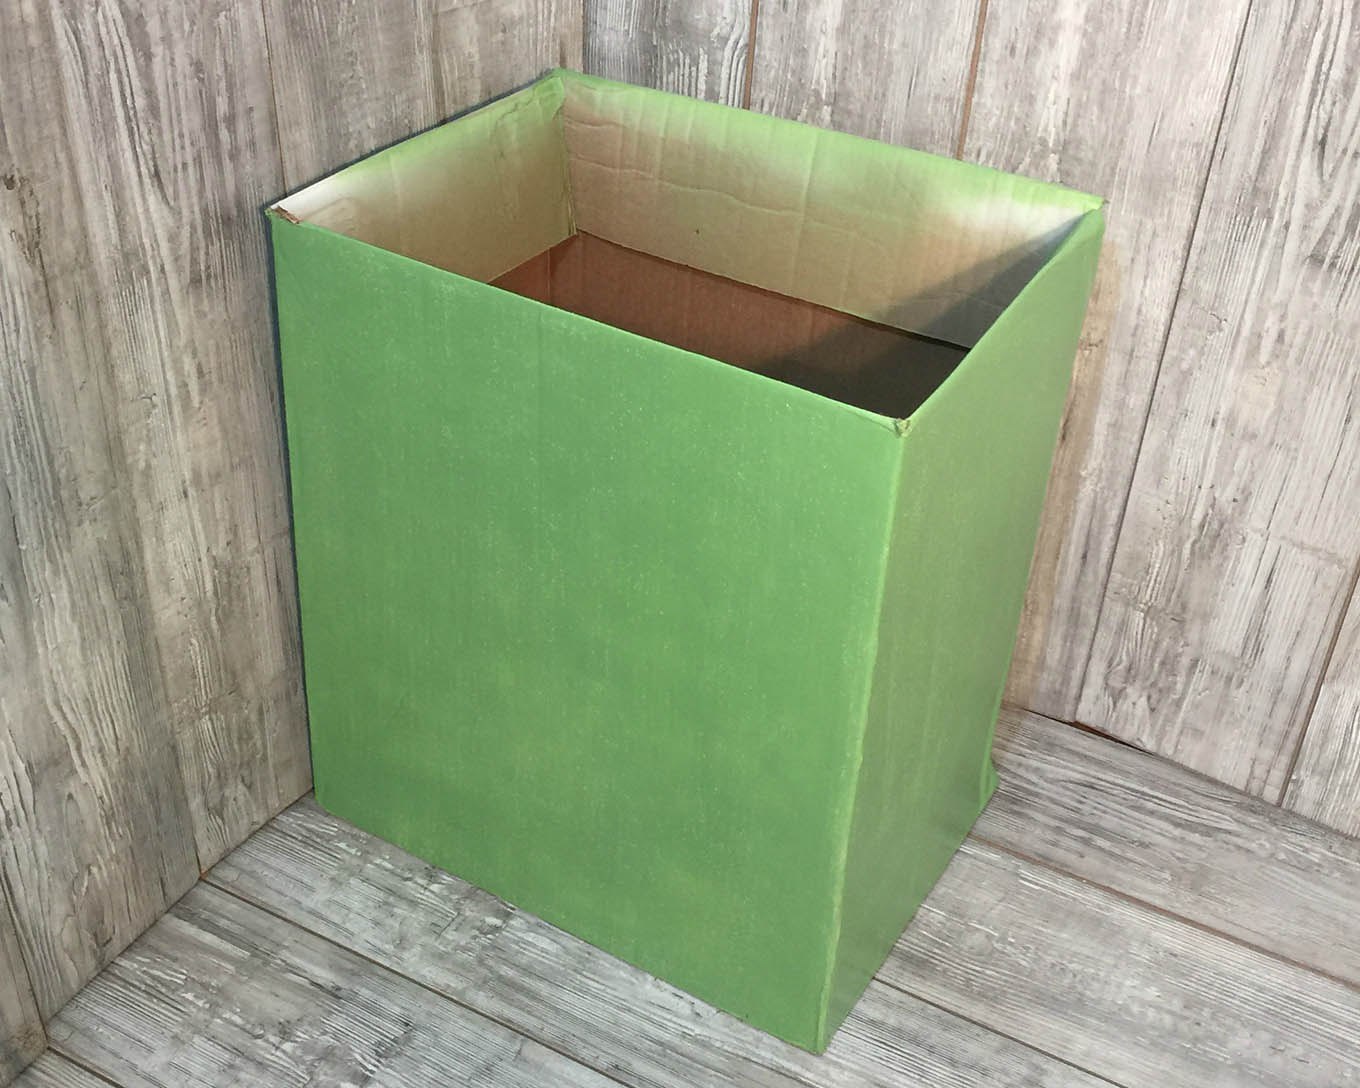
2. Paint the box green to match the Amazon Fresh grocery bag.

AmazonFresh DIY Cardboard Box Costume.

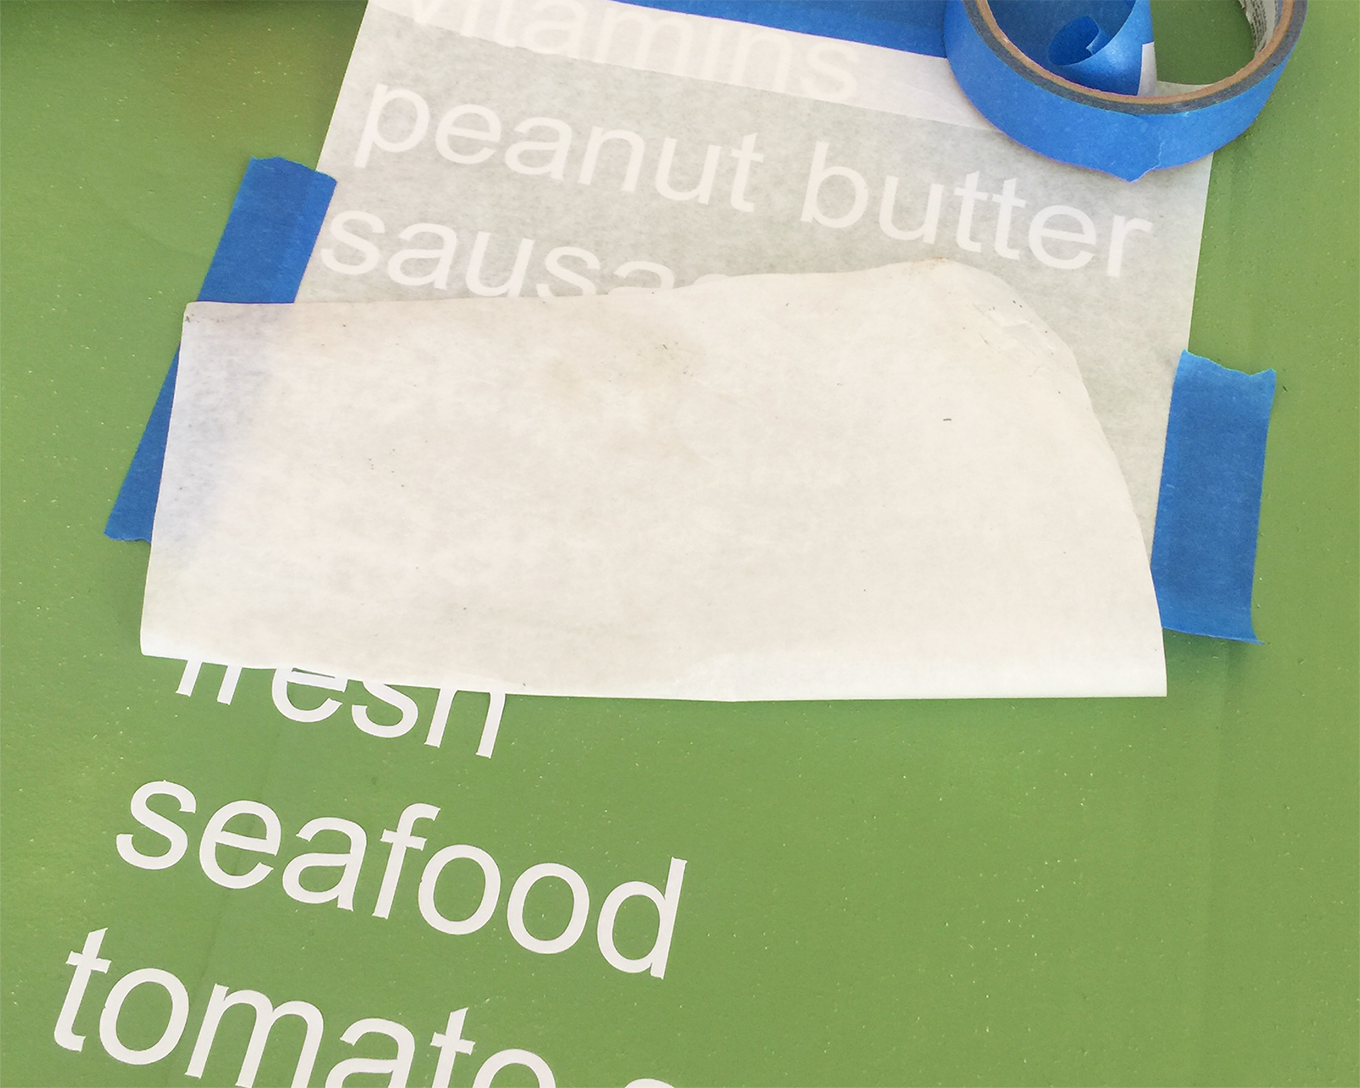
3. Create or order custom vinyl lettering. If you have the ability to create vinyl lettering on your own, go for it. If not, I paid $20 and ordered the custom lettering from a local company. They created all the words, including the Amazon logo to ensure the box looked exactly like the AmazonFresh recyclable grocery bag.

4. Mark placement for the vinyl lettering.

5. Affix the vinyl lettering. If you are not familiar with how to apply vinyl, you’ll want to watch a tutorial. I found this how to extremely helpful.

AmazonFresh DIY Cardboard Box Costume.

6. Create the straps. Make sure to size them first. I found these to be a bit too long for my little trick-or-treater.

AmazonFresh DIY Cardboard Box Costume.

7. And there you have it! Only 7 simple steps and your child will be the talk of the neighborhood come Halloween night.

What are your favorite funny Halloween costume ideas?

If you liked this post you might also enjoy…

  • Easy DIY Dice Costume
  • Kids Tin Man Costume
  • DIY Claw Machine Costume
  • Doll in a Box Costume

Chocolate Covered Fox Pretzels

Thursday, October 19, 2017

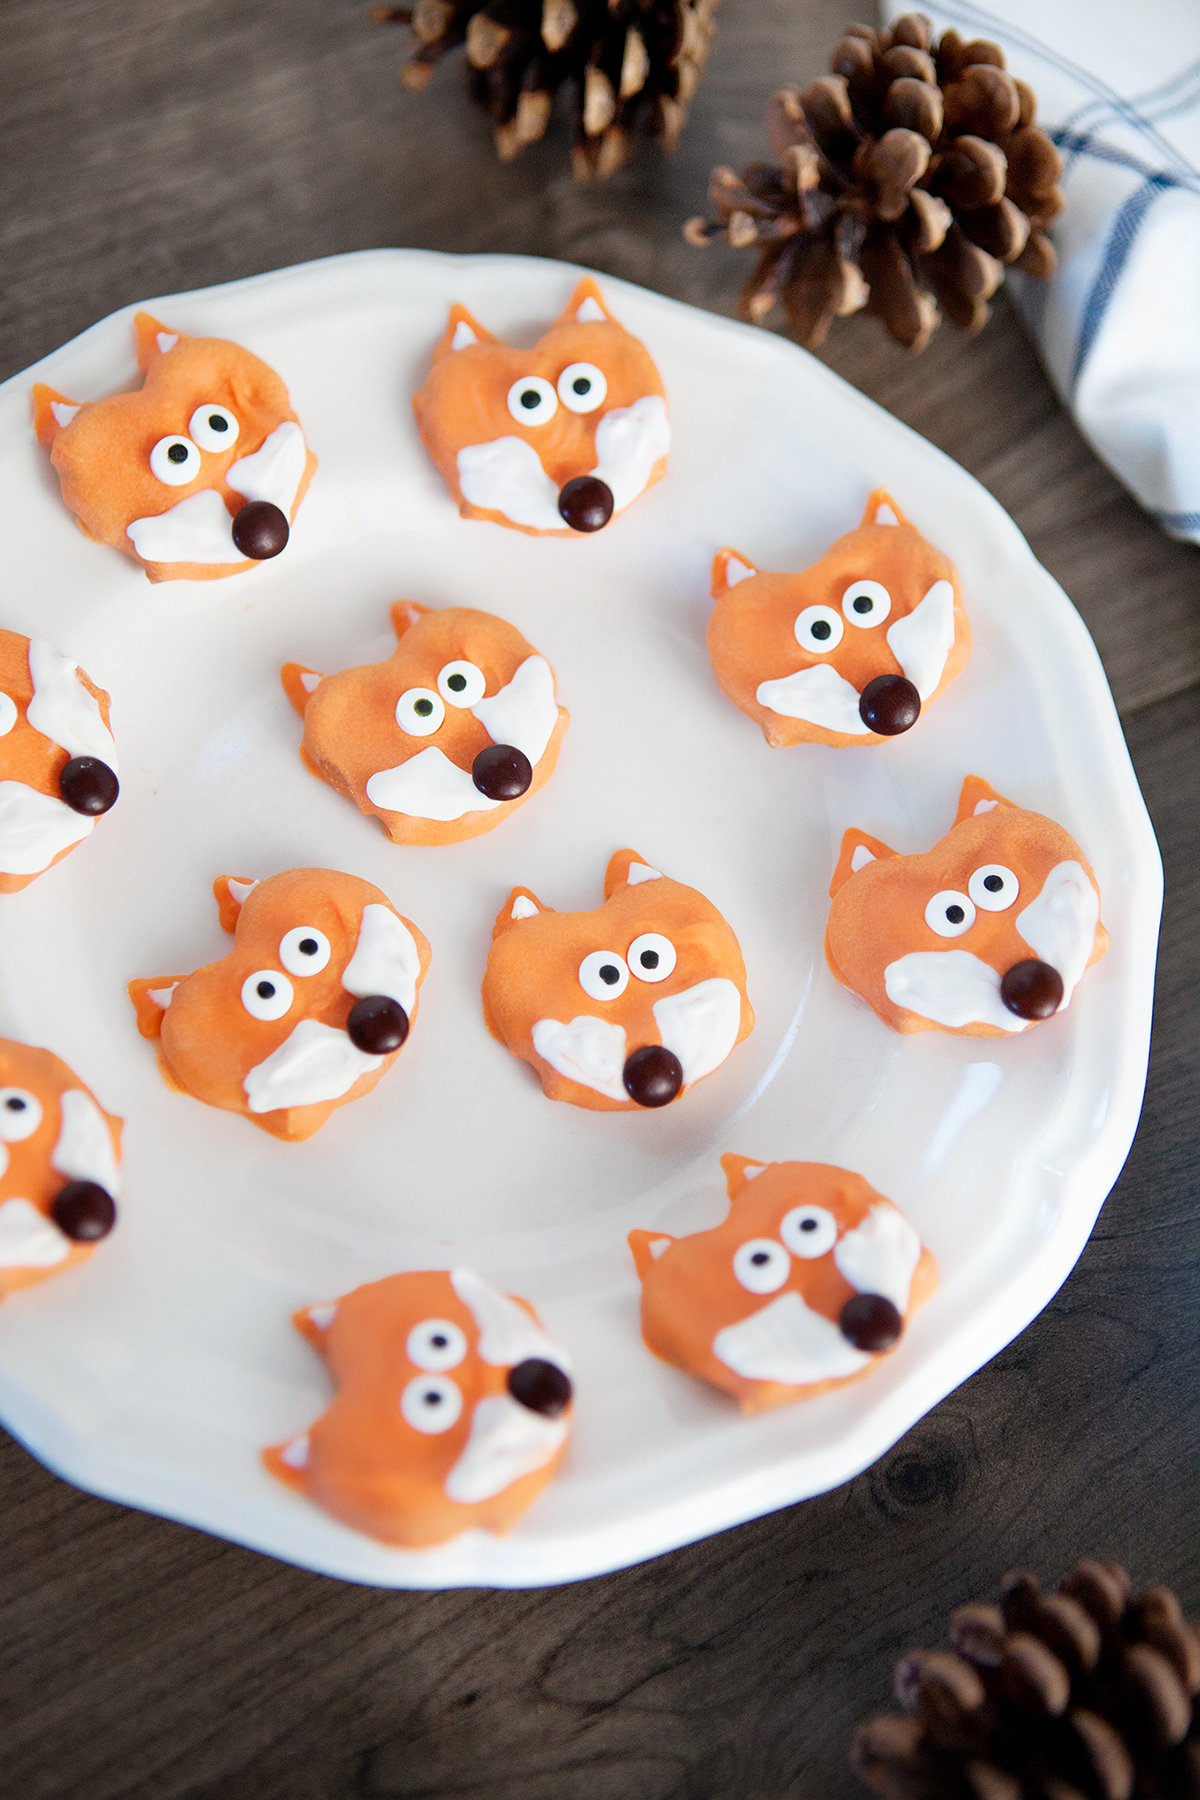
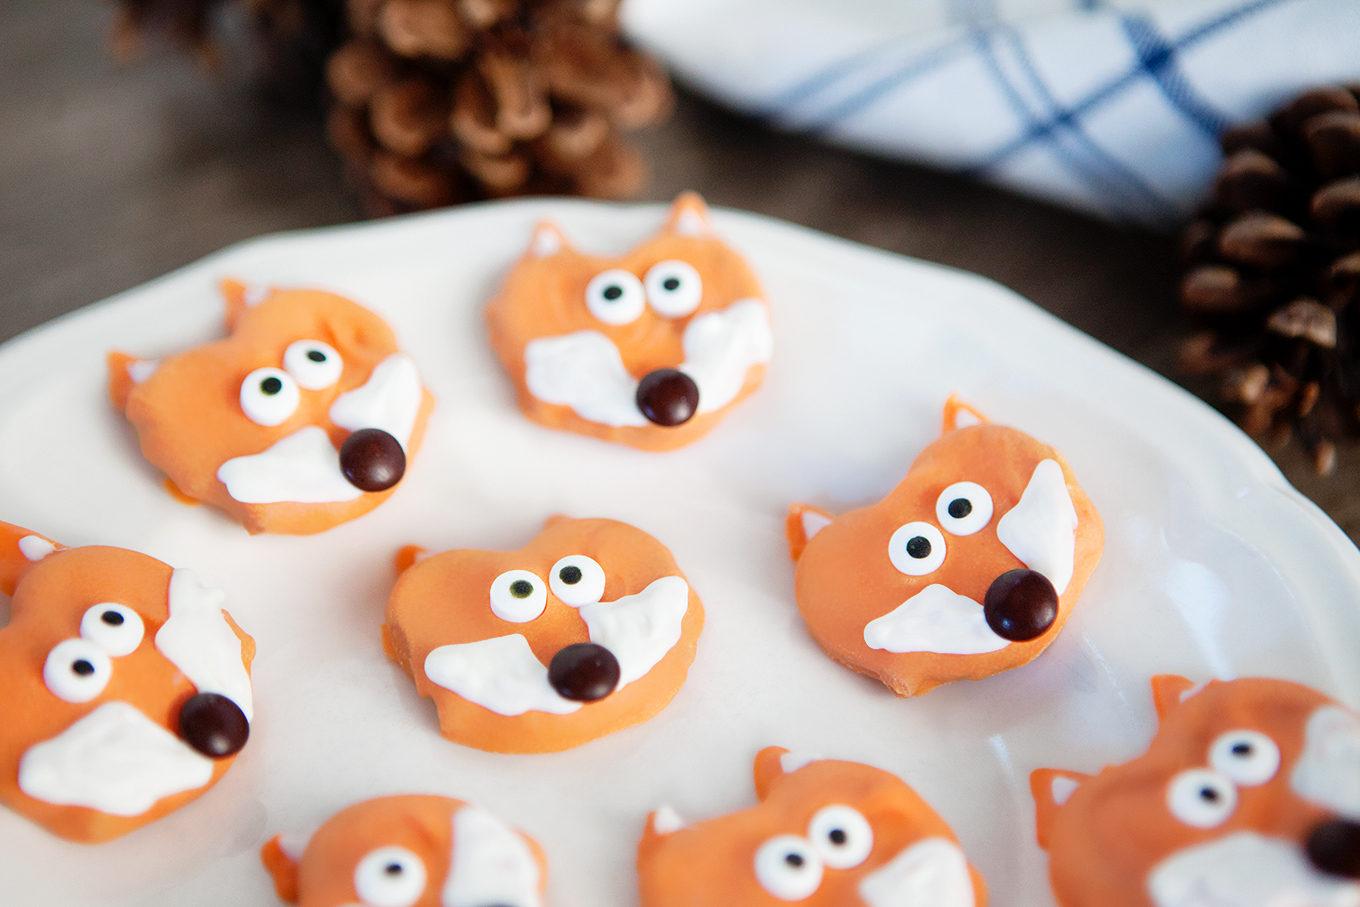
The cutest little chocolate covered fox pretzels. A delicious fall treat that can be made in just a few minutes!

The cutest little chocolate covered fox pretzels. A delicious fall treat that can be made in just a few minutes!

Chocolate covered pretzels are one of our favorite quick and easy treats to make for any season. These pumpkin pretzels we made for Halloween were a hit and we’ll definitely be making these reindeer pretzels again this Christmas!

The cutest little chocolate covered fox pretzels. A delicious fall treat that can be made in just a few minutes!

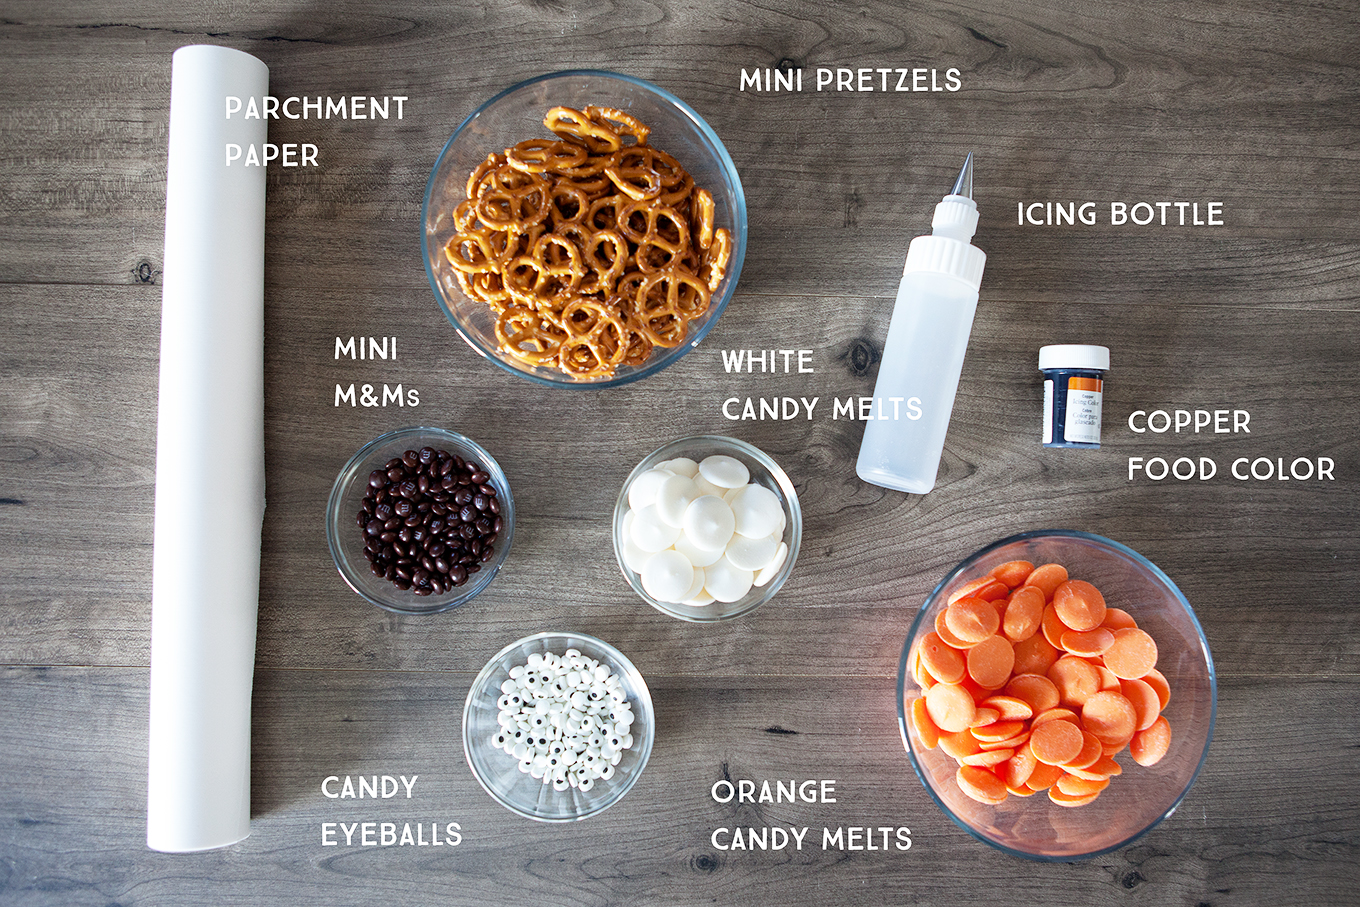
Supplies

  • Mini Pretzels
  • Toothpicks
  • Brown mini M&Ms
  • Orange Chocolate Wafers
  • White Chocolate Wafers
  • Mini candy Eyeballs
  • Icing Bottles
  • Wilton Copper Icing Color


The cutest little chocolate covered fox pretzels. A delicious fall treat that can be made in just a few minutes!

Instructions

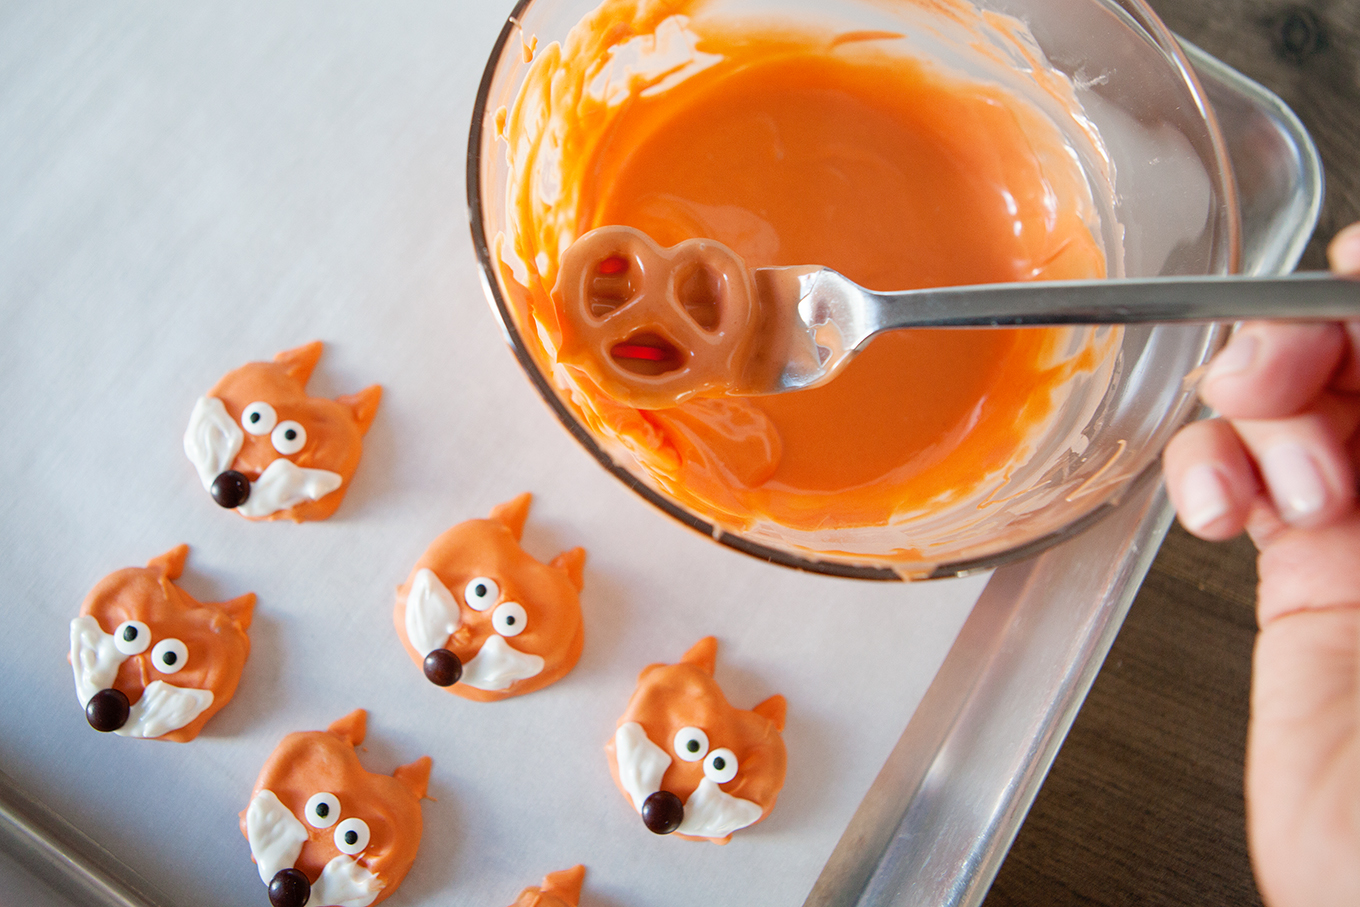
Melt orange chocolate candy melts in a microwave safe bowl. Heat in 30 second intervals, stirring well in between until chocolate is completely melted.

Once melted, add a small amount of Wilton Copper Icing Color to the chocolate to give it a more burnt orange color.

Dip pretzels in chocolate, covering generously. Place on cookie sheet lined with parchment paper. Fill in entire pretzel with melted chocolate.

The cutest little chocolate covered fox pretzels. A delicious fall treat that can be made in just a few minutes!

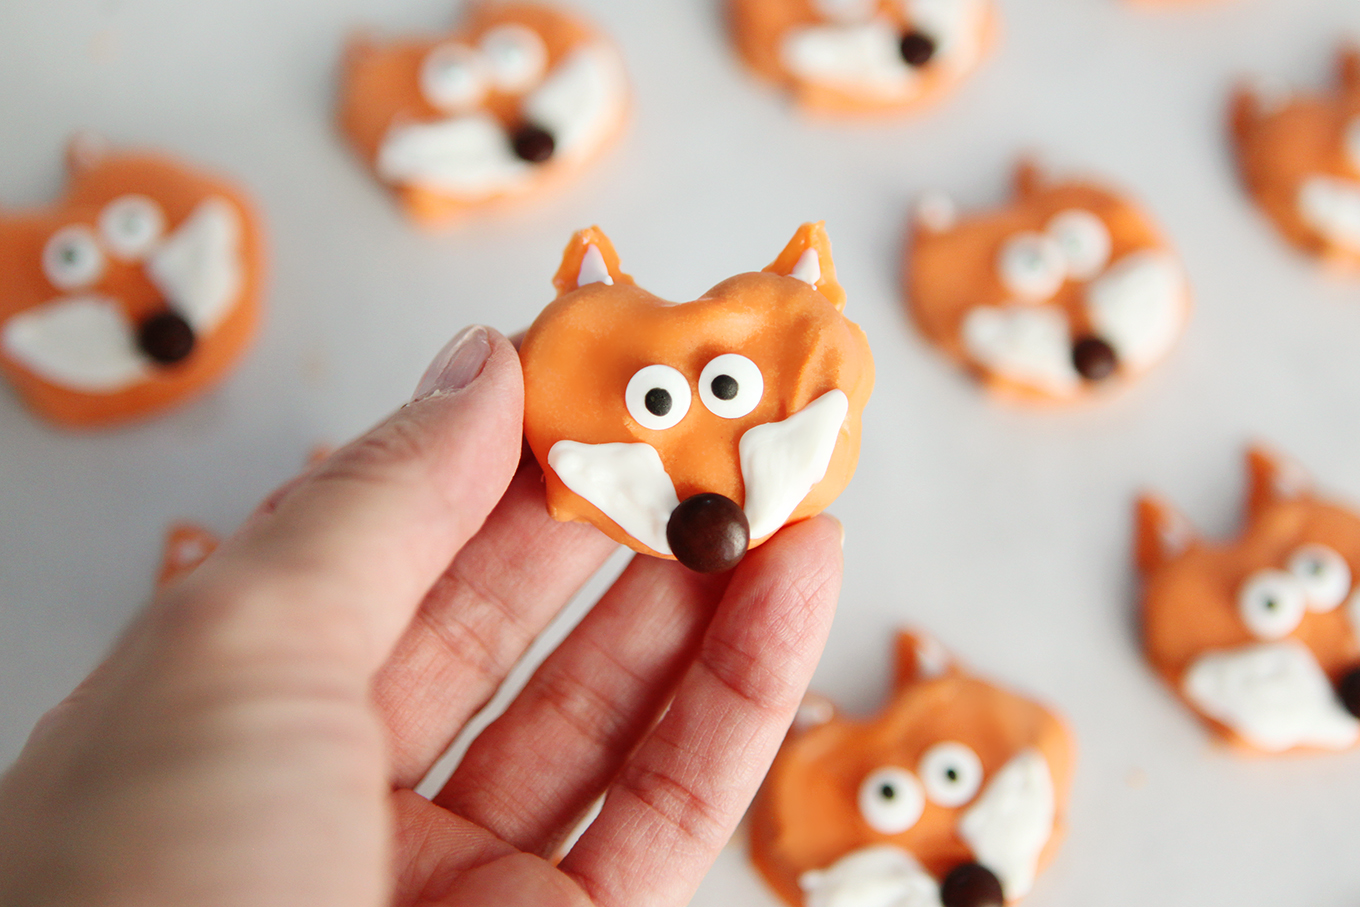
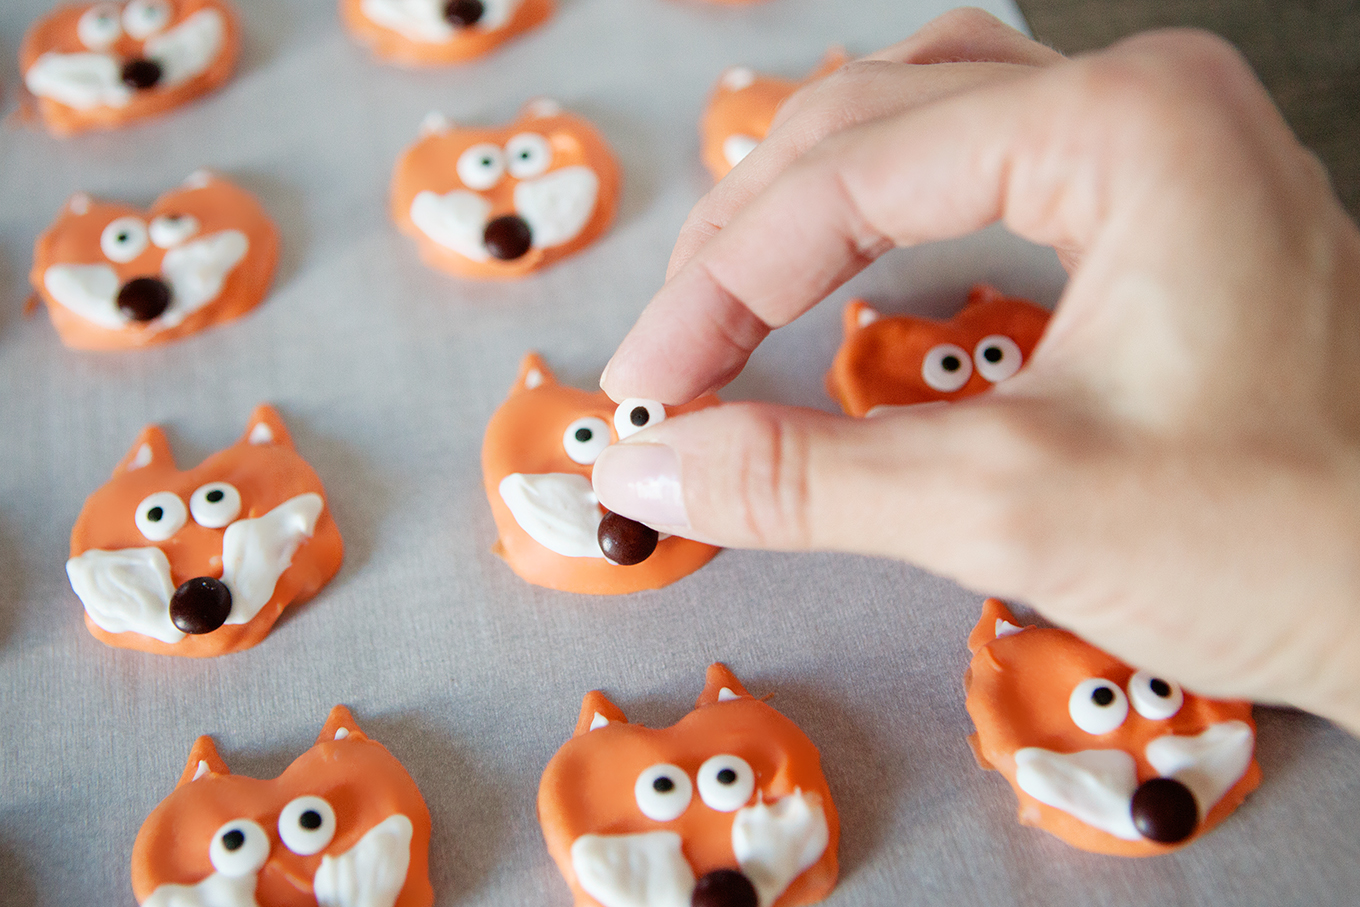
Melt white chocolate candy wafers according to directions above. Place in a fine tip icing bottle. Pipe white icing to cover white areas for the fox’s face as pictured.

Place some of the melted orange chocolate in an icing bottle and add ears to the top of each pretzel.

Add eyeballs and brown mini M&Ms while chocolate is still warm.

The cutest little chocolate covered fox pretzels. A delicious fall treat that can be made in just a few minutes!

Use a toothpick to add a small triangle of melted white chocolate to each ear.

I put together a short video showing how to decorate one of the cupcakes from start to finish and you can view it her –>

The cutest little chocolate covered fox pretzels. A delicious fall treat that can be made in just a few minutes!

Place in refrigerator to cool. Remove when chocolate is completely hardened and they’re ready to eat!

This batch of chocolate covered fox pretzels disappeared quickly at our house and my kiddos are already asking what our next chocolate covered pretzel creation is going to be!

What do you think we should make?

If you liked this post you might also enjoy…

  • 5 Minute Fox Cupcakes
  • Woodland Creature No-Carve Pumpkins
  • Woodland Creature Cup Crafts
  • Fox Apron Tutorial and Pattern

The cutest little chocolate covered fox pretzels. A delicious fall treat that can be made in just a few minutes!

Salted Spiced Caramel Sauce

Wednesday, October 18, 2017

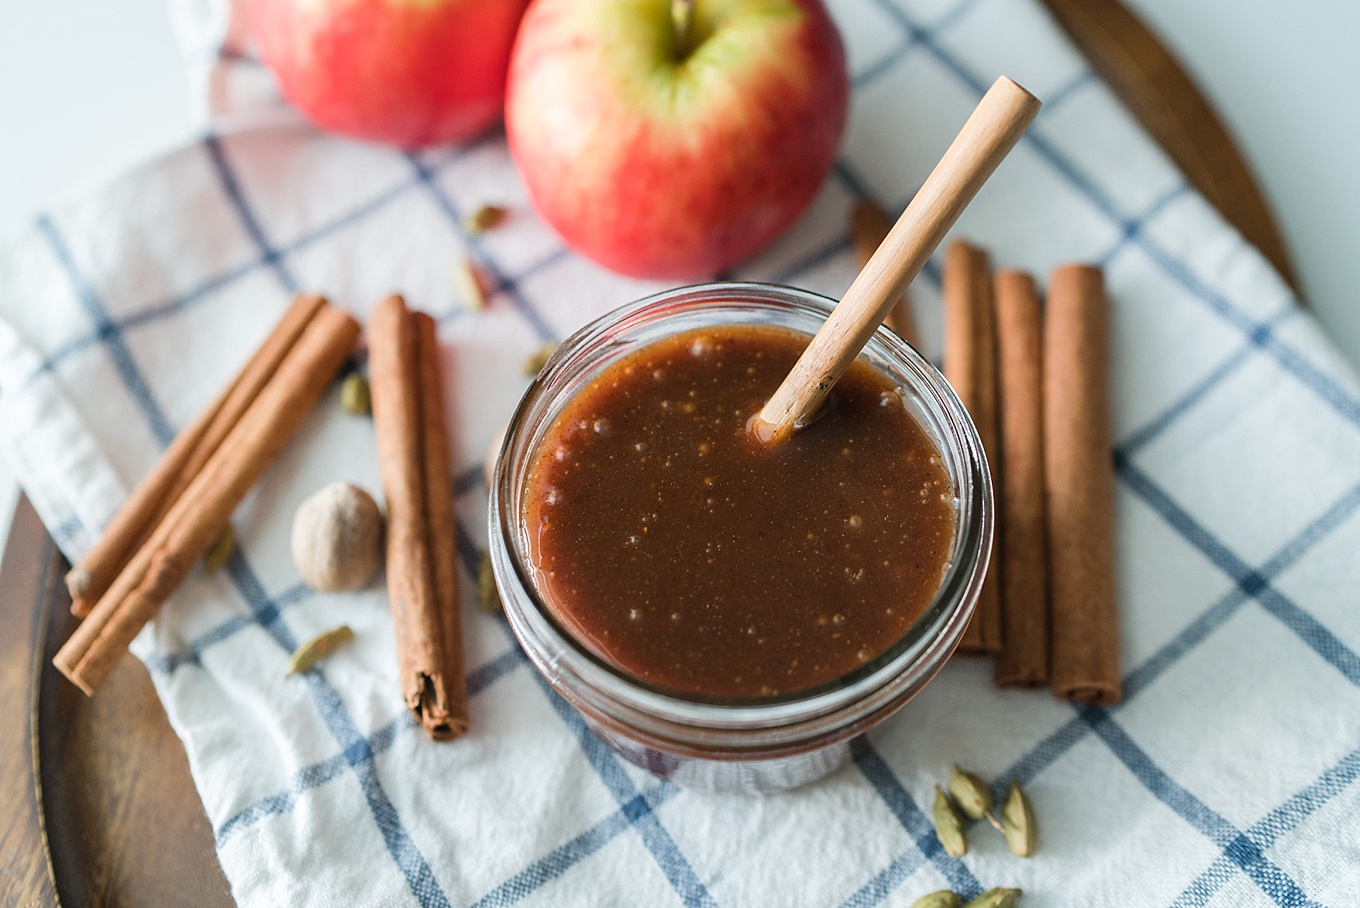
Salted Spiced Caramel Sauce is the perfect fall gift for neighbors and friends. Rich caramel sauce with maple syrup, vanilla, and warm spices. 

Salted Spiced Caramel Sauce

Does your neighborhood Boo! each other? It’s a fun little tradition that my kids look forward to each year. You drop off a treat to your neighbors and they hang a sign on their door that says that they were Booed! and then they get to Boo! someone else. It is really fun to open your door and find a Halloween treat on your porch. I like to make my neighbors jars of Salted Spiced Caramel Sauce with apples for dipping. It’s really easy and people love it so much. How often does someone bring you salted caramel? Not enough in my opinion!

Salted Spiced Caramel Sauce

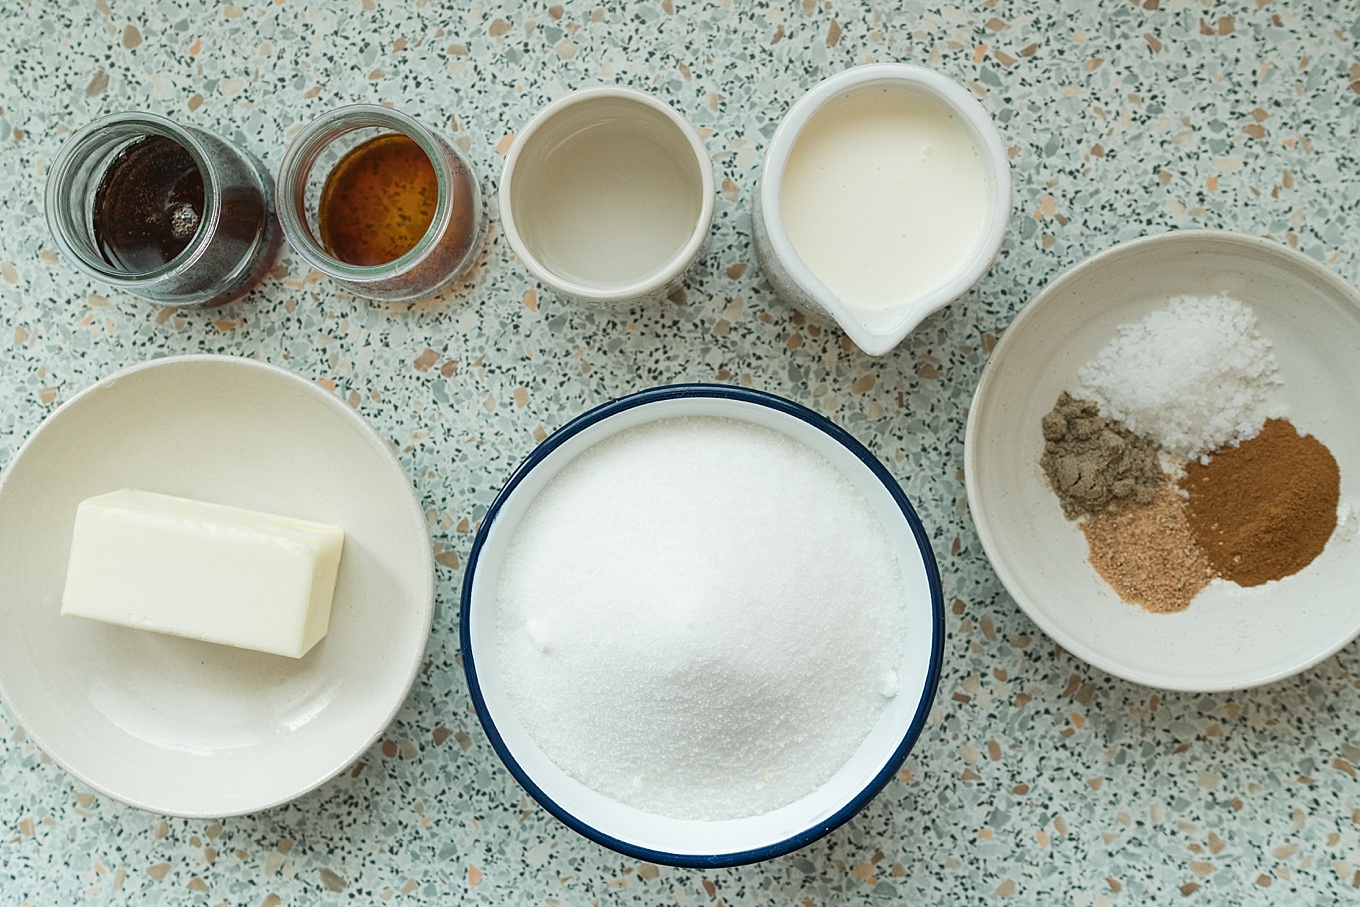
Making caramel isn’t difficult (even though it seems like it would be) but it is important that you have everything ready to go before you start. Once you get going, you don’t have a lot of time to look around for ingredients, so have everything ready before you even turn on the stove.

Here’s how to make it

Salted Spiced Caramel Sauce

Ingredients

  • 1 cup plus 2 Tablespoons sugar
  • 3 Tablespoons water
  • 1/2 cup heavy cream (warmed in the microwave)
  • 1/4 cup COLD butter
  • 1/4 cup pure maple syrup
  • 2 teaspoons vanilla
  • 3/4 teaspoon sea salt
  • 3/4 teaspoon cinnamon
  • 1/4 teaspoon cardamom
  • 1/2 teaspoon nutmeg

Salted Spiced Caramel Sauce

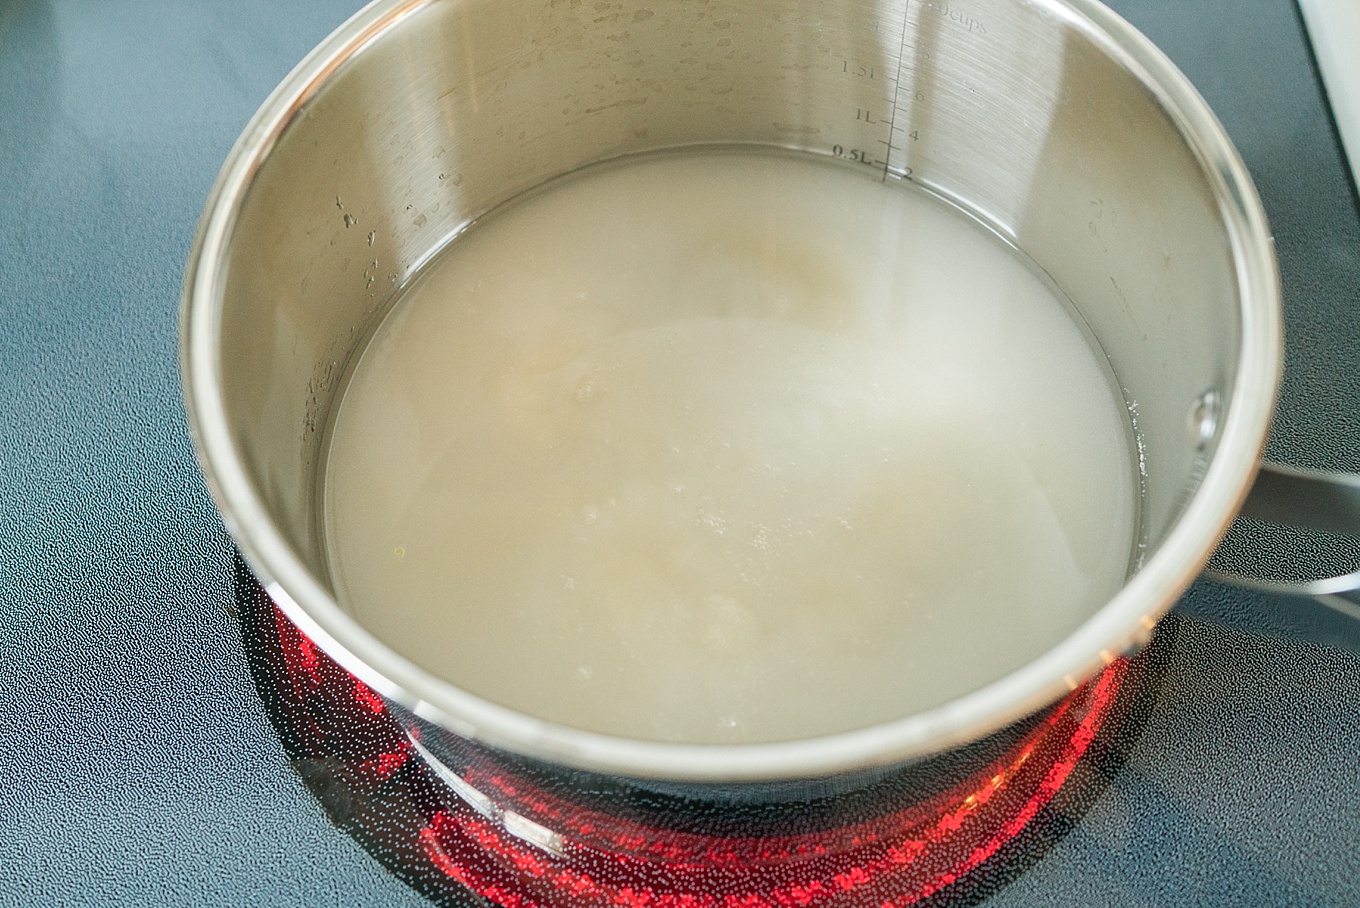
Put your sugar in a medium size pot that has a lid. Pour the water around the edges to soak the sugar.

Salted Spiced Caramel Sauce

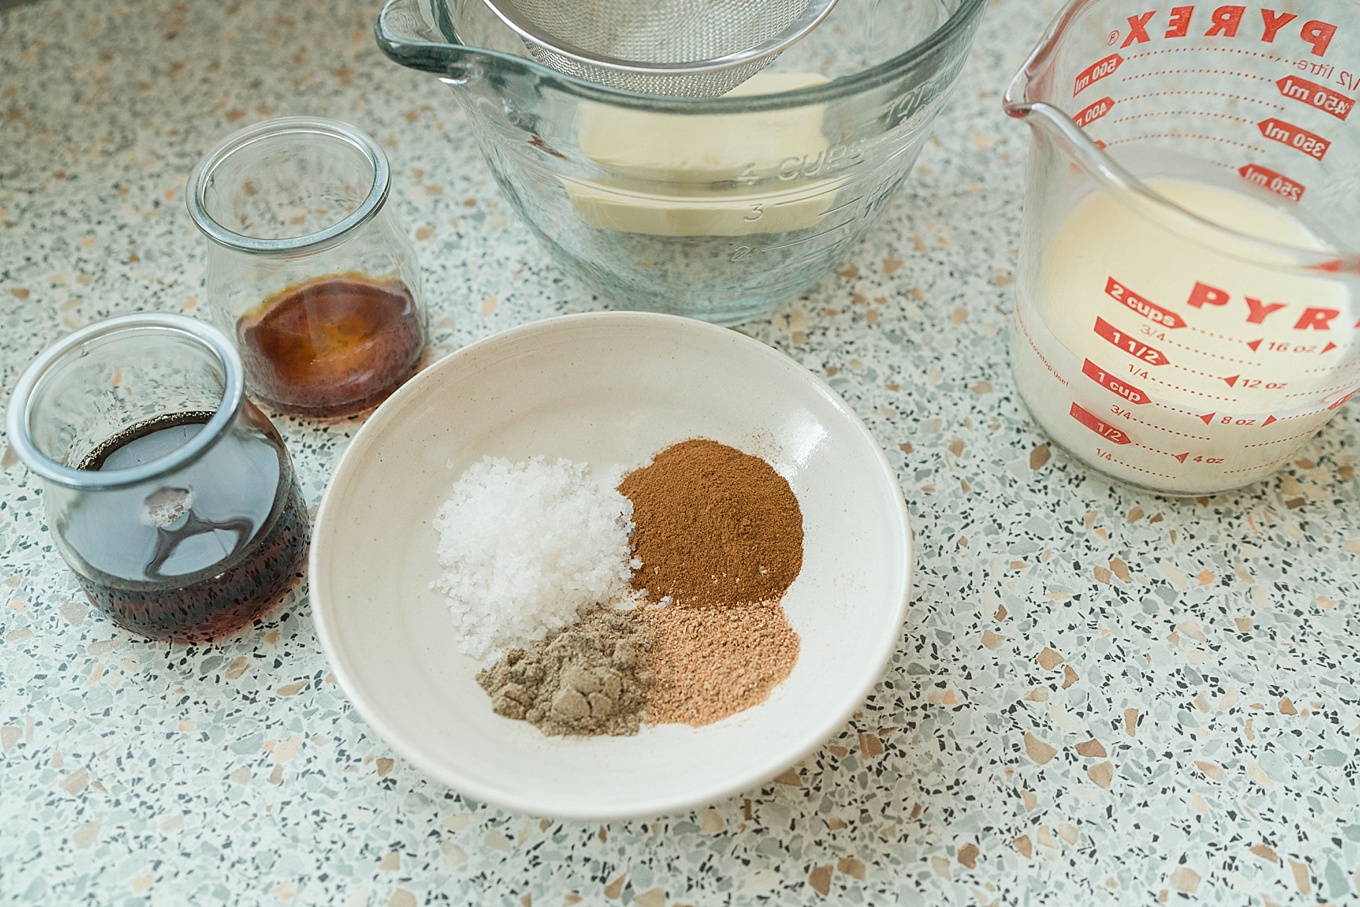
Warm the cream in the microwave for one minute. If you put cold cream into the hot sugar, it will splatter. Measure out your spices, maple syrup, and vanilla. Set aside.

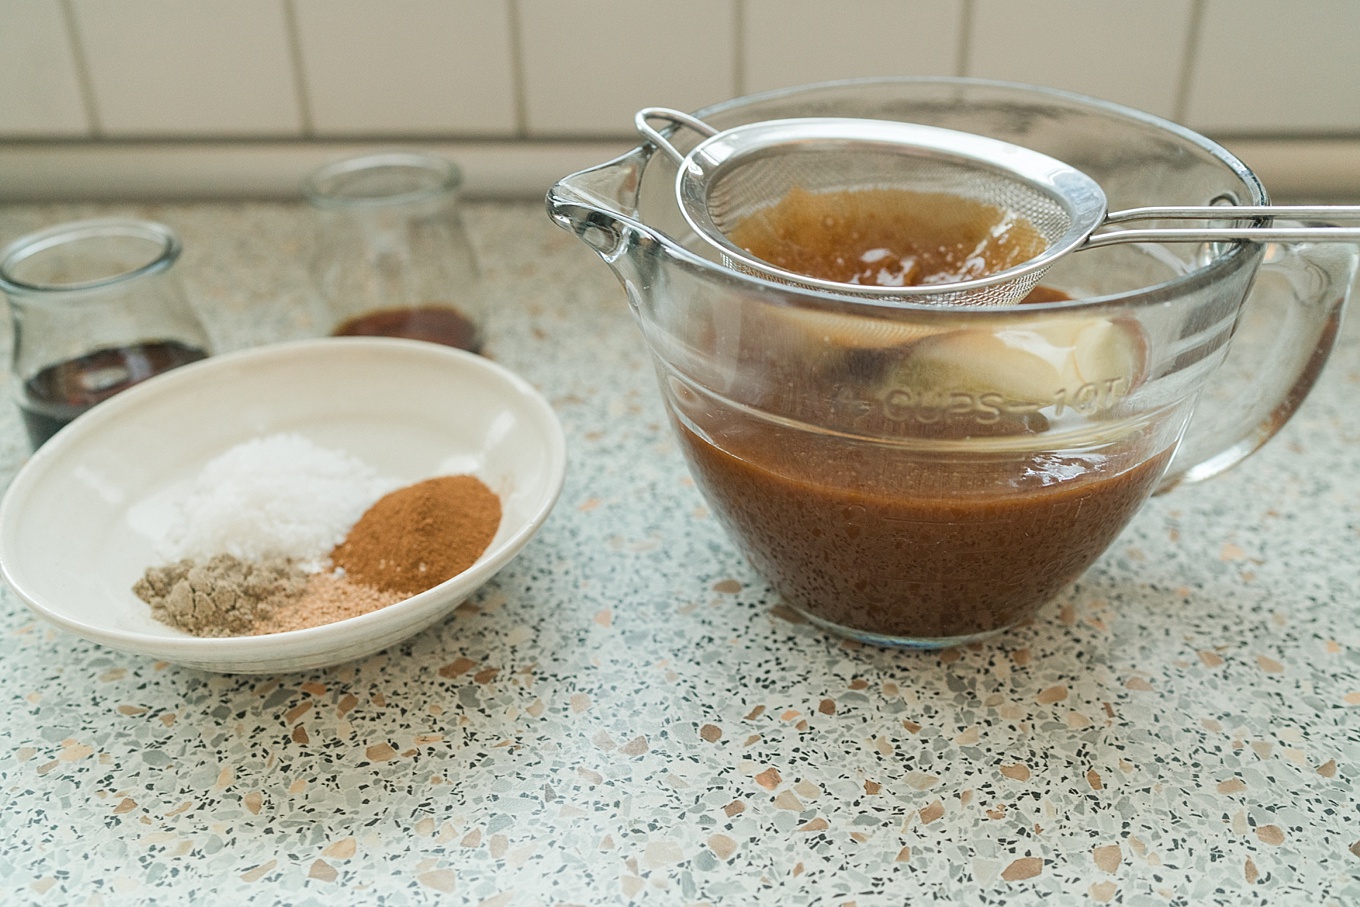
Place the cold butter in the bottom of a heat-proof bowl. Place a sieve over the bowl.

Salted Spiced Caramel Sauce

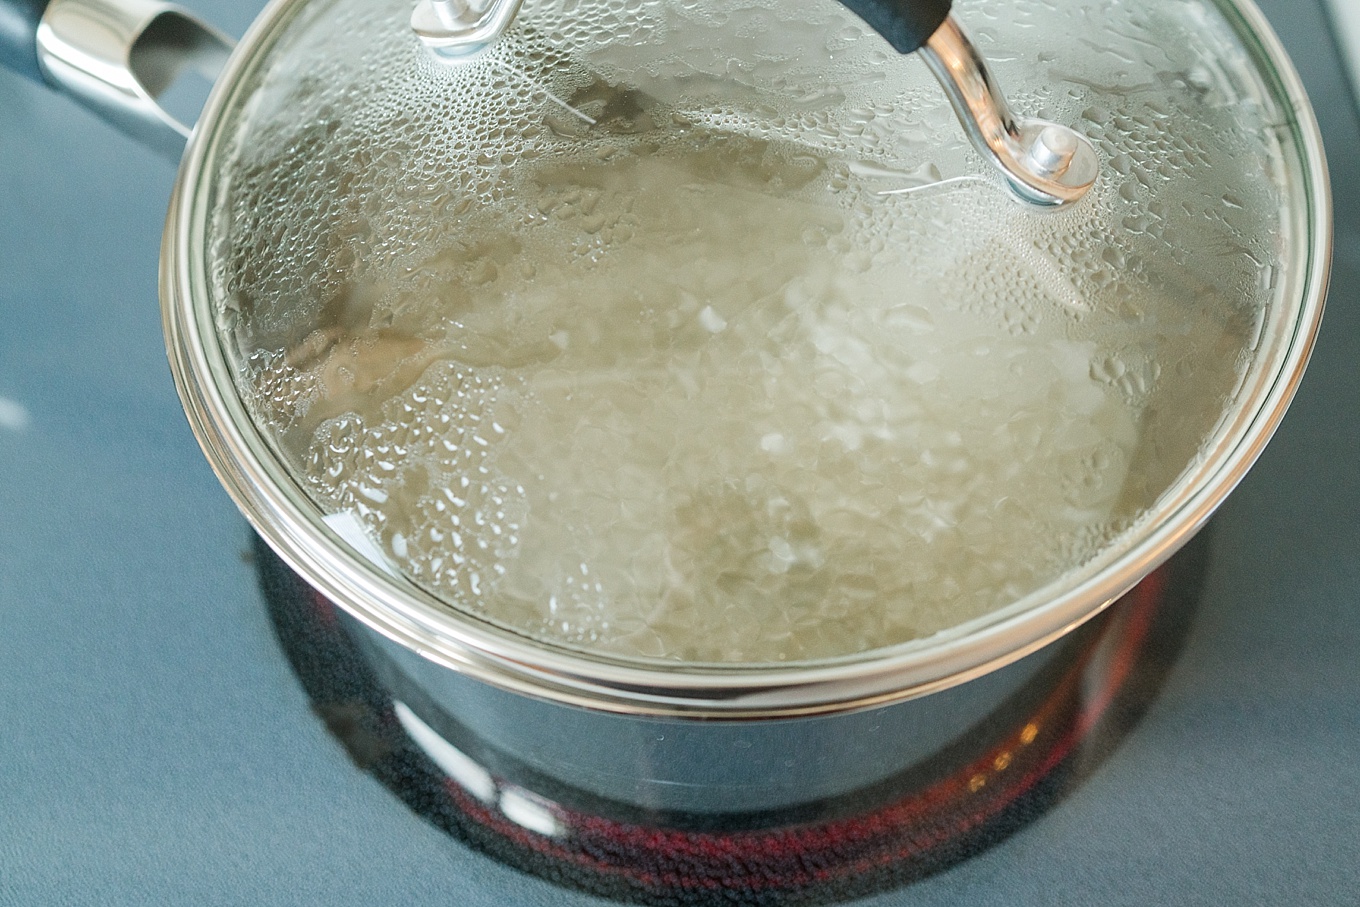
Put the lid on and place on the stove over medium-high heat.

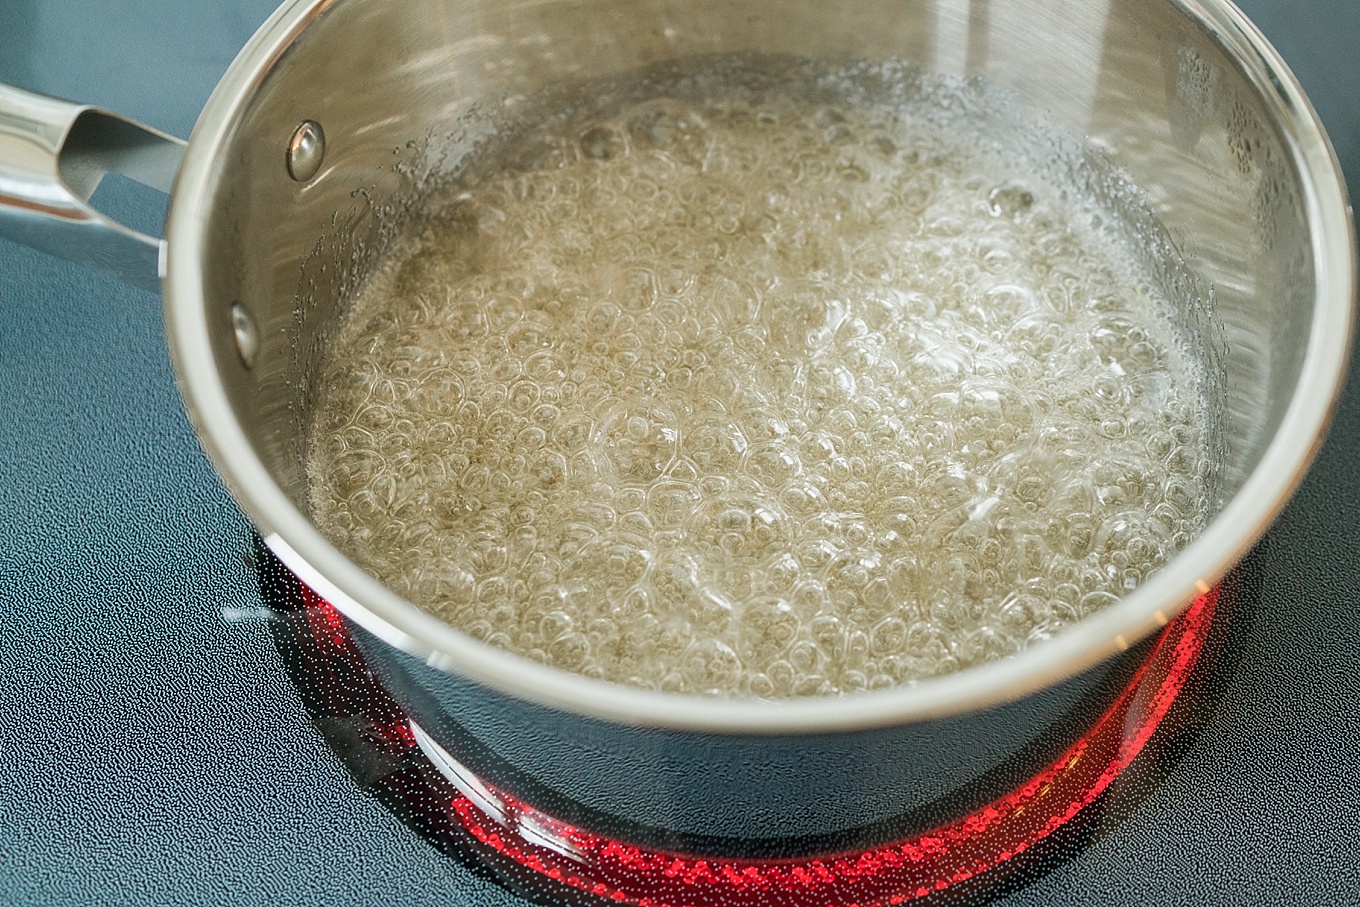
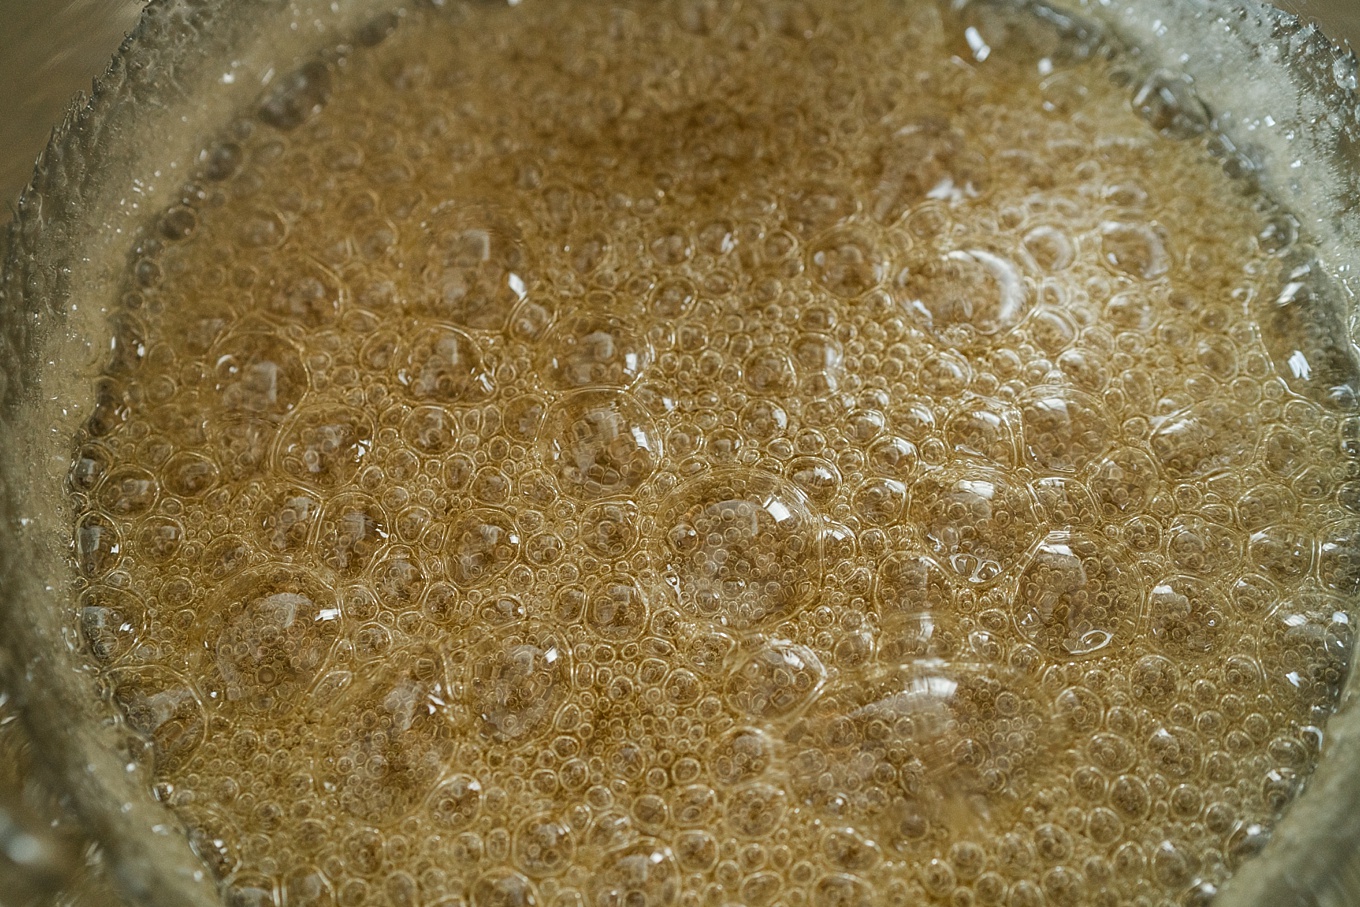
Salted Spiced Caramel SauceWhen the sugar comes to a boil, remove the lid.
Salted Spiced Caramel Sauce

Let boil until it reaches an amber color. It takes about 4 to 7 minutes. You need to babysit this because it will burn quickly after it turns amber. Resist the urge to fold laundry or to check your phone.

Salted Spiced Caramel Sauce

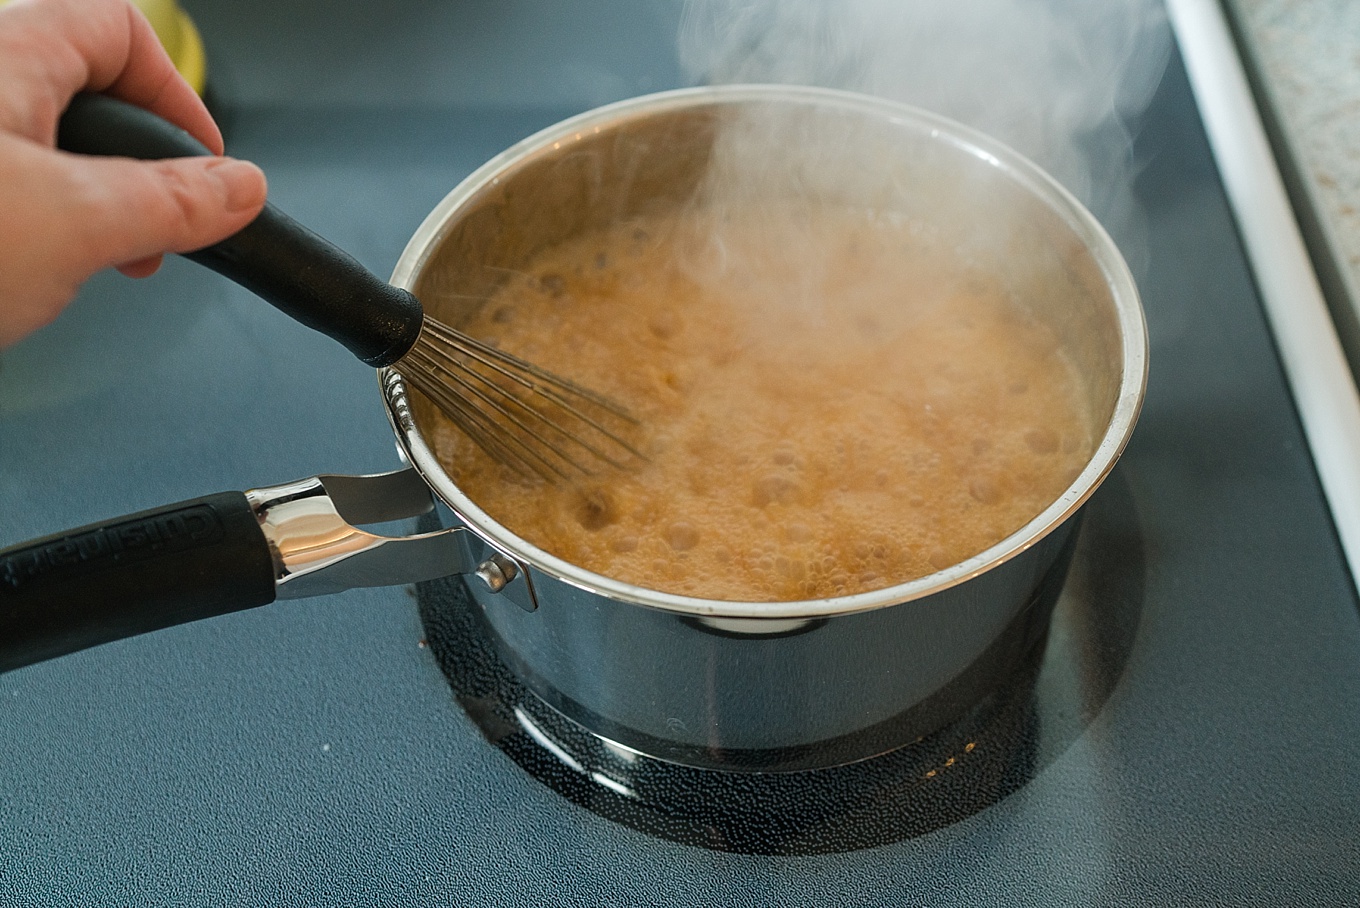
When the sugar is amber, slowly whisk in the warm cream. It will bubble and spit, so please be careful. Keep whisking until it comes together.

Salted Spiced Caramel Sauce

Pour the sugar mixture through the sieve onto the butter. This will get rid of any sugar that has crystallized so the caramel is silky smooth.

Salted Spiced Caramel Sauce

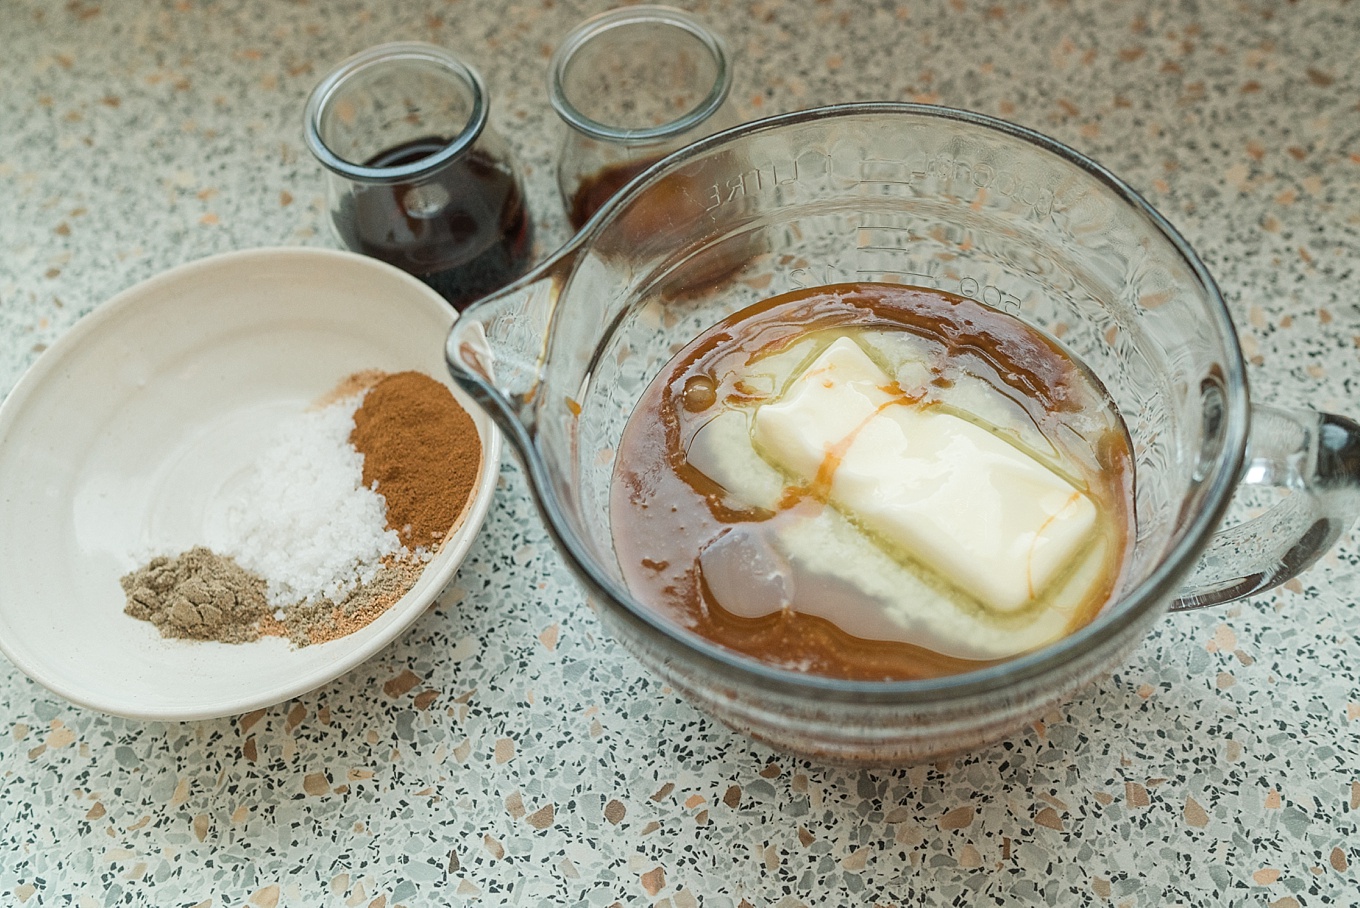
Let sit so the butter begins to melt.

Salted Spiced Caramel Sauce

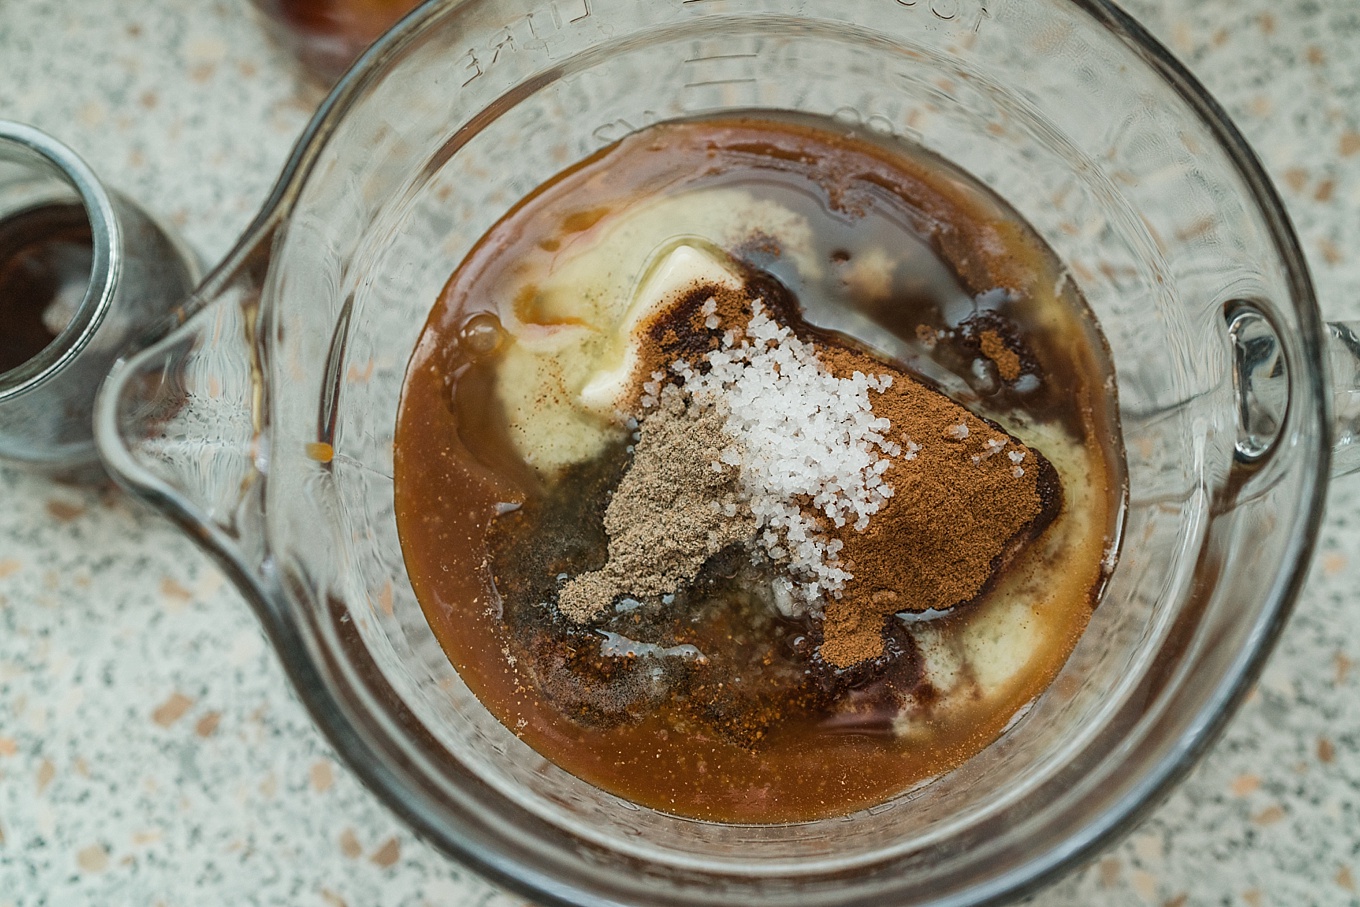
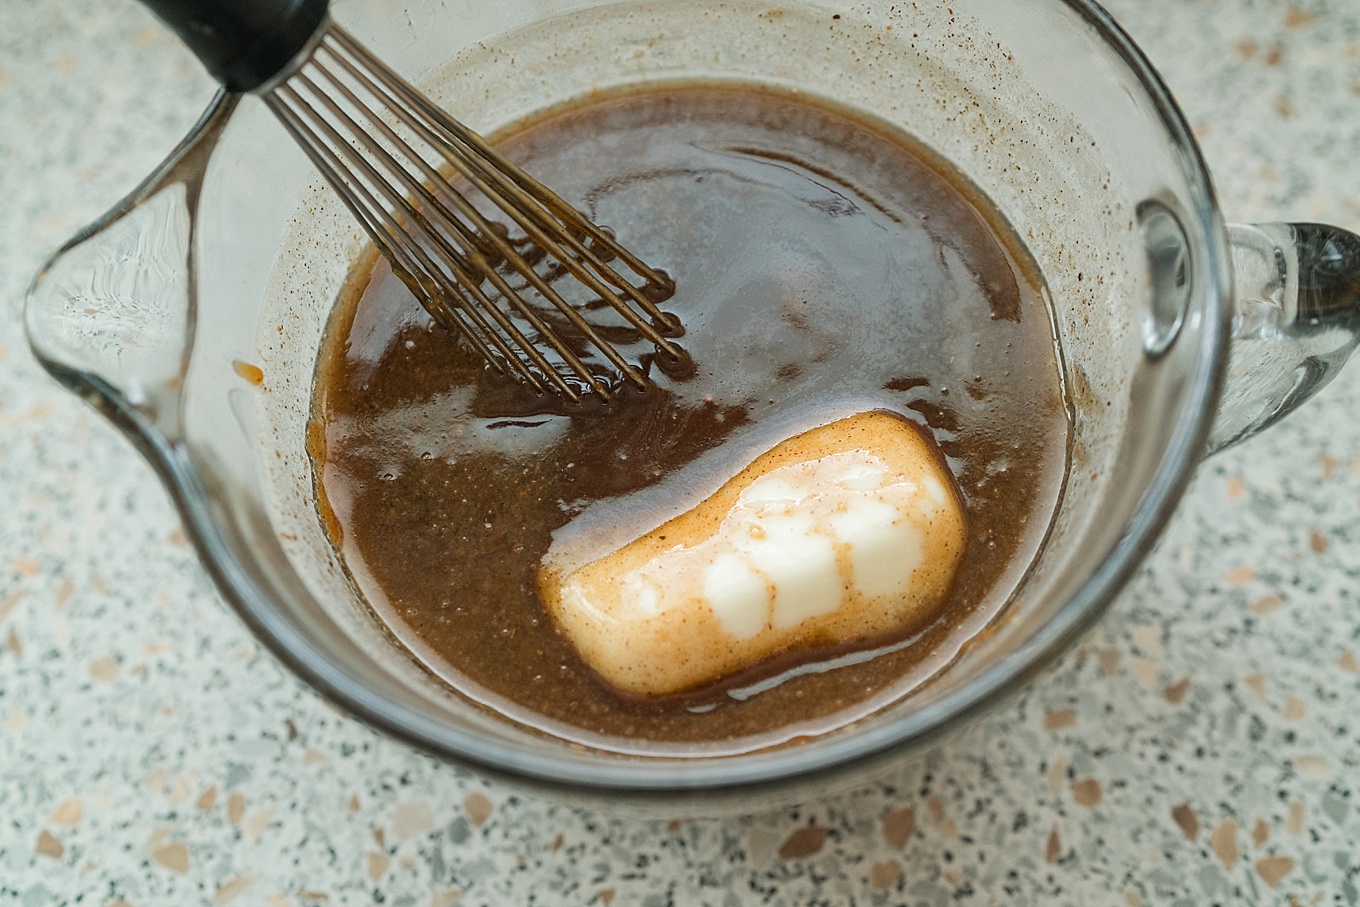
Add the spices, salt, syrup, and vanilla.

Salted Spiced Caramel Sauce

Keep whisking until the butter is completely melted.

Salted Spiced Caramel Sauce

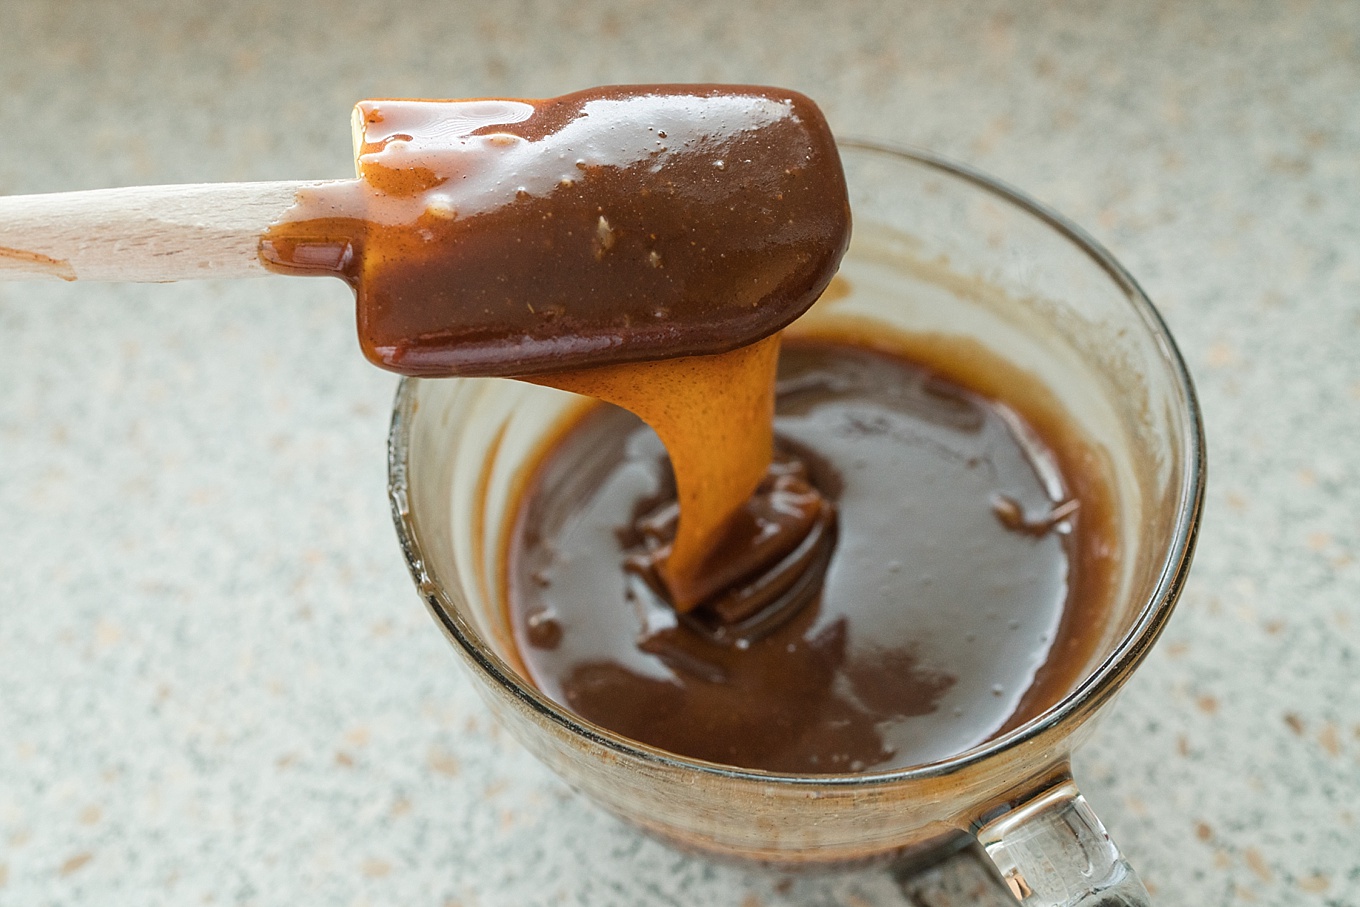
The caramel sauce will thicken as it comes together (it will thicken even more as it cools). Pour into jars and seal. I keep mine in the fridge for up to 2 weeks.

Salted Spiced Caramel Sauce

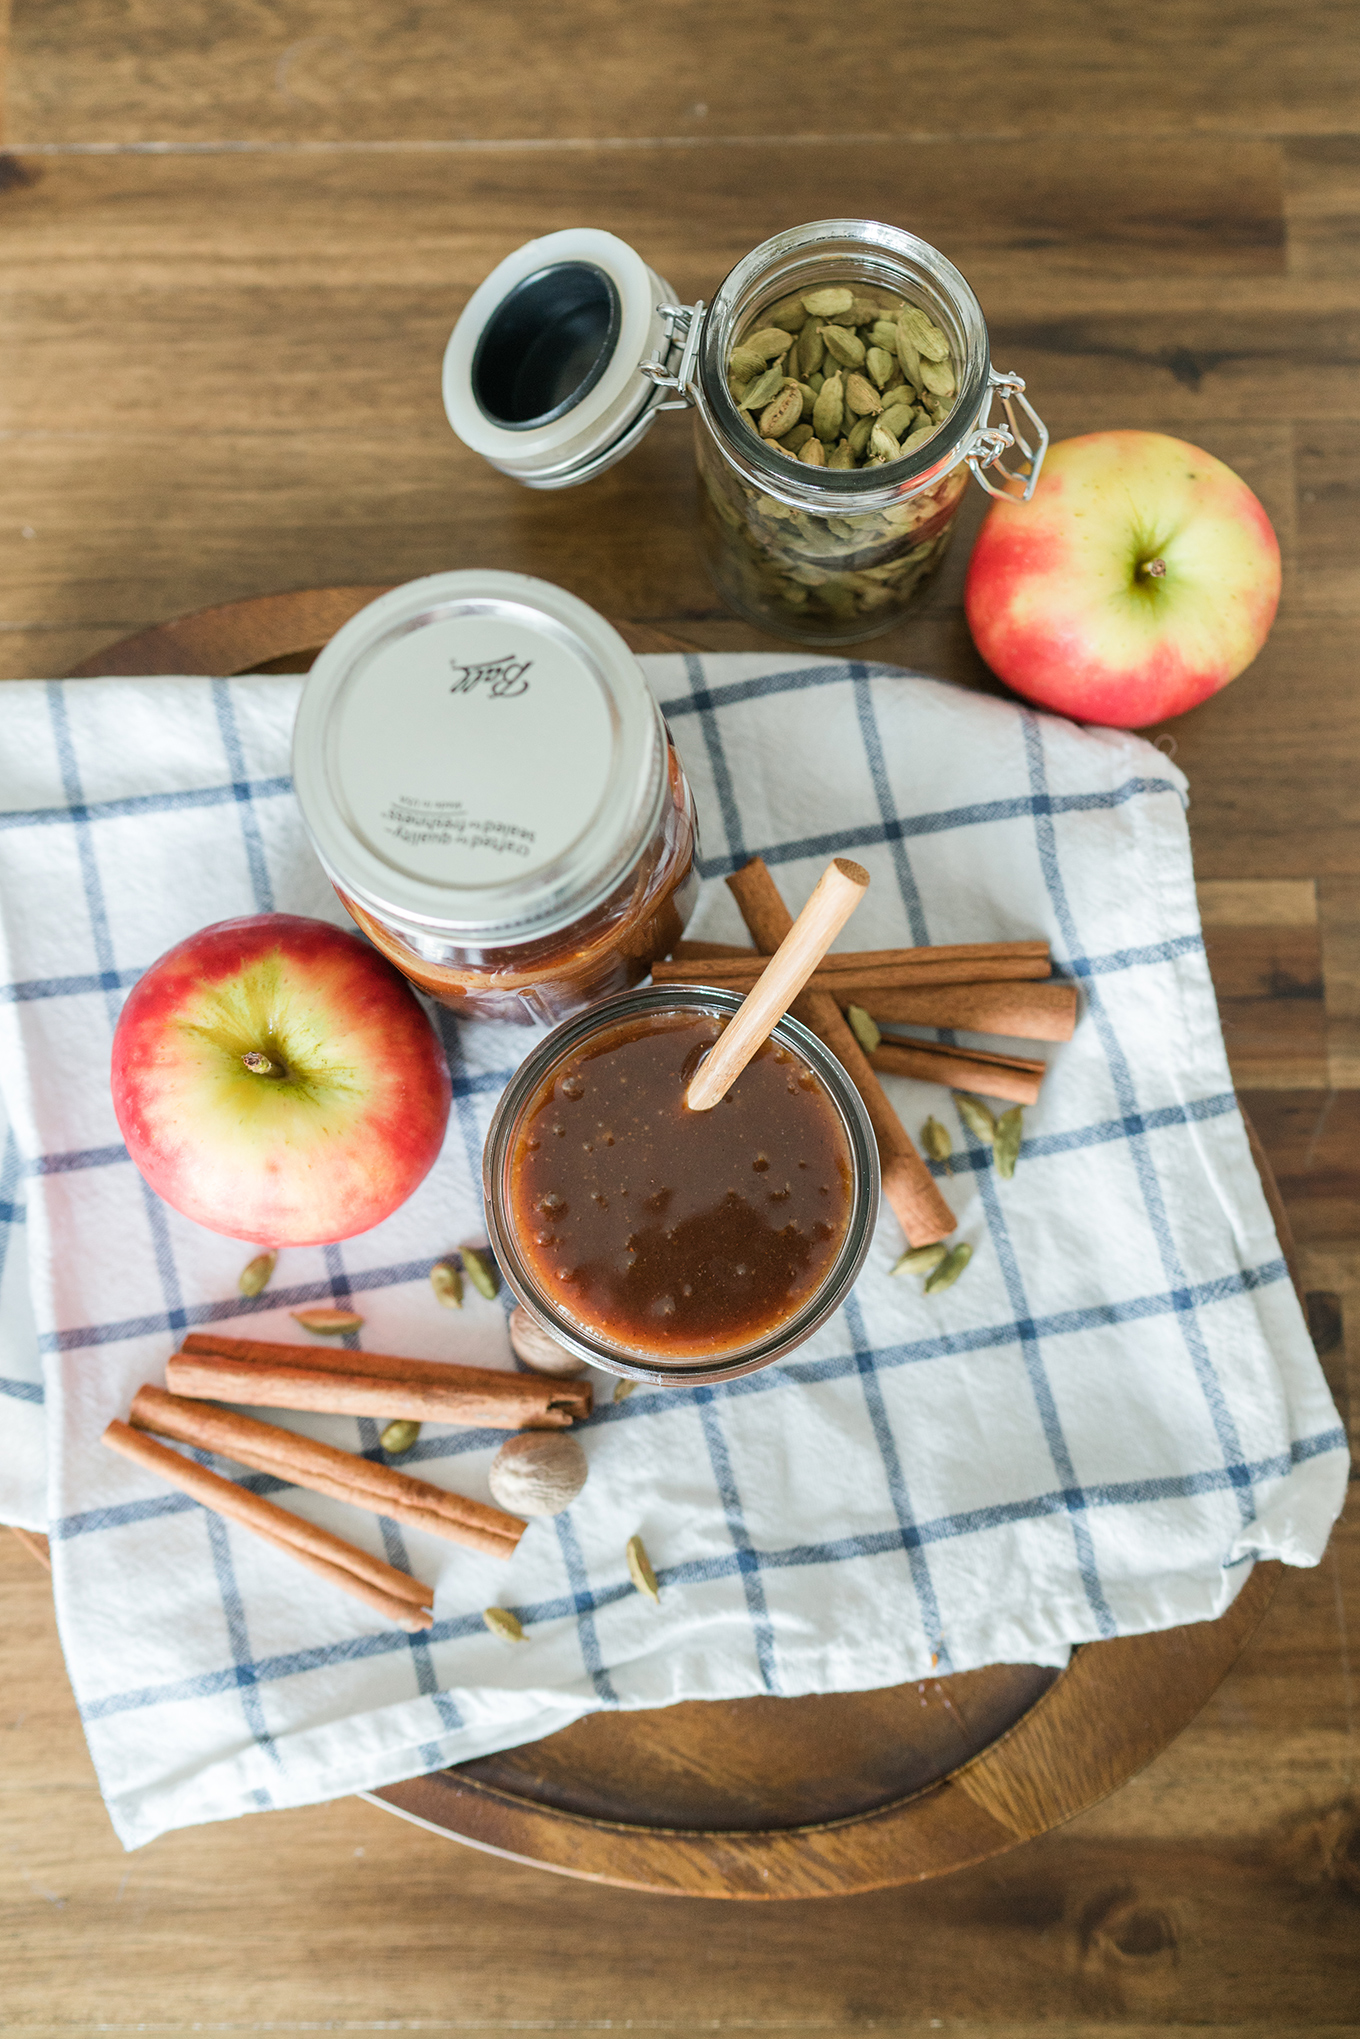
Serve with apple wedges for dipping, heat gently to pour over ice cream, add to your favorite pie, or just eat it straight from the jar with a spoon. No judgement here.

Salted Spiced Caramel Sauce
 
Print
Salted Spiced Caramel Sauce is delicious for dipping apples, over ice cream, or drizzled over apple pie.
Author: Bree Hester
Serves: 2.5 cups
Ingredients
  • 1 cup plus 2 Tablespoons sugar
  • 3 Tablespoons water
  • ½ cup heavy cream (warmed in the microwave)
  • ¼ cup COLD butter
  • ¼ cup pure maple syrup
  • 2 teaspoons vanilla
  • ¾ teaspoon sea salt
  • ¾ teaspoon cinnamon
  • ¼ teaspoon cardamom
  • ½ teaspoon nutmeg
Instructions
  1. Heat cream in the microwave for one minute. Add butter to a heatproof bowl and place a sieve over the bowl. Measure out maple syrup, vanilla, salt, and spices. Set aside.
  2. Place the sugar in a heavy pot and pour water over. Cover with a lid and cook over medium-high heat until it comes to a boil. When boiling, remove lid and continue to cook until the sugar turns a golden amber color, about 4 to 7 minutes.
  3. Remove from heat and slowly whisk in warm cream. Continue to whisk until smooth. Pour through sieve over cold butter. Let sit for a minute and then add maple syrup, vanilla, salt, and spices. Whisk until butter has melted and everything is smooth.
  4. Pour into jars.
3.5.3226

Salted Spiced Caramel Sauce

If you enjoyed this post you might also like…

  • Apple Butter
  • No-bake Pumpkin Spice Cookies
  • Easy Applesauce Muffins
  • No-Bake Apple Cinnamon Bites

How to Stop Letting Perfectionism Ruin Your Motherhood

Sunday, October 15, 2017

Your kids don’t need a perfect mom, they need a happy mom. How to stop letting perfectionism ruin your motherhood.

Your kids don't need a perfect mom, they need a happy mom. How to stop letting perfectionism ruin your motherhood.

Photos courtesy of Courtney Fairchild Photography

Perfectionism can be my strong suit when it comes to business, photography, and executing projects; but when it comes to motherhood, it can get really messy.

In fact, slowly and oh-so-painfully, motherhood has taught me to let go of the picture-perfect vision I so often like to uphold in my mind.

I clearly remember the day I began to unravel. I was sitting on the couch, face in my hands, a figurative white flag looming over my head. Feeling defeated and utterly exhausted from all of my unmet expectations.

The rug that lay before me was scattered with toys, the kitchen sink full of dishes, my once clean floor now tainted with sticky pasta, a chair pulled up to the counter, and cabinet doors left all ajar. And there I sat, in my pajamas at noon—I was a mess and I fit the scene perfectly.
I took a deep breath, wondering what kind of game I was trying to play.

I wanted to have it all together (really I did), but on this particular day I just couldn’t. The perfectionist in me was raging, but something else inside of me was done.

I could hear my children playing happily in the next room.

“Let me check your heartbeat,” I could hear my son say. “Now your eyes, ears, and your blood pwessure too!”

Swish, swish, swish. I could hear him inflating the toy cuff.

What was I doing to myself? I thought.

Perfectionism is robbing us of a beautiful, messy, and authentic motherhood. It's an all or nothing game, and there's just no winning. Maybe we can start letting go of perfect and give ourselves credit for simply doing our best.

Each and every day I was trying my hardest to do and be all of the things–so desperately wanting control, but it was always out of reach.

I wanted to be the room mom, the put together mom, the business savvy mom, the mom with the clean house, AND the mom that got a shower before noon. But there just weren’t enough hours in the day.

“Maybe you should come check mommy’s blood pressure.” I decided to call out.

My son came quickly, a huge smile on his face. Wrapping the cuff around my arm, while giving it a few gentle squeezes, he looked into my eyes. I scooped him up and put his cheek next to mine.

It was in that moment that I realized that my kids don’t need a perfect mom, they need a happy mom.

Perfectionism is robbing us of a beautiful, messy, and authentic motherhood. It's an all or nothing game, and there's just no winning. Maybe we can start letting go of perfect and give ourselves credit for simply doing our best.

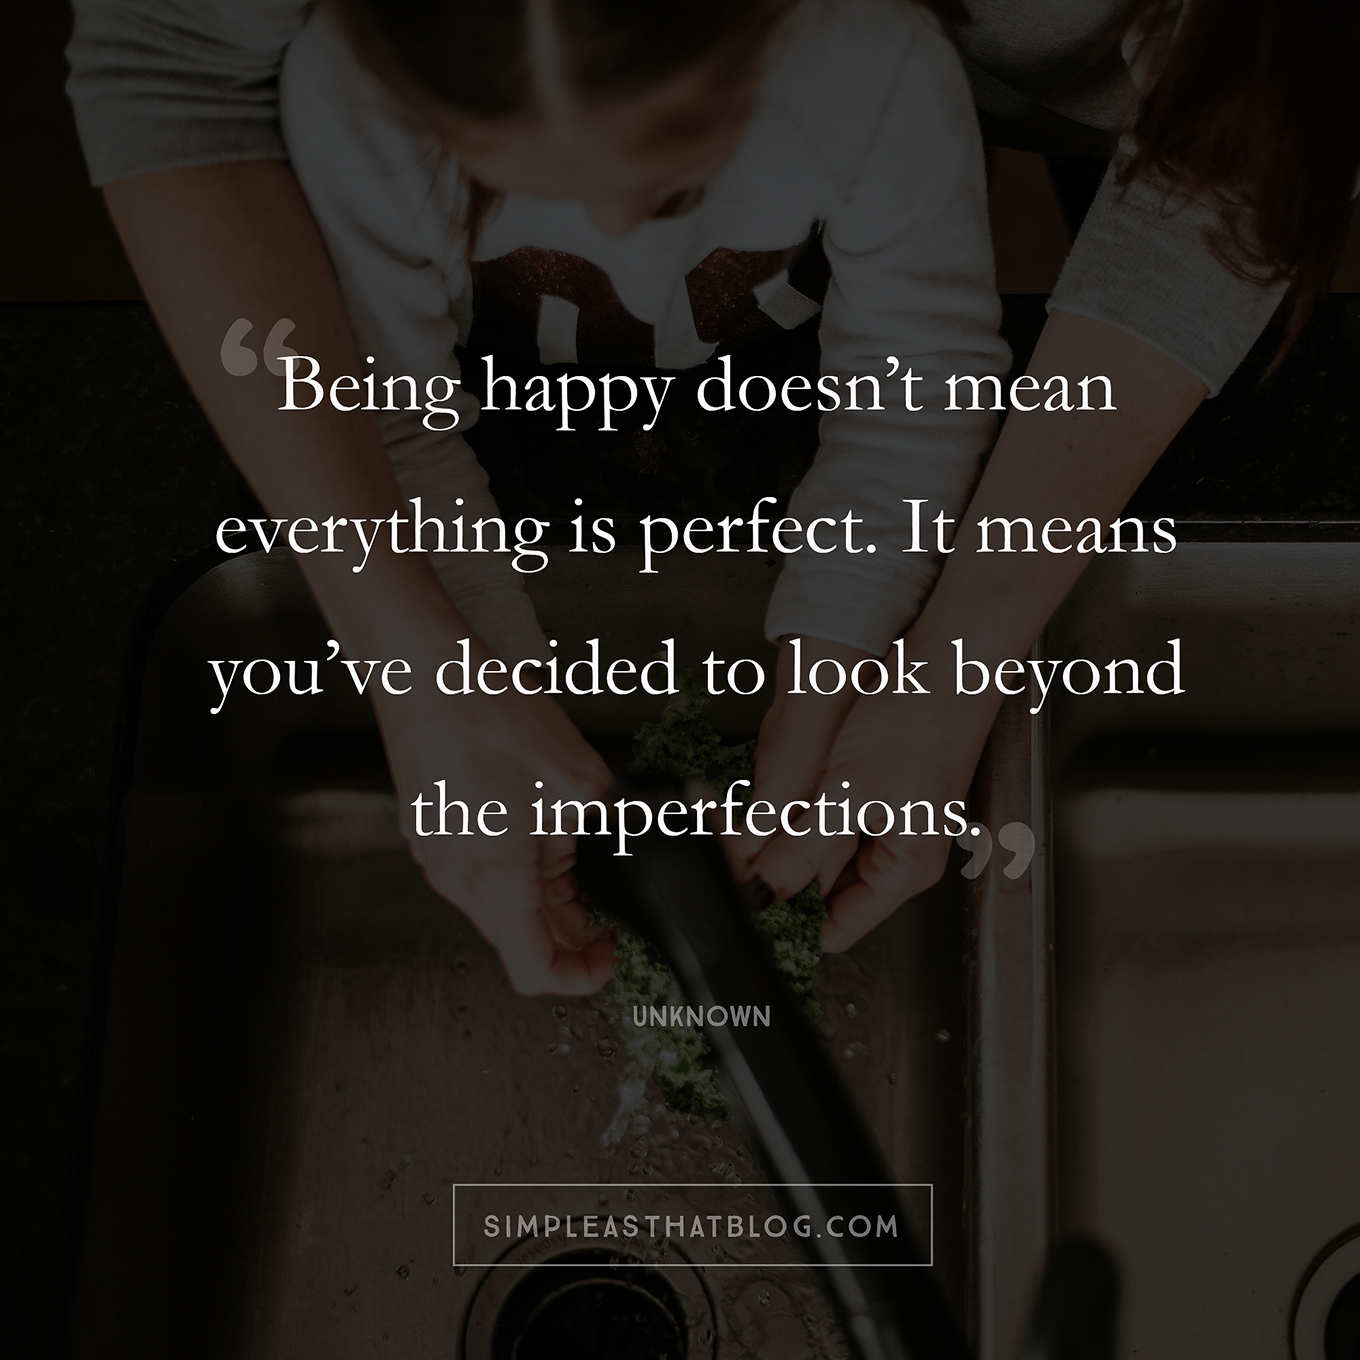
“Being happy doesn’t mean everything is perfect. It means you’ve decided to look beyond the imperfections.”

Today was the day I needed to begin adjusting the lens through which I was viewing my world to something more realistic. Because the most important thing of all, is not how everything looks on the outside, but how everything feels on the inside.

How to Stop Letting Perfectionism Ruin Your Motherhood

1. Understand that this is a season. 

A messy, but beautiful season. I feel it going fast, and maybe you do to?

Embrace your season for what it is.

Pick out moments of beauty in the messiness, and know that it will eventually pass. We only get a certain amount of time with our children, so although the days feel long, the years may blur into something that in the end, felt wistfully short.

2. Know that you CAN and should control a few things.

Everyone needs a tangible amount of control.

Can you select a few manageable areas to keep in check?

Maybe it’s a clean and organized purse, making your bed each day, or thirty minutes of Netflix each night—no matter what. Choose what matters to you, and let those things be a predictable source of stability in your life.

You can’t control everything, but you can control a few things.

Your kids don't need a perfect mom, they need a happy mom. How to stop letting perfectionism ruin your motherhood.

3. Adopt a “good enough” mentality.

Chicken nuggets will do when you forgot to plan for dinner. Hair in a bun. Yoga pants. Those will do too.

What can you call “good enough” on today?

In her book, The Happiness Project, author Gretchen Rubin explains this:

“A twenty-minute walk that I do is better than the four-mile run that I don’t do…The dinner party of take-out Chinese food is better than the elegant dinner that I never host.”

Doing something is better than nothing.

4. Realize this.

Perfectionism keeps us from living fully present in our lives. When we are comparing and aiming for perfection, we are always thinking about what we can do next, and how we can be better. But that’s robbing us of precious moments, and we’re missing the beauty of a messy, yet authentic life.

The pursuit of perfection is also an all or nothing game. Just like my day of surrender, it tells us that if we’re not doing our absolute best, we shouldn’t try at all. There’s just no winning!

Maybe we can start letting go of perfect and give ourselves credit for simply doing our best.

I have learned that there is no FUN in perfection.

If you liked this post you might also enjoy…

  • Motherhood Is a Beautiful Work of Art
  • Stop Looking for Perfect and Embrace What Is
  • Motherhood Simplified
  • Confessions of an Unbalanced Mom

Your kids don't need a perfect mom, they need a happy mom. How to stop letting perfectionism ruin your motherhood.

How to Make Exercise Fun

Tuesday, October 3, 2017

Hello, friends! I’m Rachel Gainer of rachelrebuilt.com, personal trainer and fitness nutrition specialist here at Simple as That.

I used to believe a workout didn’t count or wasn’t worth it unless I gave a full hour and ended in an exhausted, sweaty heap on the floor with sore muscles that lasted for days. It wasn’t until I injured my knee two years ago that I learned the power of treating exercise as play: trying new things, pushing boundaries, and experimenting just for the pleasure of moving. Too often, we treat exercise as an obligation, something we have to do because we want the long-term benefits. But exercise shouldn’t feel like a chore. Today, I’m sharing three easy ways to make exercise fun.

Too often, we treat exercise as an obligation, something we have to do because we want the long-term benefits. But exercise shouldn’t feel like a chore. Here are three easy ways to make exercise fun.

Tip 1: Approach exercise like a child at recess

In childhood, movement equals play. But as adults, we start to think of play as frivolous and unproductive, and we believe workouts only count if they make us miserable. That’s so backwards! Play reduces stress, increases happy endorphins, and strengthens commitment to an endeavor. So if you want to see long-term results from your workouts, it’s definitely better to have fun and do what you love!

Tip 2: Focus on the joy of movement

For me, having fun with my workouts means that sometimes I squeeze in a short, sweaty HIIT workout and sometimes I challenge myself with something longer and more intense. Play is a mindset I bring to each workout to help me focus on the joy of movement rather than the discomfort of exercise. Of course, exercise will sometimes be uncomfortable and challenging. But instead of focusing on the unpleasant physical sensations, try focusing on how fun it is to push your physical limits or master new movements.

Tip 3: Add variety to your workout routine

Novelty is a basic human need that keeps us engaged and energized. If you want to make your workouts more fun, mix it up by changing your speed, load (weights), reps, or duration. You can also add a sense of play to your home workouts by testing new moves and incorporating inexpensive equipment—like a stability ball. Take this new philosophy for a test drive during today’s total-body workout, and see how it increases your energy, determination, and strength!

Quick Home Workout

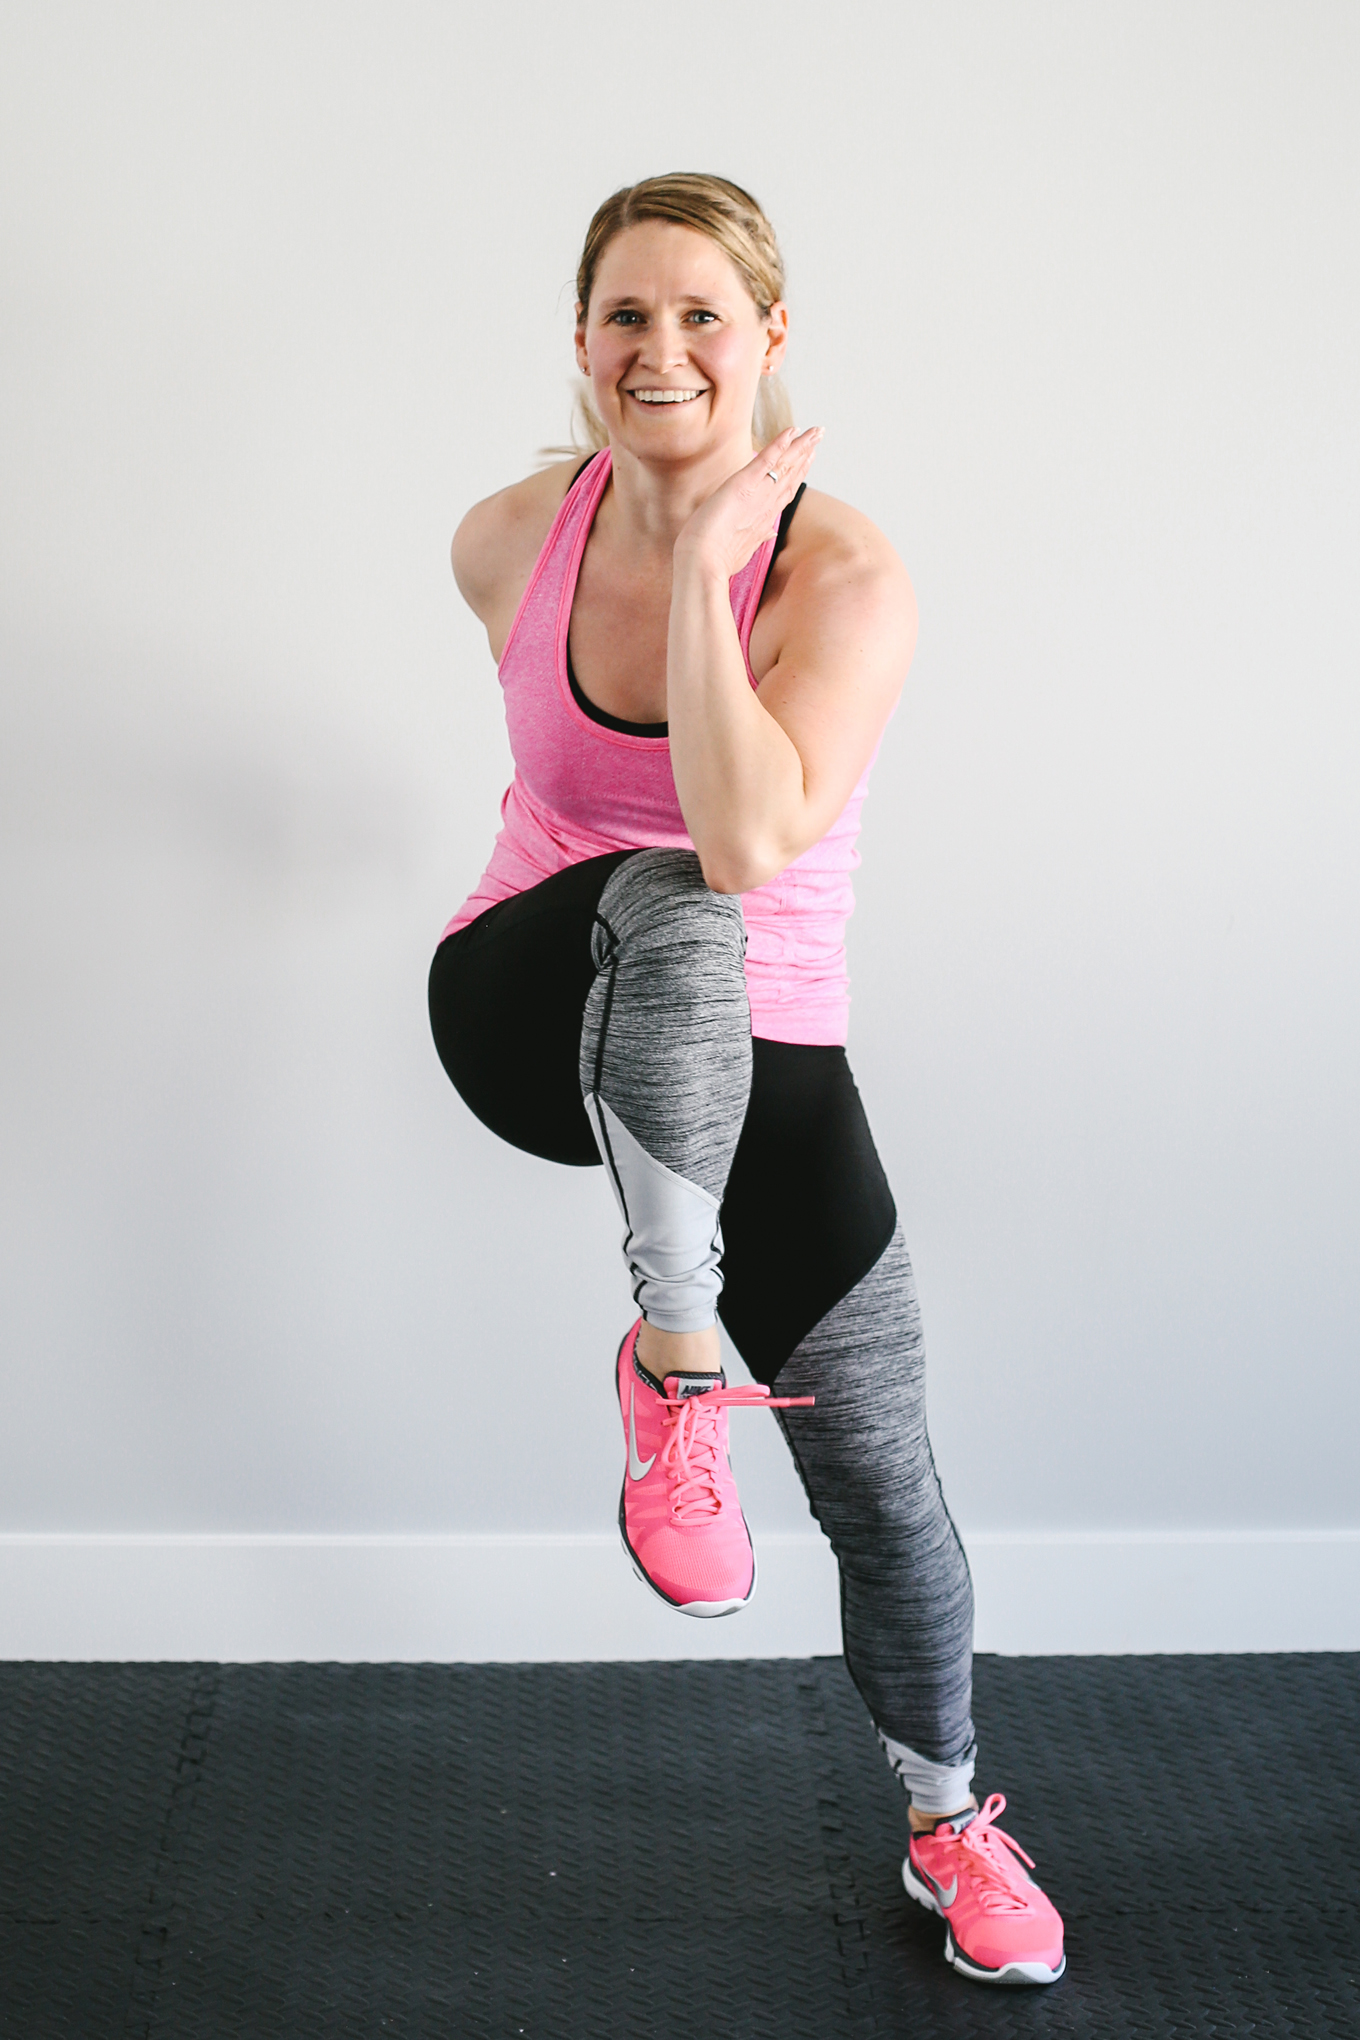
Today’s workout includes four movements using a stability ball and dumbbells. Perform 15 reps of each exercise in the circuit, resting 30 seconds between each exercise. Complete 3 sets. Read the training tips for each exercise, and review the images carefully to observe proper form. For more quick at-home workouts, visit my website rachelrebuilt.com.

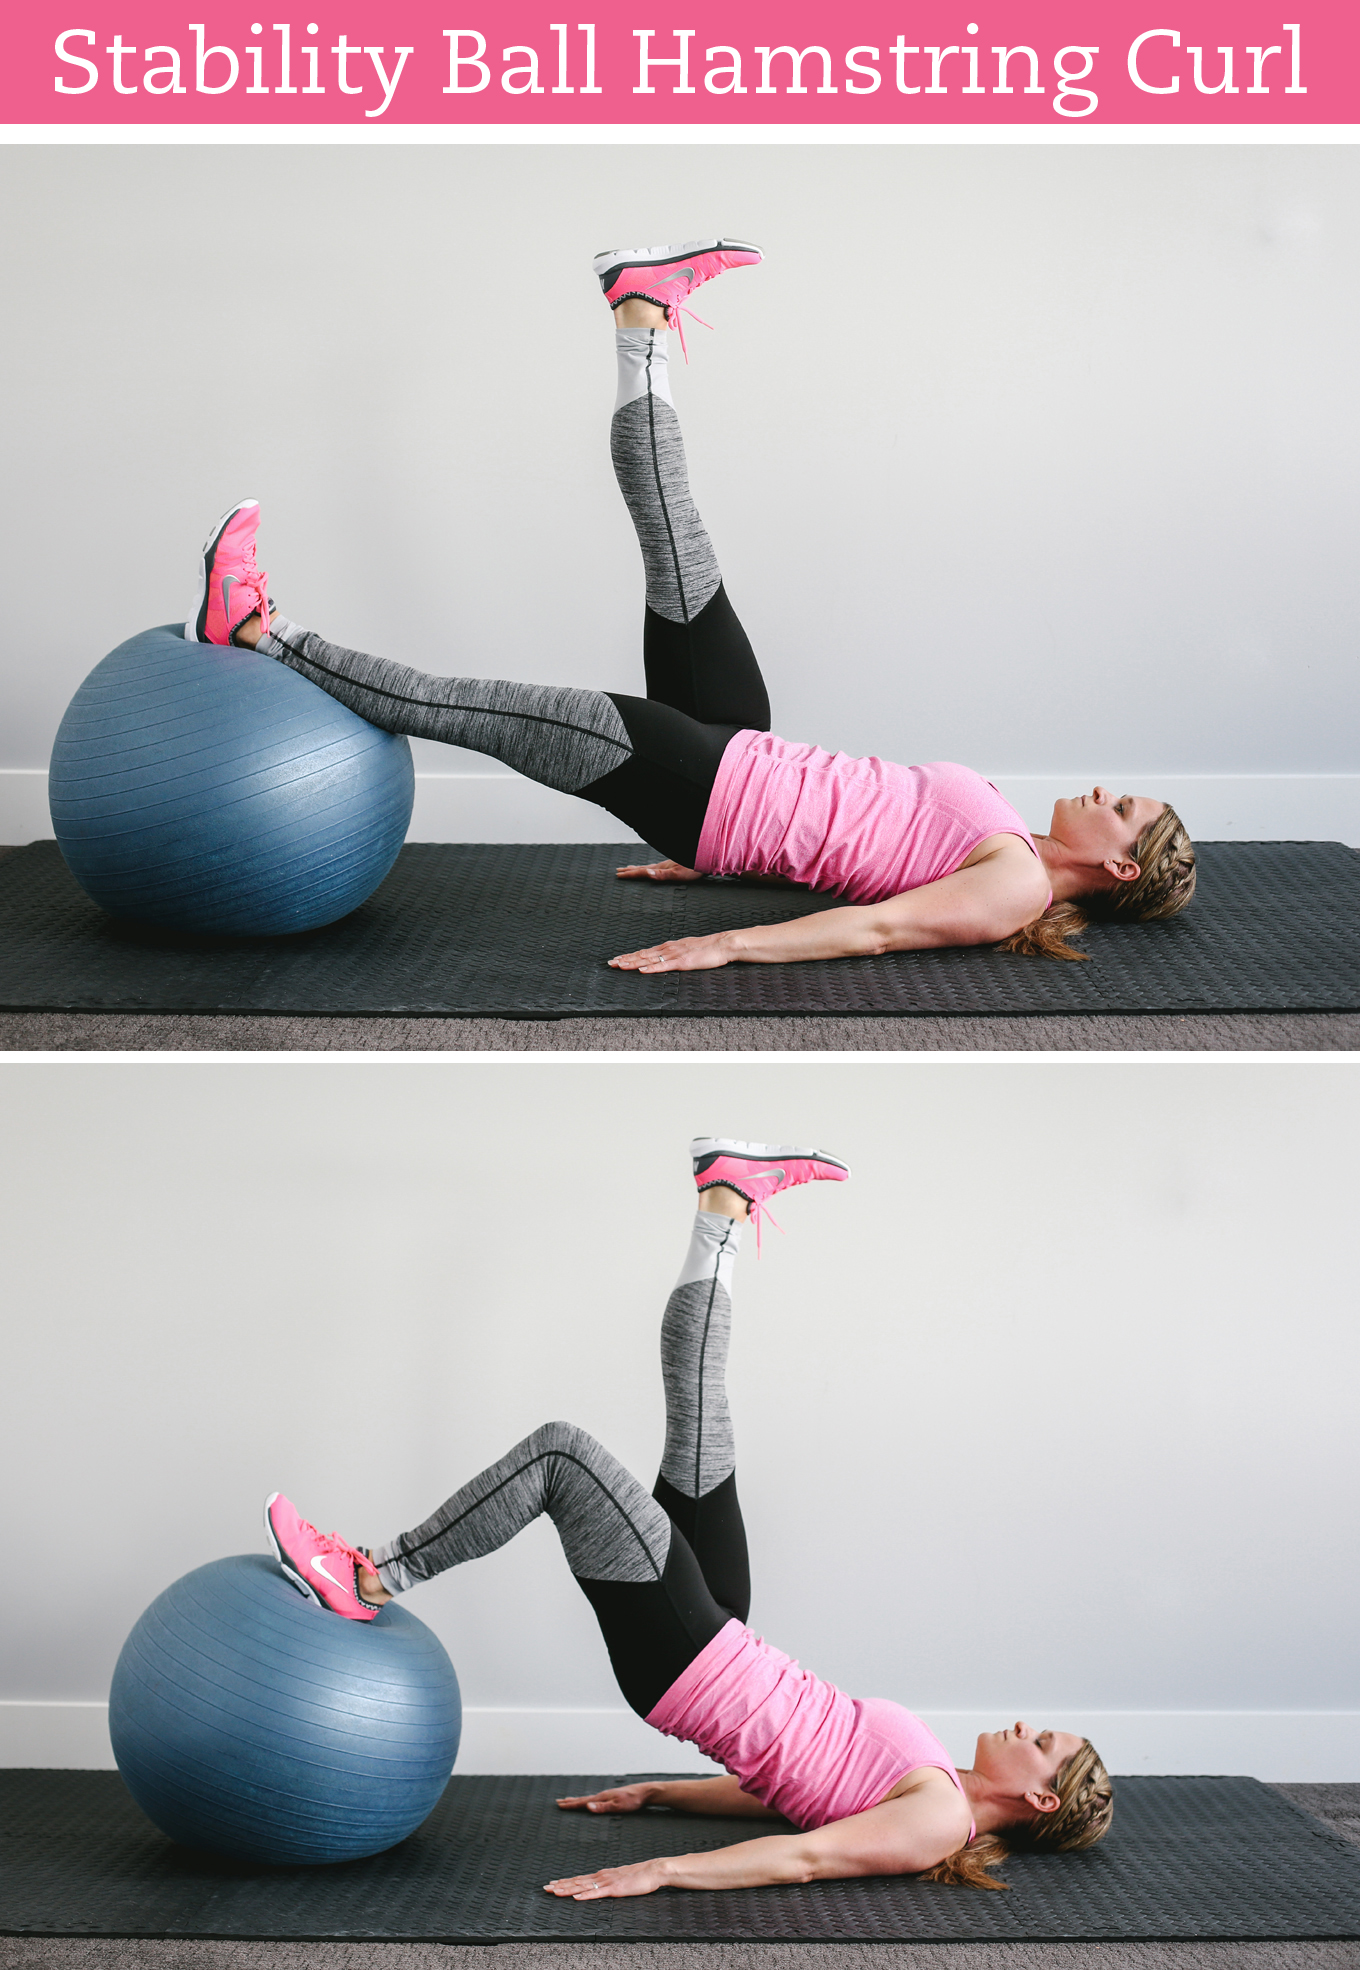
Single-Leg Hamstring Curl (Each Leg)

  1. Start by lying on the ground. Extend one leg straight into the air, and rest the opposite heel on a stability ball.
  2. Press your heel into the stability ball, and lift your hips toward the sky until you feel your glutes engage.
  3. Using your hamstring, pull the stability ball toward your buttocks. Lift your hips and your straight leg as you draw in the ball.
  4. With your hips lifted, roll the stability ball away from your buttocks until your resting leg is straight. (Your hips will naturally drop, but don’t let them drop to the ground.)
  5. Complete 15 reps.
  6. Repeat on the opposite leg.

Too often, we treat exercise as an obligation, something we have to do because we want the long-term benefits. But exercise shouldn’t feel like a chore. Here are three easy ways to make exercise fun.

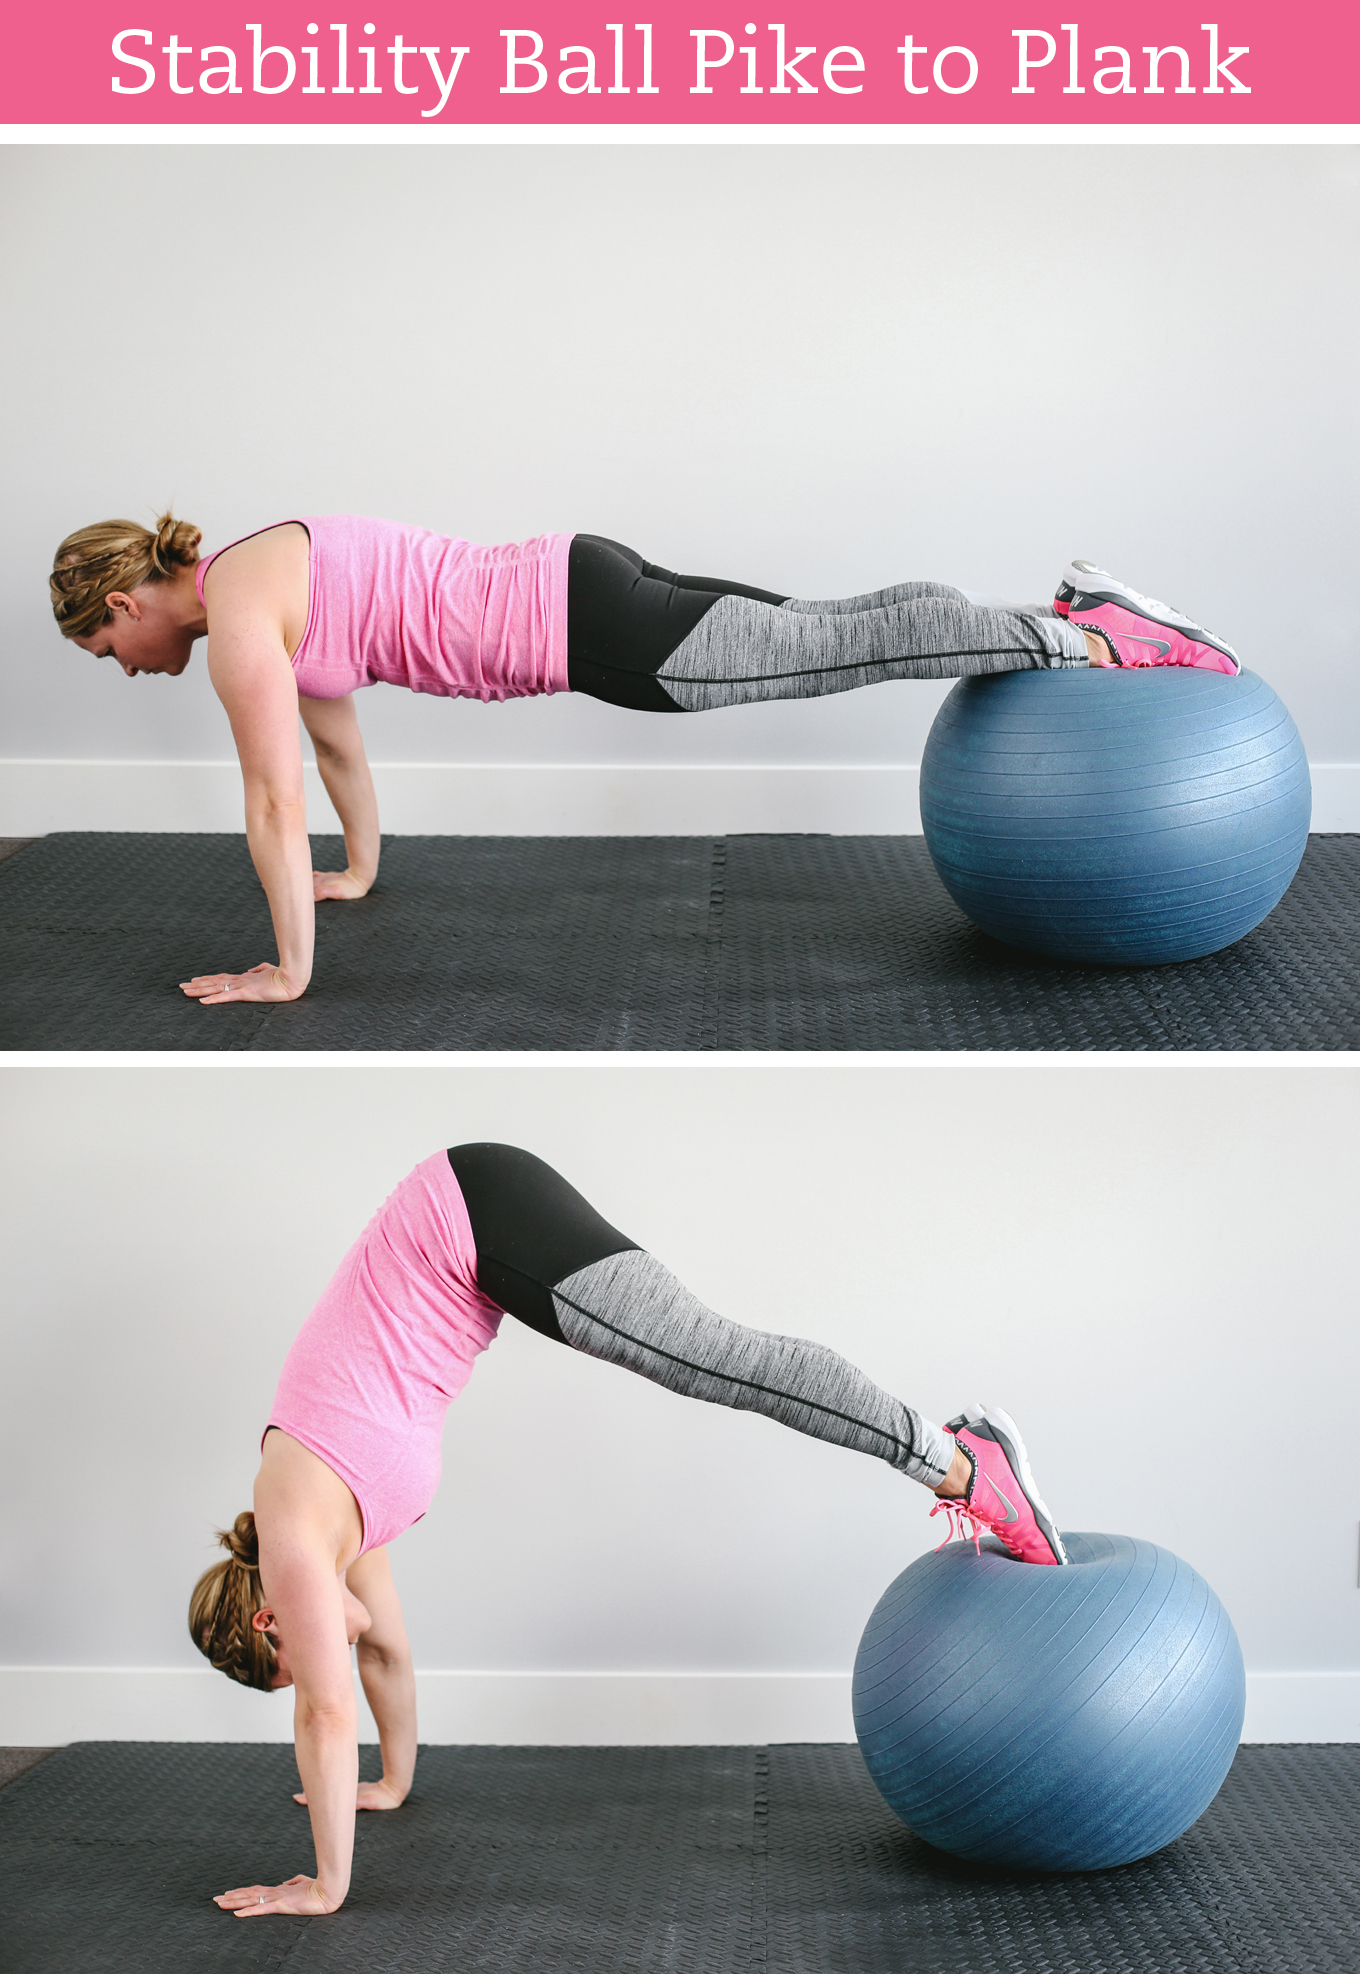
Stability Ball Plank to Pike

  1. Start in plank position with your feet resting on a stability ball.
  2. While balancing on your arms, use your legs and toes to draw the stability ball toward your core.
  3. Simultaneously, lift your hips into a pike position.
  4. Slowly return back to plank position.
  5. Complete 15 reps.

Too often, we treat exercise as an obligation, something we have to do because we want the long-term benefits. But exercise shouldn’t feel like a chore. Here are three easy ways to make exercise fun.

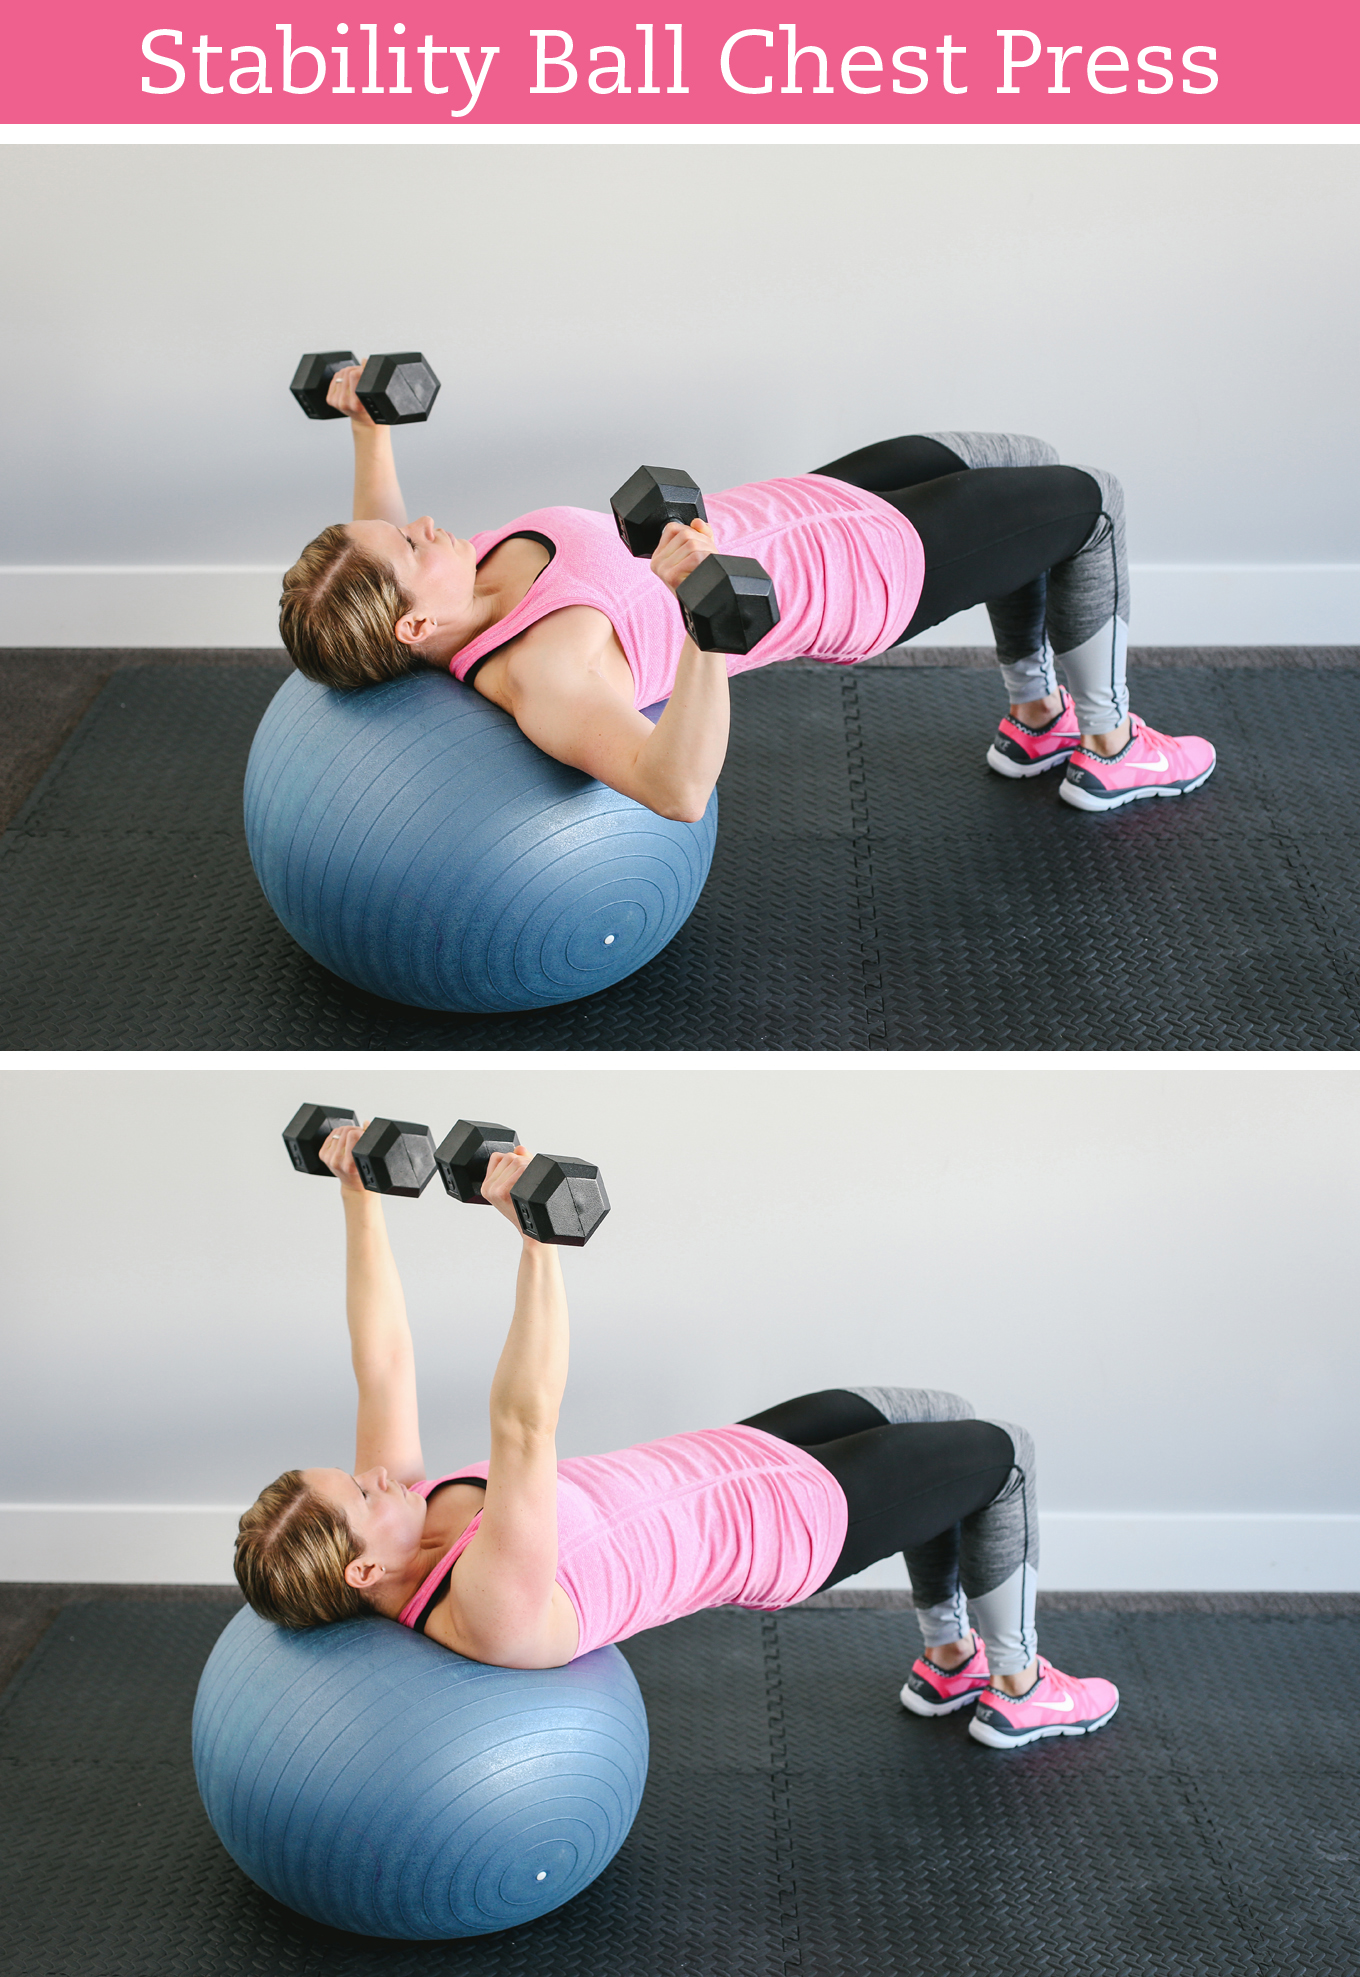
Stability Ball Chest Press

  1. Start by lying on a stability ball with your upper-back and neck comfortably supported and your feet planted on the ground.
  2. Holding a dumbbell in each hand, move your arms into a starting chest press position (illustrated below).
  3. Press the dumbbells straight into the air, above your chest.
  4. Slowly lower the dumbbells back into starting chest press position.
  5. Complete 15 reps.

Too often, we treat exercise as an obligation, something we have to do because we want the long-term benefits. But exercise shouldn’t feel like a chore. Here are three easy ways to make exercise fun.

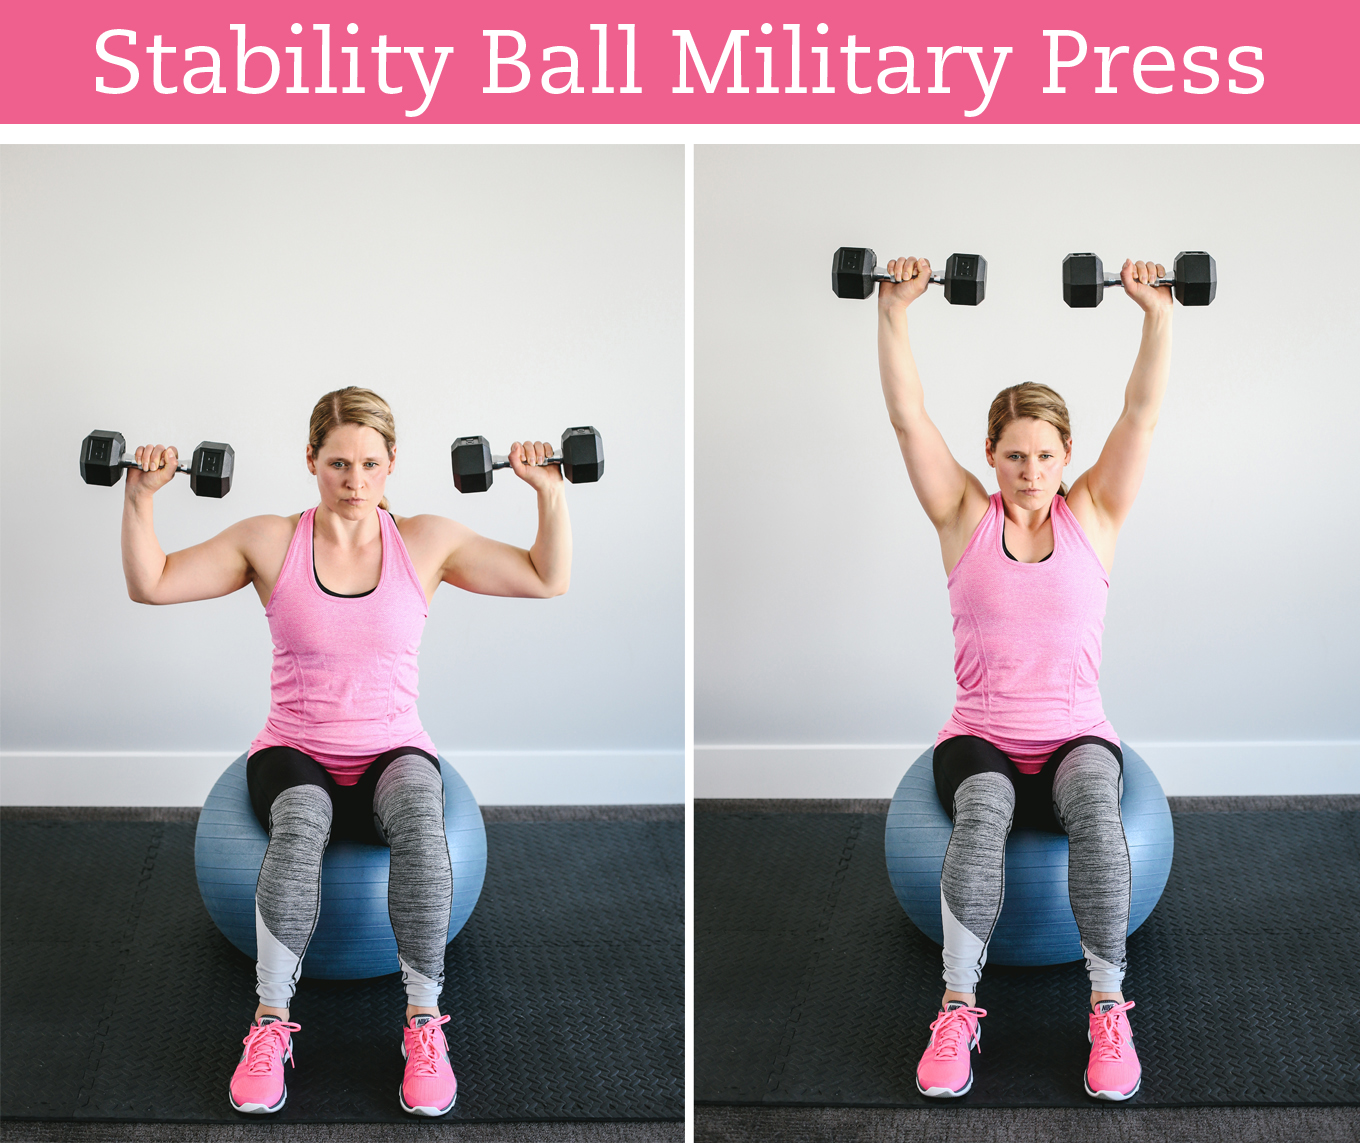
Stability Ball Seated Military Press

  1. Start by sitting on a stability ball with a dumbbell in each hand.
  2. Raise your arms into starting military press position (illustrated below).
  3. Press the dumbbells straight into the air, above your head.
  4. Slowly lower the dumbbells into starting military press position.
  5. Complete 15 reps.

Too often, we treat exercise as an obligation, something we have to do because we want the long-term benefits. But exercise shouldn’t feel like a chore. Here are three easy ways to make exercise fun.

Equipment Used

Dynapro Exercise Ball

If you liked this post you might also enjoy…

  • 5 Tips to Make Healthy Habits Stick
  • A Beginner’s Guide to Strength Training at Home
  • Free Printable Fitness Planner

Pumpkin Jack ’n Cheese Bowls

Friday, September 29, 2017

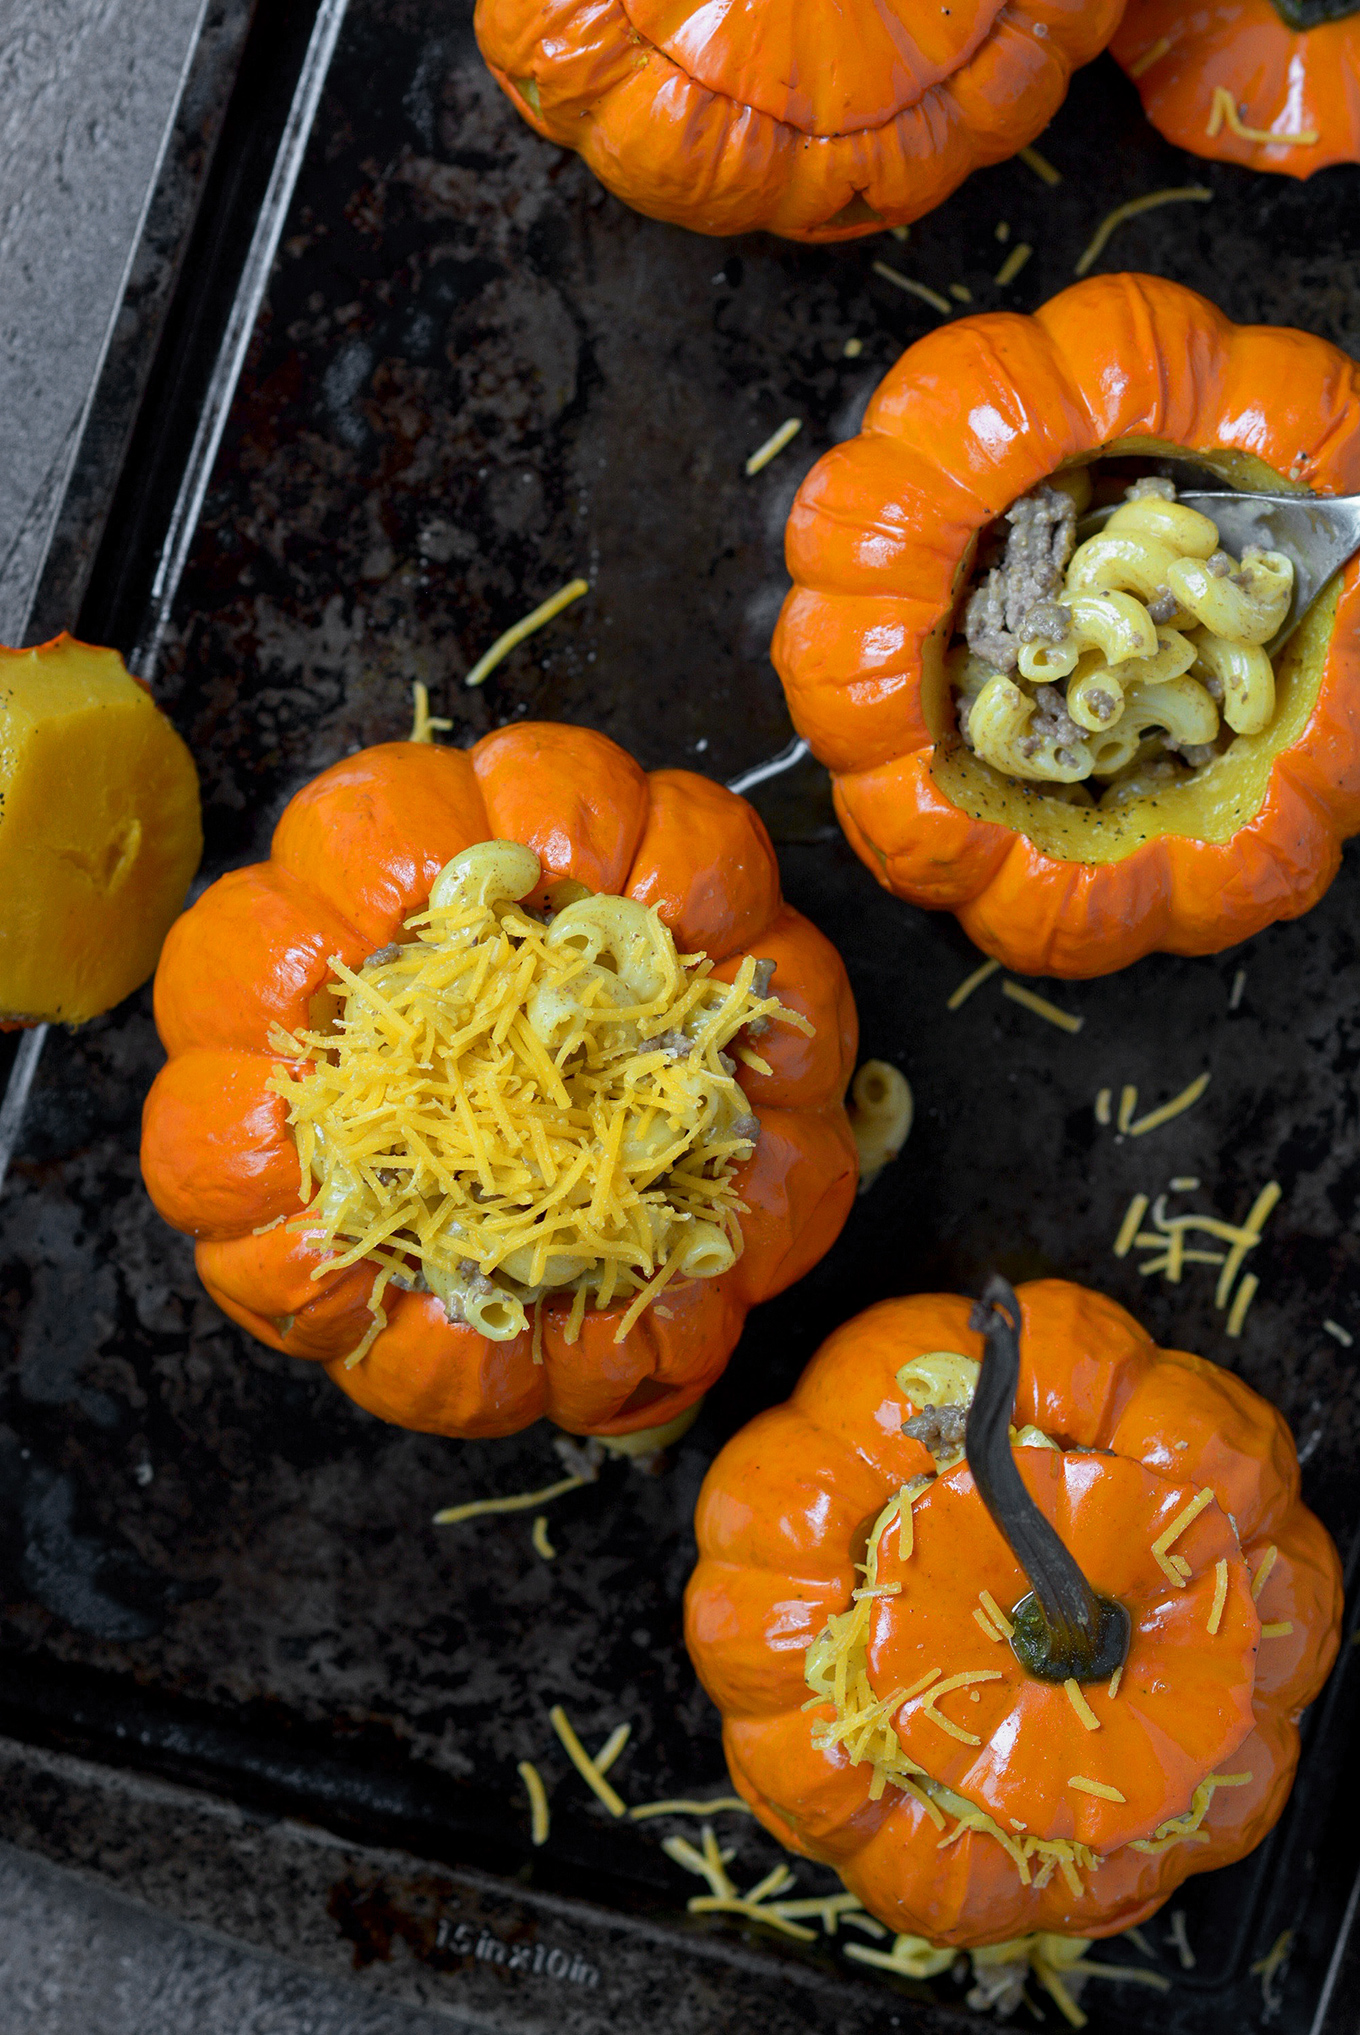
Pumpkin Jack ’n Cheese Bowls – Your little trick-or-treaters will love this fun, savory recipe that’s bursting with kid-food flavor and is also a well-balanced meal!

Pumpkin Jack ’n Cheese Bowls

Hi! This is Rachel from the food blog Simple Seasonal. If you’re anything like me, you’re super excited that it’s pumpkin season! I associate pumpkin-flavored everything with so many good memories!

Pumpkin Jack ’n Cheese Bowls

Pumpkins usher in bright reds, yellows and oranges to the landscape, a briskness to the air, and the chance to wear my favorite cozy sweater again while I sip on a Pumpkin Spice Latte. For my son, pumpkins are all about Halloween with it’s pumpkin patches, jack-o’-lanterns and the promise of dressing up and trick-or-treating.

Pumpkin Jack ’n Cheese Bowls

All that to say, I just had to make a pumpkin recipe for today’s blog post! I decided to get in touch with pumpkin’s savory side. The challenge is making a savory pumpkin recipe that my kids won’t scoff at. After all, it is a vegetable. ?

Pumpkin Jack ’n Cheese Bowls

When it comes to getting my kids to try something new, I have a couple of mom tricks up my sleeve. First, a trick well adopted by many parents is adding cheese – lots of cheese – to vegetables. It makes things SO much better for little palates. My second trick requires a little bit more creativity, and that is making food look like it’s fun to eat! Sometimes getting kids to believe that they might like something new is half the battle.

Pumpkin Jack ’n Cheese Bowls

That’s exactly what I did with these Pumpkin Jack ’n Cheese Bowls. I mean, what kid (or adult for that mater) wouldn’t love eating out of a jack-o’-lantern this fall? The combination of pumpkin and cheese is truly scrumptious! The texture of the cooked pumpkin and pasta are similar, so between that and the cheese it tames the vegetable for your skeptics. I decided to add some ground beef to the mac ’n cheese mix, making this a complete, well-balanced meal. This recipe is definitely a trick (but also a treat) this mom has up her sleeve to nourish her little trick-or-treaters this fall!

Pumpkin Jack ’n Cheese Bowls
 
Print
Author: Rachel Hanawalt
Recipe type: Entree
Cuisine: American
Serves: 4 servings
Ingredients
Jack-O’-Lantern Bowls
  • 4 small pumpkins*
  • 1 Tbsp olive
  • salt and pepper to taste
Beef Mac ’n Cheese Filling
  • ¾ lb extra lean ground beef
  • 1 10 oz box of organic mac ’n cheese mix
  • 1 C finely shredded sharp cheddar cheese
Instructions
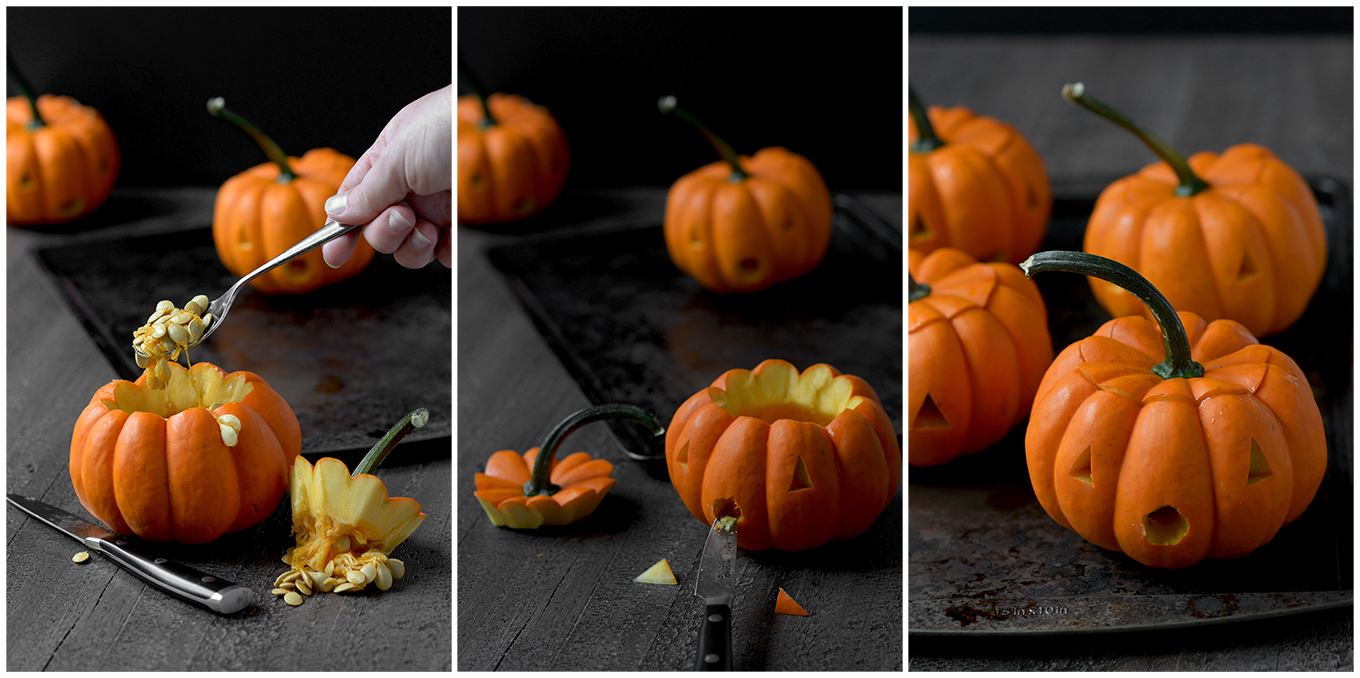
  1. Preheat the oven to 400º F. Meanwhile, using a sharp paring knife, cut the tops off of 4 mini pumpkins and remove the seeds. When removing the pumpkin tops, pop them off with your knife and gently pull at the stem so that the stem doesn’t break off. The seeds can be discarded, but they can also be reserved for roasting, much like larger pumpkin seeds. To cut the eyes into your pumpkin, make 3 cuts for each eye with the pairing knife and then pop out the triangular pieces of pumpkin. For the mouth drill a hole into the pumpkin by twirling the tip of your knife into the pumpkin until you have a mouth-sized hole.
  2. Once the mini jack-o’-lantern bowls are cut, lightly brush olive oil over the insides and outsides of the pumpkin bottoms and tops and season with salt and pepper to taste. Bake for 30-40 minutes in a 400º oven with the tops on the pumpkins. The cook time may vary depending on the size of your pumpkins. The pumpkins are done when the inner flesh is fork tender.
  3. Meanwhile, in a medium sized sauce pan, brown the ground beef. Once it’s cooked through, drain the fat off the beef, cover, and set aside. You can then rinse out the pan that you cooked the beef in and prepare a 10 oz box of mac ’n cheese per the package instructions. I recommend using an organic brand for this item because they tend to be lower in sodium and they’re free of artificial flavors and dyes. Gently stir the cooked beef into the mac ’n cheese once the macaroni is prepared to make Beef Mac ’n Cheese.
  4. Finally, remove the cooked pumpkins from the oven and spoon the Beef Mac ’n Cheese into each one. Garnish with shredded cheddar and top with the pumpkin lids. Serve immediately. Note that pumpkin skin is tough, so the flesh should be eaten out of the pumpkin like a bowl and the skin should be left behind.
3.5.3226

Pumpkin Jack ’n Cheese Bowls

More delicious, fall recipes…

No Fuss Apple Wrapper Pie

No-Sugar-Added Canned Apple Sauce

Savory Mushroom and Quinoa Stuffed Mini Pumpkins


Giving Your Family Memories a Second Life

Thursday, September 28, 2017

Don’t let your family memories stay unseen—your stories untold! Free them from your phone or computer and give them a second life! Thank you to Animoto for sponsoring this conversation.

If your family memories were important enough for you to record them, why not take the next step? Free them from your phone or hard drive, and share the stories that are waiting to be told!

Wearing only a diaper and a Pebbles-style ponytail, she squealed at each new image that came across our screen.

It was the first time I ever used the slideshow feature on our TV, and our sweet toddler could not get enough.

Family memories passed by—a camping trip, a waterfall hike, that time she smashed avocado all over her face and hair. My husband and I sunk deeper into the couch and watched her gleeful reaction to each photo.

It was all the proof I’ve ever needed of the power of not just preserving our memories but accessing them—again and again.

If your family memories were important enough for you to record them, why not take the next step? Free them from your phone or hard drive, and share the stories that are waiting to be told!

Why Let Your Family Memories Stay Unseen? 

Our photos and videos shouldn’t just exist on our phones and hard drives. They should be shared, enjoyed and relived a dozen times with the ones we love.

Research has shown that the brain releases the same amount of dopamine (the feel-good neurotransmitter) when we remember an experience as it did the first time we lived it.

Isn’t that powerful?

It’s why you feel—even for just a few moments—the tranquility of your beachside anniversary trip when you think back on it months later.

It’s why you feel light and carefree again when you remember the times your grandparents took you out for ice cream as a child.

It’s why you feel such intense love and protectiveness (and maybe some fear and overwhelm) when you reflect on the first time you held your baby in your arms.

Those feelings are ours to access over and over if we purposefully make space for them. 

Our children also gain a deep sense of family identity from the experiences we share together. But experiencing something once—from the magic of that Disney trip to that time you went cliff jumping—and then never talking about it again? That’s like letting a big opportunity pass you by.

If your family memories were important enough for you to record them, why not take the next step? Free them from your phone or hard drive, and share the stories that are waiting to be told!

Stories Are Meant to Be Shared

Stories are meant to be shared, after all. These moments were important enough for you to record them; it’s time to take the next step—free them from your phone or hard drive and share the stories that are waiting to be told!

When I have time, I love to compile our pictures into photo books {Top 5 Places to Print Photo Books}, because it’s so satisfying to smell the fresh paper when it first arrives and feel the weight of a book in your hands. I often find a photo book at the foot of my son’s bed. It makes my heart burst, knowing he sneaks them up to his room to look at before he drifts off to sleep.

But books take time to compile, and I like to use more than one medium to really help our memories take on a second life.

If your family memories were important enough for you to record them, why not take the next step? Free them from your phone or hard drive, and share the stories that are waiting to be told!

One of my favorite ways to ensure that our precious moments live on is with simple, easy-to-create slideshows. I love making a slideshow for each of my kids to play on their birthday. And slideshows are fantastic for capturing the essence of a short period of time, like your summer adventures or a particular family vacation.

The difference with a slideshow, compared to a photo book, is that slideshows can include video footage. Video clips let us hear the sounds of our lives; they capture facial expressions and body movements and mannerisms that I know I’d otherwise forget. And I want to remember these things. 

Giving Your Family Memories as Second Life 

This summer was a special one for our family, our first full summer living in a new State—a summer that brought us some challenges but also some incredible moments that deserve to be celebrated.

I made this sweet video using Animoto, whose mission is to help people like you and me make great videos easily.

This video was a breeze to put together. The only part that took me some time was selecting the photos! Assembling them into the slideshow only took a few minutes.

The next time you want to create a video or slideshow, I hope you’ll turn to Animoto. The ease of use plus the payoff of being able to relive your family memories over and over? It’s a no brainer.

Use coupon code memories17 for 20% off your Animoto subscription

If your family memories were important enough for you to record them, why not take the next step? Free them from your phone or hard drive, and share the stories that are waiting to be told!

The Power of a Moment

I love the Dr. Suess line—

“Sometimes you never will never know the value of a moment until it becomes a memory.”

Let’s ensure that our moments—and our memories—make the biggest impact possible on ourselves and our families.

If you liked this post you might also enjoy…

  • 50 Everyday Moments you Need to Photograph
  • Starting a Photography Blog in 5 Simple Steps
  • How to Capture the Moments that Matter Most

If your family memories were important enough for you to record them, why not take the next step? Free them from your phone or hard drive, and share the stories that are waiting to be told!

5 Ways to Improve Your Photography Skills

Tuesday, September 26, 2017

Starting to learn photography and wondering what you need to do to improve your photography skills?

Here’s five things you can do that will have a big impact on your images, and the best news is they are all pretty easy to do!

Starting to learn photography and wondering what you need to do to improve your photography skills?  Here's five things you can do that will have a big impact on your images, and the best news is they are all pretty easy to do!


1) Move away from AUTO 

AUTO is probably the worst setting in your camera to take pictures on!

Sure, it’s easy, and it requires very little thought from you, but I’m afraid it’s not going to give you the pictures you dream of.

In order to take images that look more professional, or even just more accurately capture a scene the way you want to remember it, you are going to want to move away from the AUTO settings on your camera.

An easy way to do this to is move onto using Scene Modes, such as Portrait Mode, or Night Mode.

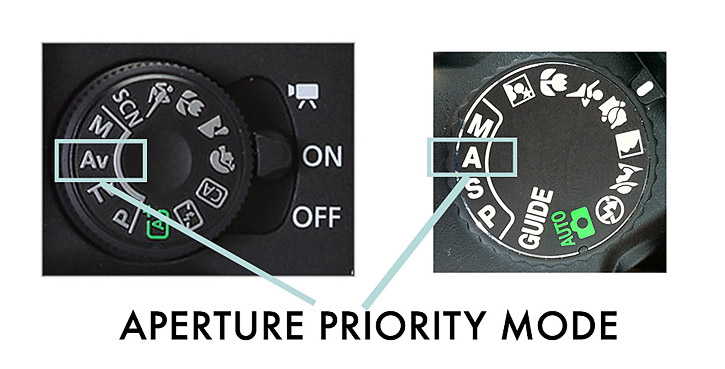
These will make a good starting point away from AUTO, especially if you don’t feel to confident yet about using one of the semi automatic modes, like Aperture Priority, but will still help you improve your photos.

Using these scene modes are a great first step because they tell your camera what you are taking a picture of, so that it at least has some idea of what settings it should choose for you.  (It’s a bit like going into a restaurant and having someone order for you, but you giving them an idea of what you like!)

However, ideally you don’t spend too long using scene modes – when you feel more comfortable with your camera, your next step will be to use Aperture Priority Mode.

The good news? There ‘s a whole other blog post right here on Simple As That that breaks down what Aperture Priority Mode is, and how to use it, step by step. Check it out here. 

2) Take a class

Regardless of what type of photography you do, or what type of camera  you have, an easy way to improve your skills is to take a class.

The reason a class is so effective is because it lays all everything you need to know, step by step, so you don’t have to go rummaging about in the internet for tips and tricks, which can be time consuming and frustrating.

You can find online courses, in person classes or even ebooks.

If you want to get started with a free class, and you have a DSLR camera, you can grab my own free course, the Beginners Bootcamp right here.

If you have a iPhone you want to take better pictures with, then check out Rebecca’s Mobile Photography class.

Classes are simply a way of helping you get to where you want to be faster!

3) Practice 

Once you have some basics down the next thing you are going to want to do to improve your skills is practice.

It’s like everything else, the more you do it, the better you will get!

You will begin to feel more confident, and not feel like you are having to fumble around with your settings so much because it becomes much more instinctive.

And of course, you will be capturing some lovely memories at the same time 🙂

Starting to learn photography and wondering what you need to do to improve your photography skills?  Here's five things you can do that will have a big impact on your images, and the best news is they are all pretty easy to do!

4) Learn how to edit 

Editing your images is something you do after you have pressed the shutter and uploaded your pictures to your computer.

This is where you can fix images that are too dark or too bright,  or crop an image into a better composition.   You will probably go on to do even more than that, but even those two simple steps can have a big impact on your images, so it’s worth doing.

There are loads of different programs to help you edit your images, my favourites are Lightroom or Photoshop Elements, but you could just as easily use any of the free software, such as the software that probably came with your camera.

5) Use light more effectively 

Light is everything in photography (literally, we can’t take a photo without it!) and learning how to use it well is a skill that will serve you well and definitely help improve your images!

In fact, it doesn’t really matter what type of camera you are using, from an iPhone to a point and shoot to a top of the range DSLR –  light is the one thing that can make or break your photo.

You should check out this post with 3 Tips to Help You Get Flattering Light which will give you some ideas about how use the light you have available!

If you liked this post you might also enjoy…

  • 3 Tips to Help You Get Flattering Light for Portrait Photos
  • 50 Everyday Moments you Need to Photograph
  • How to Organize your Digital Photo Collection
« Previous Page
Next Page »

Primary Sidebar

Rebecca Cooper — Founder, Simple as That Blog

Hello, I'm Rebecca. Welcome to my blog, Simple as That. Come along as we embrace simplicity in crafting, photography, travel, and family life. Read more about me.

Newsletter

Get the latest updates from Simple as That delivered to your inbox.

Join for Free

Beyond Snapshots: Mastering the Art of Mobile Photography

Connect

  • Bloglovin
  • Facebook
  • Instagram
  • Pinterest
  • Twitter

Follow On Pinterest

Visit Rebecca - Simple as That Blog's profile on Pinterest.

Categories

  • Crafts / DIY
  • Holidays
  • Motherhood
  • Organization
  • Photography
  • Printables
  • Recipes
  • Simple Living
  • Travel
  • Wellness

Our Privacy Policy

Follow on Instagram

Instagram has returned invalid data.

Printable 2023 Calendar

Our printable calendars and organizational pages have been essential in keeping our home and my life in order and I guarantee they will be a help to you too!

Click here to learn more

© Simple as That Blog, 2017 · Design by Brian Gardner

Simple as That Blog

Facebook / Instagram / Pinterest / Twitter / Contact