• About
    • About Rebecca
    • Meet the Team
    • Media Kit
    • FAQ
  • Photography
  • Holidays
  • Recipes
  • Printables
  • 2019 Calendar
  • Write for Us
  • Beyond Snapshots

Simple as That

Making Everyday Beautiful

Blog

Easy Slow Cooker Beef and Noodles

Thursday, December 14, 2017

Easy Slow Cooker Beef and Noodles is a simple comfort meal recipe that the whole family can enjoy. This post is sponsored by Reames Frozen Egg Noodles. All opinions are my own.

Easy Slow Cooker Beef and Noodles is a simple comfort meal recipe that the whole family can enjoy. This

With my family the holidays are all about traditions and hearty food. We love warm comfort food during the winter months and one of our favorite meals is beef and noodles. This Easy Slow Cooker Beef and Noodles recipe tastes just like homemade but is so much quicker to make.

Easy Slow Cooker Beef and Noodles is a simple comfort meal recipe that the whole family can enjoy.

For this slow cooker recipe we are using Reames Frozen Egg Noodles. You get the taste, texture and simple ingredients of homemade and they are down right yummy. They hold up well during the cooking process and pair so nicely with the seasoned beef.

Easy Slow Cooker Beef and Noodles is a simple comfort meal recipe that the whole family can enjoy.

Reames Frozen Egg Noodles’ are made with 3 simple ingredients:

Eggs, Flour, Water—just like how you’d make them from scratch. I love the convenience of the frozen noodles and they taste so much better than dried noodles. Click here to find out where to buy Reames noodles.

Easy Slow Cooker Beef and Noodles is a simple comfort meal recipe that the whole family can enjoy.

This recipe is made entirely in the slow cooker saving you time cooking and doing dishes. When family and friends come over you want to visit with them instead of being in the kitchen, am I right?

Try this Easy Slow Cooker Beef and Noodles recipe the next time you have company and see the frozen noodle versus dried difference for yourself!

Easy Slow Cooker Beef and Noodles is a simple comfort meal recipe that the whole family can enjoy.

Print the recipe

4.5 from 12 reviews
Easy Slow Cooker Beef and Noodles
 
Print
Easy Slow Cooker Beef and Noodles is a simple comfort meal recipe that the whole family can enjoy.
Recipe type: Main
Cuisine: American
Serves: 8
Ingredients
  • 1 (2-pound) beef chuck roast
  • 1 envelope beefy onion soup mix from a 2.2 ounce box
  • 1 can condensed cream of mushroom soup
  • 1 heaping tablespoon minced garlic
  • 1 (14-ounce) can beef broth
  • 3-5 cups water
  • 1 (12-ounce) packages Reames Frozen Egg Noodles
  • salt and pepper to taste
  • parsley for garnish, optional
Instructions
  1. Place beef roast in slow cooker. Sprinkle onion soup mix on top. Add mushroom soup and garlic and smear on top of roast. Add beef broth.
  2. Put lid on crockpot and cook 9 to 10 hours on LOW.
  3. Remove lid and shred beef using 2 forks. Add noodles and enough water to mostly submerge the noodles.
  4. Cook for 1 hour. Check for seasoning and add salt and pepper to taste.
#version#

Giveaway

During these cold, winter months nothing is quite as comforting as warm, homemade soup! Our friends at Reames are giving away a $50 Visa Gift Card to one lucky Simple as That reader. Comment below telling us one of your favorite soups to make this chilly time of year.

This is a sponsored conversation written by me on behalf of Reames®. The opinions and text are all mine.


It’s Time to Trim your Traditions

Sunday, December 3, 2017

 It's time to trim your traditions and give yourself permission to not only be the orchestrator of the moments, but to be a real part of them.

When we moved far away from family, December was so lonely. The open evenings and empty calendar just made me homesick. I wanted my kids to feel that same intense excitement that I felt growing up, so I started all kinds of new family traditions. We did something every day of December and invited friends and neighbors to join in. While it was a ton of work on my part, it was worth it for the smiles and warmth that it brought to our home. It felt like Christmas again.

I was Disappointed, stressed out and grumpy

We moved closer to family a few years ago and I was thrilled to celebrate the holidays like we had in the past. All of a sudden there were multiple events every night and so many places to be. I didn’t want to let go of our new traditions, so I tried to incorporate them too. It was a delicious whirlwind of cheer.

The next year I did the same, but the novelty had worn off and we were stretched so thin, there was hardly room to enjoy anything. My kids were getting older with lives and obligations of their own, and I found myself exerting serious effort trying to force people to be excited or to make time for “just one more thing.” I was disappointed, stressed out and a very grumpy Mrs. Claus.

It's time to trim your traditions and give yourself permission to not only be the orchestrator of the moments, but to be a real part of them.

Trimming our Traditions

Vowing to never have my favorite time of year spoiled by busyness again, we decided to trim our traditions. My husband and I sat down and thought about what things were truly important for us to do with our family during December and we made them a priority. They were planned and penned in on the calendar.

Then, we opened the conversation up so the kids could weigh in. I was a little surprised at which things they could do without, what they loved and what they were hoping to add. I must be honest, it was a relief to delete “Christmas Craft” from my December list.

We simplified where we could. We spent a weekend in a hotel downtown and knocked out all the activities we loved in the center of the city. It was a fabulous family weekend. We cut the fluff out of our other favorites but kept the heart of the traditions intact. It made for a much simpler but still memorable time.

I let go of the idea that everyone had to be at everything, and enjoyed some of the kiddie traditions with my youngest while my older kids were at school or sports. I stopped getting my feelings hurt when friends were more important than drinking hot chocolate with a candy cane on a weekend night, and I shrugged off the guilt when we had to say no to what sounded like a great invitation. I realized that change and flexibility can be a really good thing.

It's time to trim your traditions and give yourself permission to not only be the orchestrator of the moments, but to be a real part of them.

Christmas Became Magical Again

And something happened for me last year. Christmas became magical again. It was still full and exciting, but there were quiet moments too. A morning together discussing the Book of Luke; a free evening to pop in a Christmas movie and an afternoon to buy gifts for dad.

There was time to remember what the holiday is really all about, and I gave myself permission to not only be the orchestrator of the moments, but to be a real part of them. My kids were happy to have me present, they didn’t miss all the extras one bit, and there was a content feeling throughout the month that had been missing for a few years.

It may seem a bit strange, but by trimming my traditions, I got my Christmas back.

If you liked this post you might also enjoy…

  • How to Slow Down and Savor this Season with Your Kids
  • Motherhood Simplified
  • A Less-Is-More Christmas Season

It's time to trim your traditions and give yourself permission to not only be the orchestrator of the moments, but to be a real part of them.

The Joy of a Slow and Simple Christmas

Thursday, November 30, 2017

Slow down. Focus on fewer, more meaningful traditions. Find the joy in the Christmas season again.

It’s one of my favourite childhood memories.

Each Christmas Eve after late mass, fun snacks, and opening one gift each, the little kids and my dad were tucked into bed and my mom and I got to work. She pulled bag after bag out of her closet, working hard to find all the hidden treasures that been tucked away over the past year without rhyme or order amongst sweaters and the boxes of Toffifee and After Eights that she would pull out over the holidays to the delight of us all.

It was stocking time.

Simple Traditions

Our big family shared a low-key Christmas but it was full of love, connection, and simple tradition. I’d lay the many stockings out side by side on the couch and fill them up excitedly for my little brothers and sisters. I’d help her lay out the boxes of labeled lifesavers and family gifts from Santa upon the iron wood stove that would keep us all toasty the following morning.

Our giant raggedy Christmas tree stood sentinel in the corner, filling up the entire front entrance and proudly displaying years of handmade felt and paper ornaments, a few glittery bulbs sprinkled throughout the motley mix. This was no Pinterest-worthy tree but one that was hunted down in sub-freezing weather and dragged home with devotion and determination.

I don’t know if my parents ever struggled with feeling they didn’t offer us enough, but we knew we were loved.

They bought a savings bond at the start of each new year to save for the following Christmas. They avoided debt and knew that without planning, it would be easy for a family of our size to eat up every bit of income that came in the door.  Our gifts were few but thoughtful.

I still remember many of the gifts I received over the years: one year Santa brought me a handmade doll crib with a Baby Alive sleeping inside. Mine was white but I secretly wanted my sister’s black baby (portent of babies to come). One year I received a delicate diamond ring, another a portable stereo. One year a set of downhill skis with second-hand boots, still another a Driver’s Training coupon tucked into a hand-spun Beatles compilation recorded by my dad and his best friend.

Every Christmas morning bright and early, tired and bedraggled, we’d all gather together wrapped in quilts. For breakfast year after year, we ate the same mandarin oranges and oatmeal-blueberry muffins and they feel as synonymous with Christmas now as snowmen or Silent Night.

The Christmas Stockings

And of course, there were the Christmas stockings. I remember the delight of unloading my stocking with care. Item by item, slowly, carefully, so as not to lose a single treasure amidst the hubbub of wrapping or excited kids. And at the bottom of the toe, where it always hid, lay a special ornament handpicked by my mom that would form my own collection so that one day I could share a slow and simple, joy-filled Christmas with my own little family.

I continue the tradition long after both my parents are buried, my childhood home sold.

Our trees are far smaller and we hunt them down in the grocery store parking lot instead of the woods but they smell just the same. My kids and I string the lights and hang our eclectic collection of ornaments including many they handmade in their younger days. I have a few simple decorations that go up each year but for the most part, the frosty panes and tree peppered with red berries that draw the deer and birds to eat just outside our living room window, are decoration enough.

We decide as a family what we want to eat each year – sometimes we each take a role in pulling together a turkey dinner; some years we choose lasagna and salad. I make some simple desserts or my girls jump in to roll and bake. We watch the same movies over and over and my husband laughs at the same parts every year. We have no real plans for the holidays apart from family game nights and special treats, laughing and connecting.

There was no debt, no frenzy, no pressure to keep up.

I start collecting gifts and stocking stuffers early in the year like my mom before me, on a budget; no last minute hunting and gathering for me. As in my childhood, we attend a candle-lit service, eat snacks together and open one gift on Christmas eve. And after everyone in the house has gone off to bed, I turn on the lights of my little fir tree and fill stockings for my own babies, half grown up now.

As I work, I think of my mom. I think about how much I love her and miss her. About the simple joy of filling stockings with her on Christmas eve. I think of my dad in his orange tuque and how hard he worked to provide for us all. How he’d take us skidooing in arctic temperatures and warm our icy little hands in his.

I think about how my parents were imperfect people just like me and how they loved fiercely. I think about how our holidays, like our life, were simple, imperfect by social media standards, yet oh so beautiful.

And I suspect that when my kids are all grown up with families of their own, even if they opt to celebrate the holidays more extravagantly than me, one of their favourite holiday memories will be the Christmas stockings their mama filled up with care.

So I wonder, as you enter into a season of social expectation and bustle, what are the most important traditions or memories you want to pass along to your children? How might you slow down and simplify to make space for a joy-filled holiday that is, above all, about delighting in these people you share life with?

This is a guest post from Krista from alifeinprogress.ca. If you’d like to connect with her please visit her website or find her on Facebook.  She’d love to give you her free 30 Days to Greater CALM mini-course.

If you liked this post you might also enjoy…

  • How to Slow Down and Savor this Season with your Kids
  • A Less-is-More Christmas Season
  • 5 Ways to Simplify Christmas This Year

Gather Around the Christmas Tree

Wednesday, November 29, 2017

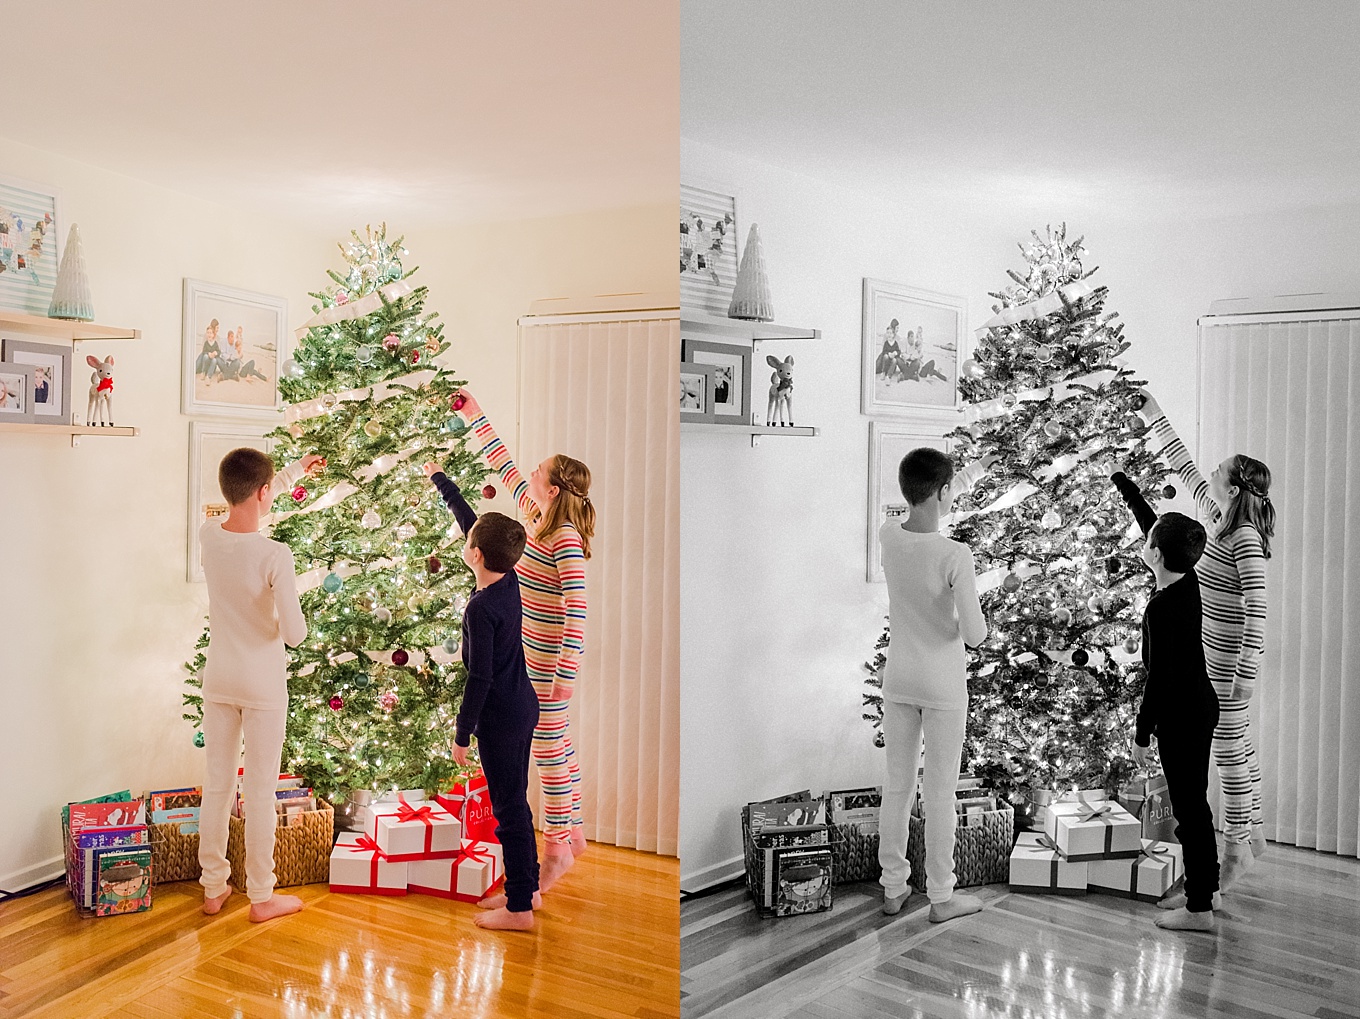
How to take Christmas tree photos. These sweet photos will be a keepsake year after year. Tips and tricks to get the best shots of your tree and pajama clad children. how to take christmas tree pictures

The holiday season is one where I rekindle my love of photography each year. There is something about the twinkle lights and the sparkle that make me want to take my camera out and capture the holidays in a new way to cherish from year to year. It makes me so happy to drag the tubs of holiday stuff up and to go through all of the decorations and the albums that I make for each holiday season. My children aren’t babies anymore and I know that my years of having them all around my tree are numbered. I get very sentimental as soon as the Christmas books come out.

Christmas tree shots are one of my favorites to take each year. I love that the only light source is the light from the tree. The twinkle lights illuminate my babies faces and I love having these keepsakes to look at forever and ever. They aren’t hard to take, but there are some things that make it much easier.

how to take christmas tree pictures

To get ready:

  • Learn from me and do your best to hide the cords from the lights or at the very least try to use a cord that is a similar color to your floor or baseboards.
  • Add some wrapped gifts to put around the bottom of the tree. I also put the book baskets there to help fill the space. It makes it look festive and homey.
  • To get the prettiest, twinkliest effect, add more lights (a few extra strands) than you think that you do. I like to use regular white lights and the mini white globe lights that are a little larger. I think that it adds a nice variety.
  • Put the kids in Christmas jammies. You can do it in fancy Christmas dresses, but I like them in comfy jammies, and they are a part of our Christmas Eve tradition.

How to take Christmas Tree pictures

How to take Christmas tree photos:

  • Turn off all of the lights in the room. The only light available should be from the lights.
  • You can use a tripod or shoot handheld. I’m super lazy and don’t like using a tripod. And I like to be able to move around and get closer shots and details.
  • Use a shutter speed no slower than 1/200th of a second. I need a fast shutter so that I don’t get any camera shake. If you use a tripod, you could probably go a little lower.
  • We aren’t working with a lot of light, so my apertures are f/2.0 and lower. Some of these are f/1.4, so the fast shutter helps get it into focus.
  • My ISOs are HIGH. In the 2000 to 4000 range.
  • I use AUTO white balance. Your colors are going to be wonky because of the Christmas lights, so you will need to adjust these in post-processing.
  • I use Lightroom presets on all of my images. I like the Refined Collection for my color images and Mastin Labs Ilford for my black and white.

how to take christmas tree pictures

Helpful Tips:

  • Because of the high ISOs, your images are going to be a little noisy. (They are going to have some digital grain.) These days, cameras do incredibly well at high ISOs so it isn’t that big of a deal. You can run it through some Noiseware (this one is free and easy to use) if it bothers you, but I don’t like how it can soften the image. If it is really bad, I might make it into a black and white. Black and white can hide a lot of flaws. (Like something a little soft, something noisy, or if the color cast is tricky.)
  • Your meter is going to be all over the place. I only really care about the skin, so that is what I expose for. It’s a bit of trial and error, so I rely on the LCD instead of my internal meter.
  • Bring out a keepsake or a special ornament. Having photos of these things will be nice if they should break. Or just to have the memory of it with your children.
  • Have them do something. I have them read a Christmas book, trim the tree, sip cocoa, or look through their stockings. It is helpful to have them moving a bit. It adds story to the image and interest.
  • At the end of the holiday season, make an album. I do this on New Years Day. It just as much a tradition as taking the pictures. I love sitting down and making these books. It is the last thing I put it in the decoration bin as I am cleaning up for the year.

how to take christmas tree picturesTaking these pictures is one of my favorite things to do each year. The end result is magical and something that I know I will cherish forever and ever. Happy Holidays!



This post contains affiliate links. If you click through and make a purchase, I may receive a commission (at no additional cost to you).

11 Secret Spots in Universal’s Diagon Alley to Find Harry Potter Spells and More

Wednesday, November 29, 2017

Universal Studios Florida’s Diagon Alley is a must-see spot for kids ages 2 to 92 when visiting Universal Orlando Resort. Most people know it as the place to practice their Harry Potter spells using an interactive wand all while drinking Butterbeer. Others love to get their thrill on by riding Harry Potter and the Escape from Gringotts. And one of the most popular attractions? Watching the dragon breathe fire with temperatures reaching up to 3,560°F. But these popular attractions are just the beginning of what you can experience.

Harry Potter Spells-Interactive Wand-Diagon Alley

Where to Find Harry Potter Spells, Tattoos, and More in Diagon Alley

While waiting for my kids to ride and re-ride Harry Potter and the Escape from Gringotts, I quickly found hidden gems on signs, in window displays, and even inside the stores.

Check out these 11 secret spots to discover Harry Potter spells and other fun finds in Universal Studios Florida’s Diagon Alley.

Diagon Alley in the Daytime-Harry Potter Spells

1. Interactive Wands and Harry Potter Spells

No visit to Diagon Alley is complete without an interactive wand. So, if you haven’t bought one prior to entering this magical spot, head over to Ollivander’s where you’ll have your selection of many wands. From there, you are all set to head to one of the many spots to cast your Harry Potter spells. My son and I always go straight to the interactive wand spot in Knockturn Alley that makes the digital skeleton move (there is always a line for this one).

Searching for these spots as a family is a great way to make magical memories. To find all of the locations, look for markings in the pavement, indicating where you should stand to cast Harry Potter spells. When you find one, stand on the exact spot and use simple movements for the best chance of having the spell work. If you need help, Universal Orlando Resort team members are available to assist you.

Not wanting to search on your own to find all the spots to use your interactive wand? Look no further than in your wand’s box for a map. One side shows the spots in Diagon Alley and the other side shares those in Hogsmeade.

Tip! If your spell isn’t working and you see an anti-jinx sign near the pavement marking or if a team member tells you it’s jinxed, this means the spell isn’t working.

Interactive Wands-Ollivanders Wand Shop-Diagon Alley-Harry Potter Spells

2. Motion Tattoos in Knockturn Alley

While making the giant skeleton move is a huge crowd pleaser, don’t miss checking our the tattoo parlor right across the alley.

In true Harry Potter fashion, the shop advertises not just static, but motion tattoos. You can stare into the parlor and see your options for tattoos and they actually move. My family, of course, made terrible jokes while we looked at the parlor for example “I want to get a full-body tattoo of myself only skinnier.” Or “Can I get a tattoo of my muscle flexing bigger?” No one can actually go under the needle here, so don’t start planning your soaring Hippogriff back mural. The good news? You can enjoy window shopping.

3. Giant Troll Skeleton

I mentioned the digital skeleton that you can make dance about while casting a Harry Potter spell with your interactive wand in Knockturn Alley. But, have you ever noticed the troll skeleton just behind the dancing bones? It’s one of those things you might face palm yourself for not seeing because it’s huge. I’ve been in there a dozen times and I never noticed the giant of anatomy hanging in the shop window. Be sure to check it out on your next visit.

4. Want Ads from the Daily Prophet

My favorite little detail in Knockturn Alley is a window filled with newspaper. The paper is filled with articles and information from the Wizarding World of Harry Potter. The advertisement for a Gringott’s position had me smiling and laughing. Who comes up with this stuff? Did J.K. Rowling suggest this or do the Universal Orlando Resort creative teams come up with these ideas? Either way, make sure to search the want ads for jobs and “Snake oils” to solve your wizarding ailments.

5. The Staff of Shops

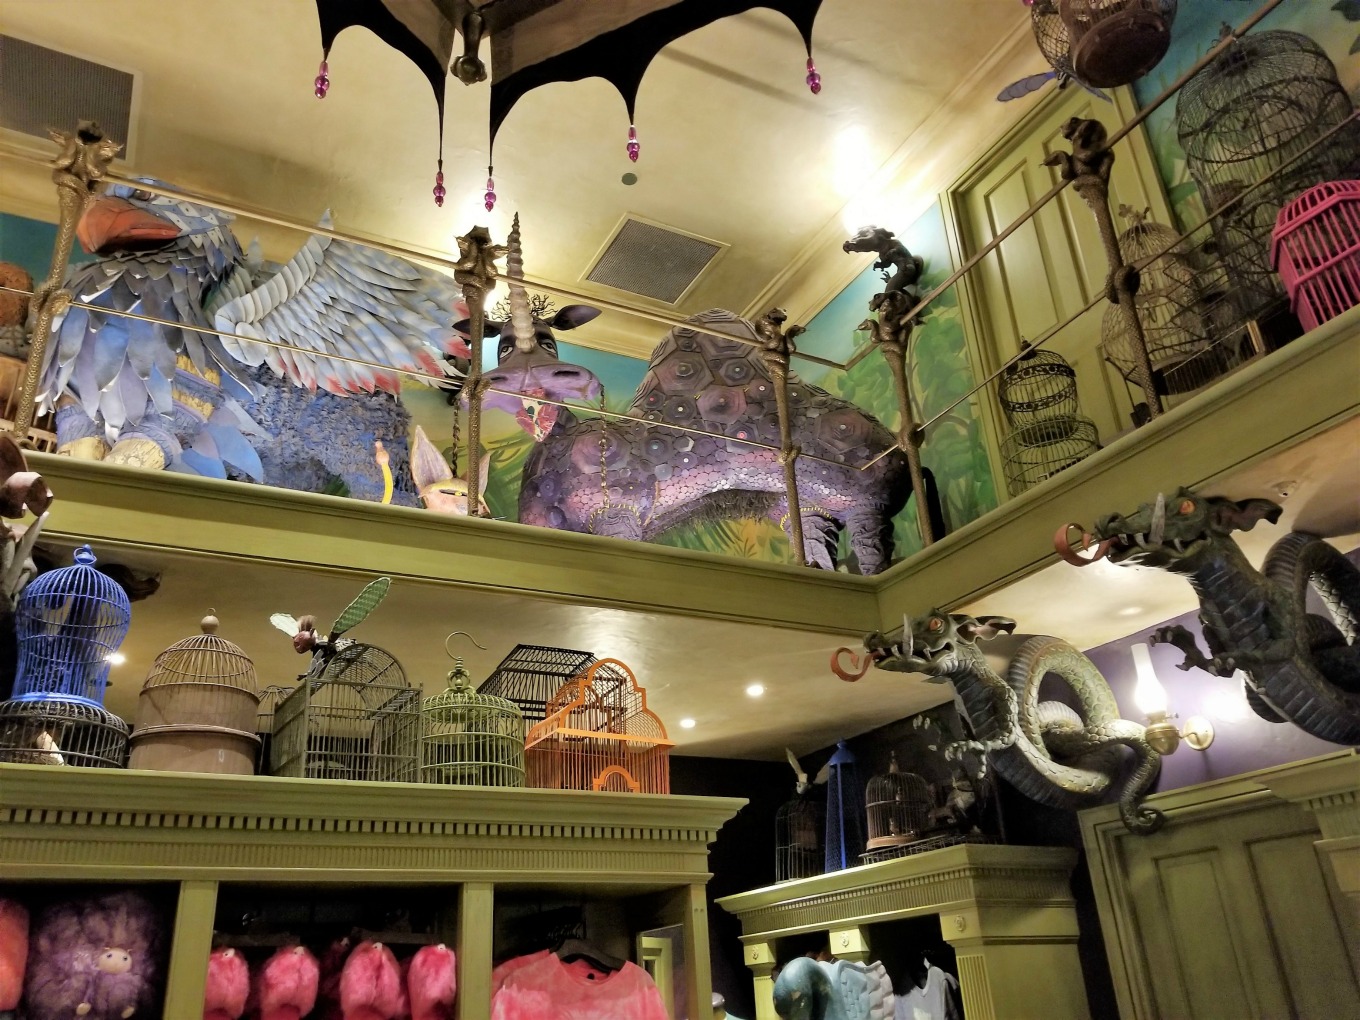
While at the Magical Menagerie store, make sure to chat with a sales clerk. The gal I talked to shared all sorts of interesting information. First off, she named all the creatures in the shop like they were friends. For example, I discovered a Crumple-Horned Snorkack, Luna Lovegood’s favorite creature. The clerk told me that the Snorkack is an animal that Trolls are stupid enough to try and ride even though the horn often skewers them. Specifically, she said, “What can you expect? Trolls are very dimwitted.”She also told potions I could use and what books I can find the potions. The information you can gain at the Staff of Shops is by far more useful than just locating the stuffed pygmy puff.

Magical Creatures-Diagon Alley-Harry Potter Spells

6. The Most “Fantastic” Publisher

On the other side of the street from the Magical Menagerie is one of the first signs I admired: “Obscurus Books.” What’s that? The publisher that commissioned Newton Scamandar to write “Fantastic Beasts and Where to Find Them.” Of note to theme park fanatics, this sign was up in Universal’s Diagon Alley before the movie came out for us muggles. Pretty clever work by Universal Orlando Resort’s creative team, right?

7. Exiting the Leaking Cauldron is a Laugh

The Leaky Cauldron will satisfy your not only your Butterbeer needs but also your British Food desires (Scotch Egg anyone?). You can look at all the one-of-kind drawings on the walls while you slowly sip the best drink in Diagon Alley. But don’t leave without checking out the real Leaky Cauldron or reading the instructions immediately to the right of the exit door. Makes me ask, which way are you gonna leave?

8. Gildaroy Lockhart Fandom

I have to give credit to my daughter who found the Gildaroy Lockhart—the heartthrob of Ms. Weasley and just about every mom in the Wizarding World of Harry Potter—on display in the windows on the main thoroughfare. Check out the titles as you peruse. What my daughter didn’t notice was what kinds of books are ripped up and put at the bottom of the display immediately next to it. It’s a law text book and not from Orlando. Give it a look when you are wondering the street.

9. The Best Ingredients

While you are on the main thoroughfare, notice the two competing apothecary shops immediately next to each other. Both the windows have several odd and rune labeled bottles of potion necessities. My business goes to Mulpepper’s because their bottle logo is better and who can’t be impressed when you see “worm mucus” in a jar. I didn’t’ even know worms had noses to wipe, but I guess Mulpepper finds a way to harvest it.  Usually worm mucus just thickens potions but if you wanted to make Wiggenweld Potion, then you have a key ingredient.

Potions-Diagon Alley-Wizarding World of Harry Potter-Harry Potter Spells

10. The Secret Grocery-Getter

As a mom who has driven a minivan for many years, I felt a kinship with the Family Broomstick sign atop the Diagon Alley exit. I never considered that a witch might need more than a Harry Potter spell to haul several kiddos without broomstick skills to various places throughout town. Thankfully, there is a 6-passenger broomstick. I wonder how many cupholders it has!

11. British Outlets and Old Toasters

The only place you will find a British electrical outlet in the US is in Diagon Alley’s Museum of Muggle Curiosities. A little piece of British day-to-day life is right in the wall. Don’t leave the museum without checking out the other curious things that interest the Mr. Weasley’s of the world. Lamps, old typewriters, and fans. And, if you look down the same street you will probably see a House Elf-Placement business. Now that’s funny! House elves needing a new house?

Visiting Diagon Alley at Universal Studios Florida is a must-do activity. While there, you won’t want to miss casting Harry Potter spells with your interactive wands, escaping from Gringotts, getting a Butterbeer mustache, and warming up as the dragon breathes its fire. But make sure to leave time to check out the amazing details, not just in the design but also in these 10 not-to-miss secret stops along the way. And if you want to find an 11th one? I hear there is some instant darkness powder in Weasleys’ Wizard Weezes. Let me know if you find it.

Have you been to Diagon Alley? If so, what was your favorite find?

Fire Breathing Dragon-Diagon Alley-Universal Orlando Resort- Universal Studios Florida-Harry Potter Spells

11 Tips for Healthy Holiday Feasting

Monday, November 27, 2017

Hello, friends! I’m Rachel Gainer of rachelrebuilt.com, fitness contributor here at Simple As That. As we wrap up Thanksgiving and head into Christmas, I want to offer a few tips to help you enjoy all the holiday parties and neighbor treats without feeling overstuffed or deprived.

One of the biggest reasons we overindulge during the holidays is that every gathering feels special. We don’t want to miss out on favorite foods, so we eat them even when we aren’t in the mood. Instead, try listening to your body and giving it a good balance of nutritious meals and mindful indulgences.

You don’t have to ban sugar to have a healthy holiday, and you don’t have to eat every treat to have a happy holiday. Here are 11 tips to help you enjoy a little of both:

Tip 1: Plan ahead for social situations.

Instead of treating the weeks between Thanksgiving and Christmas as a month-long feast—where treats are always bombarding you—consider the big picture. How many events will you actually attend? What are your favorite food traditions? Plan for these celebratory meals, and try to make healthier choices on ordinary days.

Tip 2: Don’t arrive hungry.

It’s tempting to save up calories for big events, but everything looks good when you’re starving. Hunger makes it harder to make healthier choices. Eat normal meals earlier in the day. You’re more likely to make better choices when your brain isn’t screaming, “FOOD!!”

Tip 3: Scope out the spread.

Take a walk around the table to see what’s available. Before you even pick up a plate, note healthier options. Before the event, offer to bring a vegetable tray or salad to ensure there is at least one healthy choice.

Tip 4: Load up on healthy stuff.

Fill your plate three-quarters full with vegetables and fruits; then choose proteins and healthy fats to round out your meal. Limit yourself to one trip. If you’re still hungry, grab some raw veggies or fruit.

Tip 5: Indulge when it matters to you.

Some meals and desserts are worth every bite. Splurge on high-quality treats or once-in-a-lifetime delicacies. Skip cheap, store-bought confections. Choose foods and moments that will help you truly enjoy the season.

Tip 6: Visualize your portion size.

If you plan to indulge, set mental boundaries. Make it reasonable. Remember, this is not the last time you’ll eat dessert, so you don’t need to eat until you’re sick.

Tip 7: Savor your meal.

We tend to eat treat meals quickly, because they are so exciting. Take smaller bites. The first three bites are always the most satisfying, so take smaller portions of treat foods when you choose to indulge. Really savor each flavor.

Tip 8: Respect hunger and satiety.

When you choose to indulge, eat slowly, savor the flavors, and stop when you feel gentle fullness. If you aren’t hungry, don’t be afraid to walk away or save a treat for later.

Tip 9: Research your restaurant order.

If you’ll be eating out, look up the menu online, and select your meal in advance. Use the nutrition and allergy guides to help you select a meal that fits your needs. Consider calling the restaurant to inquire about substitutions or ingredients.

Tip 10: Avoid “last-chance” feasting.

When you’re trying to eat healthier, it’s easy to get trapped in an all-or-nothing mentality. But this can lead to breakdowns in willpower that lead to uncontrolled binging. One splurge snowballs into a daylong feast, while you rationalize that you’ll start fresh tomorrow. Instead, treat each meal, each bite, as a new decision.

Tip 11: Schedule daily movement.

As the days get colder and darker, it’s tempting to cozy up on the couch and catch up on Netflix. There’s nothing wrong with a little down time, but daily movement will keep your metabolism up and increase motivation in other areas of your life. Exercise also produces mood-boosting endorphins that can help you manage holiday stress and winter blues. Not sure where to start? Try my free #17MinutesStronger video series.

Many of these tips come from Clean Eating. Simplified. an eBook I co-authored with Shannon Sargent of cleaneatsandtreats.com. This eBook is a step-by-step guide to eating whole foods with over 117 tips and tricks to get you started and keep you going. Get full details and grab your copy here.

Photo credit: Shannon Sargent

No-Knead Whole Wheat Rosemary Bread

Friday, November 24, 2017

Sponsored by the Alberta Wheat Commission’s Life’s Simple Ingredient campaign.

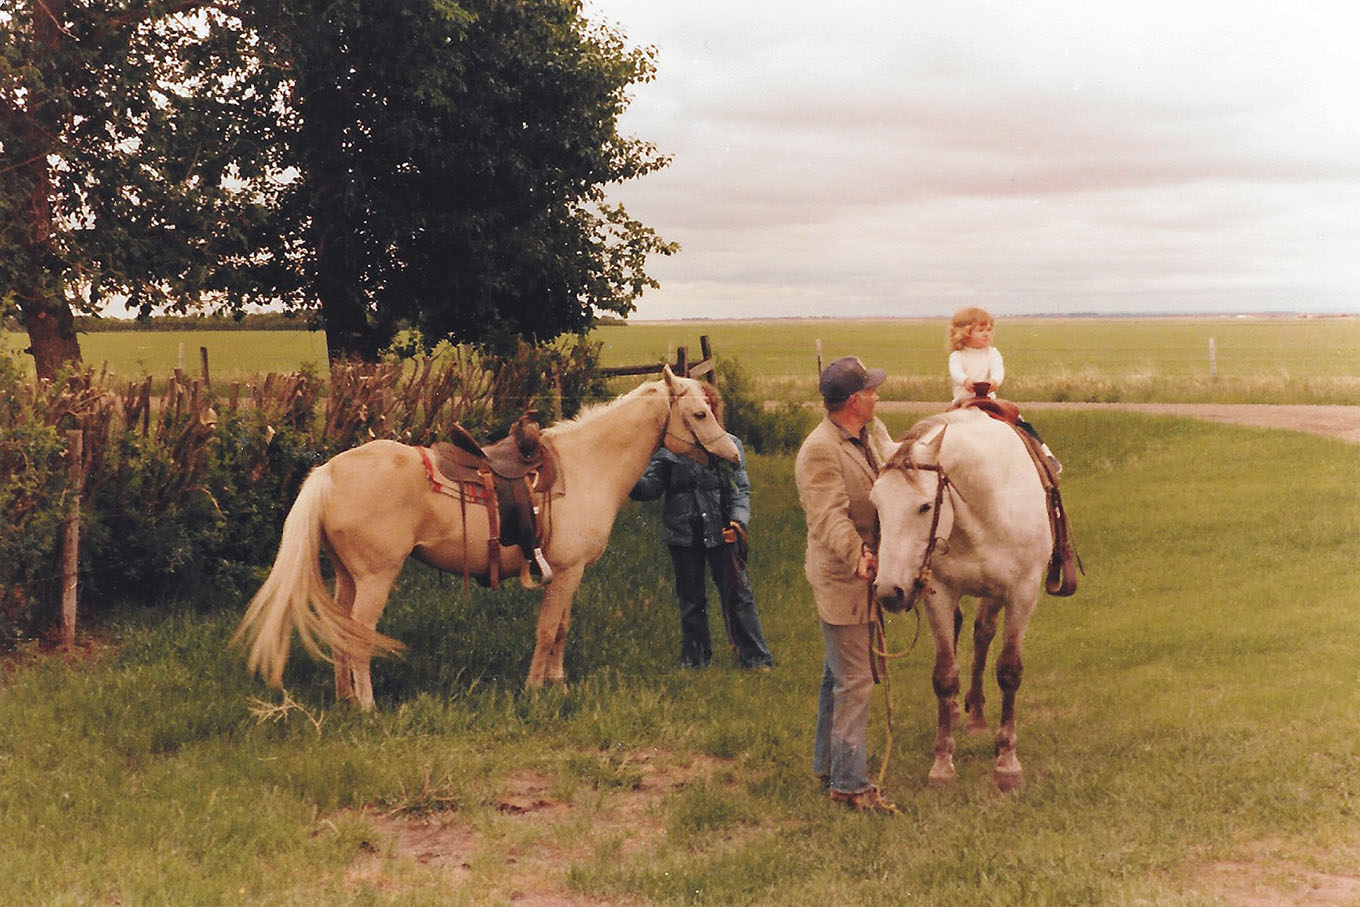
Growing up on a farm meant that I spent my childhood working alongside my mom and dad—feeding animals, harvesting crops, and preparing meals using ingredients we’d grown or raised ourselves.

I remember early morning drives out to check the crops, and I can recall the distinct taste and feel of chewing on freshly harvested wheat kernels. I remember the sound my boots made as I’d tromp through a wet and muddy cow pen. I can almost smell the hay during harvest season and see the sparkle of dust hanging in the air at sunset.

At harvest time I’d ride for hours in the combine with my dad, pulling sandwiches my mom had made out of the small cooler that I used as a makeshift seat… Talking about everything and nothing until we watched a dusty sun set over the golden field stretching out in front of us.

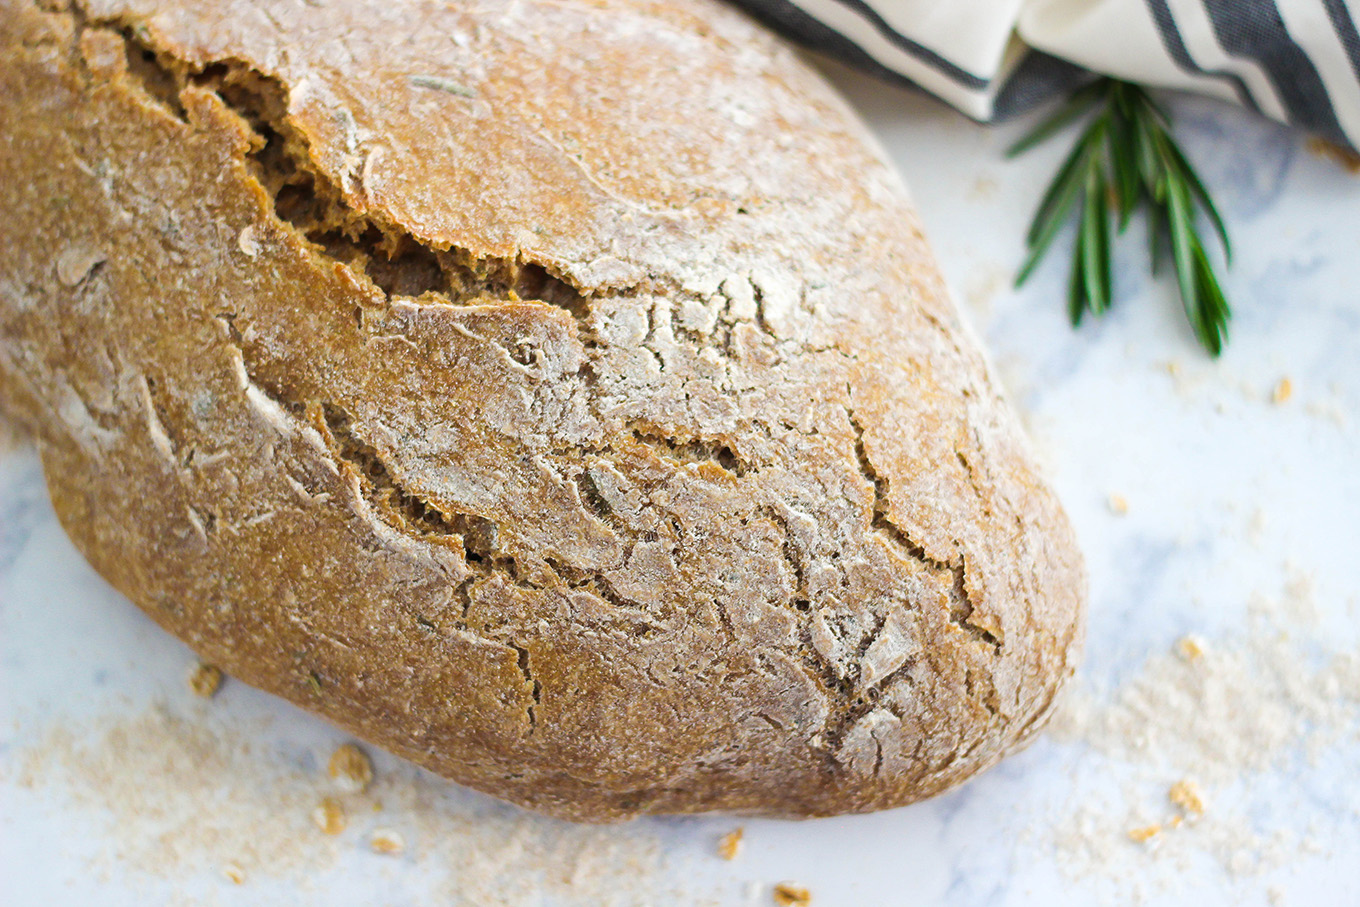
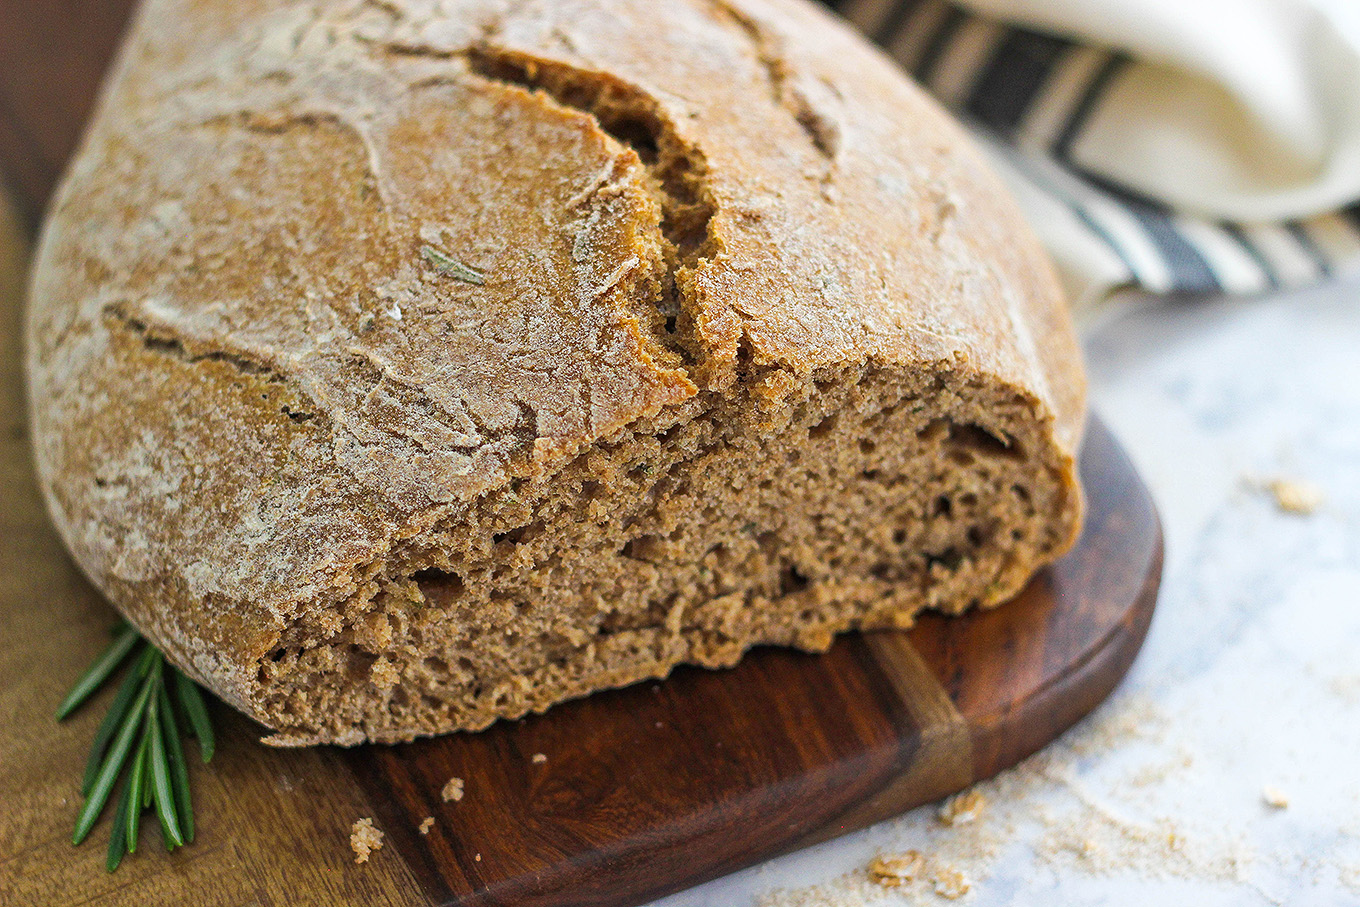
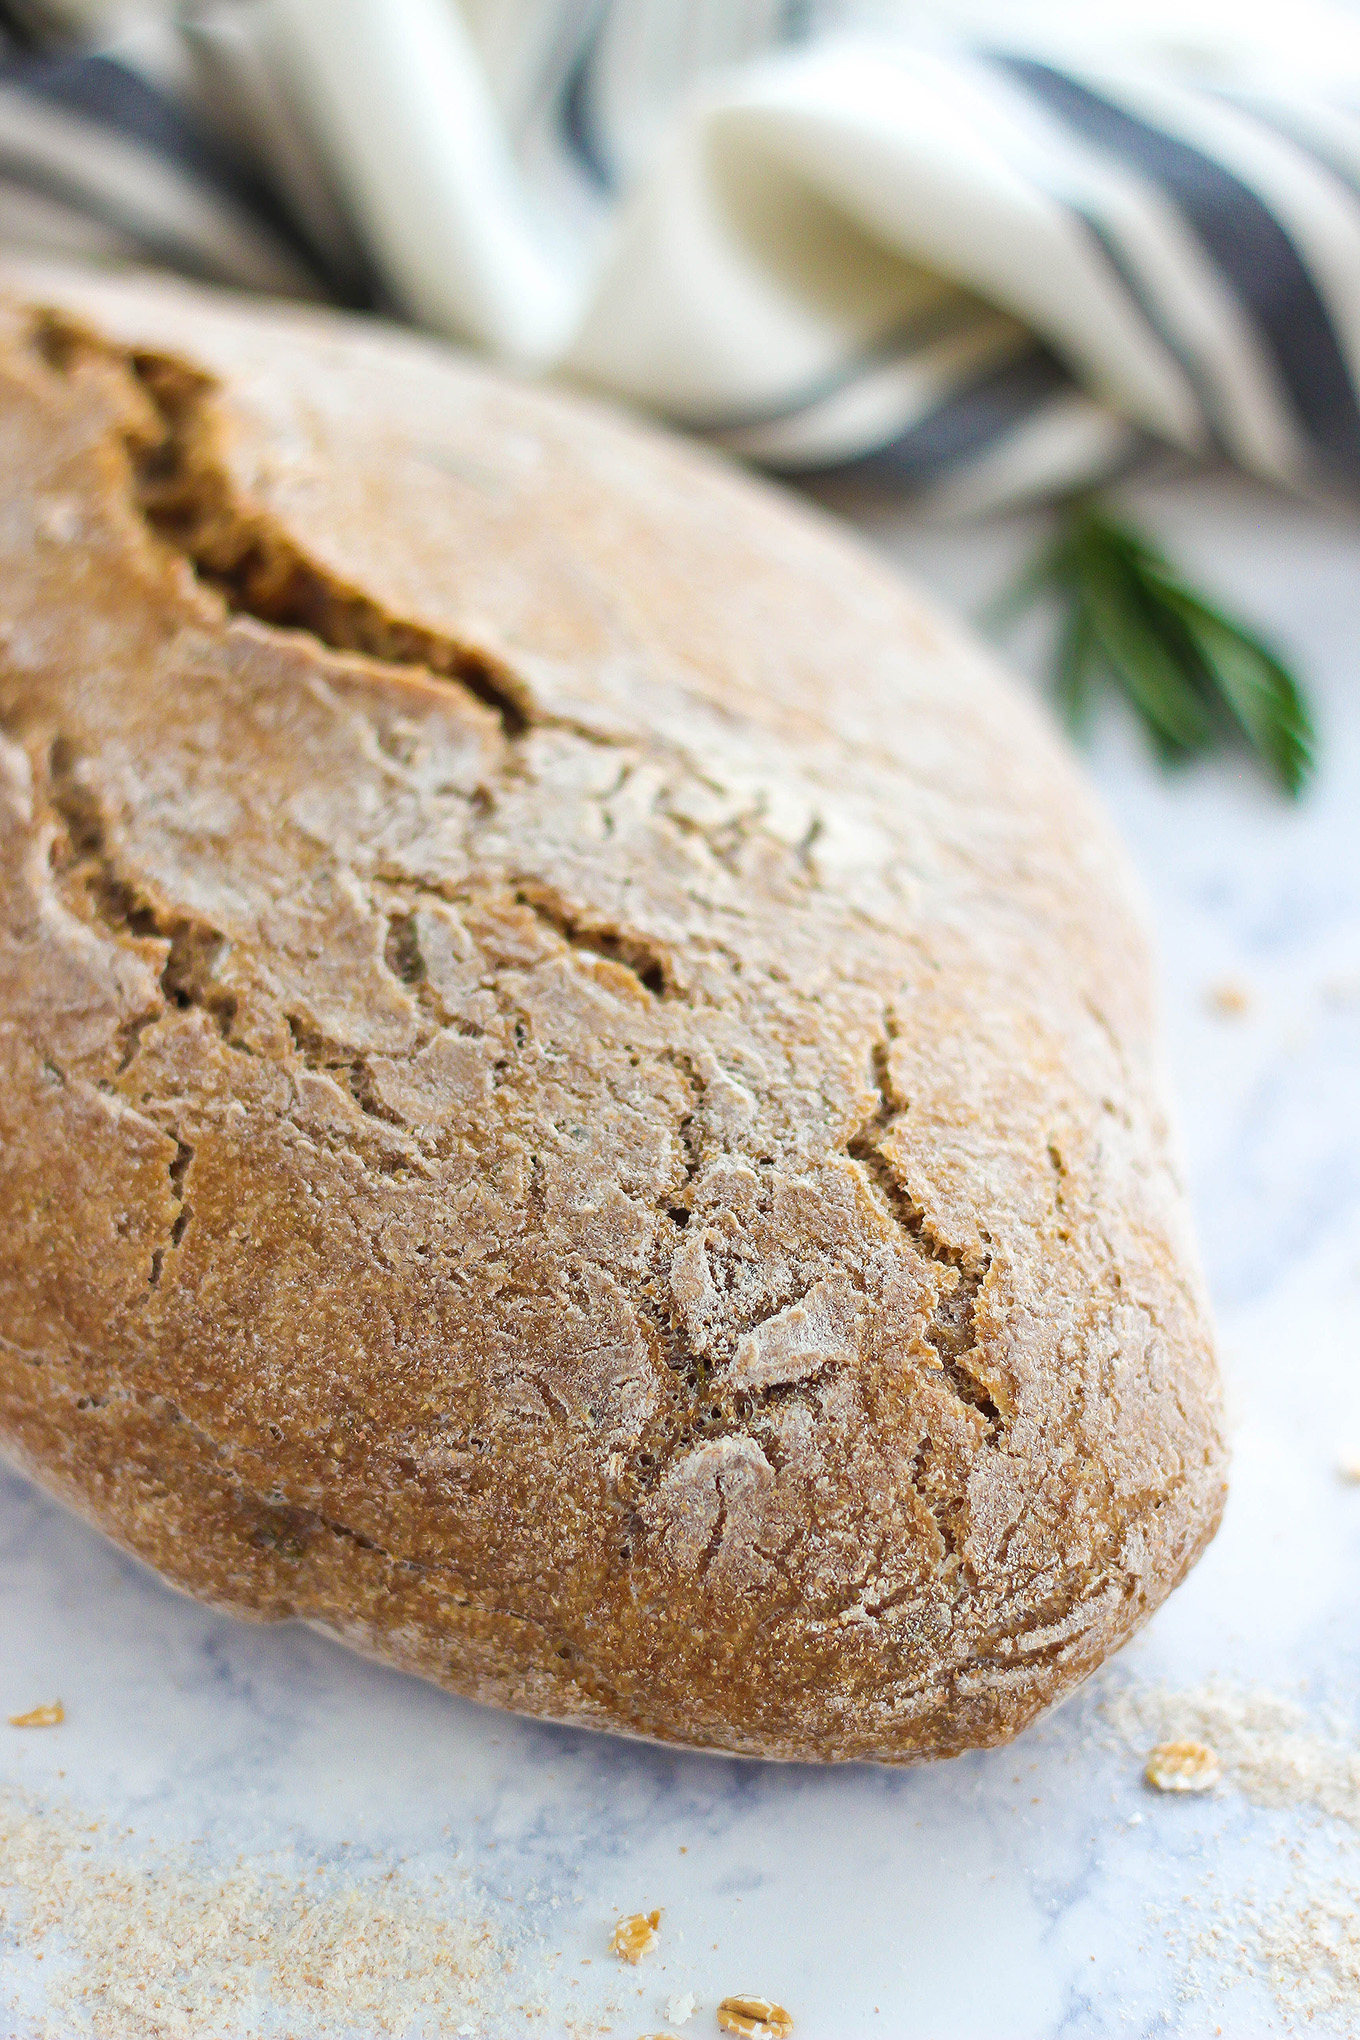
This No-Knead Whole Wheat Rosemary Bread is the perfect recipe for beginners. Enjoy a hearty and healthy loaf of bread with just a few steps and a simple list of ingredients.

Farm to Table

I think I take for granted the perspective growing up on a farm has given me. As a kid I couldn’t have realized how unique it was to pour milk from our own cow onto my cereal in the morning. I didn’t realize how special it was to know firsthand the process of cultivating our wheat in the field, grinding it in our kitchen, and baking bread in the warm oven of our farmhouse.

I experienced the farm-to-table lifestyle long before it became a movement. And it was on that farm that I learned so many valuable lessons. I learned the ingredients for a happy life while gathering eggs and nudging animals toward the barn at night—even if I didn’t realize it then.

This No-Knead Whole Wheat Rosemary Bread is the perfect recipe for beginners. Enjoy a hearty and healthy loaf of bread with just a few steps and a simple list of ingredients.

The Simple Ingredients for a Happy Life

Work hard.

Respect nature and animals.

Don’t give up.

Make do.

Serve others (and experience the joy that comes from it).

Know that you’ll reap what you sow.

This No-Knead Whole Wheat Rosemary Bread is the perfect recipe for beginners. Enjoy a hearty and healthy loaf of bread with just a few steps and a simple list of ingredients.

How It All Comes Together

While my own children haven’t grown up on a farm, they hear me talk about what it was like for me, and we regularly visit the farm where my dad still lives. My kids get to see the fields of wheat as we drive down the gravel road, just as I did as a child. They get to touch and taste the crops.

And although we don’t often grind our own wheat, like my mom did, we do get to create in the kitchen together; we get to take simple ingredients and turn them into something beautiful, wholesome, and delicious.

This is why baking with whole wheat is meaningful to me: It reminds me of my upbringing, the lessons I learned on the farm, and my parents’ dedication to their life’s work. At the same time, I think of my family now—the chance I have to nourish little bodies and hearts at the same time when we bake together in the kitchen.

It’s my honor to join with the #LifesSimpleIngredient campaign and share this healthy, comforting recipe with you, using one of life’s most simple ingredients.

This No-Knead Whole Wheat Rosemary Bread is the perfect recipe for beginners. Enjoy a hearty and healthy loaf of bread with just a few steps and a simple list of ingredients.

No-Knead Whole Wheat Rosemary Bread

This No-Knead Whole Wheat Rosemary Bread is the perfect recipe for beginners. (Novice bread makers: Don’t let bread making intimidate you!) Enjoy a hearty and healthy loaf of bread with just a few steps and a simple list of ingredients.

No-Knead Whole Wheat Rosemary Bread
 
Print
Ingredients
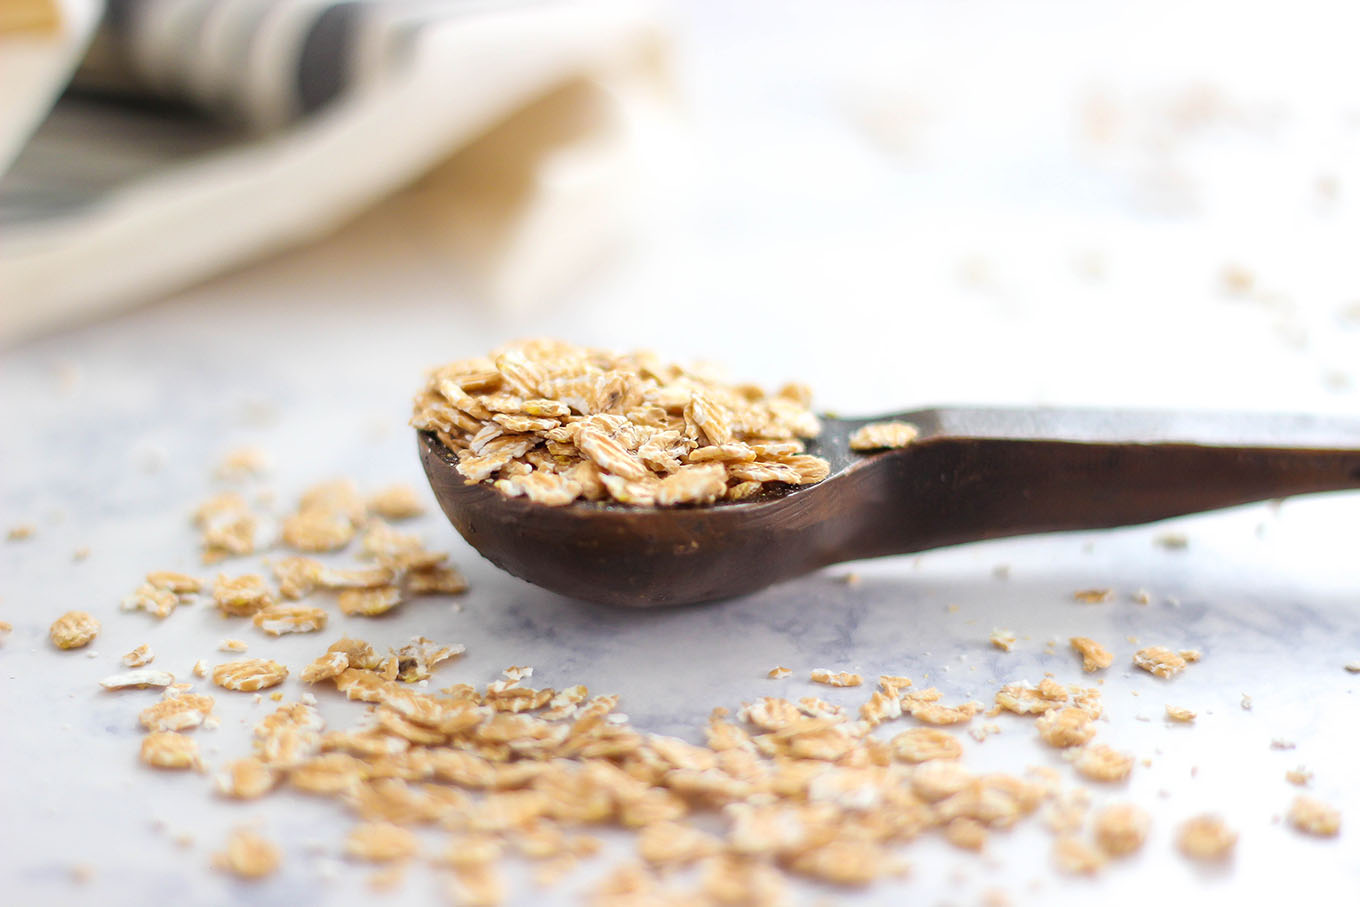
  • 2 cups whole wheat flour
  • 1 cup all-purpose flour
  • 1 teaspoon salt
  • ½ teaspoon active dry yeast
  • 1½ cups warm water
  • 2 sprigs fresh rosemary, minced
Instructions
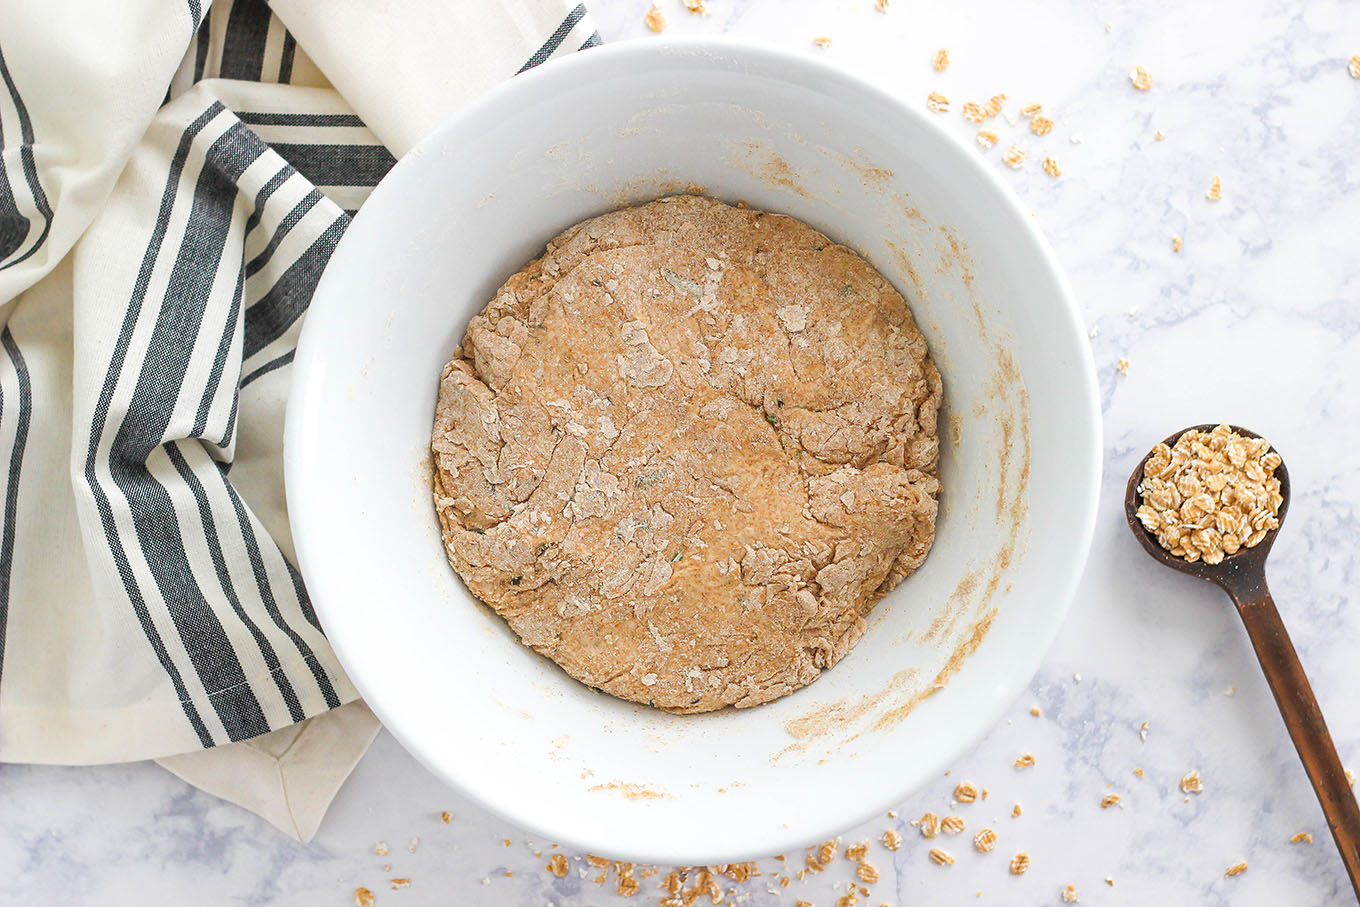
  1. In a large bowl, stir together the flours, salt, yeast, and rosemary. Using a wooden spoon, stir
  2. Cover and let rise for 8-24 hours.
  3. Preheat a dutch oven with the lid on in the oven at 450°
  4. Flour a piece of parchment paper, roll the dough out onto it, and shape to where the dough will fit into your dutch oven.
  5. Place parchment paper and shaped dough in the heated dutch oven, cover with the lid and bake for 30 minutes. Remove the lid, and cook for an additional 8-15 minutes, until golden brown.
3.5.3226

My kids request homemade bread at least weekly, and for the sentimental reasons I shared above, it’s a menu item I’m usually quick to agree to. I hope your family enjoys it as much as ours.

Who knows… Maybe you’ll even imagine my parents’ wheat fields when you make it.

This No-Knead Whole Wheat Rosemary Bread is the perfect recipe for beginners. Enjoy a hearty and healthy loaf of bread with just a few steps and a simple list of ingredients.

13 Insider Tips for Universal’s Volcano Bay Water Theme Park

Monday, November 20, 2017

Planning a family vacation to Orlando, Florida? Mixing up your traditional theme park visits by adding in a day at Universal’s Volcano Bay Water Theme Park is a fun way to beat the heat while having great family fun.

Perfect for family members of all ages and adventure levels, Volcano Bay is a themed water park unlike any other. With its cutting-edge technology, including the TapTu pay system and TapuTapu wearables, Volcano Bay goes over and beyond to make your visit both fun and easy. It’s a water park that allows you to relax (Yes! I said relax!), get your thrill on, enjoy delicious food,  and cool off all while making meaningful family memories. If you’re a parent, you’re probably already saying, “Sign me up!” But, there are a few things to know before you go.

Enjoy 13 insider tips for planning your Universal's Volcano Bay water theme park trip, including what to know before you go about TapuTapu wearables

What to Know Before You Go to Universal’s Volcano Bay

When preparing for a trip to Orlando, Florida and your first visit to Universal’s Volcano Bay Water Theme Park, consider these 13 insider tips to enjoy the best family experience.

1. Go Early

Universal’s Volcano Bay Water Theme Park is the new kid in town and that means it often reaches capacity in the summer. With Early Park Admission (available to guests who stay at the hotels onsite at Universal Orlando Resort), you will get be able to secure beach chairs for your family with an umbrella in the free seating area and ride the most popular rides. By lunch time, the most popular rides often have 90-minute to 190-minute waits during peak season. So get in a virtual line for a ride, but take your break for the day to eat lunch.  After 4 p.m., the lines get shorter.

Tip! If you aren’t staying at an onsite hotel, arrive 30 minutes before the park open so you can be one of the first public in.  It will still make a difference.

2. Know Which Volcano Bay Rides to Go on First

If you arrive at the water park early, check out these three rides first when there will be zero to minimal line. This order is recommended, assuming all height and fearlessness requirements are met.

  • Krakatau Aqua Coaster. This ride is the amazing down AND UP raft ride of the park. Guaranteed 190 minutes wait by mid day. Get on as early as possible.
  • Honu ika Moana. This is actually 2 slides with separate TapTu stations. You want to do Honu first as its wait will always exceed Moana. The two half-pipe walls of Honu will flip stomachs and thrill the teens.
  • Ko’okiri Body Plunge. This is the most extreme ride and not for everyone, but thrill seekers will need to hit it early to avoid the large wait. It’s a single-rider trap door drop that feels like a free fall. The single load and slow wait between loads makes for turtle speed turnover and the wait can exceed 120 minutes midday. The slightly less daring can head over to the Kala & Tai Nui Serpentine Body Slides (same trap door style, but a much shorter fall with additional turns and twists for a longer ride).

Tip! Less adventurous riders should head to the Ohyah/Ohno drop slides first. These are single-rider load and that makes them achingly slow midday.

3. Familiarize Yourself Ahead of Time With TapuTapu Wearables

TapuTapu is the electronic wristband virtual-line system at Volcano Bay. Tap your wearable at a slide or tube ride and it puts you in the virtual line. Then, it lets you know when you can “ride now.” This means a lot less standing and slowly moving forward, which is an ingenious solution by Universal Orlando Resort to end painful waits. Until you get the clearance to ride, enjoy no-wait attractions (for example, TaniWha Tubes, the two lazy rivers, and the wave pool). Waits are inevitable and being able to play instead of wait in a long line makes Volcano Bay amazing.

Enjoy 13 insider tips for planning your Universal's Volcano Bay water theme park trip, including what to know before you go about TapuTapu wearables

Park guests get very excited about the TapuTapu wearables and if not prepared, can be disappointed. Setting expectations ahead of time make the most out of this great benefit Volcano Bay has to offer. Here are some things to keep in mind.

  • TapuTapu is new technology and has a few quirks. For example, you can only wait in one virtual line at a time. And sometimes, a group of four people will “tap in” consecutively, but not be notified to “ride now” at the same time. The time gap can be up to 10 minutes. But don’t worry!  Walk over to the slide entry and usually everyone is cleared to ride by then. If not, the staff can help with this problem.
  • You have up to about one hour to use your “ride now.”  So don’t drop your lunch in the trash if it just arrived to head for the slides. TapuTapu understands that not everyone can give an immediate response. Be assured you won’t lose your place.
  • One ride may have multiple Tapu stands and they may have different wait times listed, sometimes varying by 15 minutes. So quickly scan all the stands, if you can, for the best offer.
  • TapuTapu wearables fall off easily. Make sure to keep your park passes and take pictures of your wearables in case you need to replace yours or your family members.

4. Remember That “Ride Now” = “Short Wait”

Just because the wristband says “ride now,” doesn’t mean you’ll be walking up to the Maku Puihi round raft rides and immediately be first in line. “Ride now” is a more positive way of saying, “get in the short queue now and wait for the final leg of the line.” I think the goal is less than 10 minutes standing in the actual line. Single-rider slides and the very popular aqua coaster usually have longer waits.

The virtual line times take into account the time riders will be standing time. You will see a listed wait time at the Tapu stand of “90 minutes.” Then, you tap in and your wristband says, “75 minutes.” Unfortunately, you didn’t score a shorter time. The wristband indicates the wait to enter the short line. It assumes you’ll be standing there for 15 minutes.

Enjoy 13 insider tips for planning your Universal's Volcano Bay water theme park trip, including what to know before you go about TapuTapu wearables

5. Set up Your Universal App Account Prior to Going to Volcano Bay

Load the Universal Orlando Resort app, available for Android and iOS, fill in the wallet information, sync your tickets, and pick a pin number before heading to Universal’s Volcano Bay. This allows you to use all the advantages of TapuTu, the Volcano Bay purchase system. As a side bonus the app is useful for line info when you are in Universal Studios and Universal Islands of Adventure.

Tip! You can also rent a locker with the TapuTu and access the photo pass locations. This is a HUGE advantage with teens who want in and out of the locker to check their phones.

6. Send the Wristbands for a Group with One Person

Unless you have a cabana with the cool Tapu Station for all rides, you will need to walk to the entrance of a ride to tap in and enter the virtual line. For some rides that is no big deal. For others, the crowd at the stations can be hard to get through (Honu ika Moana is the worst). To get all the wristbands there at the same, time take them off your wrist and hand them to one person. That person can get through the crowd and tap everyone into the virtual line without the headache of getting every member of the party through the crowd. It also saves the problem of people cutting in line and tapping in between your family members.

7. Know the Rivers are Rides too

The floating rivers do not require Tapu Tapu entry, but don’t assume they are the best means of getting around the park as is so often the case with water parks.  Not so at Volcano Bay. There are 2 exits for each river, but location doesn’t prove useful as the park is designed in a meandering path style.  Just walk to the rides when you get your “ride now” message.  The rivers are an attraction unto themselves, so you can enjoy them while you are in virtual line.  After you experience the glow worm cave of the Winding River or the swiftness of the Fearless you will understand my meaning.

Enjoy 13 insider tips for planning your Universal's Volcano Bay water theme park trip, including what to know before you go about TapuTapu wearables

8. Find the Hidden TapuTapu Spots

Down time between rides is a given at a popular theme park and Volcano Bay is no different. But, you can go on a treasure hunt of sorts to make the wait more fun. Use your TapuTapu wearable to locate fun spots throughout the park that activate something like squirt water at lazy river riders, start a mist, blow air on passersby, create an underwater song, etc. Using these spots while waiting in a virtual line does not affect your wait.  They are freebies and fun to discover.

Tip! Two exist in the leisure pool, three are in the volcano, one is on a bridge, you’ll find several in the Runamukka Reef children’s play area, and you’ll discover a few more you seek out on your own.

9. Avoid Losing Your TapuTapu

Losing your TapuTapu is a very real possibility. Here are some tips to avoid losing it:

  • Put it on securely. Lose bands get pulled off the easiest. One clever mom  in the park put her child’s band on the upper arm to keep it more securely in place on a skinny wrist.
  • Be aware single-rider slides are the most likely place to lose them. Cross your arms over the TapuTapu as you go down and try to grip it with the opposite hand when you hit the splash pool.

Tip! Should you lose your TapuTapu wearable, don’t bother trying to find it. The exit pools usually have lifeguards quickly shooing you out. And they instruct you to NOT look for it as it holds up the ride. Furthermore, all the TapuTapu’s look the same. There is no way to identify yours from another one that fell to the bottom of the pool. Just go to concierge, take your park passes, and get a new one.

10. Find a Shady Spot

The most guaranteed way to get a shady spot it to rent a cabana or reserve premium seating, but this isn’t necessary. If you arrive early, you can find get seats for your family with umbrellas in the free seating areas. Umbrellas of varying sizes  are all over the sandy beach areas by the Winding River, Waturi Beach, and the Fearless River. Waturi Beach is the busiest, most popular place to park your towels because it’s the first one guests reach coming into the park. So, head to the back of the park for more options of shade.

11. Prepare for a Day at the Beach

Universal’s Volcano Bay has a lot of sand. In fact, unless you reserve a Cabana, you will be walking on sand. The good news? The water theme park has come up with a fun way to help guests clean their feet. In addition to showers, walking paths have water sprayers that are aimed low for the very purpose of helping guests get the sand off of their feet.

12. Leave the Towels at Home

Luggage space and issue? Save yourself some space by renting the towels at Volcano Bay for $5 per towel for the day.  The towels are better than a typical poolside towel, but it will be the same green or blue color as a few zillion others. So, be sure to keep track of them.

Tip! Our family of four could have gotten by with two towels as we rarely used them and they didn’t seem to stay wet.

13. Remember Volcano Bay is a Theme Park

Just like at any other theme park, the rides at Volcano Bay may break down. This means you may have to wait in lines or not be able to ride. Additionally and due to Universal Orlando Resort’s strict concern for its guest’s safety, rides will close due to lightening. Please help prepare your family in advance by talking through the potential situations you could encounter. Then, get in virtual lines and enjoy your water theme park experiences with the delicious food, fun Tapu spots, and rides that do not require a “ride now”—the lazy rivers or the wave pool.

Tip! If you prefer to rest during the middle of the day, you can leave the park and return around 5 p.m., but know that if the park is still at capacity you can’t get back in.

There you have it—insider tips to make your experience at Universal’s Volcano Bay Water Theme Park an amazing one. It’s easy to think these tips won’t make or break your vacation, but they actually can.  No shade leaves some sunburned. Late arrival means fewer rides with long waits. No TapTu pay means digging the credit card out of the locker throughout the day.  Following these tips means enjoying every ounce of your theme-park experience.

Have you been to Universal’s Volcano Bay Water Theme Park? If so, what tips do you recommend?

Enjoy 13 insider tips for planning your Universal's Volcano Bay water theme park trip, including what to know before you go about TapuTapu wearables

Photo credit for all but the last image: Universal Orlando Resort.

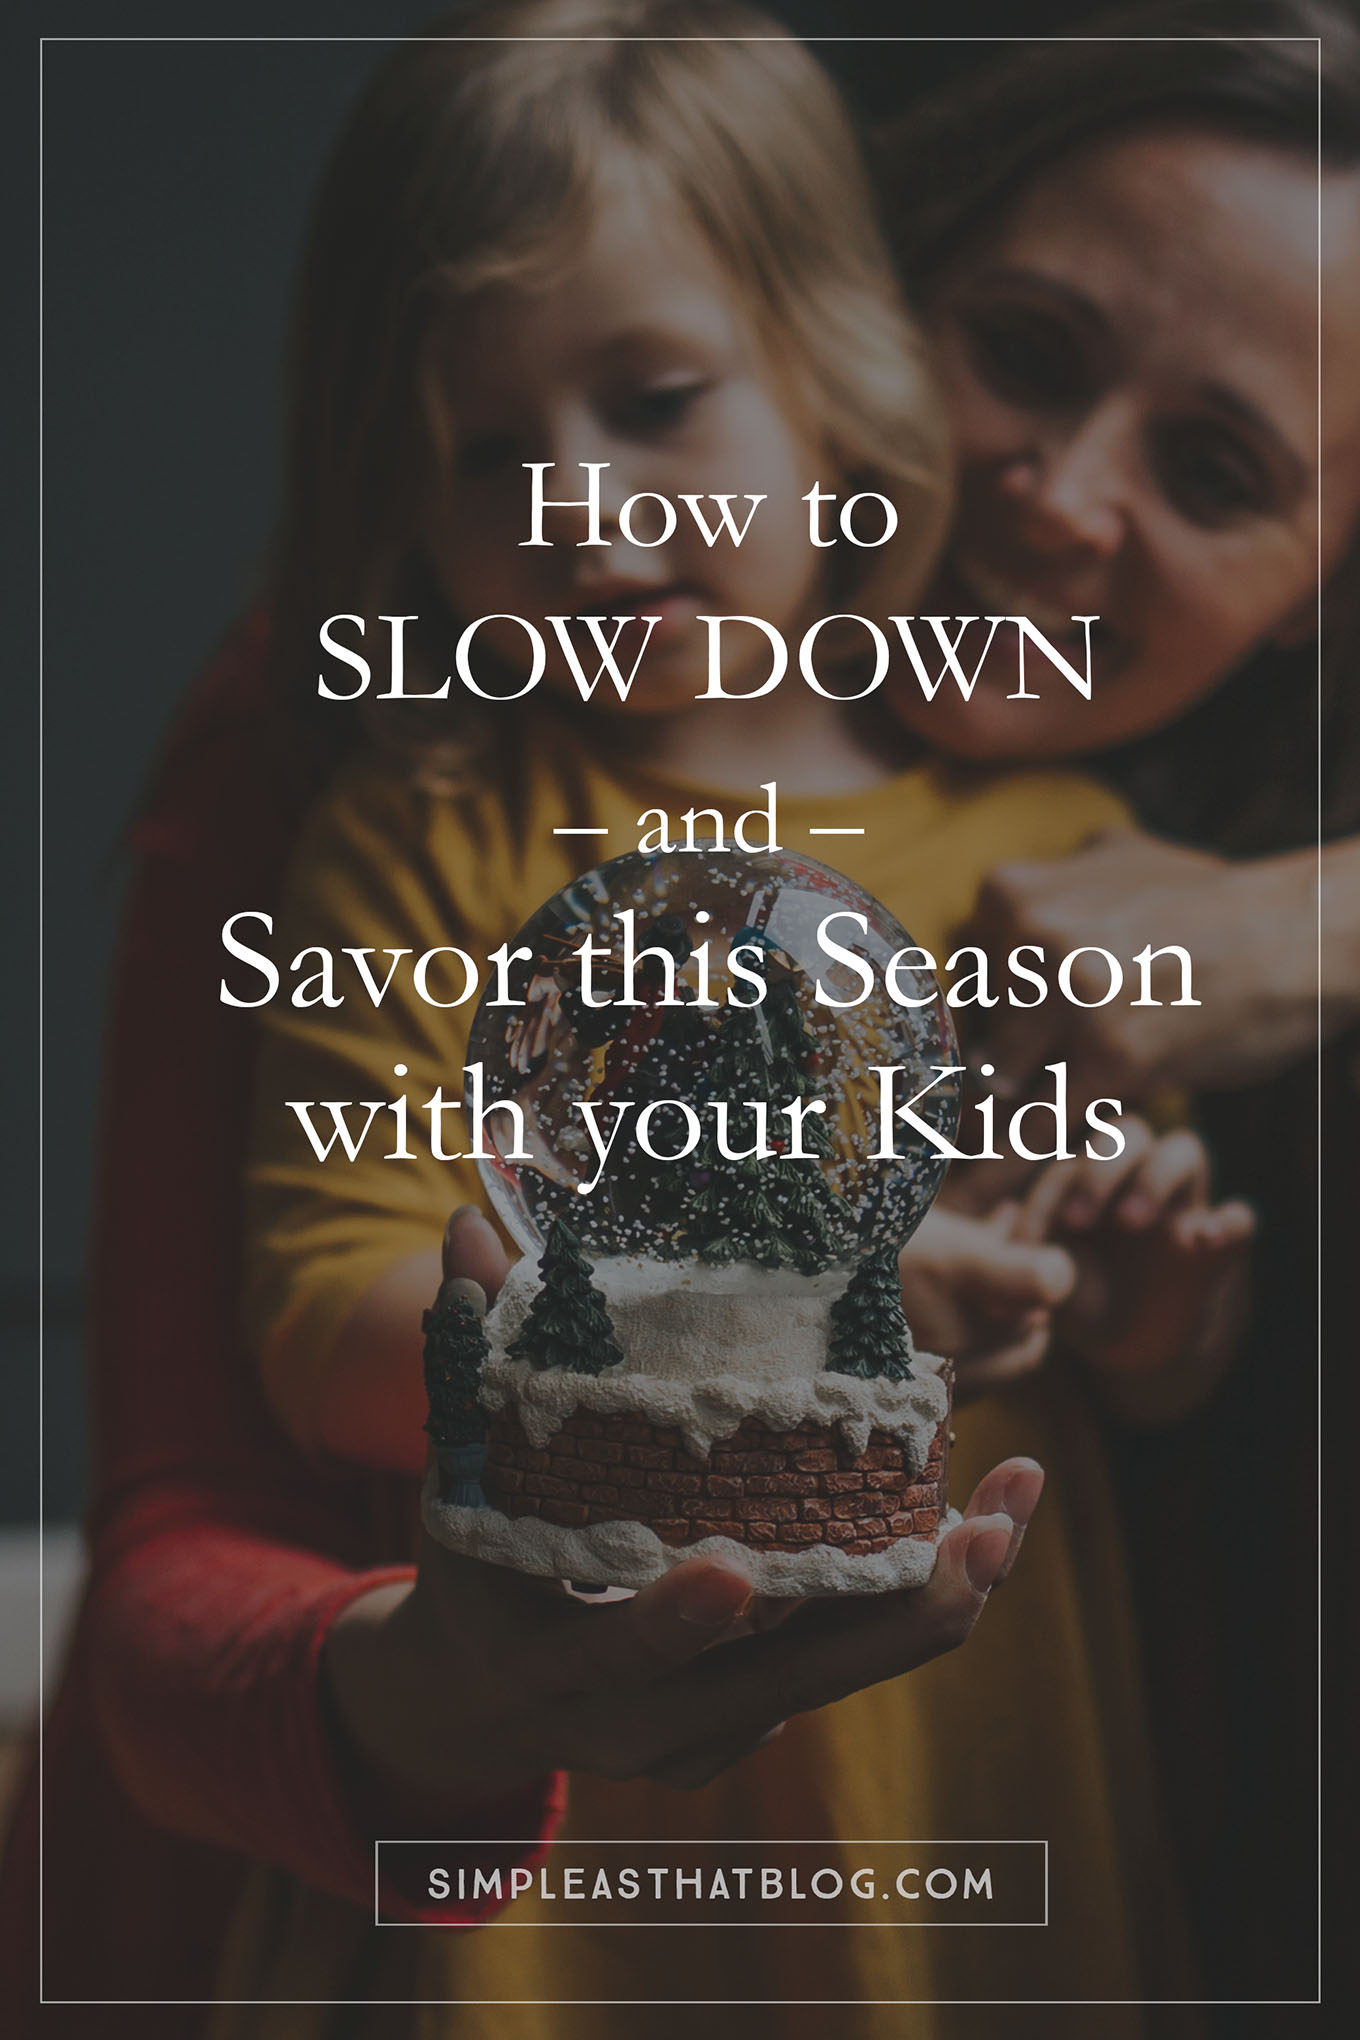
How to Slow Down and Savor This Season With Your Kids

Saturday, November 18, 2017

The other day I was searching through photos when I came across some pictures of my children’s very first Christmas’s. My daughter sat in a small pile of torn gift wrap with a joyful smile. My son in his Christmas PJ’s, occupied with a simple gift. As I scrolled through those photos I felt a small lump in my throat and I held back a tear. Those were the days.

The days when the crinkly sound of wrapping paper was magical and boxes were more interesting than an actual gift. Where the memories came easy and the days were more simple.

How I long to go back to that time!

We put a lot of pressure on ourselves as moms to make the holidays special. It's so easy to adopt the myth that doing more will equal more magic.

Photos courtesy of Stephanie Michaelis Photography

As my children have grown older the days seem to be slipping by. Life feels busier and my mom-heart pleads for me to slow things down—to savor each season I get with my kids. For although I still have them in my home, it won’t be long until they are grown.

I’m feeling the pressure to make our time together count. To bottle it up and make it special. To create a memorable and magical Christmas for my kids. And although I sometimes long to do ALL that the season has to offer, I’m understanding that doing it ALL doesn’t necessarily mean that we’ll make MORE memories. In fact, I’m learning that the opposite is true.

It’s in the rushing that we miss the magic.

Scaling back the extras is truly how we can uncover more room to savor, enjoy, and remember these holiday moments we get with our kids. To dive into the warmth of the season and make it the most memorable yet.

We put a lot of pressure on ourselves as moms to make the holidays special. It's so easy to adopt the myth that doing more will equal more magic.

How to Slow Down and Savor This Season With Your Kids

1. Do less. You don’t do more to invite the spirit of Christmas into your life—you do less.

2. Focus on fewer, but more meaningful traditions.

3. Plan ahead. Planning ahead equals more mental energy for the things that matter most.

4. Let go of perfection. Find joy in the doing things “good enough”.

5. Know that simple and quiet are okay.

We put a lot of pressure on ourselves as moms to make the holidays special. It's so easy to adopt the myth that doing more will equal more magic.

6. Snuggle on the couch and read books by the light of the Christmas tree.

7. Sit with your kids at the kitchen table and drink hot cocoa. Talk with them. Laugh with them.

8. Spend less time in stores and more time at home.

9. Focus less on gifts and more on the true spirit of Christmas.

10. Make cookies just for you and them.

We put a lot of pressure on ourselves as moms to make the holidays special. It's so easy to adopt the myth that doing more will equal more magic.

11. Have more dinners at home instead of visiting overly-busy restaurants.

12. Notice the sights, the sounds, the smells, the way your kids light-up at the most unexpected times.

13. Bundle up and play in the snow, or go for a slow walk.

14. Drive around and look at holiday lights.

15. Reminisce about old memories – tell family stories.

We put a lot of pressure on ourselves as moms to make the holidays special. It's so easy to adopt the myth that doing more will equal more magic.

16. Capture the moments, but live in the moment too.

17. Give the gift of experience over things.

18. Volunteer together at a place of need.

19. Watch your favorite holiday movie together.

20. Disconnect from social media for a day.

We put a lot of pressure on ourselves as moms to make the holidays special. It's so easy to adopt the myth that doing more will equal more magic.

21. Take time for you. Fill your cup so you can give to others.

22. Stop conforming and go with your heart.

23. Let them help decorate the tree, add the ingredients, wrap a gift.

24. Uncover the magic. Remember what it was like to be a kid and allow yourself some whimsy.

25. Feel the warmth and love that only this time of year can bring.

And above all, remember this:

We put a lot of pressure on ourselves as moms to make the holidays matter. It’s sooo easy to adopt the myth that doing more will equal more magic. But when we are intentional about the season and can take a moment to listen–really listen to our hearts, we can find a better, more meaningful way.

If my younger-mom self (the one with the small children who enjoyed crinkly wrapping paper and cardboard boxes) could tell me one thing, I think she’d tell me this:

Know that simple is okay, AND perhaps it is even BEST.

The holidays can be magical and memorable by slowing down and savoring things in a different way. Ignite that little spark within yourself and have the most wonderfully-beautiful holiday season yet.

Join us for 12 Days to a Simpler Holiday Season.
Because it may feel counterintuitive to do less this time of year, but doing less leaves more room for family, simple traditions, and the true spirit of the season.

If you liked this post you might also enjoy…

  • Motherhood Simplified
  • A Less-Is-More Christmas Season
  • 5 Ways to Simplify Christmas This Year
  • Confessions of an Unbalanced Mom

We put a lot of pressure on ourselves as moms to make the holidays special. It's so easy to adopt the myth that doing more will equal more magic.

Baked Corn Pudding

Friday, November 10, 2017

Baked Corn Pudding – Be a holiday hero when you show up to the family gathering with this delicious sweet-and-savory side dish!

Baked Corn Pudding

Hi Simple As That readers! This is Rachel from Simple Seasonal again and I’m excited to bring you another seasonal recipe! Now that Halloween is over it’s time to start thinking about the holiday season…

I love how this time of year brings my family together. I love the cozy feeling of a Thanksgiving turkey dinner and the wonder in my kids eyes as we enjoy our family’s Christmas traditions. You and I both know, however, that those magical family moments don’t happen by accident. They’re a product of hours of planning and preparation, and a little bit of stress.

Baked Corn Pudding

When I was deciding what to make today, I knew I wanted to offer some kind of holiday side dish to help you with will all that planning and preparation. A couple of years ago I tried a side that was entirely new to me while having Thanksgiving with my in-laws. That is, Baked Corn Pudding. Apparently it’s pretty traditional, but my husband and I come from very different backgrounds with different food traditions, so this one never made it onto my Mom’s table.

I have to be honest, I was a tad skeptical of this dish before I gave it a try. Corn plus pudding just kinda sounds a little bit weird to me… Now, a word of wisdom for daughters-in-law everywhere: When your mother-in-law makes a side dish for a holiday meal, take a large serving. No matter what. And then announce to the entire dinner party how much you love it. Fortunately for me, I was pleasantly surprised when I gave my big helping of Baked Corn Pudding a try. It was SOOO GOOD!

How to Make Baked Corn Pudding

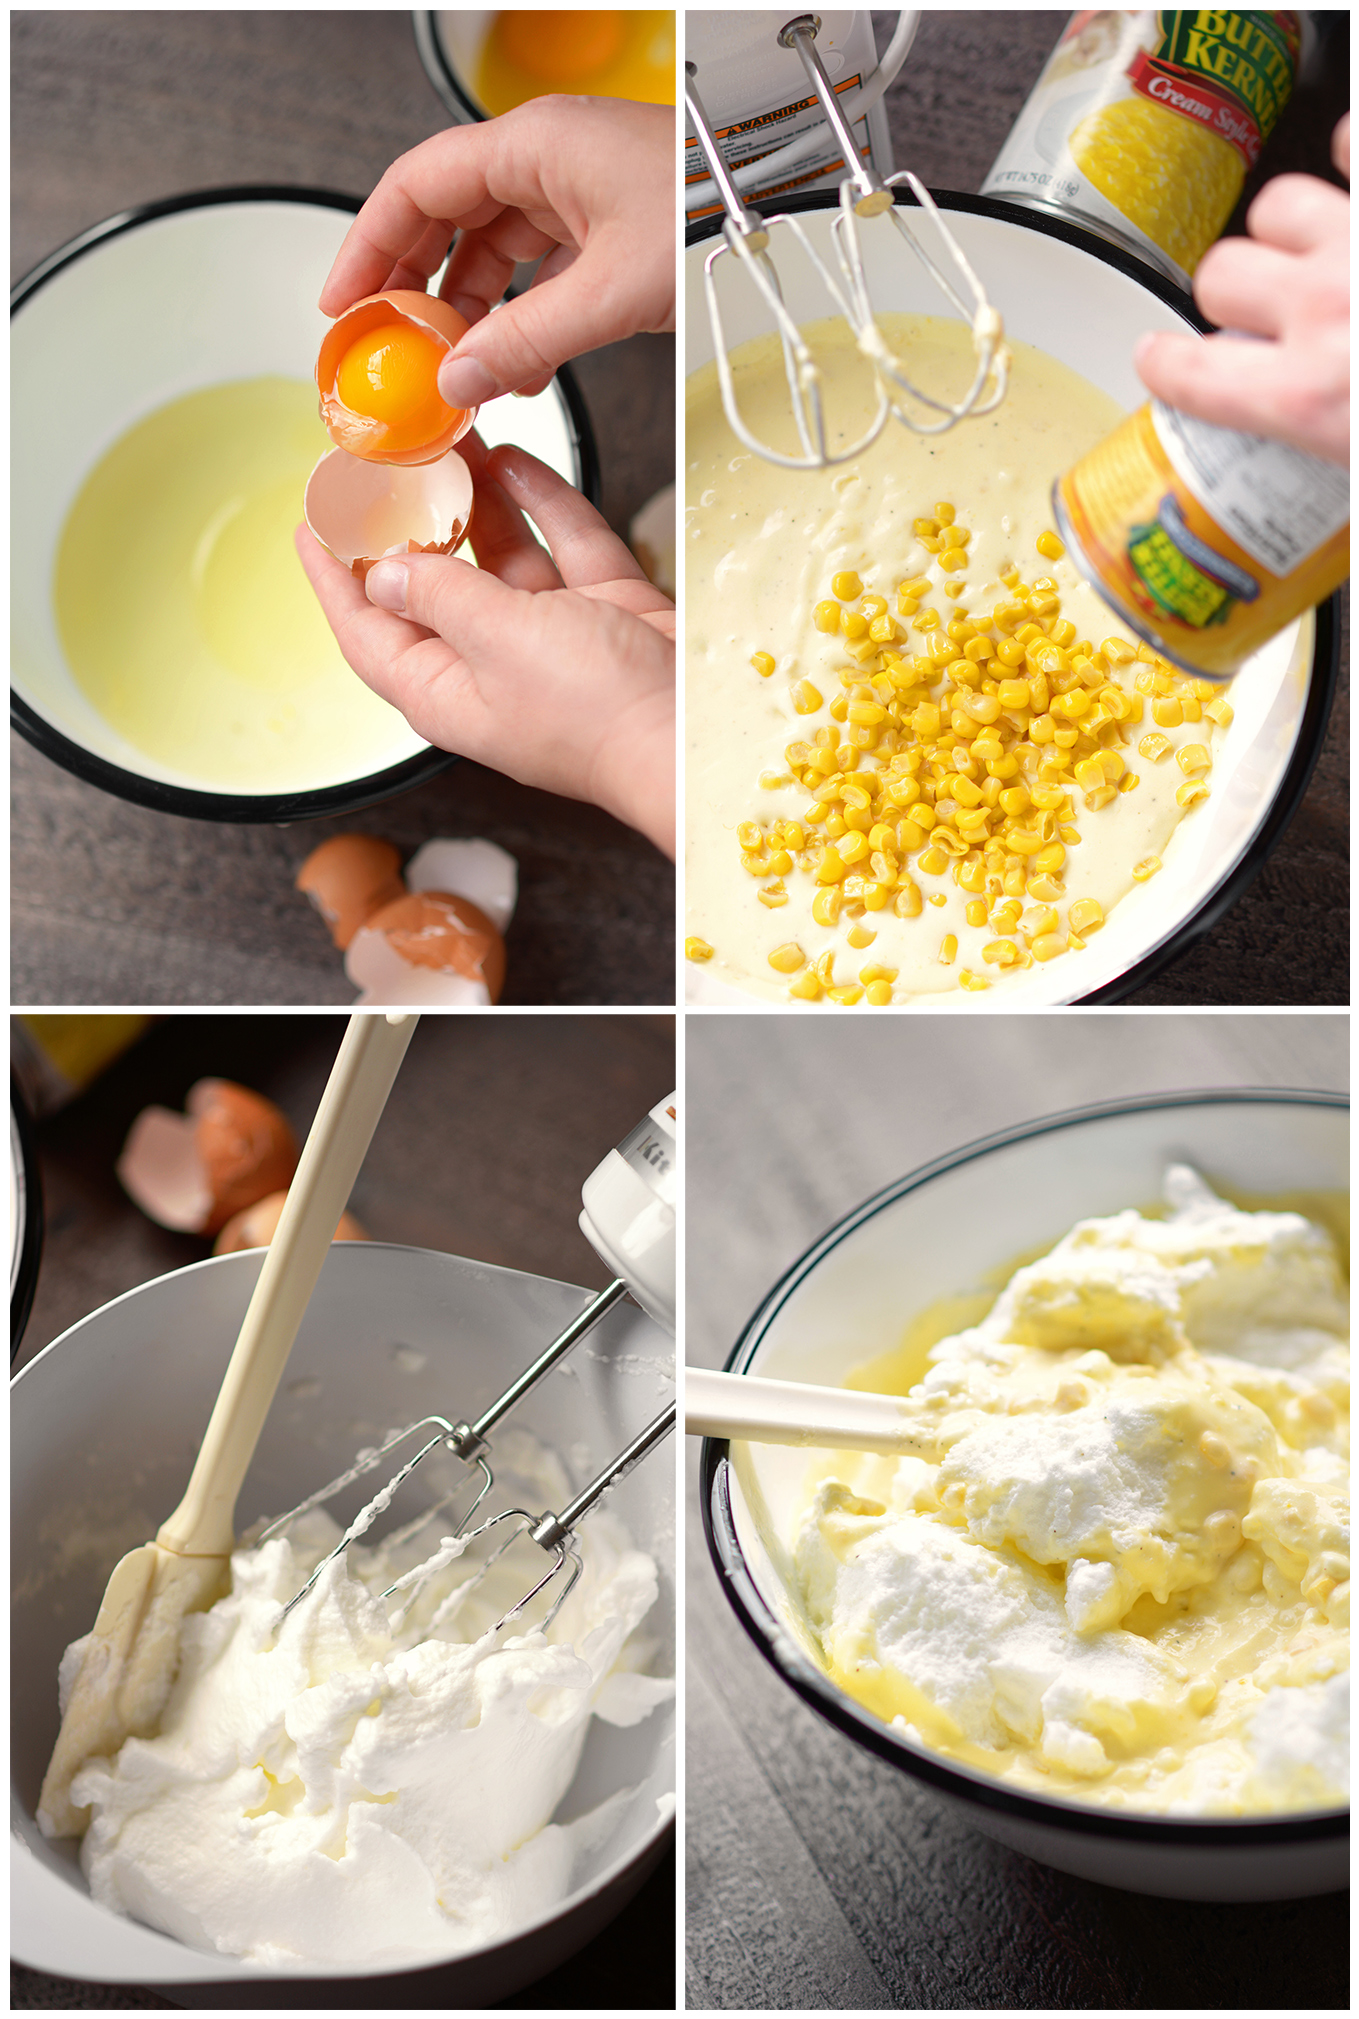
Think creamy and savory clouds of pudding paired with sweet and salty flavors. This dish has totally got the richness that elevates it to the level of an awesome holiday dinner side! The secret to this recipe lies in beating egg whites into fluffy, snow white peaks, and then gently folding them into your batter. Check out my photos above and the recipe card below for guidance, so that you can plan on making a perfect Baked Corn Pudding as part of your holiday meal plan this season!Baked Corn Pudding


4.0 from 1 reviews
Baked Corn Pudding
 
Print
Be a holiday hero when you show up to the family gathering with this delicious sweet-and-savory side dish!
Author: Rachel Hanawalt
Recipe type: Side
Cuisine: American
Serves: 6 servings
Ingredients
  • 1 can creamed corn
  • 1¾ C milk
  • 7 egg yolks
  • 4 Tbsp sugar
  • 3 Tbsp cornstarch plus
  • ½ tsp salt
  • ⅛ tsp pepper
  • 1 can whole sweet corn, drained
  • 4 Tbsp melted butter
  • 7 egg whites, beaten
  • 1 C shredded mild cheddar cheese
  • 1 C crushed ritz crackers
Instructions
  1. In a large mixing bowl beat together creamed corn, milk, egg yolks, cornstarch, sugar, salt, and pepper for one minute. Next, beat in the melted butter until combined and then stir in the drained whole sweet corn.
  2. In another mixing bowl beat 8 egg whites for about 5 minutes, or until they form stiff white peaks. Then fold the egg whites into the corn mixture, taking care not to over mix.
  3. Pour the mixture into a 3 quart casserole dish and bake at 400º F for 15 minutes. Reduce the oven temperature to 350º F and bake for another 20 minutes.
  4. Meanwhile, mix together the shredded cheddar cheese and crushed ritz crackers. After the Baked Corn Pudding has been in the oven for 20 minutes, top it with the cheddar and cracker mix and return it to the oven and bake for another 3 minutes. The Corn Pudding is done cooking when a knife can be inserted in the center and it comes out clean. Remove the dish from the oven and allow it to sit for 5 minutes before serving.
3.5.3226

Baked Corn Pudding

You may also enjoy…

  1. Thanksgiving Wild Rice Stuffed Acorn Squash
  2. Homemade Slow Cooker Dulce de Leche
  3. Sheet Pan Chicken Drumsticks with Delicata and Grapes
« Previous Page
Next Page »

Primary Sidebar

Rebecca Cooper — Founder, Simple as That Blog

Hello, I'm Rebecca. Welcome to my blog, Simple as That. Come along as we embrace simplicity in crafting, photography, travel, and family life. Read more about me.

Newsletter

Get the latest updates from Simple as That delivered to your inbox.

Join for Free

Beyond Snapshots: Mastering the Art of Mobile Photography

Connect

  • Bloglovin
  • Facebook
  • Instagram
  • Pinterest
  • Twitter

Follow On Pinterest

Visit Rebecca - Simple as That Blog's profile on Pinterest.

Categories

  • Crafts / DIY
  • Holidays
  • Motherhood
  • Organization
  • Photography
  • Printables
  • Recipes
  • Simple Living
  • Travel
  • Wellness

Our Privacy Policy

Follow on Instagram

Instagram has returned invalid data.

Printable 2023 Calendar

Our printable calendars and organizational pages have been essential in keeping our home and my life in order and I guarantee they will be a help to you too!

Click here to learn more

© Simple as That Blog, 2017 · Design by Brian Gardner

Simple as That Blog

Facebook / Instagram / Pinterest / Twitter / Contact