• About
    • About Rebecca
    • Meet the Team
    • Media Kit
    • FAQ
  • Photography
  • Holidays
  • Recipes
  • Printables
  • 2019 Calendar
  • Write for Us
  • Beyond Snapshots

Simple as That

Making Everyday Beautiful

Blog

Motherhood Is a Beautiful Work of Art

Sunday, August 6, 2017

The tasks of motherhood often feel small and unnoticed, but each little moment we spend caring for and nurturing our children weaves together to become a beautiful work of art.

The tasks of motherhood often feel small and unnoticed, but each little moment we spend caring for and nurturing our children weaves together to become a beautiful work of art.

Photos courtesy of Sarah Moan Photography

We exit the store, our flip flops clapping against the hot pavement as I snugly hold onto her little hand. I narrowly escaped the water fountain on the way in, and planned to do the same on the way out. She loves that fountain, but it’s too hot, and besides I’ve got an arm full of groceries to get to the car.

I veer to the left, but I’m not fast enough and she spots it. She pulls me in the other direction, her chubby-little finger pointing the way. It’s cascading water does look enticing, I understand, but we have other things to do today, and did I mention that’s it’s hot?

I pause, wondering if I can offer her a distraction, but my heart gives in and I allow her to lead me over.

“Penny, Mama?” she pleads.

I fish around the bottom of my purse and find a single-shiny penny, then bend down and  offer it to her.

“Here you go, babe. Just one, and then we’ve got to go.”

A smile spreads on her face. I tell her to make a wish, and she sends the penny flying into the pool.

A single moment, one tiny penny. It didn’t seem big, and it didn’t seem significant, but neither do many of the moments of motherhood when we’re right there living them.

The tasks of motherhood often feel small and unnoticed, but each little moment we spend caring for and nurturing our children weaves together to become a beautiful work of art.

There are days when the little routines seem crazy-dull. The laundry, the meal planning, the scraped knees and needing whimpers. The constant demands and tasks that make up our days as mothers. So often they feel small. So often they feel unnoticed.

After that day at the water fountain, I found a quote that anchored me in a way that nothing else could do. I purposely secured it to my refrigerator door, and this is what it read:

“I long to accomplish a great and noble task,

But it is my chief duty to accomplish small tasks

as if they were great and noble.”

-Helen Keller

I long to accomplish each task of motherhood as if I’m gleefully throwing a tiny penny into a sparkling fountain of water. Making a wish each time I throw. Wishing that I’ll continue to get more and more opportunities to do the small stuff.

  • Preparing the daily snacks and meals.
  • The cleaning, the shopping, the planning.
  • The driving.
  • Story after story at bedtime.
  • Caring, consoling, and encouraging.

Our efforts are one tiny penny thrown into the fountain of our children’s lives at a time. Slowly, but surely, adding up to become thousands of beautiful efforts–a shining masterpiece, evidence of one thing:

Motherhood Is a Beautiful Work of Art

It’s a collection of golden pennies, tiny threads in a tapestry we’re weaving, brush strokes in a beautiful work of art. A work of art that doesn’t come instantly or easily, but one that is created one loving task at a time.

There’s no way to rush it, no way to compare it, and the world can’t define it. Nothing can match the sacrifice and the small, collective efforts of motherhood.

It IS a beautiful work of art. A work that is sculpting our hearts and shaping the lives of our children.

The tasks of motherhood often feel small and unnoticed, but each little moment we spend caring for and nurturing our children weaves together to become a beautiful work of art.

If you enjoyed this post you might also like…

  • Stop Looking for Perfect and Embrace What Is
  • Motherhood Simplified
  • Confessions of an Unbalanced Mom

5-Ingredient Chocolate Chip Granola Recipe

Friday, August 4, 2017

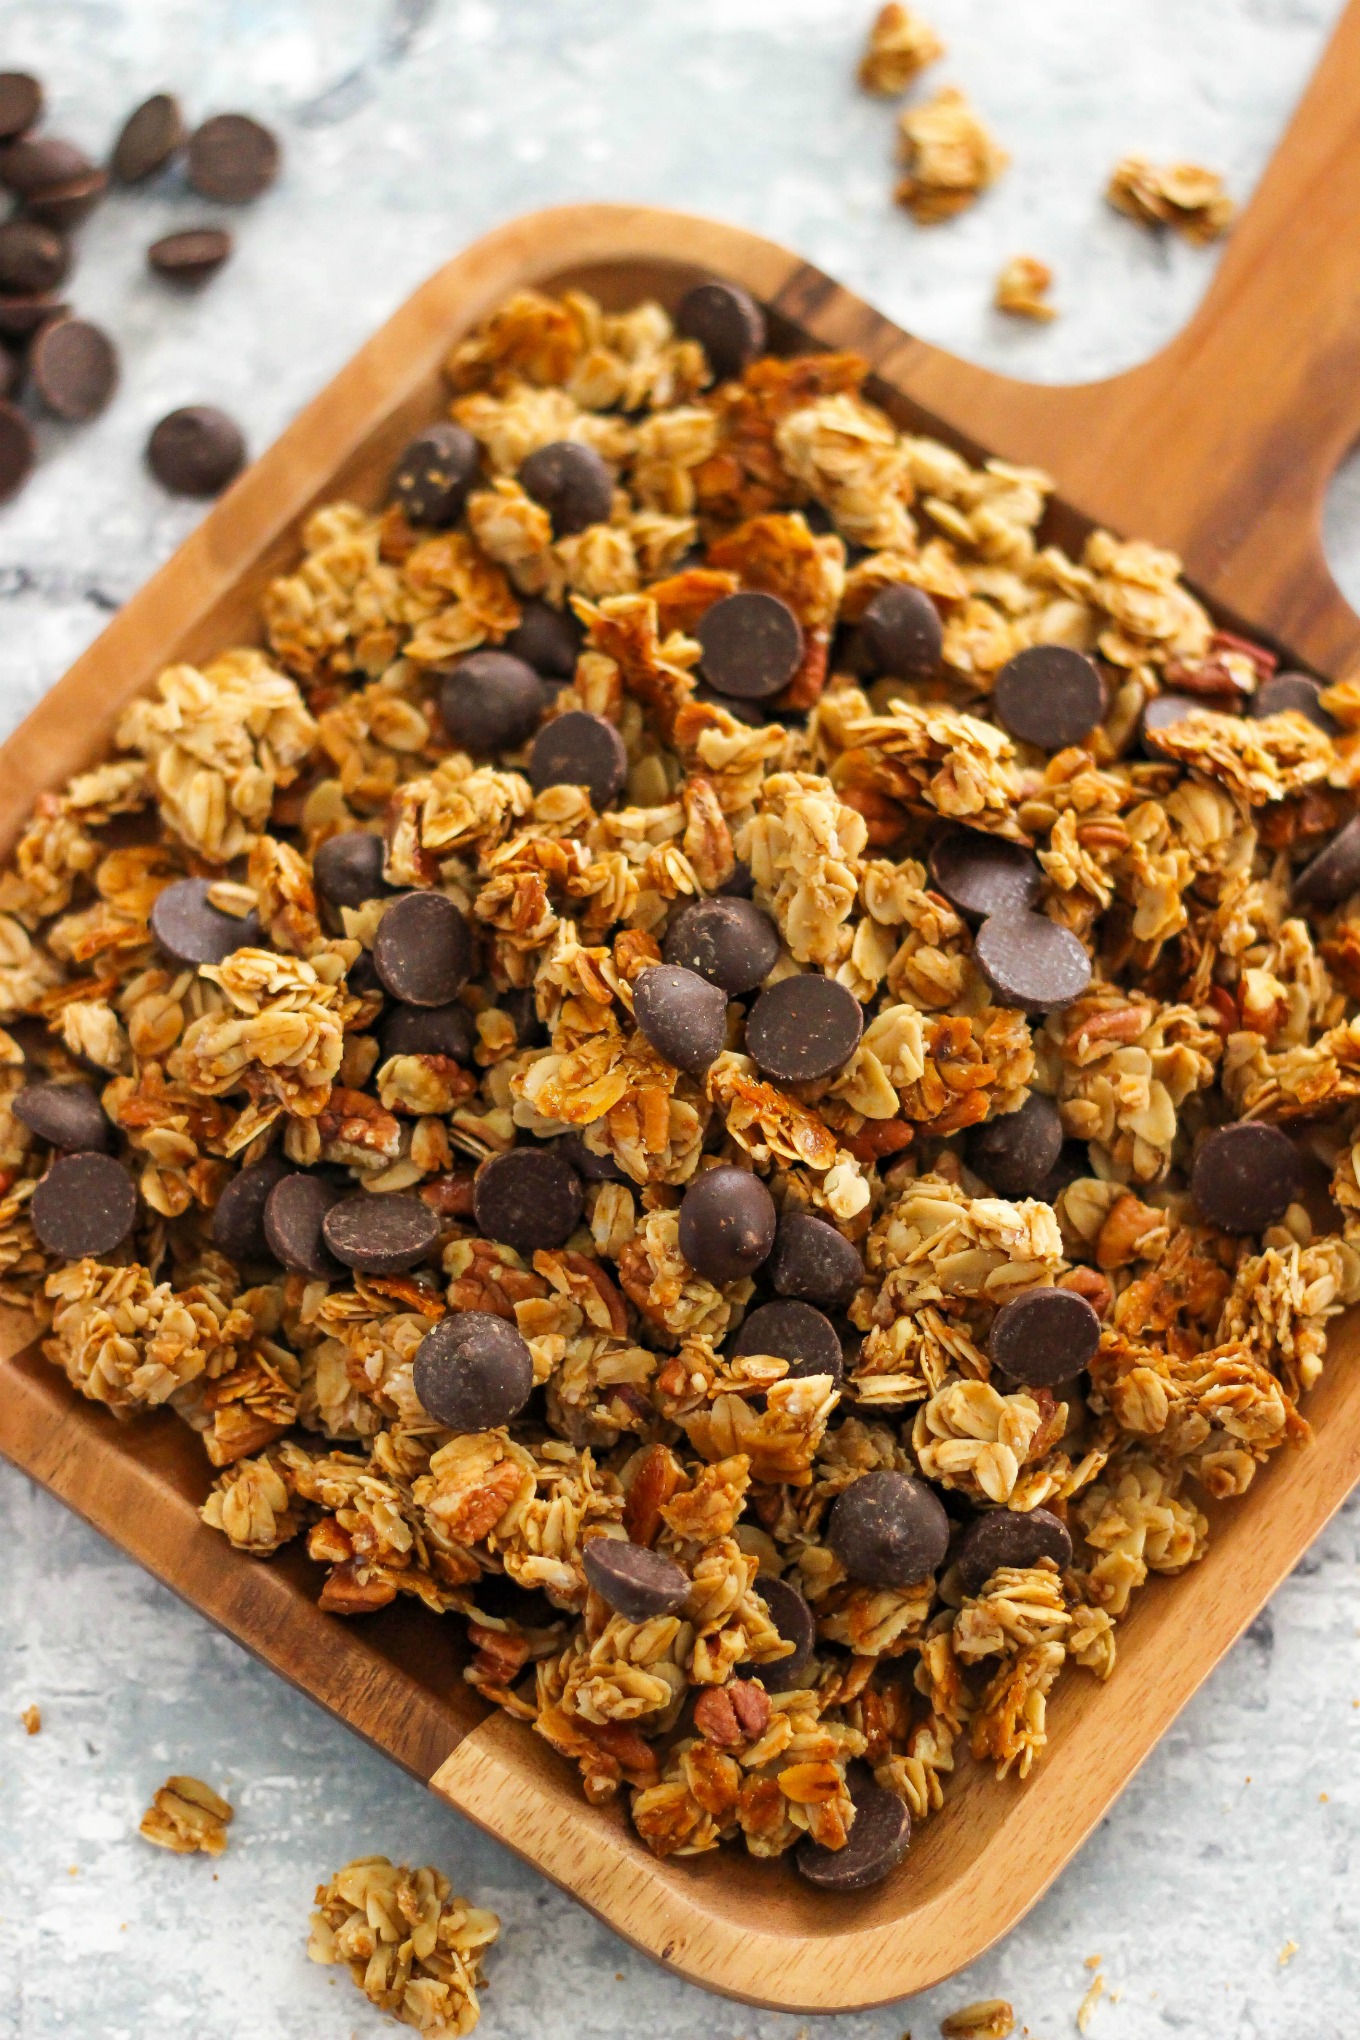
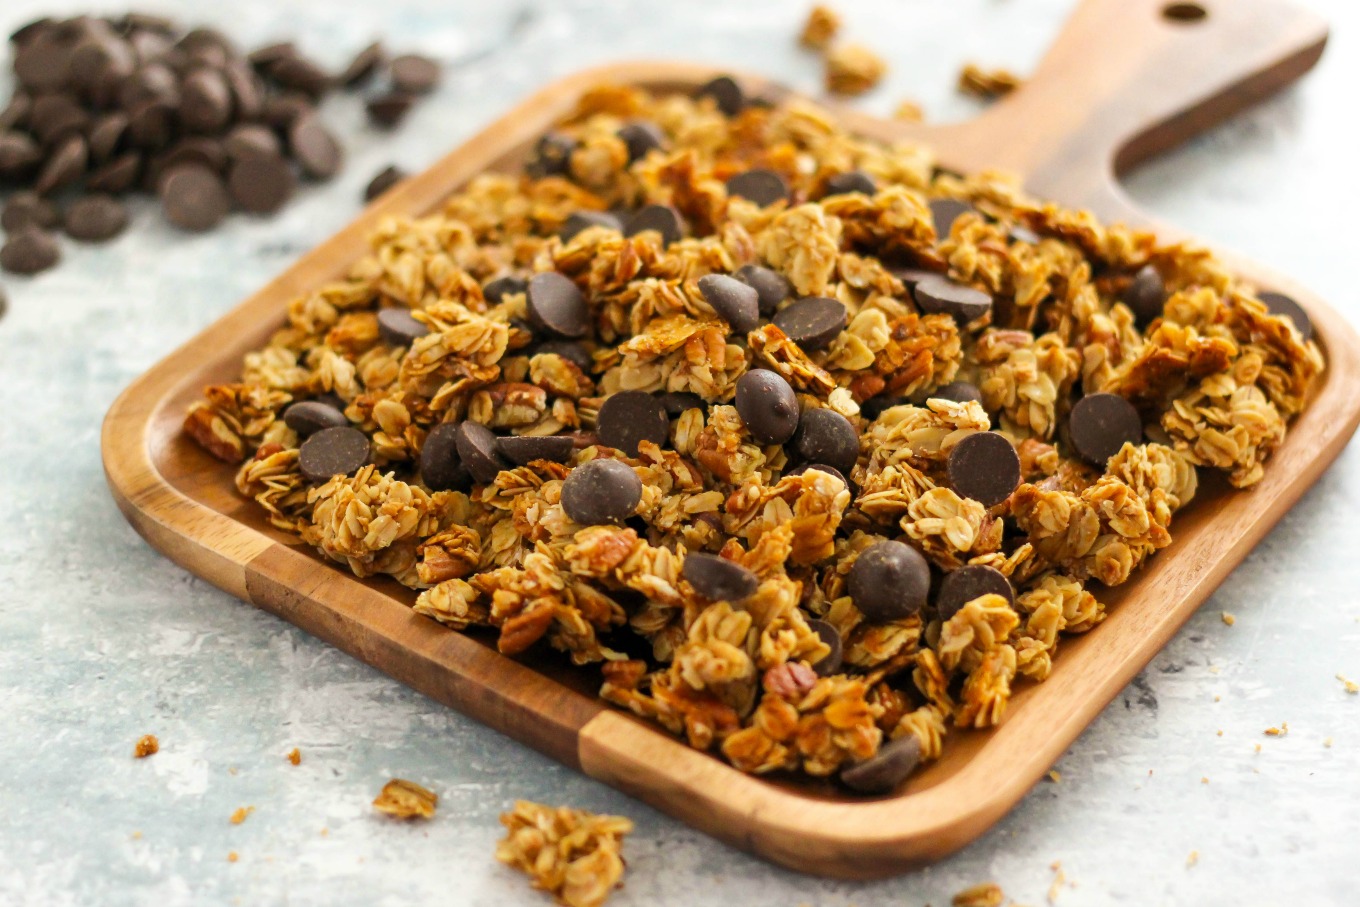
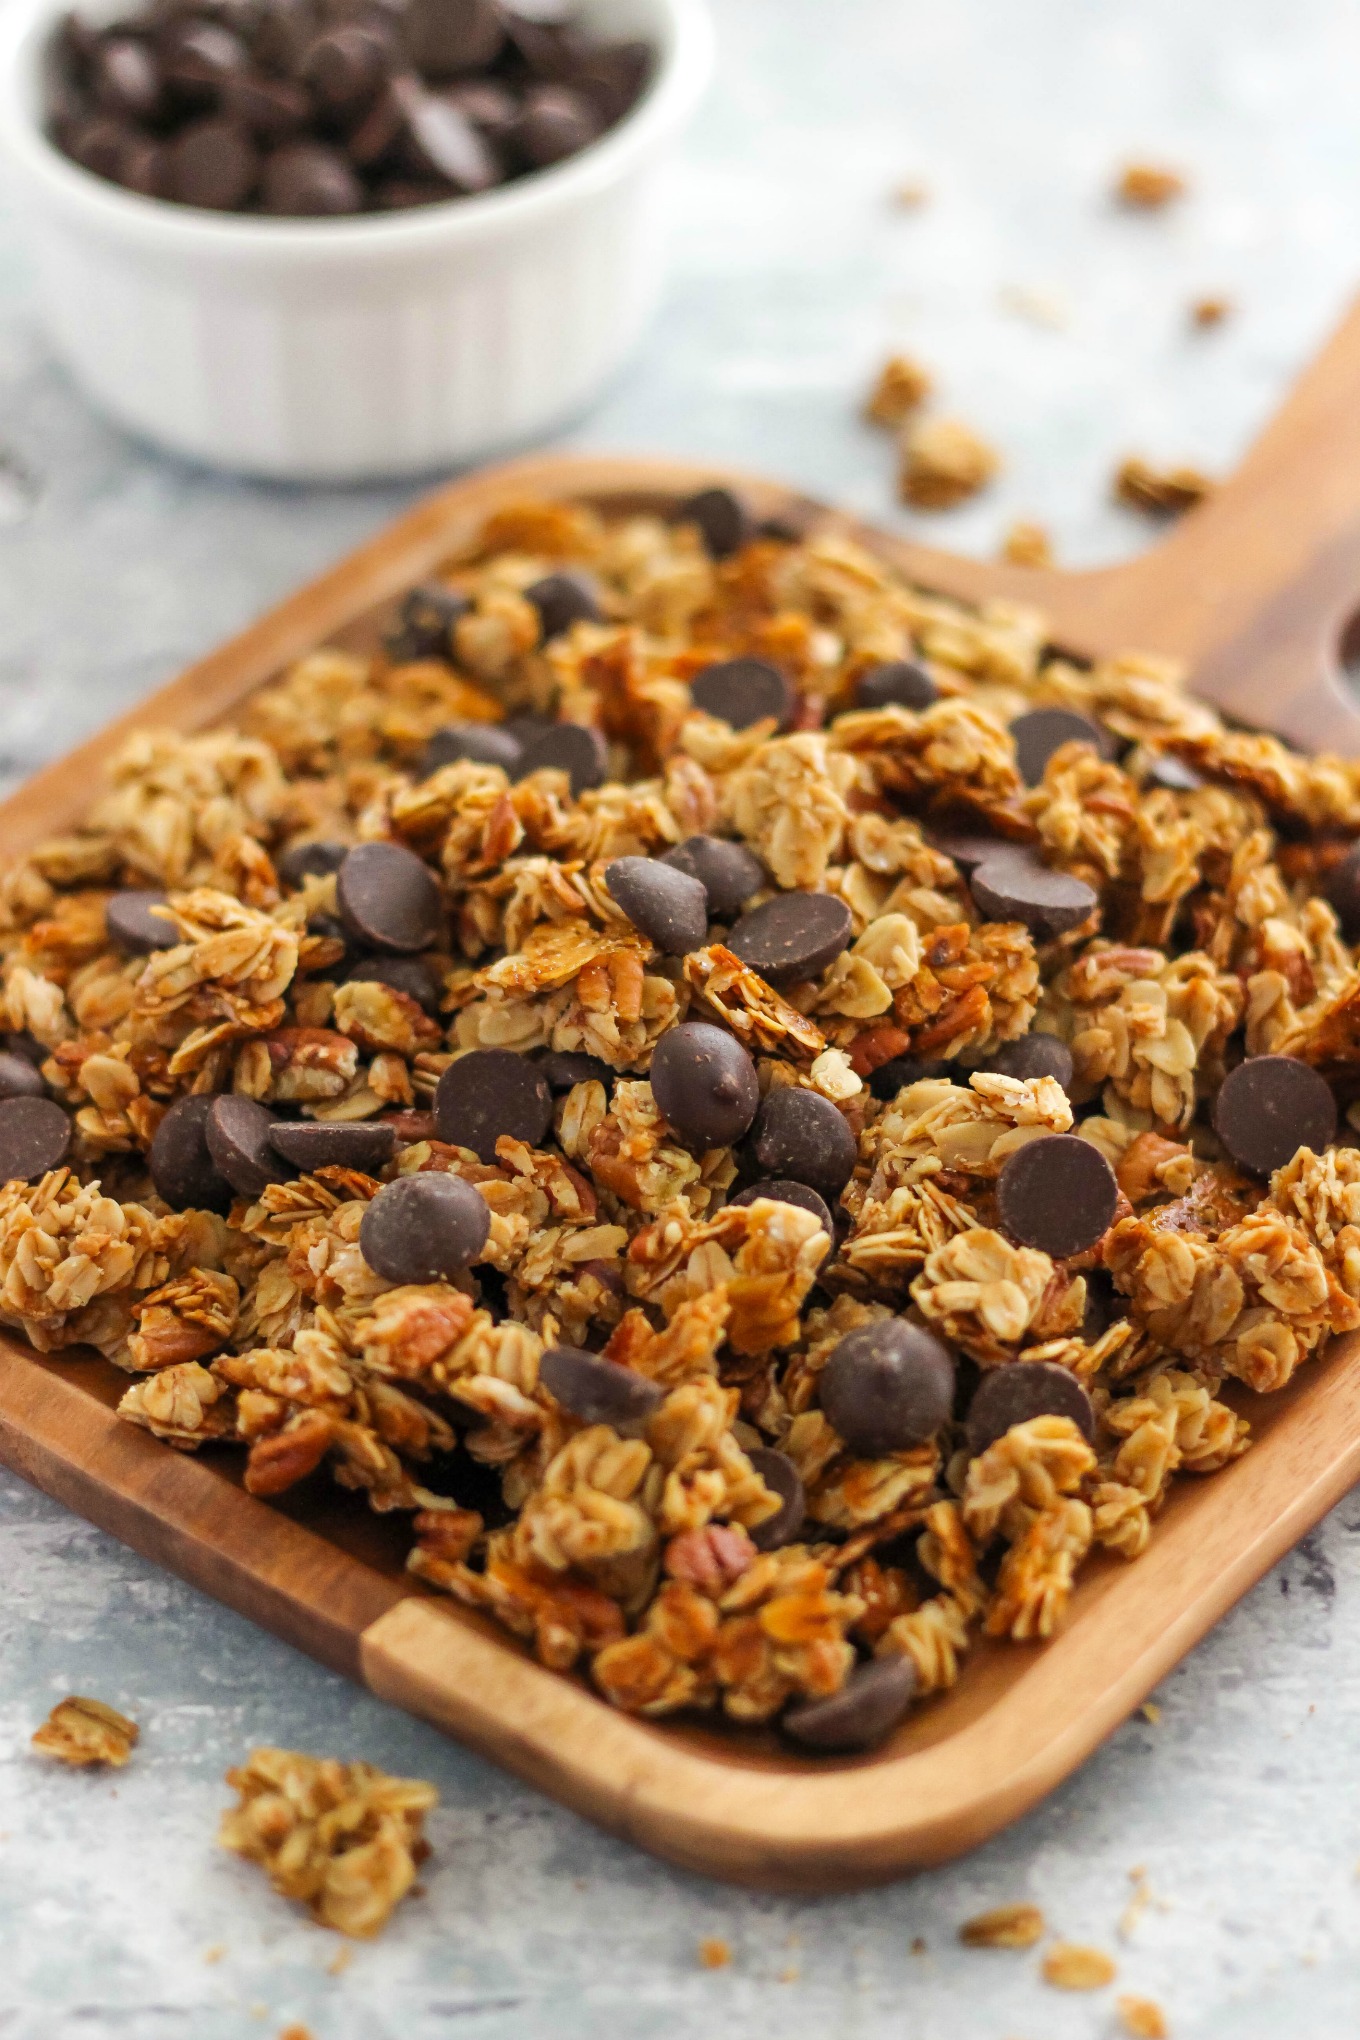
5-Ingredient Chocolate Chip Granola Recipe is an easy and healthy breakfast, snack, or topping option for yogurt and ice cream.

5-Ingredient Chocolate Chip Granola Recipe is an easy and healthy breakfast, snack, or topping option for yogurt and ice cream.

Hello there!  It’s Katie from The Casual Craftlete blog.  I love granola and eat it all the time.  I like to make my own granola and today I am sharing an easy 5-Ingredient Chocolate Chip Granola Recipe that is so much better than store-bought.  With back to school approaching, I love to make recipes ahead of time and can eat them throughout the week.  This granola recipe is great for breakfast, snacks, and topping yogurt.  Just store in an airtight container up to one week.

5-Ingredient Chocolate Chip Granola Recipe is an easy and healthy breakfast, snack, or topping option for yogurt and ice cream.

If making your own granola is intimidating, it shouldn’t be.  This recipe is so very easy and it has only 5-ingredients that you probably already have at home.  For this recipe you mix wet and dry ingredients together, then lay the mixture on a baking sheet and bake until golden brown.  The granola will be soft and flexible once it comes out of the oven.  Let the granola cool completely until firm and brittle enough to break into pieces.  Once the granola is cooled, I added dark chocolate 60% cacao baking chips.
5-Ingredient Chocolate Chip Granola Recipe is an easy and healthy breakfast, snack, or topping option for yogurt and ice cream.

The best thing about making granola is that you can add whatever ingredients you prefer.  Substitute your favorite nuts, chocolate chips or dried fruits.  You could add flax seed to pump up the nutrition value.  Store the 5-Ingredient Chocolate Chip Granola Recipe in an airtight container up to one week.

5-Ingredient Chocolate Chip Granola Recipe is an easy and healthy breakfast, snack, or topping option for yogurt and ice cream.

You can eat the granola in a bowl with milk in the mornings for breakfast, as a snack, or add as a topping to yogurt or ice cream.

5-Ingredient Chocolate Chip Granola Recipe
 
Print
Recipe type: Breakfast
Cuisine: American
Ingredients
  • ¼ cup coconut oil
  • ¼ cup plus 2 tablespoons honey
  • 2 cups old fashioned oats
  • ½ cup pecans, chopped
  • ½ cup dark chocolate baking chips
Instructions
  1. Preheat oven to 300 degrees.
  2. Add coconut oil and honey to a small microwave safe bowl. Place in the microwave for 15-30 seconds or until the honey and coconut oil are melted.
  3. Add the melted honey and coconut oil to a large bowl with the oats and chopped pecans. Toss to coat.
  4. Place granola mixture on a baking sheet lined with a silicone baking mat or parchment paper.
  5. Bake for 30 minutes or until golden brown. The granola will be soft and flexible once it comes out of the oven. Let the granola cool completely until firm and brittle enough to break into pieces.


  6. Add chocolate chips and store in an airtight container up to one week.
3.5.3226


Recycled Fabric Coiled Baskets DIY

Monday, July 31, 2017

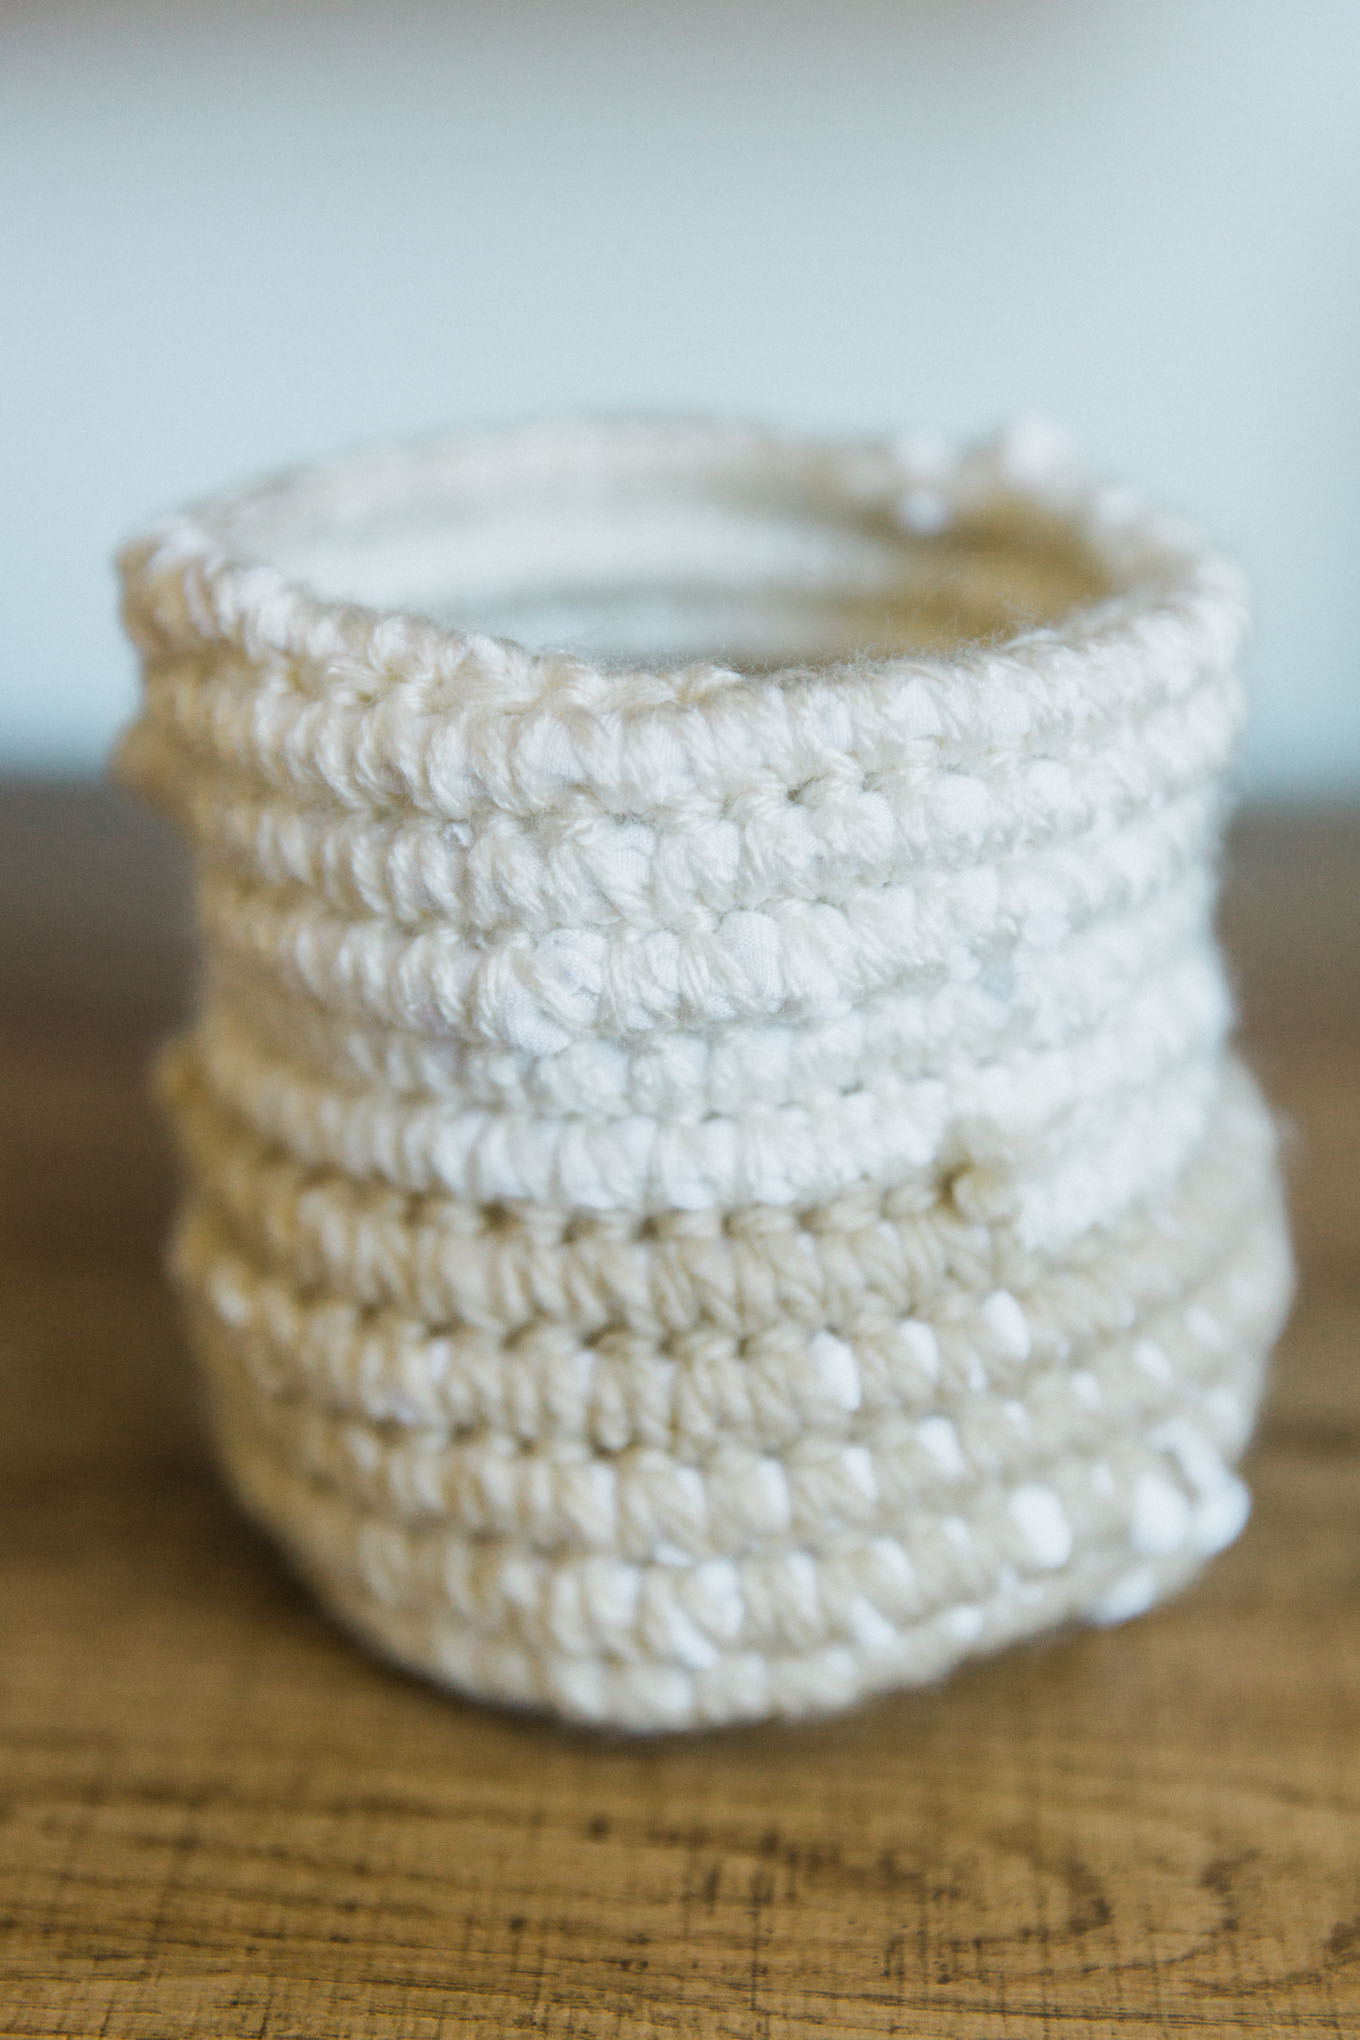
These recycled fabric coiled baskets are great for organizing all of the little things around the house that need a home, they’re really simple to make once you get in the groove of it, and the size is completely customizable!  Not to mention they look pretty stylish sitting on your desk or bookshelf.

recycled fabric coiled basket diy

Hello everyone, it’s Jennie again, here with a tutorial to recycle your old t-shirts and scrap fabric by creating beautiful, little, coiled baskets.

Have you ever gotten a hole in a favorite t-shirt?

I feel like it happens to me all of the time, in the exact same spot, and I get so frustrated just throwing out an almost perfectly good shirt.  I hate being wasteful!  This project is perfect for using those old shirts, especially when you love the colour but can’t wear it anymore.

To start this tutorial I want to give you a quick rundown on this amazing thing called fabric yarn.  I didn’t know that this was a thing until recently, and it can be used for coiled baskets, rugs, pot holders, etc.  The possibilities are as endless as your imagination!

Creating this magical fabric yarn is a breeze, and it turns so many of my old clothes and fabric scraps into something useful; I love re-purposing/recycling, it’s so satisfying!

recycled fabric coiled basket diy

Supplies:
  • Scrap fabric (or t-shirts)
  • Fabric scissors
  • Yarn
  • Crochet hook (size F6 is what I used)

recycled fabric coiled basket

INSTRUCTIONS:

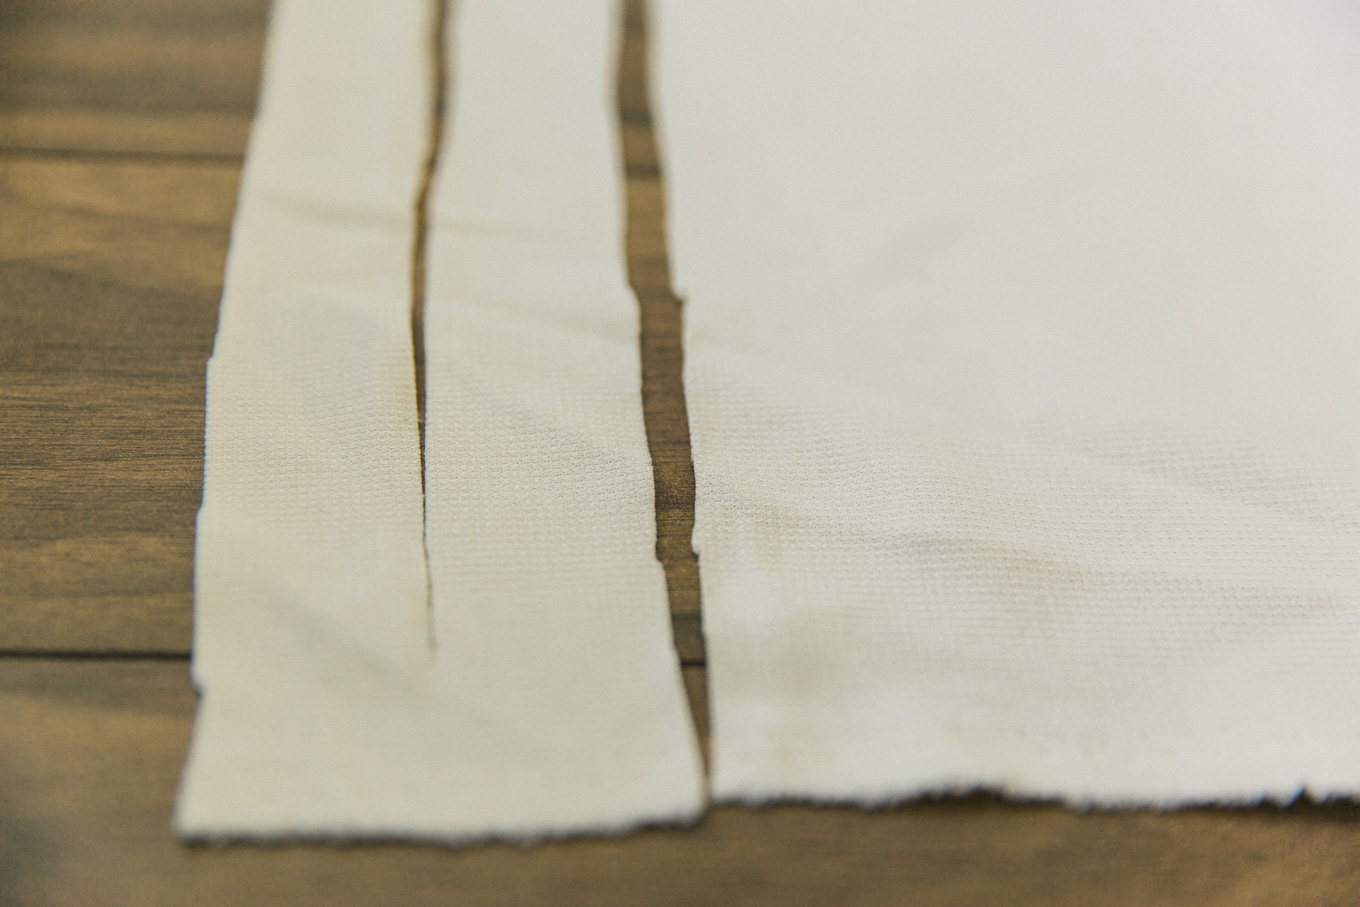
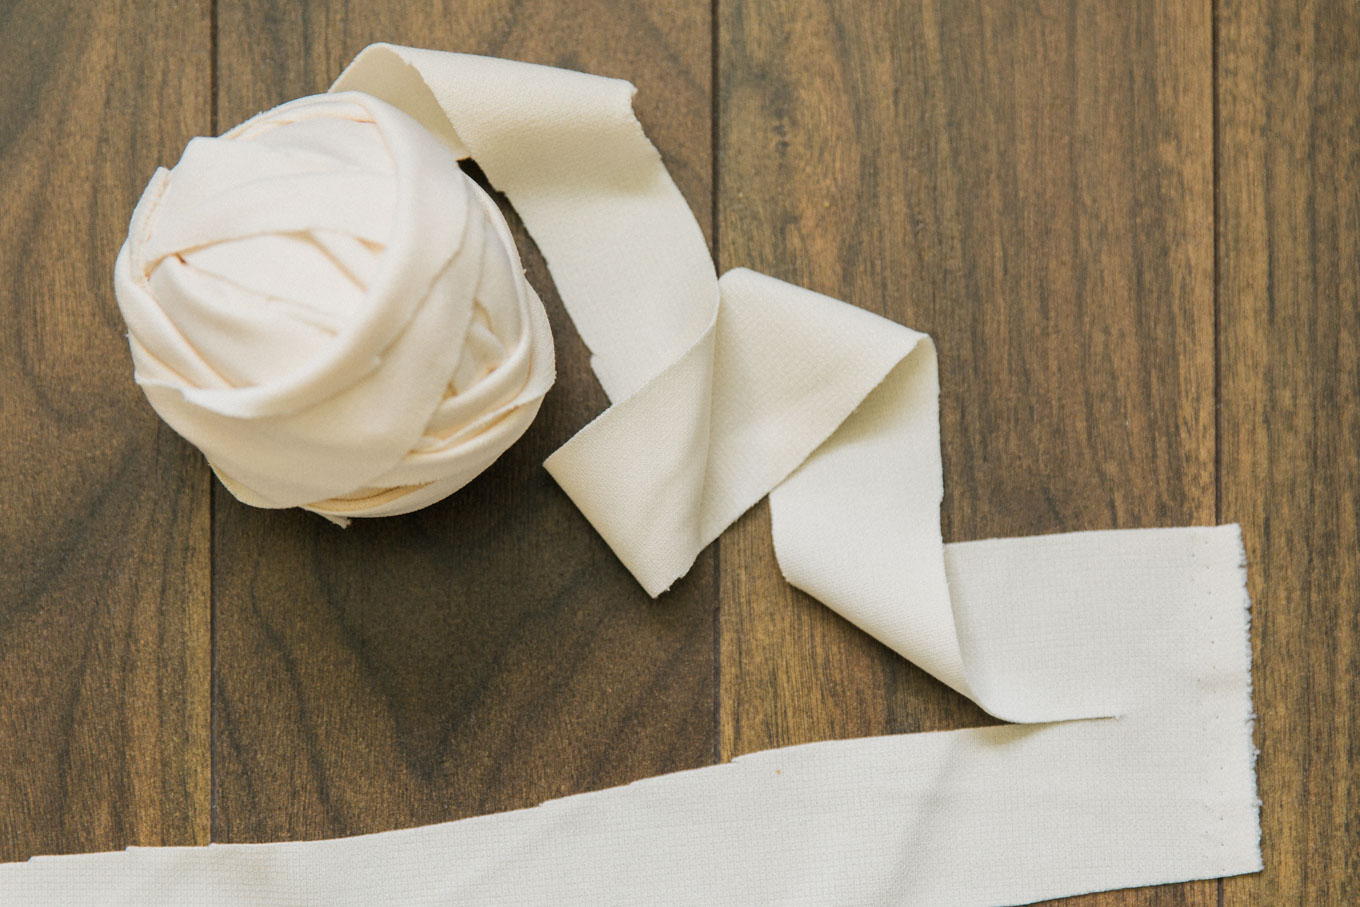
1.  First, you will need to make your fabric yarn (when cutting up your fabric into long strips, remember that the longer they are with fewer breaks, the better they are to work with).  All you have to do is take your t-shirt and cut it into one long continuous strip by cutting around and around the torso in a spiral.  If you are cutting up a flat piece of fabric like in the pictures below, all you have to do is cut back and forth in this pattern to create one continuous strip:

recycled fabric coiled basket


Roll your strip of fabric up into a big ball, just like yarn, to make it easier to work with.

recycled fabric coiled basket

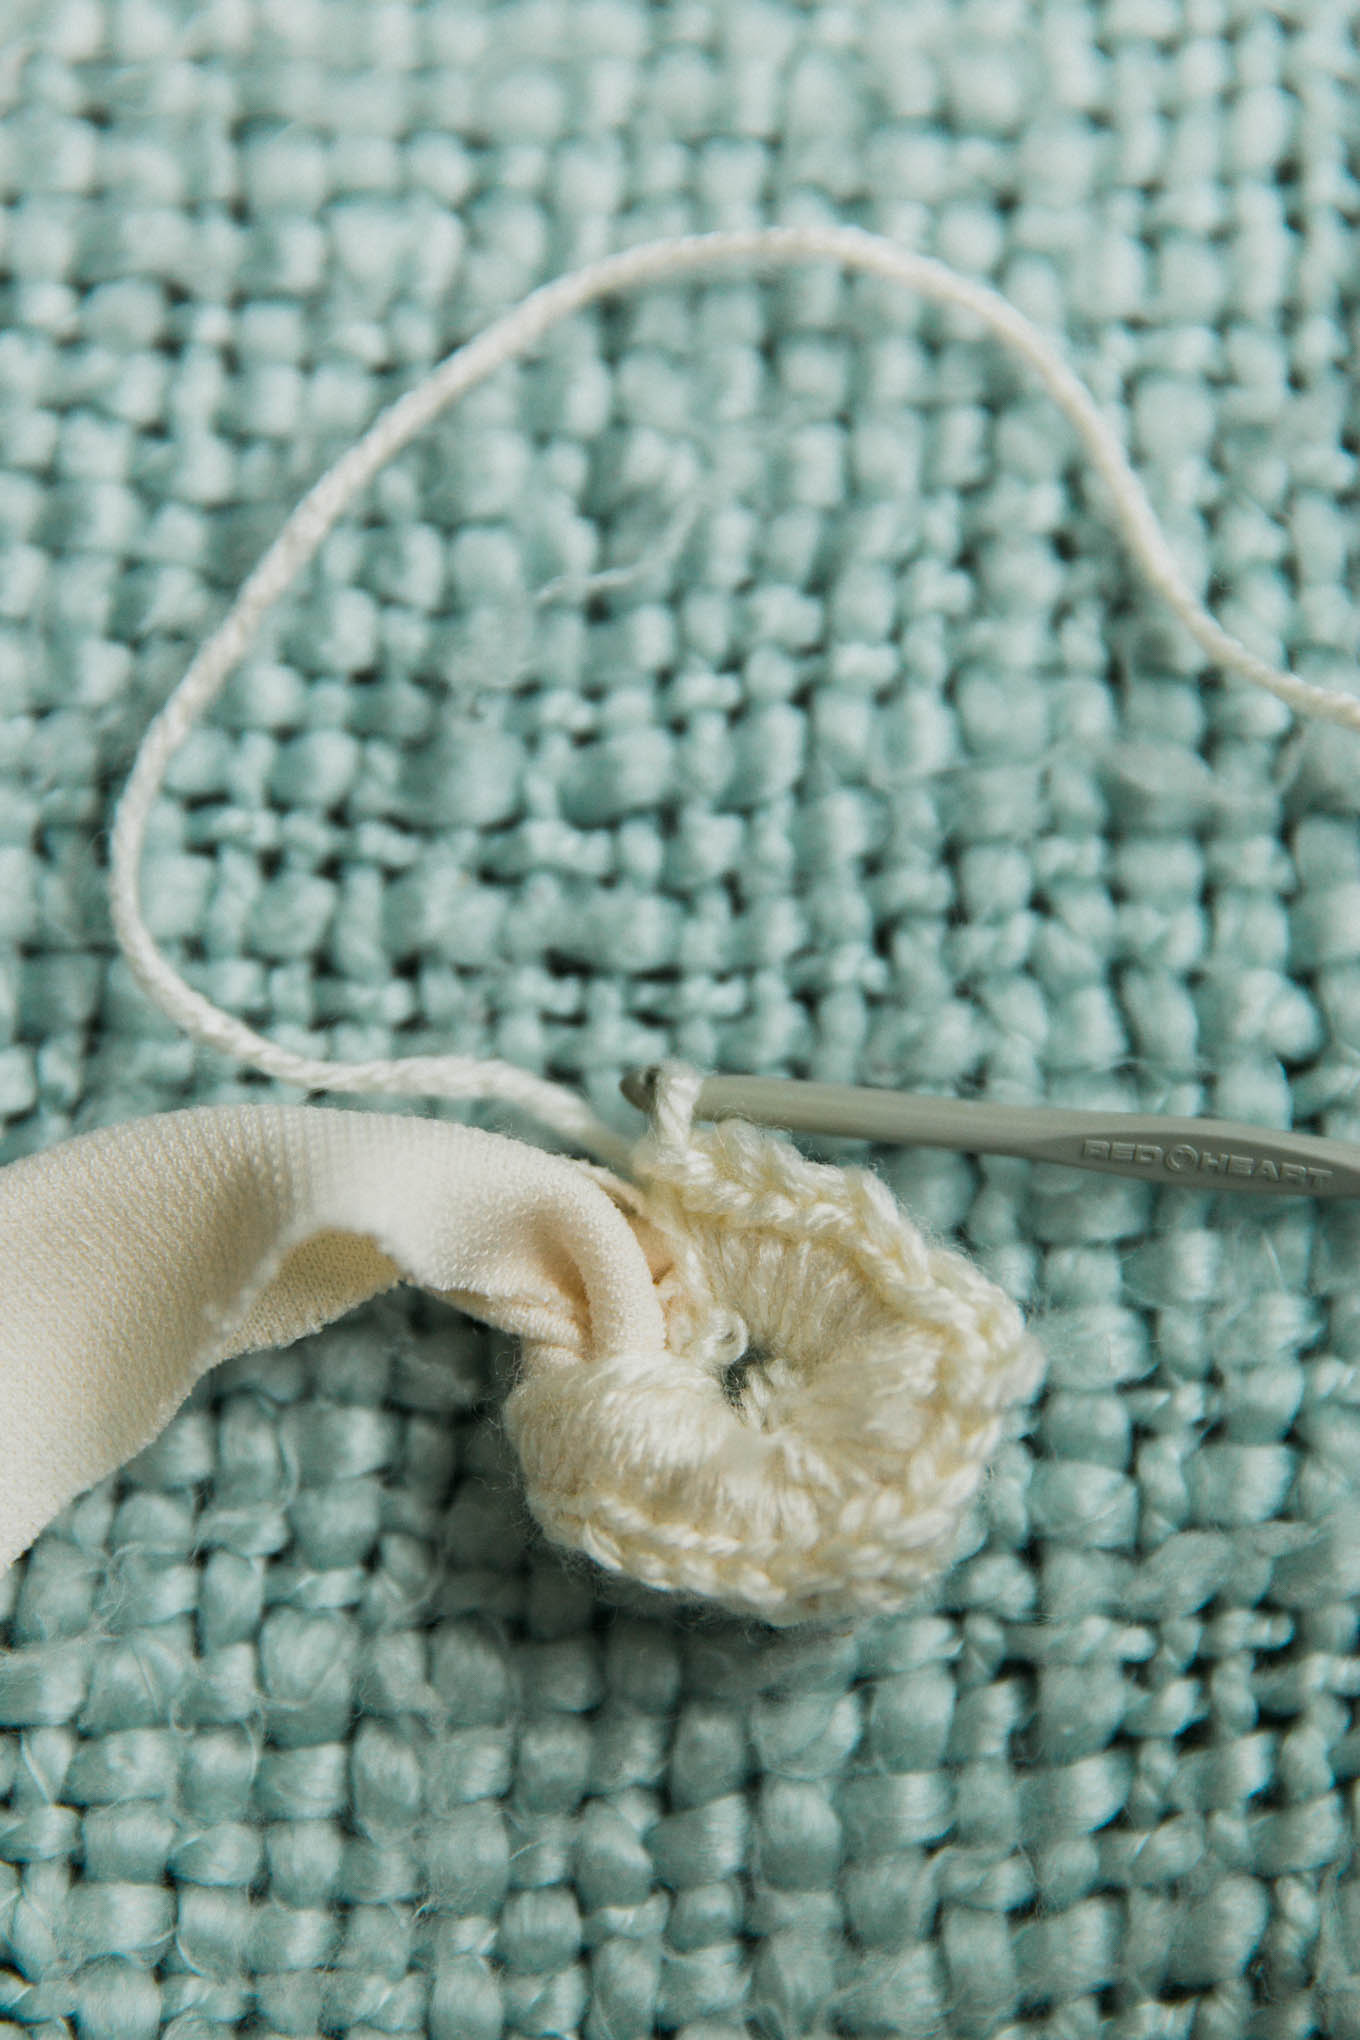
2. Tie a small loop with the end of your yarn and tighten it so it fits a little loosely around your crochet hook.

recycled fabric coiled basket

Tie a loose knot in your fabric yarn to make a small circle.  You will want to fit as many small stitches around the circle as you can, then pull the fabric yarn knot tighter to close the circle.  This is the start of the bottom of your basket.

recycled fabric coiled basket

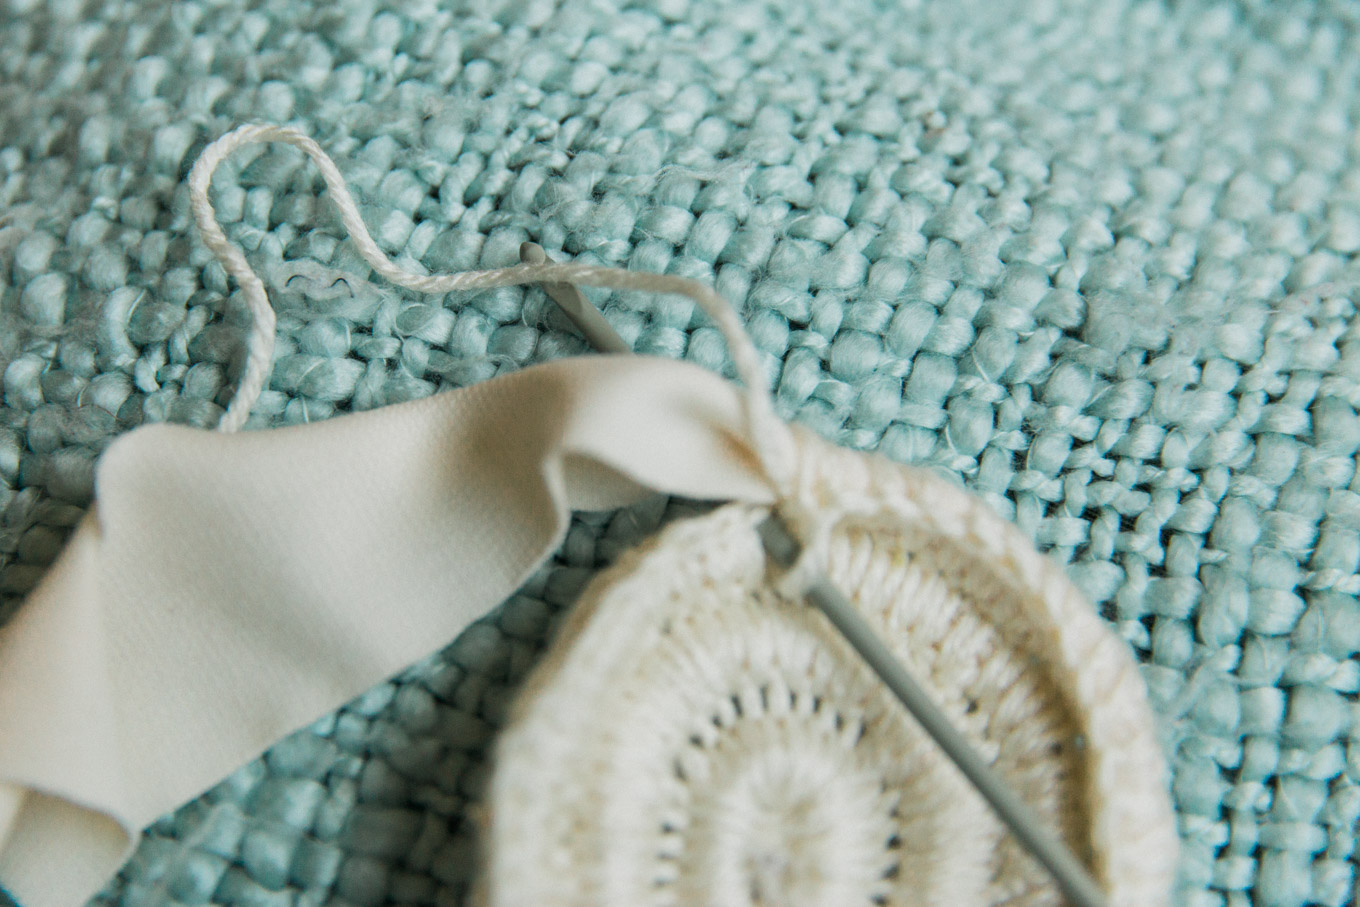
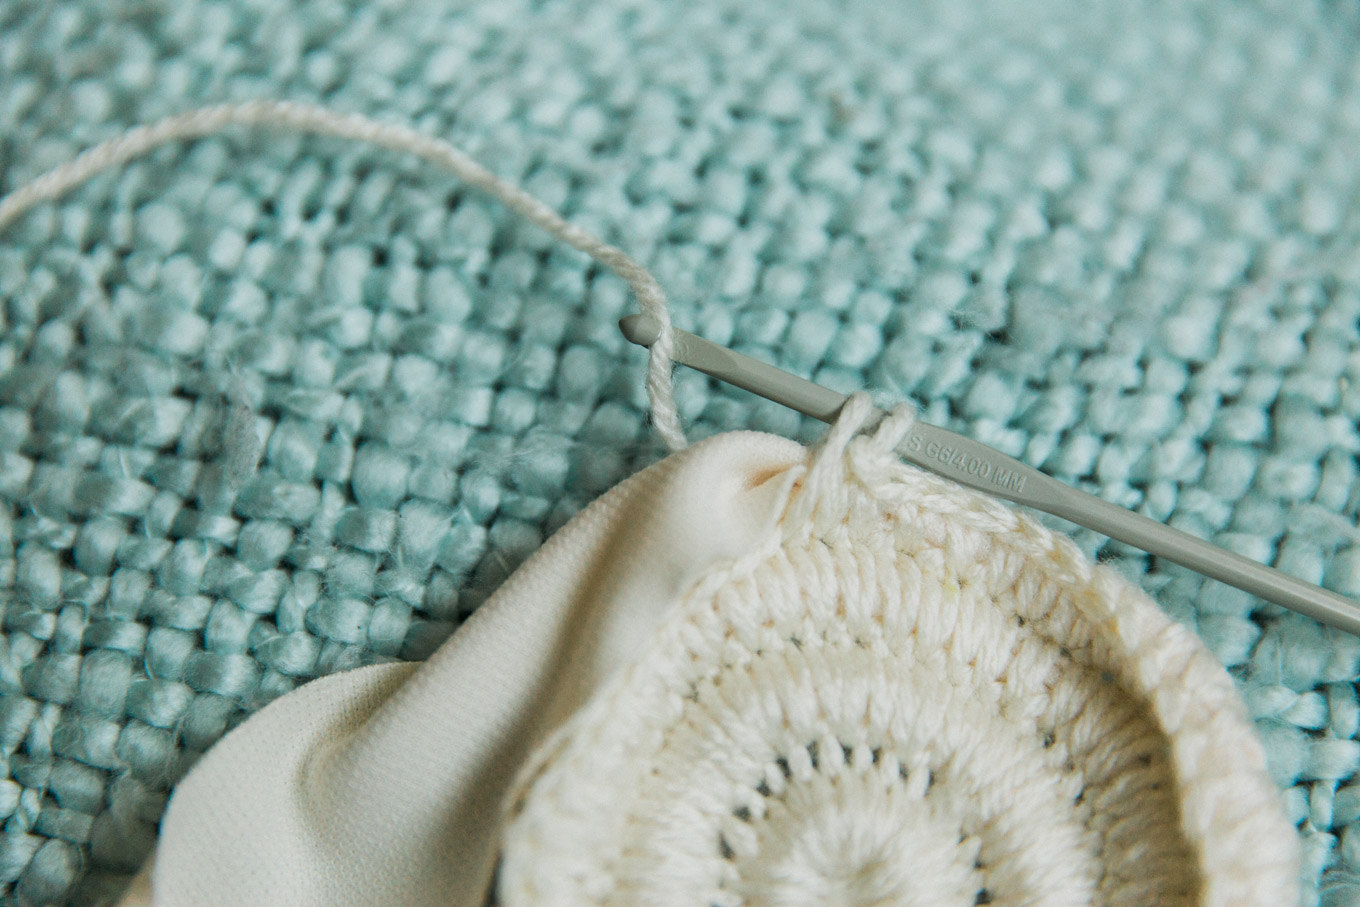
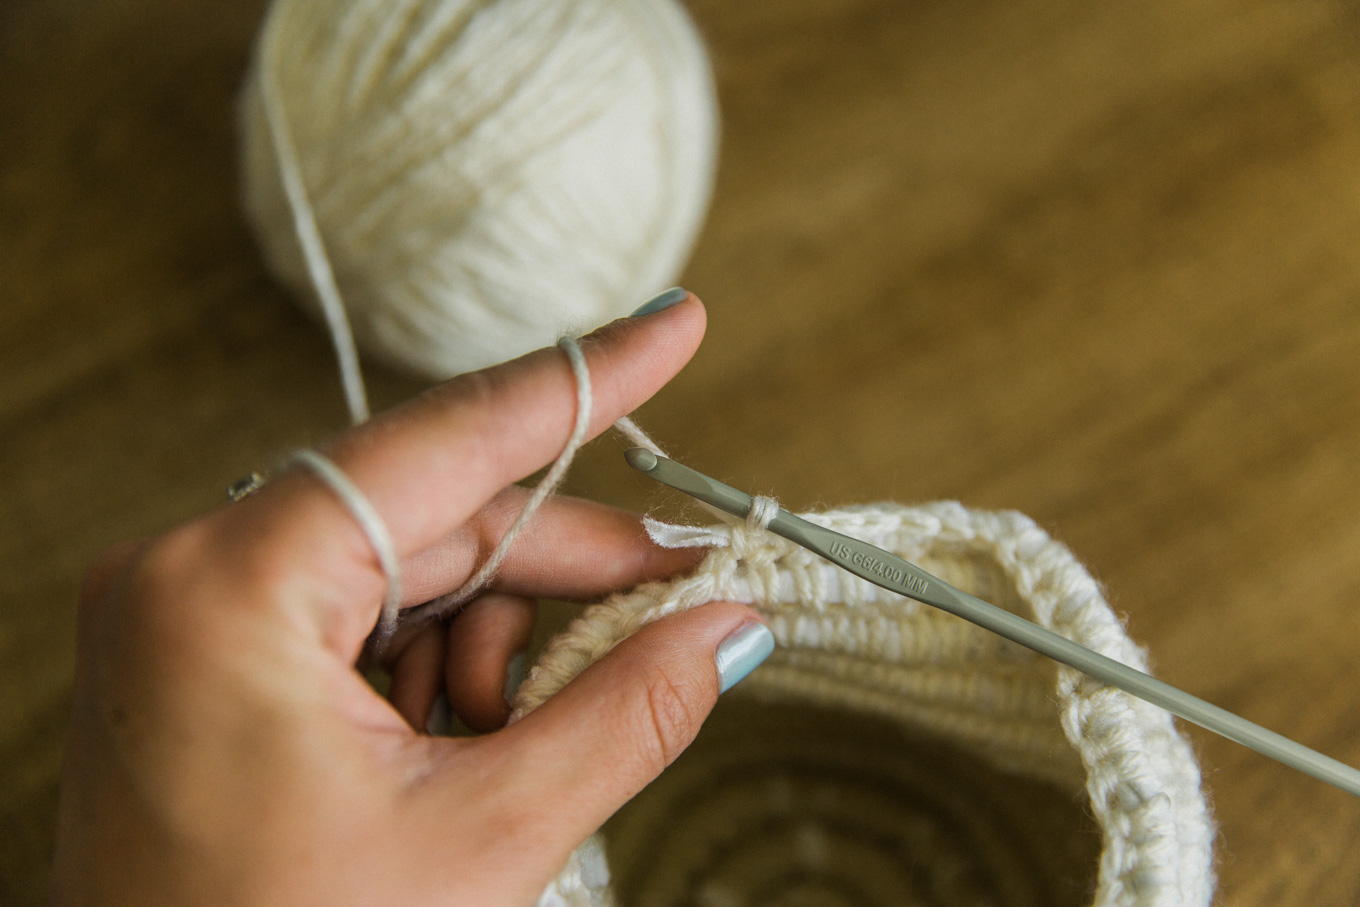
3.  To make these crochet stitches that encase your fabric, you will put your crochet hook through the chain beneath where you are working and under the fabric (for your first round above, you won’t have a chain yet to work through so you will just put the hook through the hole in your fabric knot for beginning each stitch).

recycled fabric coiled basket

recycled fabric coiled basket

recycled fabric coiled basket

Grab the yarn with the hook, pull it back through the stitch, and keep it looped on your hook.  You will now have two loops on your hook.

recycled fabric coiled basket

Hook the yarn again and pull it back through your two loops.  You should now have added a stitch in your chain and have one loop on your hook again.  This is what you will do continuously to create the basket.

recycled fabric coiled basket

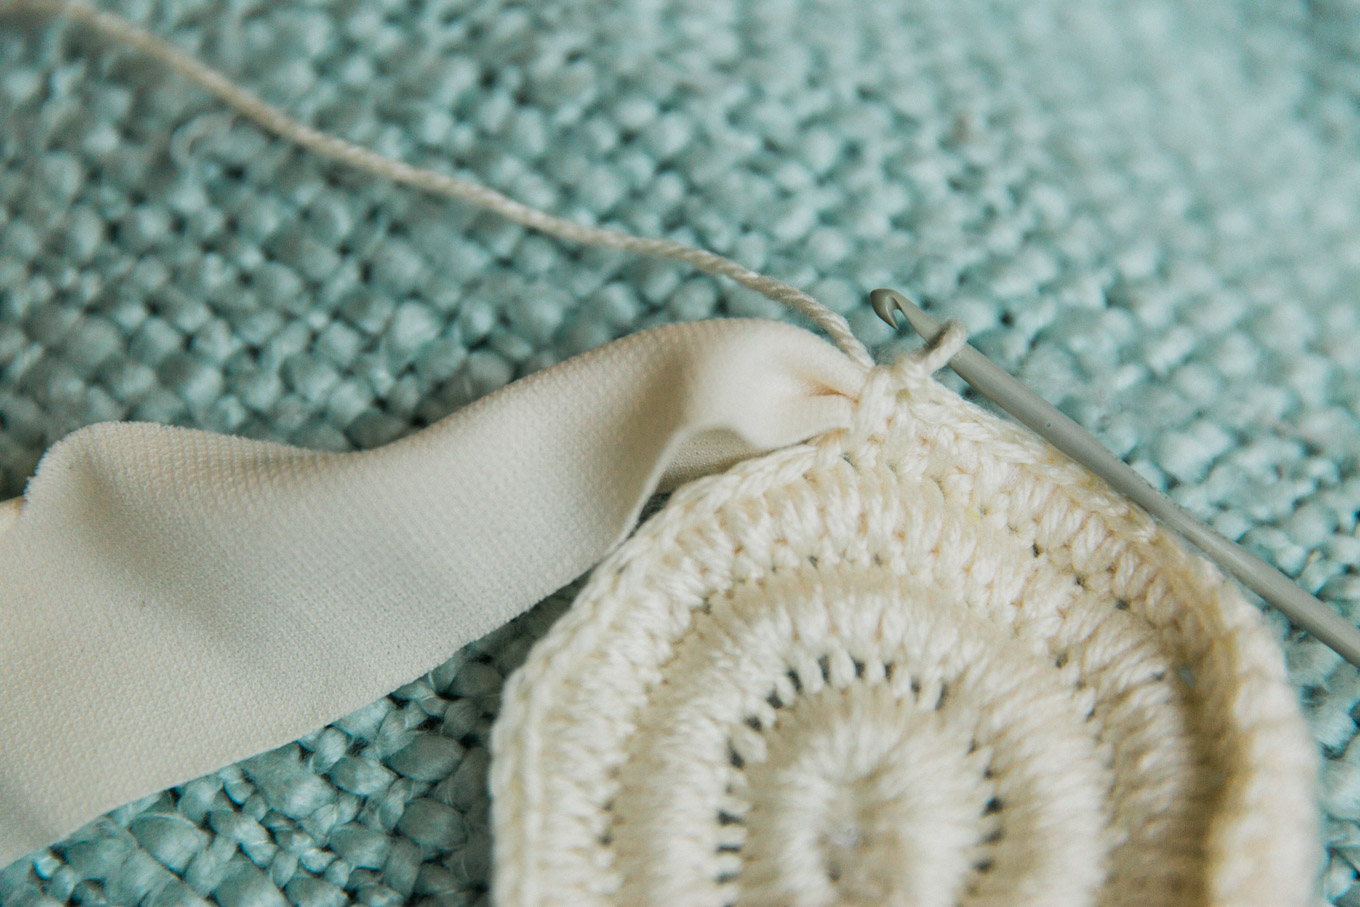
4.  To make the base of the basket bigger, you keep coiling the fabric around itself by crocheting it together.  You will want this part to lay flat.  To keep increasing the size of the base and keep it flat, you will need to add more stitches.  I like to do three stitches in each of three chain links, then put two stitches in one chain link, then three more singular stitches in each chain link, and then two again, etc.  This will increase the size of each circle or round.

recycled fabric coiled basket diy

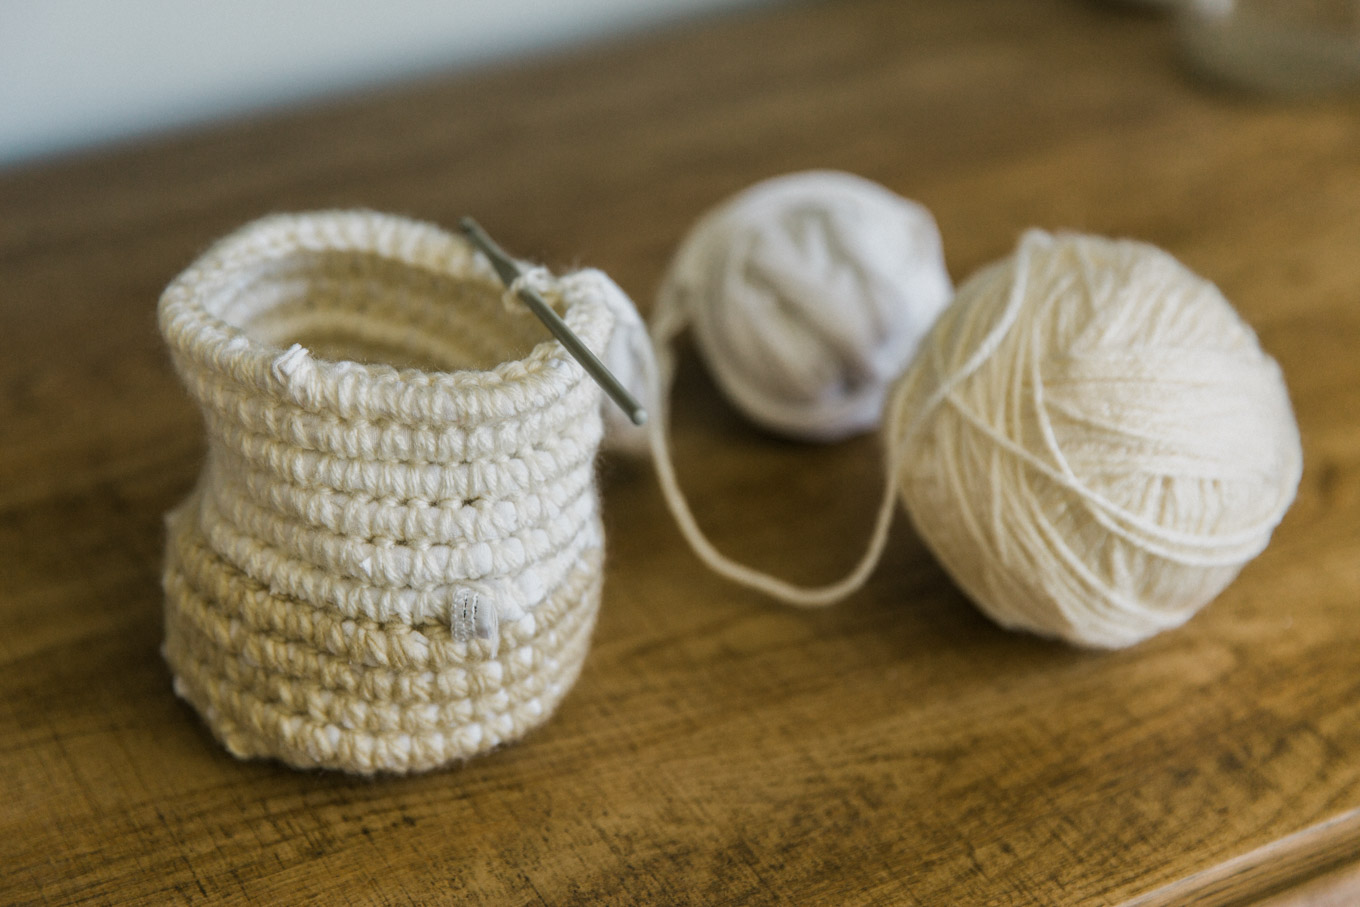
5.  Once your base is as large as you want it to be, stop doubling up some of your stitches to increase the size.  The fabric will naturally start to coil upwards as you stop increasing the rounds, and will increase only in height, not width.

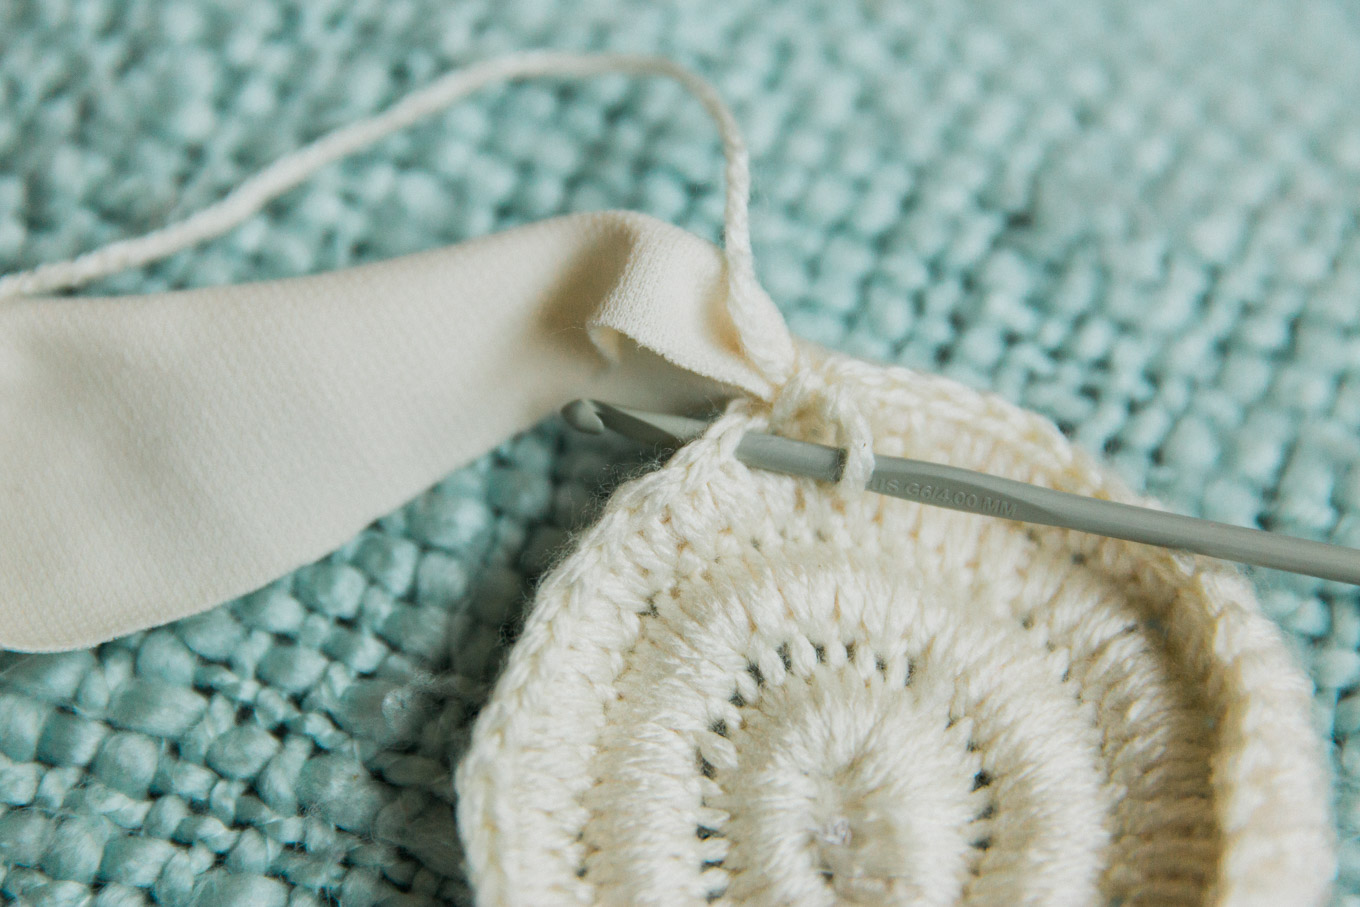
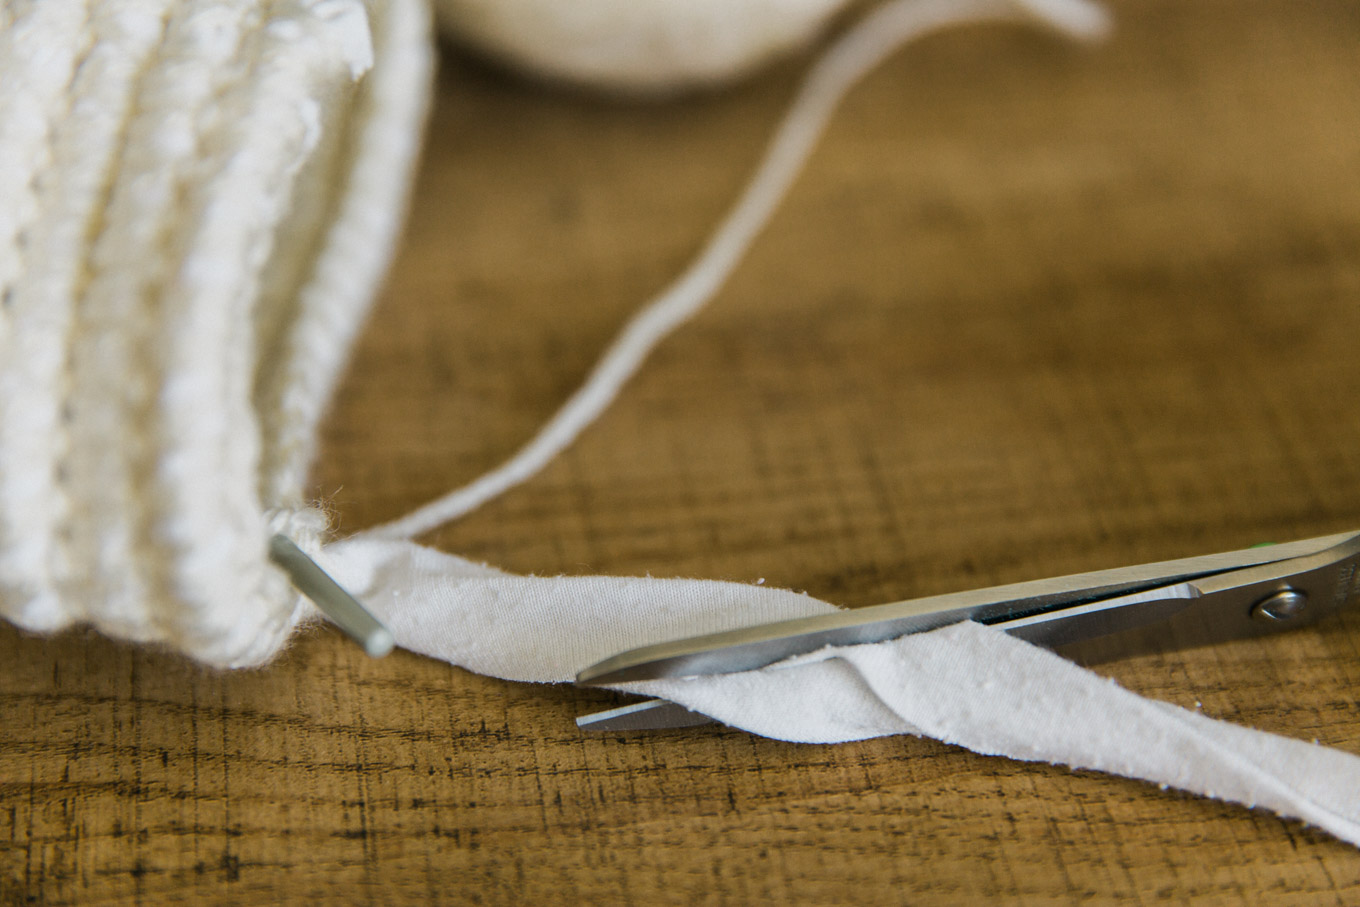
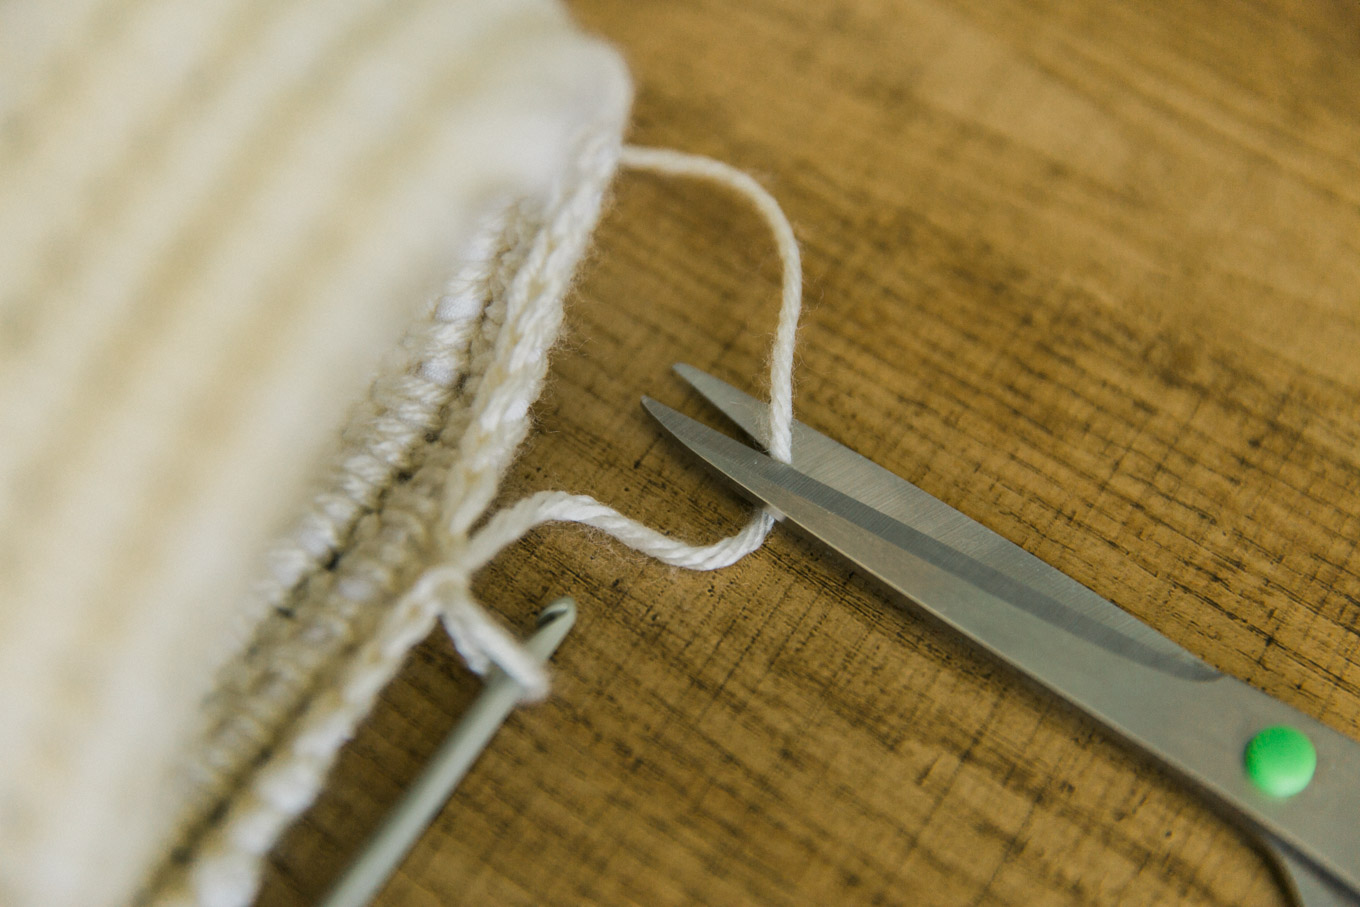
Once your basket is as tall as you want it to be, trim your fabric yarn on an angle to make its disappearance more gradual.

recycled fabric coiled basket

Continue crocheting along until you are passed the end of the fabric.

recycled fabric coiled basket diy

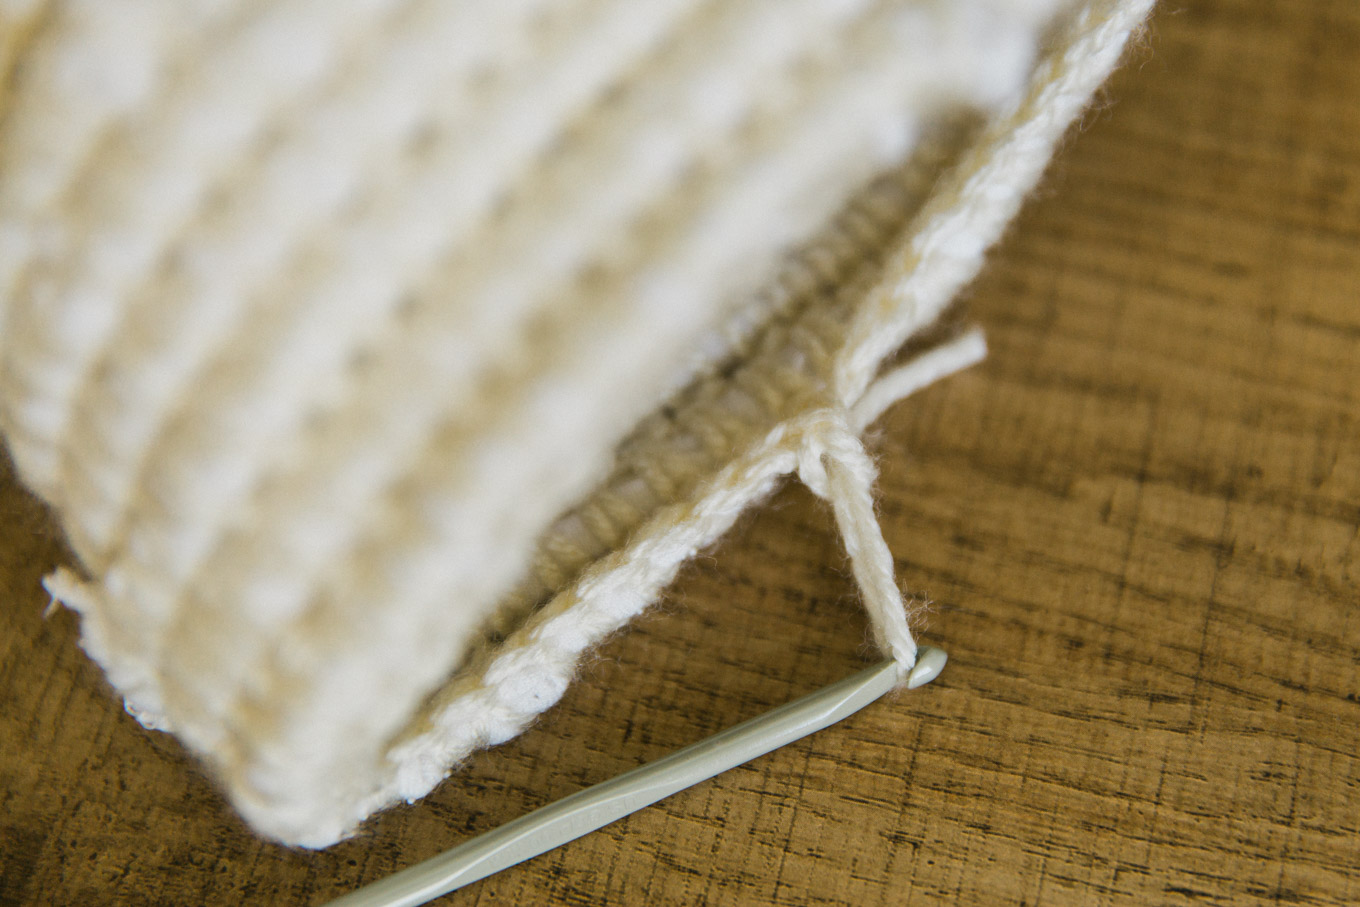
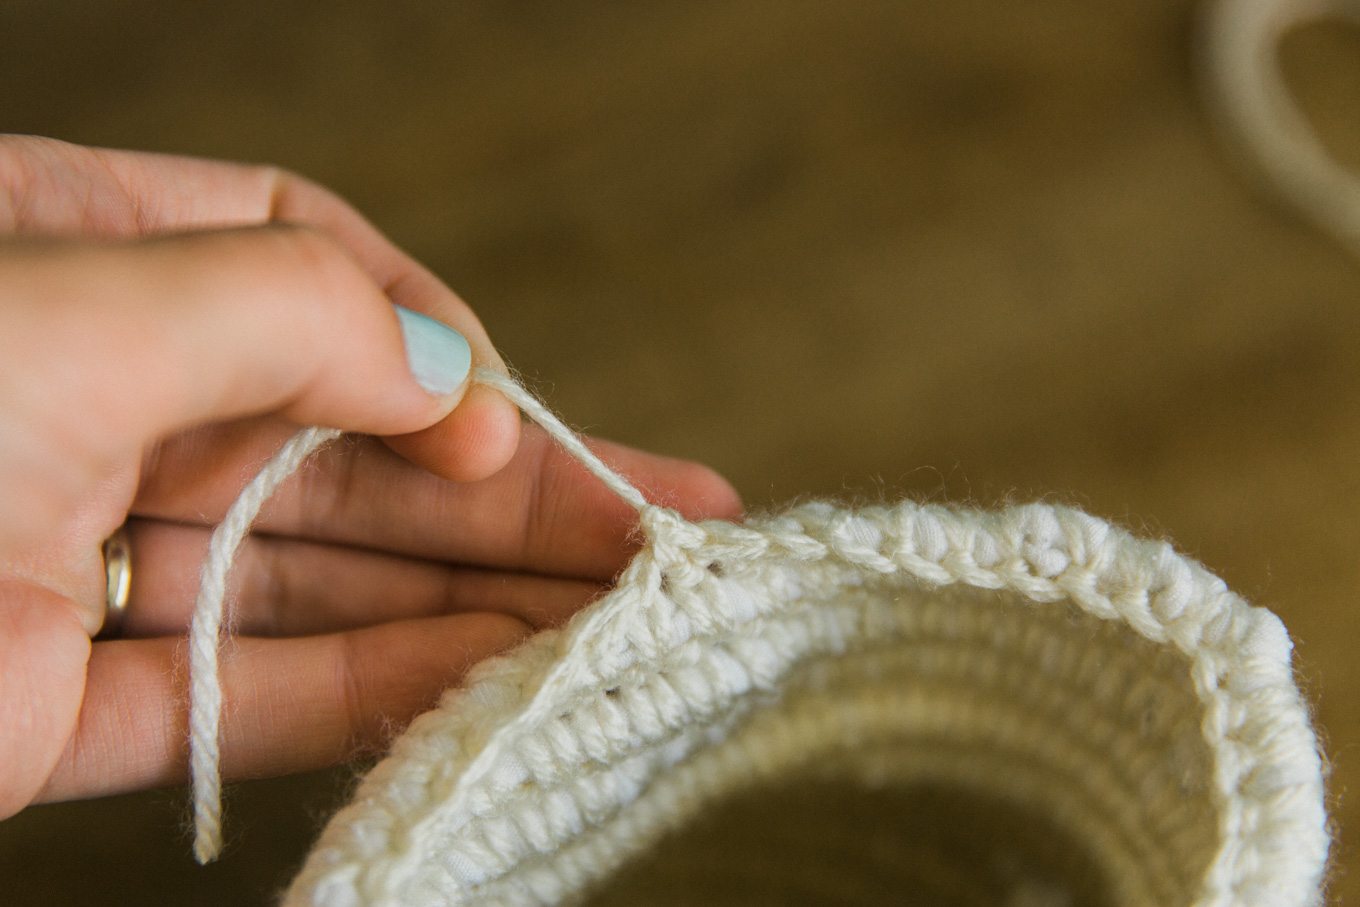
To tie off the yarn, simply cut the yarn, pull the end back through your loop, and as you pull the yarn it will tighten into a knot.  Weave the tail of your yarn into your basket stitches until it disappears and you are done!

recycled fabric coiled basket diy

recycled fabric coiled basket diy

recycled fabric coiled basket diy

And then you’re finished!  Sit back and enjoy your hard work.  Once you get the hang of these, you’ll be able to whip them up in a single sitting.

recycled fabric coiled basket diy

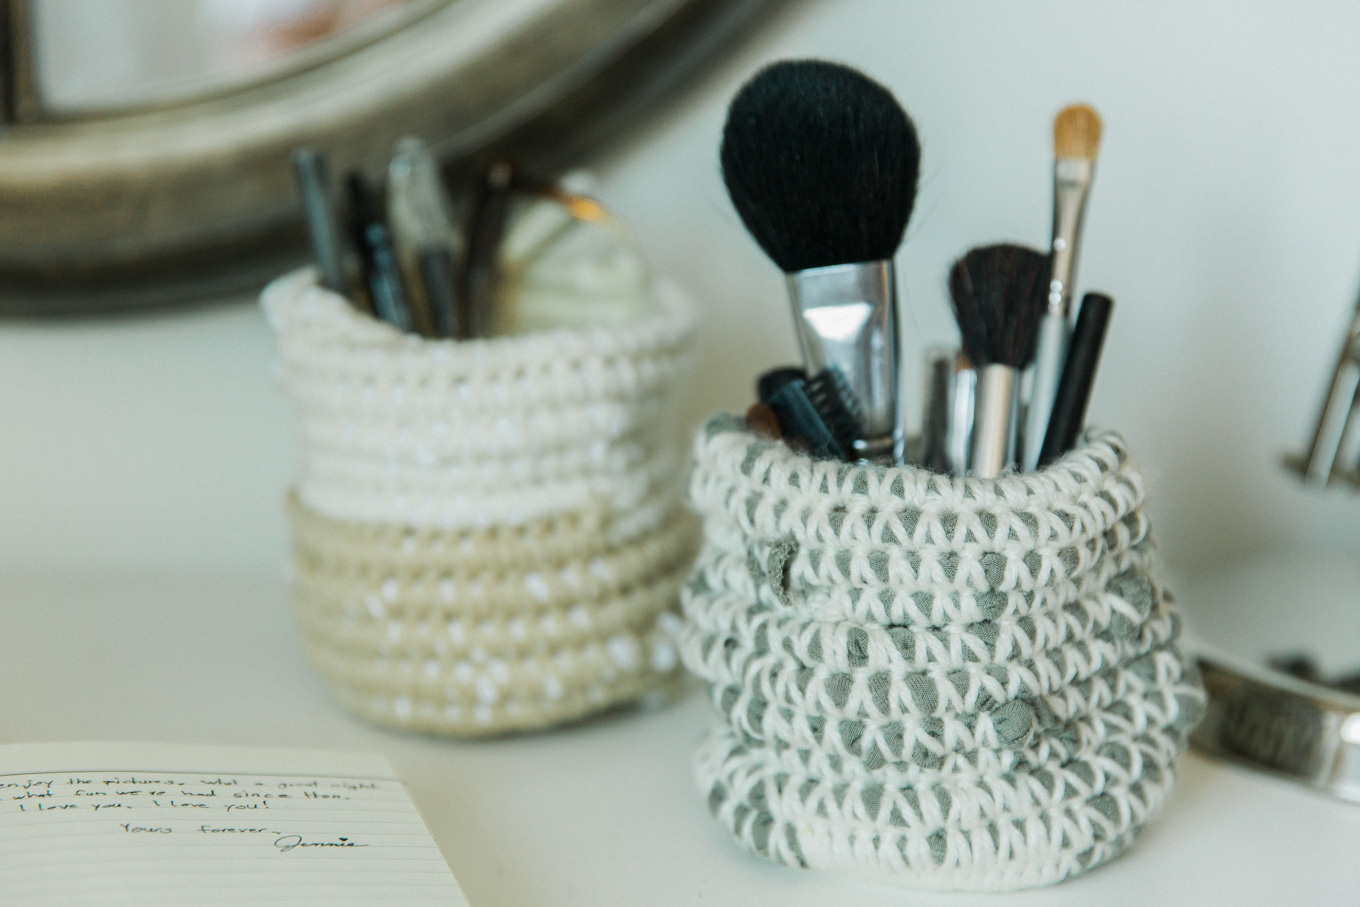
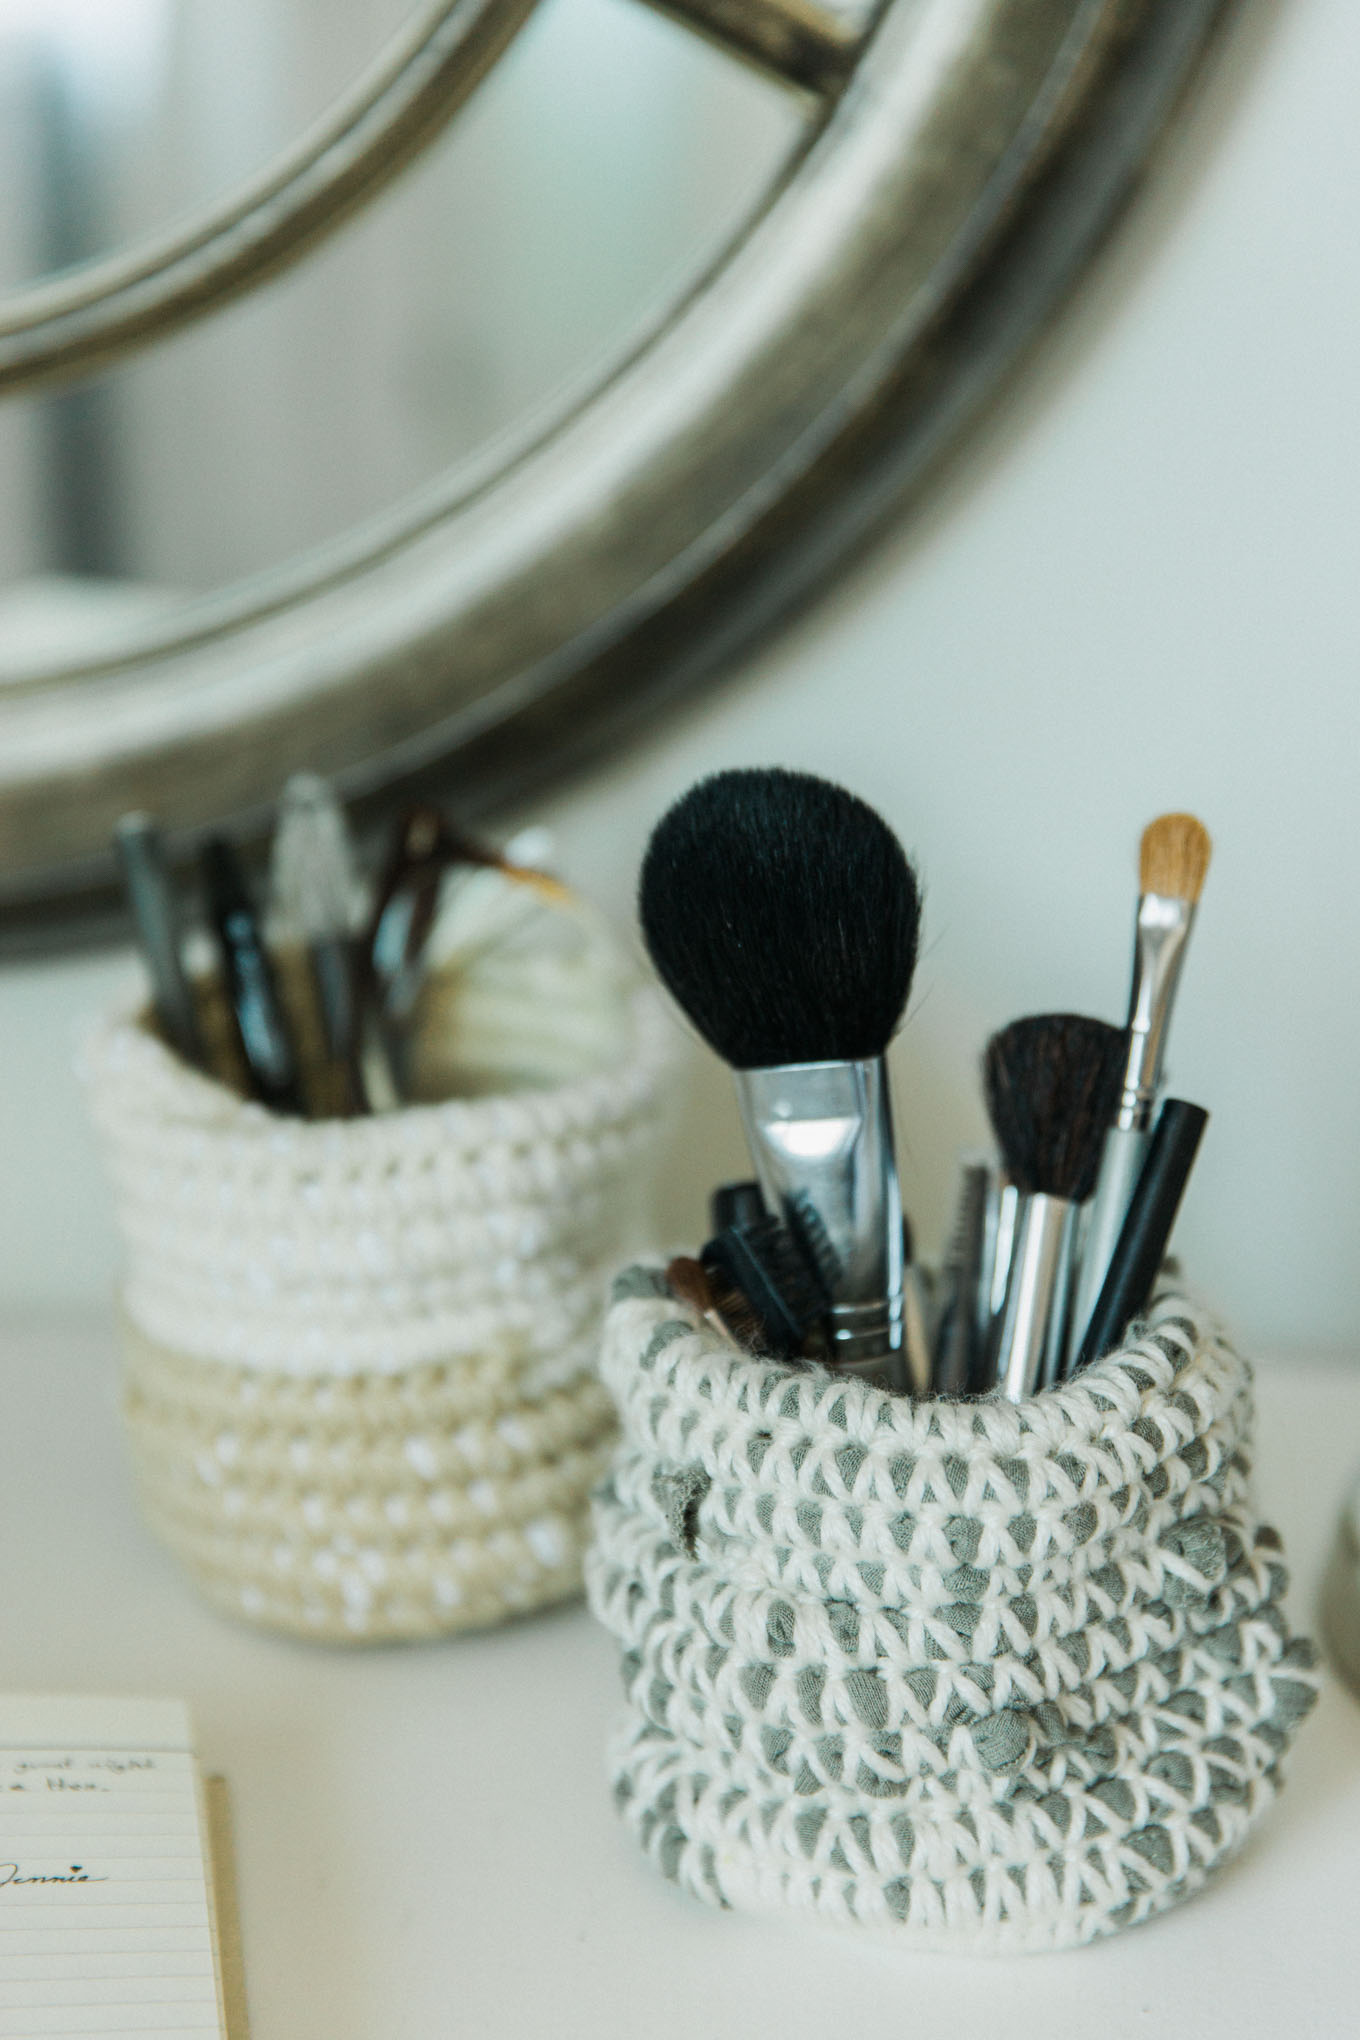
I love to use these recycled fabric coiled baskets to organize everything from makeup to my kid’s art supplies.  I love having a place for everything to stay organized, so these are great!  The other part that I love is that I made them with my own hands.  It brings a little bit of joy and sense of satisfaction to me each time I use them or see them around.

recycled fabric coiled basket diy

recycled fabric coiled basket diy

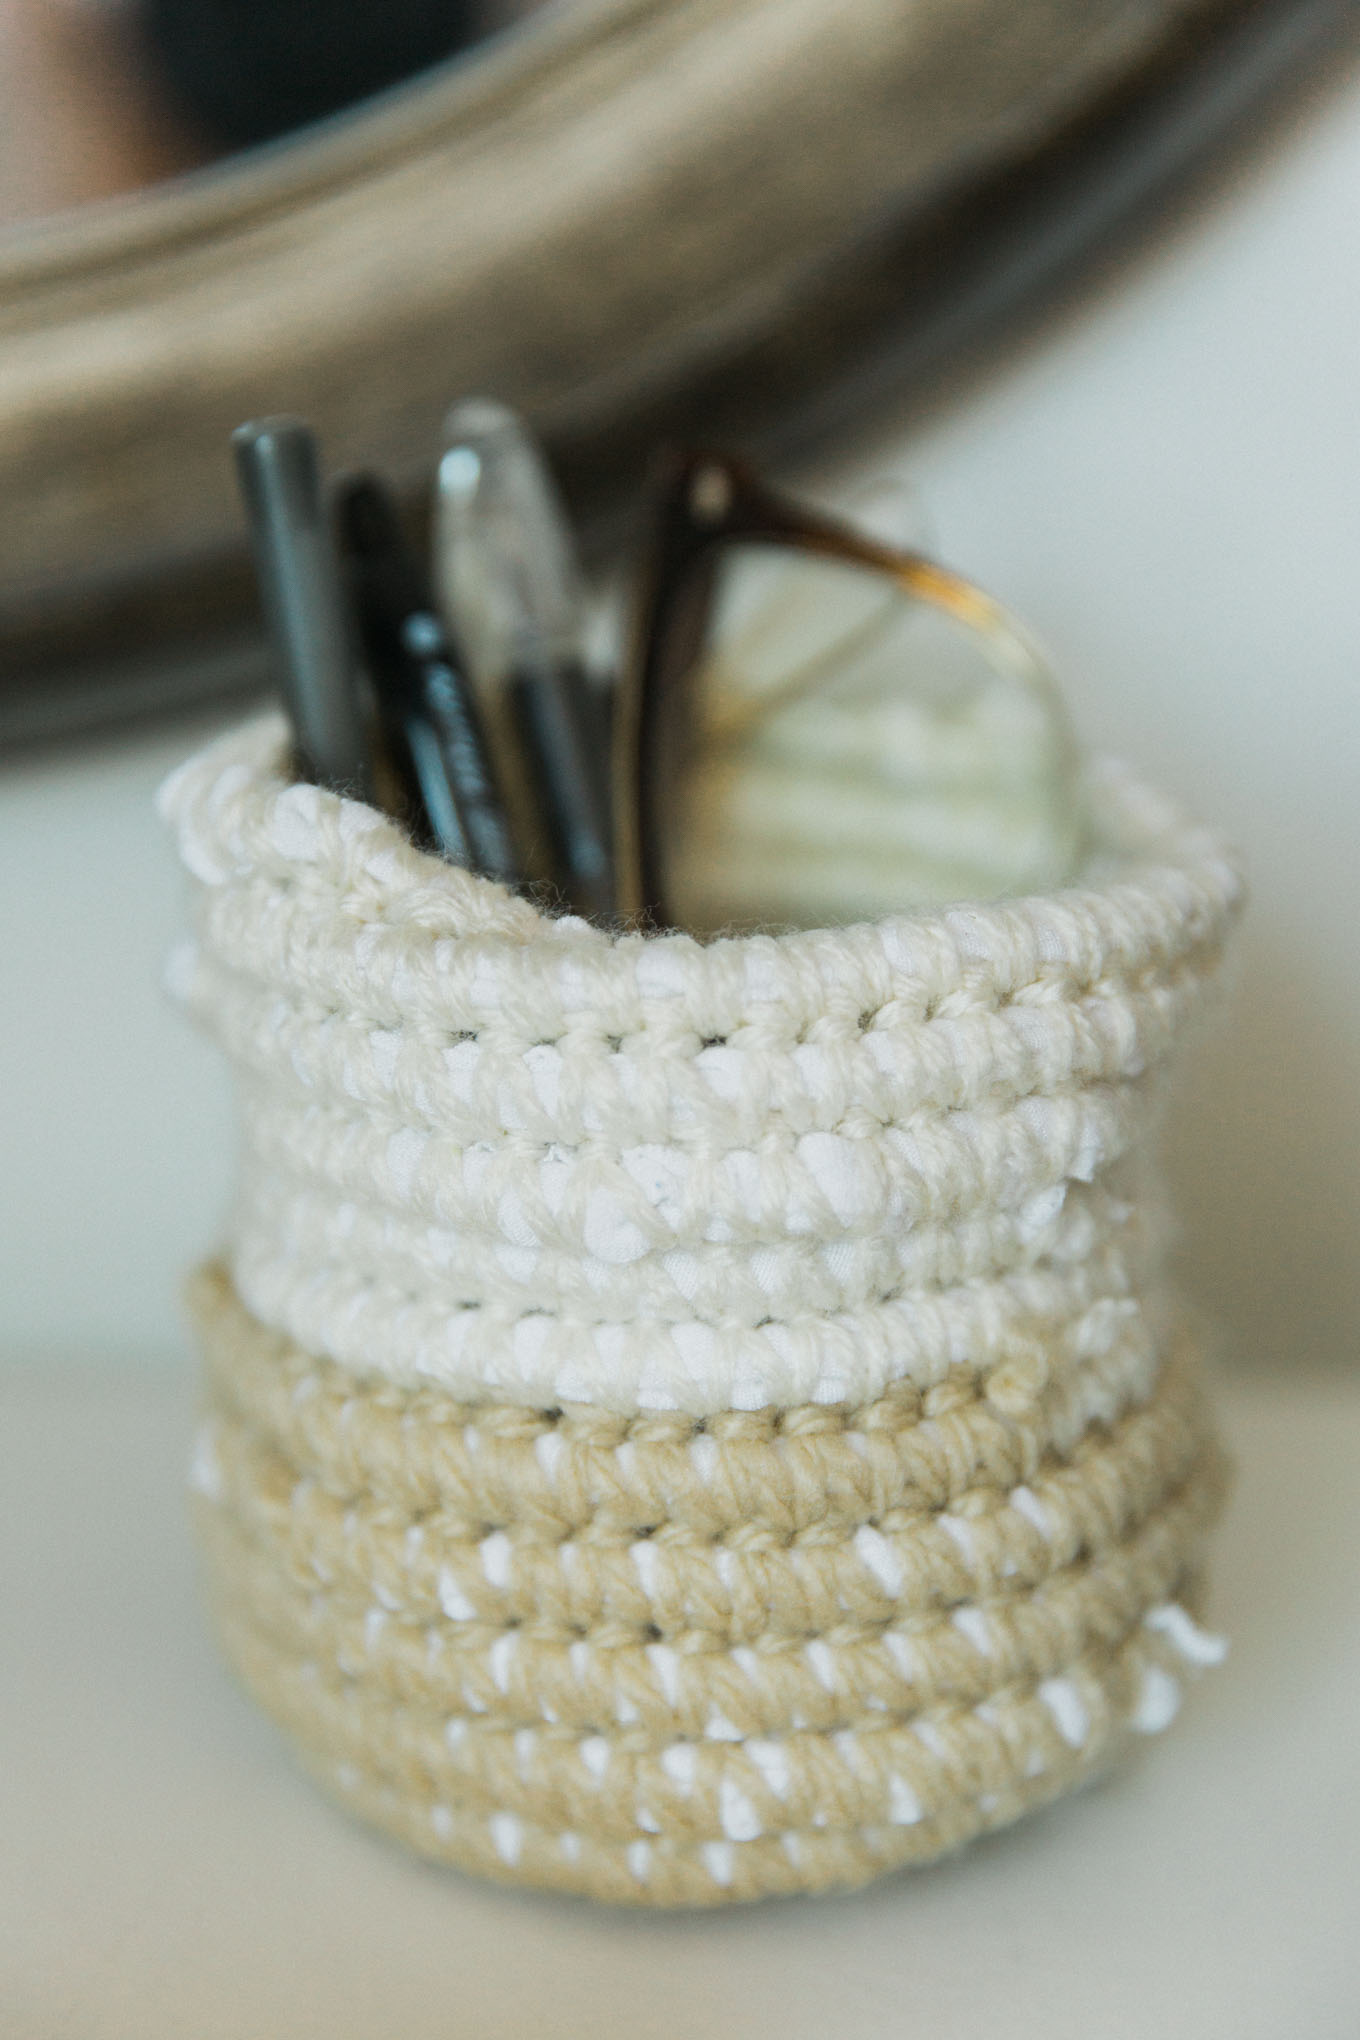
Try any colour combinations you want, I changed the color of the yarn halfway through on the cream and sandy coloured basket for a little bit of variety.  Get creative with it, and have fun!  I’m excited to try a few different sizes of these recycled fabric coiled baskets.

recycled fabric coiled basket diy

Planning a Backyard Camping Adventure

Friday, July 28, 2017

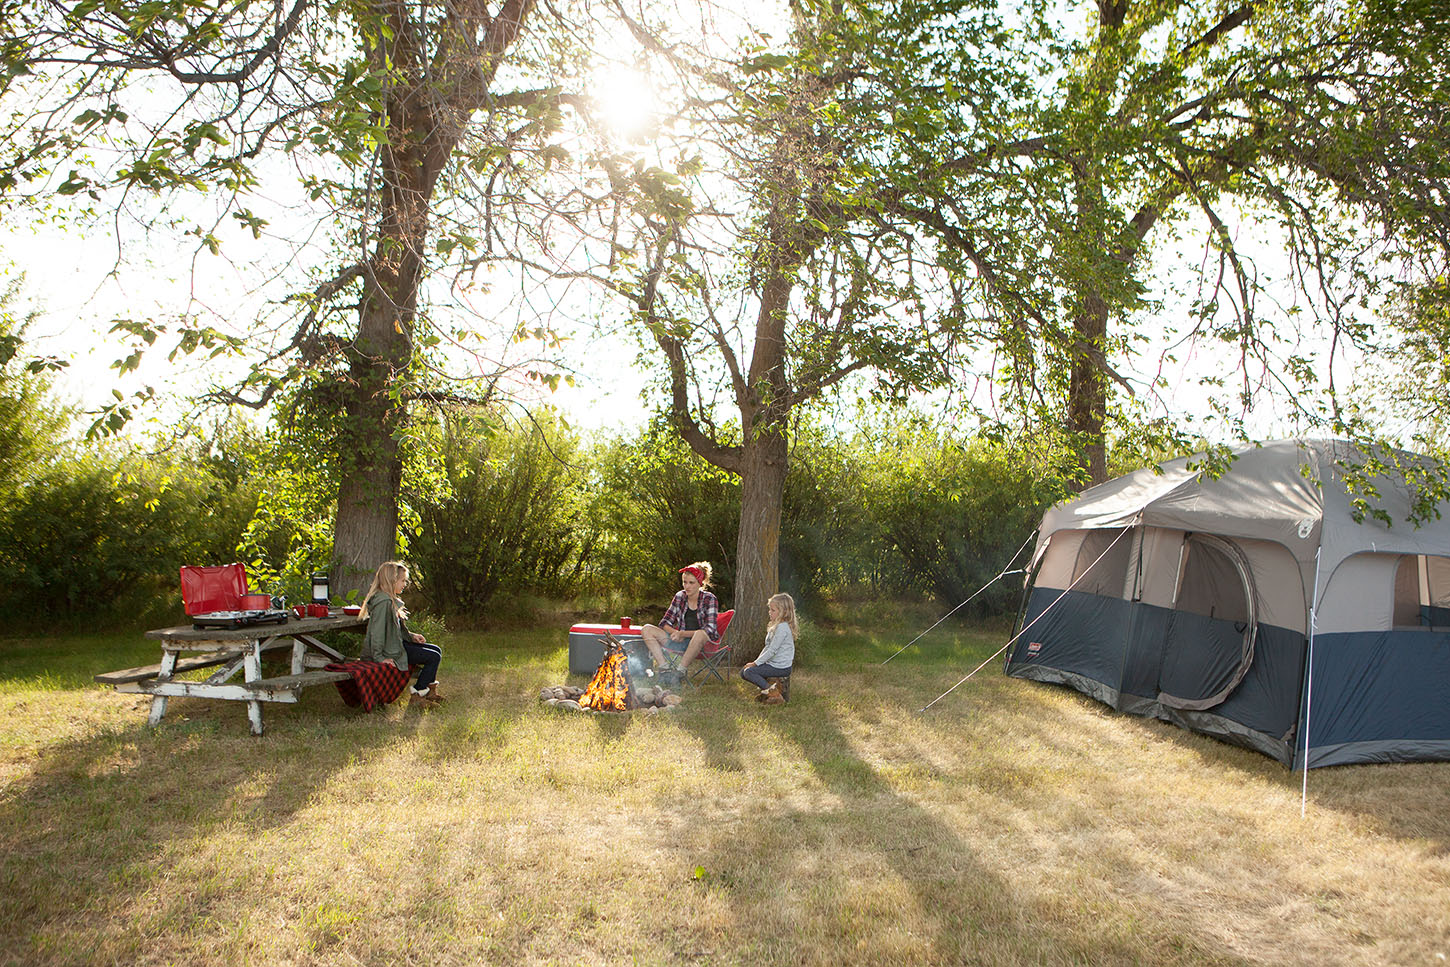
Getting outside doesn’t have to mean adventuring far from home. Make special memories as a family by planning a backyard camping adventure this summer!

Getting outside doesn't have to mean adventuring far from home. Make special memories by planning a backyard camping adventure this summer!

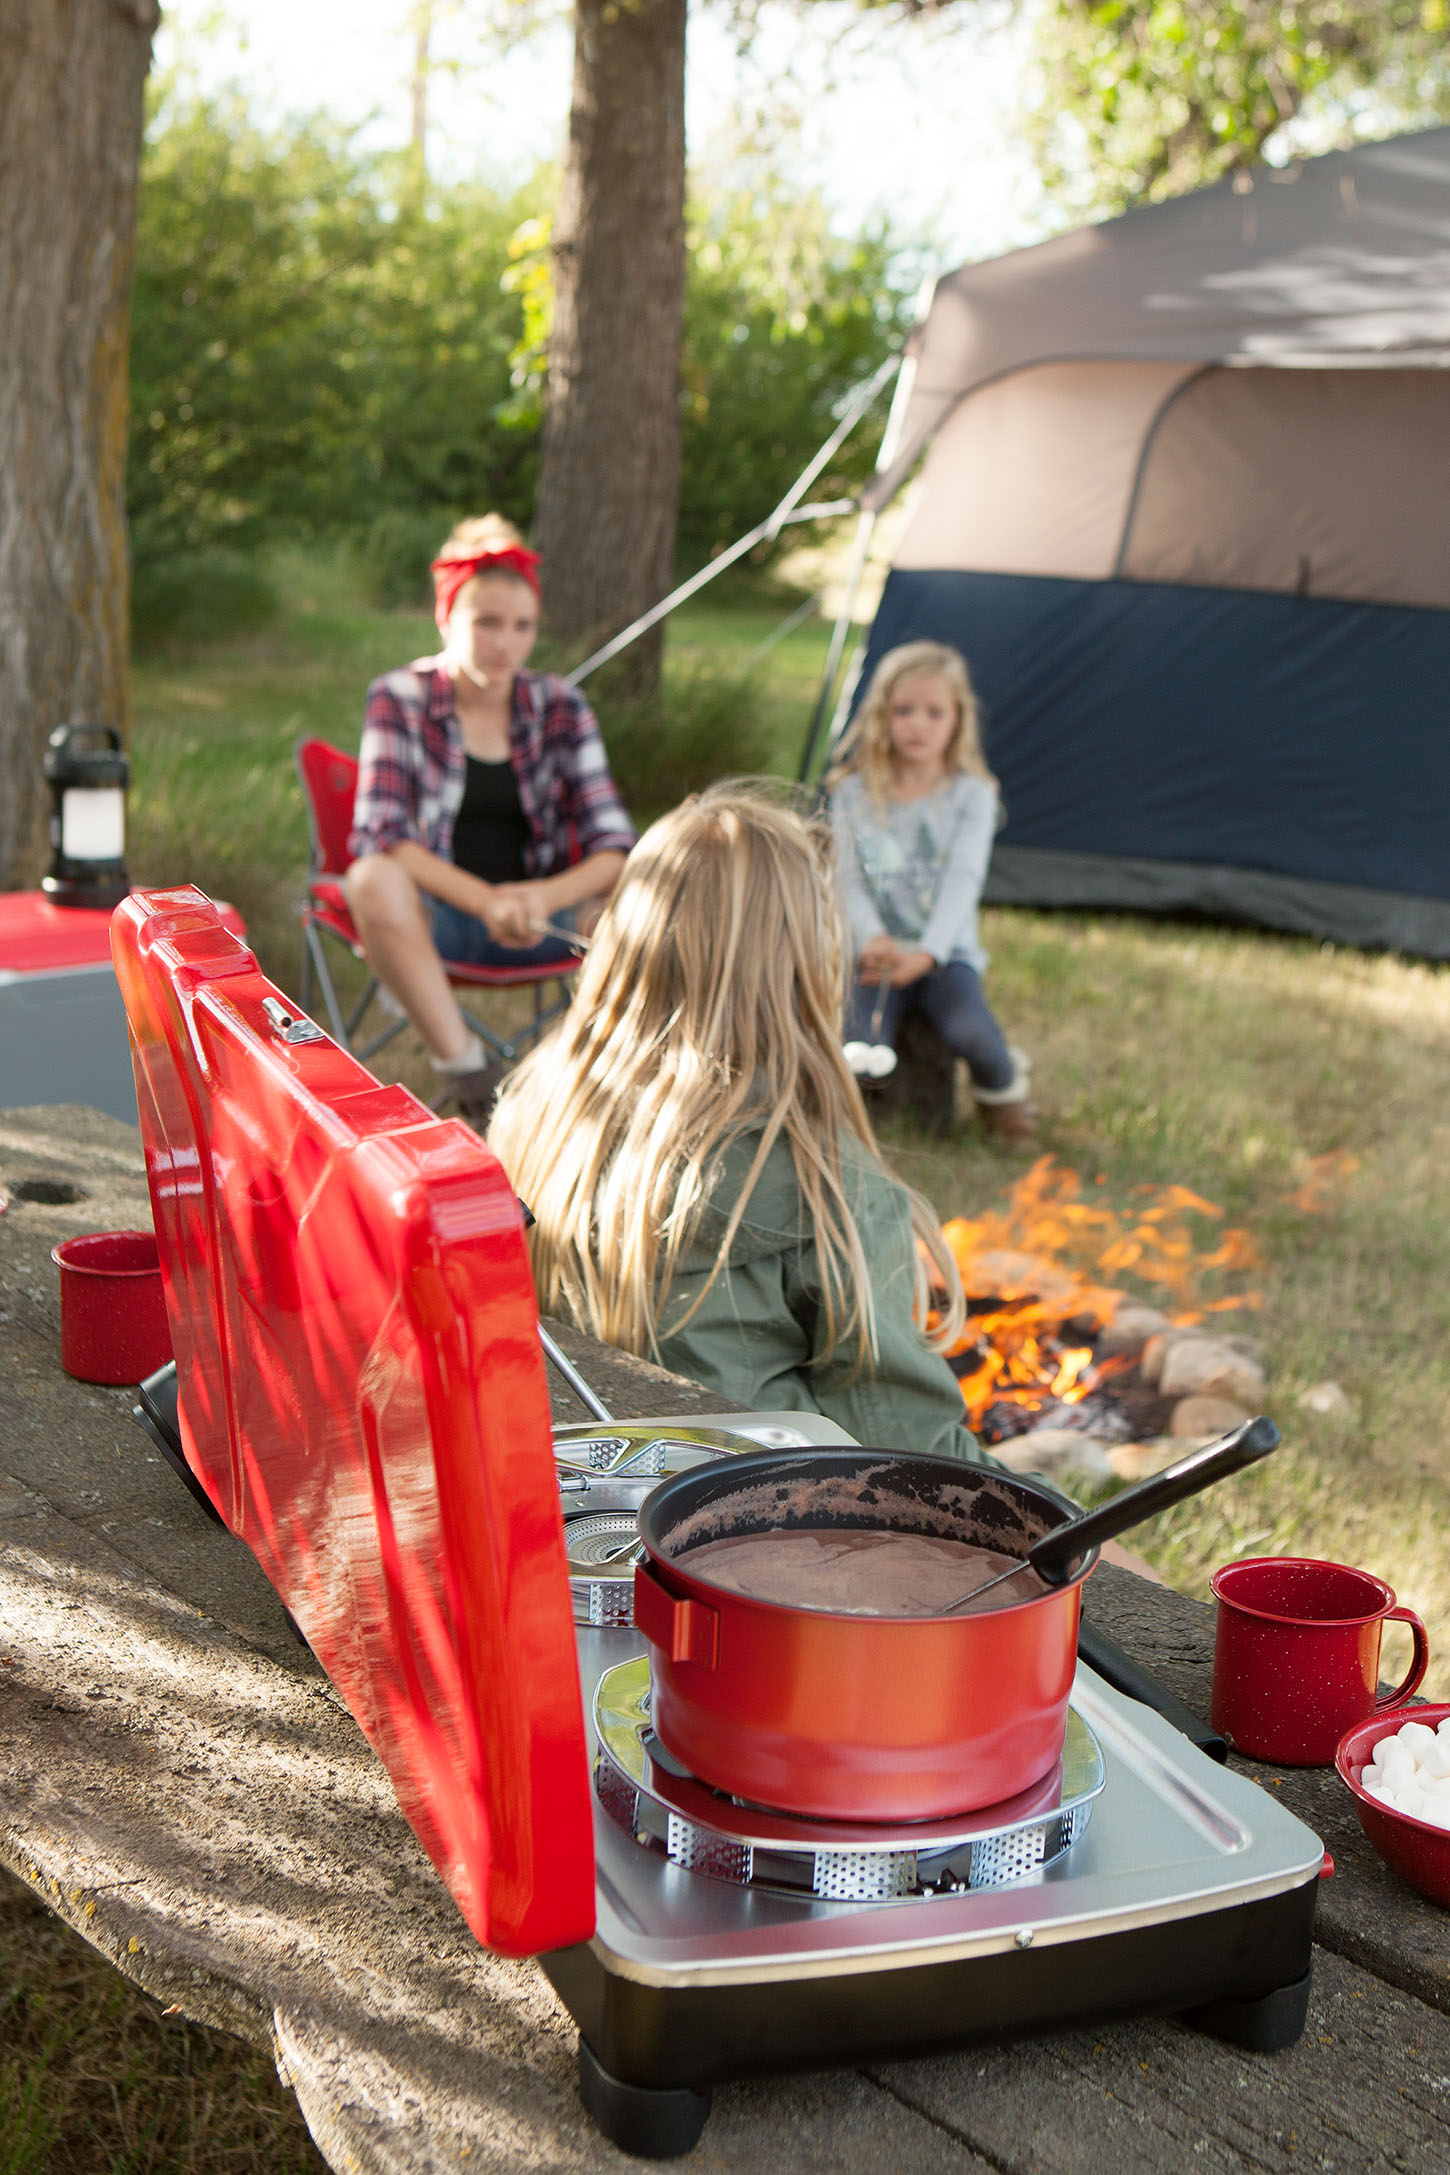
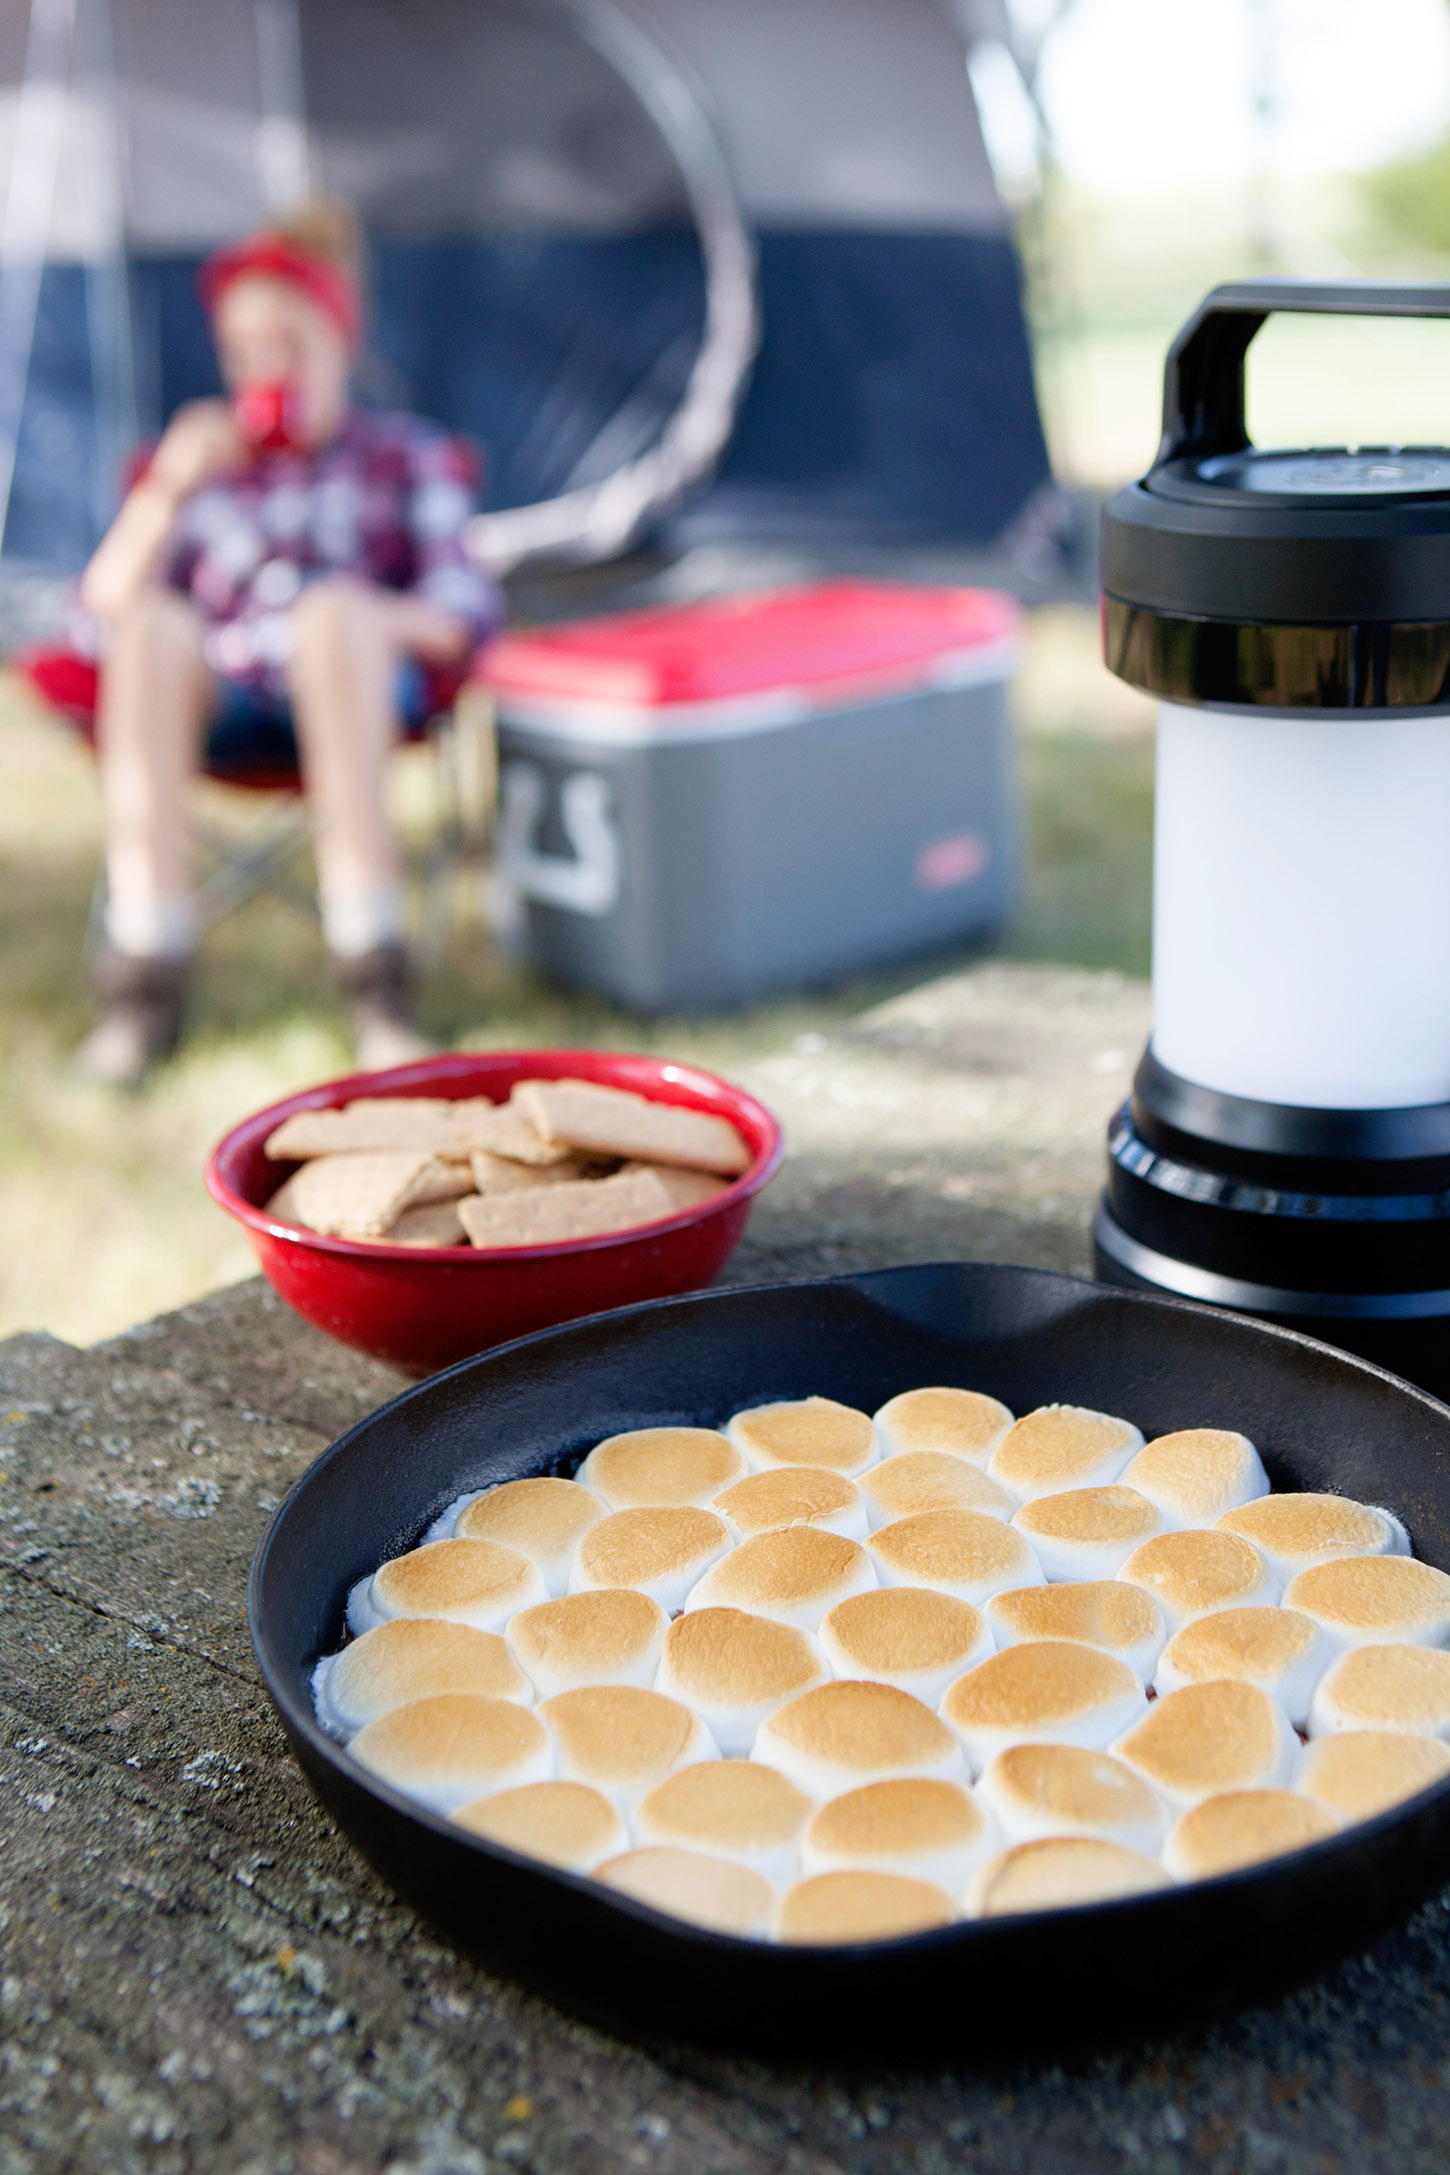
We enjoyed this yummy treat – Skillet S’mores Dip –  on a backyard campout last summer. Today I wanted to share with you just how fun it can be to “rough it” in your own backyard!

If you’re short on time and your summer fun budget is limited, then backyard camping is the perfect solution if you’re looking to spend some quality time outdoors as a family!

There’s no packing involved, no long drive in the car and I can tell you, our backyard camping experience was one to remember!

Tips for making your backyard campout an adventure to remember

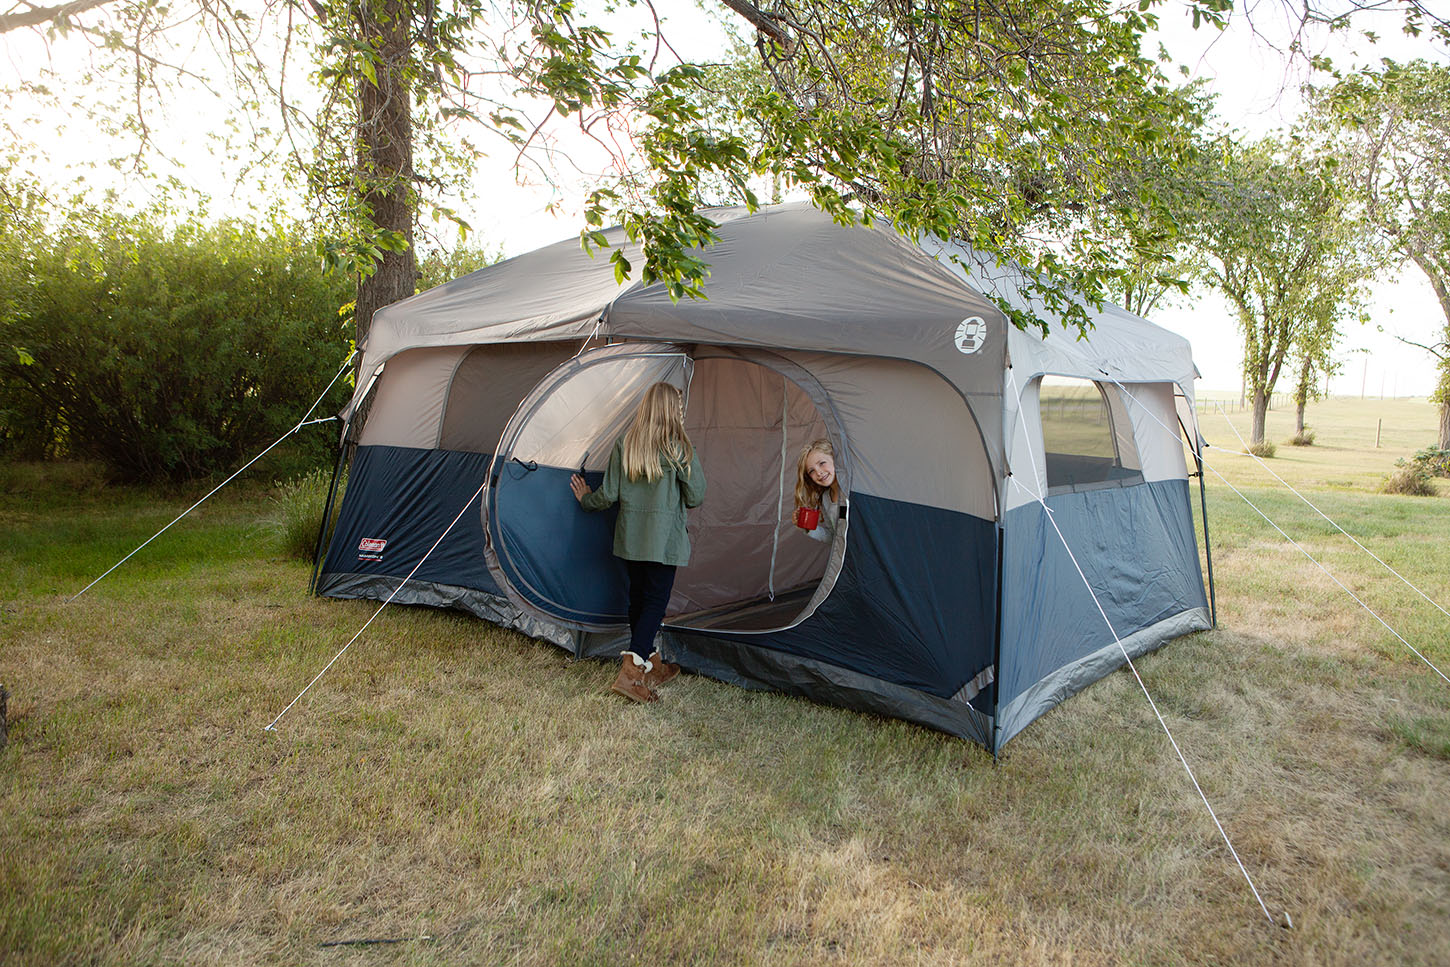
1. Make it authentic. To give your backyard campout an authentic feel, don’t forget the sleeping bags, a tent,  flashlights or lantern. They’re a must to get that true camping feel. We brought the cooler out to keep drinks in so we didn’t have to run back and forth between the house and when closed it made a great little table top!

2. Ditch the electronics. Encourage the whole family to unplug and leave their phones, iPods and laptops in the house. Tell ghost stories, sing campfire songs or do some star-gazing distraction-free! Being able to spend quality time together without the pull of electronic devices will make your backyard camping trip all the more special.

3. Get ready. Treat your backyard campout as a trial run for the real thing. Seeing how younger children do with sleeping in a tent in the backyard will help gage their readiness for a ‘real’ family camping trip. A backyard campout is the perfect way to help children who may be nervous about sleeping in a tent feel at ease.

Getting outside doesn't have to mean adventuring far from home. Make special memories by planning a backyard camping adventure this summer!

4. Keep it simple. Easy set up means easy clean up. You want your campout to feel authentic, but don’t feel like you need to pull out all the stops. Keep your supply list and your menu simple. You’ll be able to make wonderful memories without any fancy equipment. Make sure you involve the kids so they learn what’s involved with setting up and taking down “camp.”

5. Eat out. Make the experience even more fun by opting to cook dinner or enjoy a few “camping” snacks outside. Below is a list of simple food ideas to enjoy during your backyard campout. They can be cooked over a campfire or even easier, using a portable grill.

Getting outside doesn't have to mean adventuring far from home. Make special memories by planning a backyard camping adventure this summer!

Food for your Backyard Campout

Hotdogs – everything tastes better when it’s cooked over an open flame! Hotdogs are a camping dinner staple and are even more enjoyable when eaten together with loved ones.

S’mores – One tip to help make s’mores easier for little hands to manage is to use graham crackers or cookies that are already covered in chocolate. One less ingredient for your child to try and balance still delicious! You can also give our Skillet S’mores Dip a try for a different spin on this tradition camping treat.

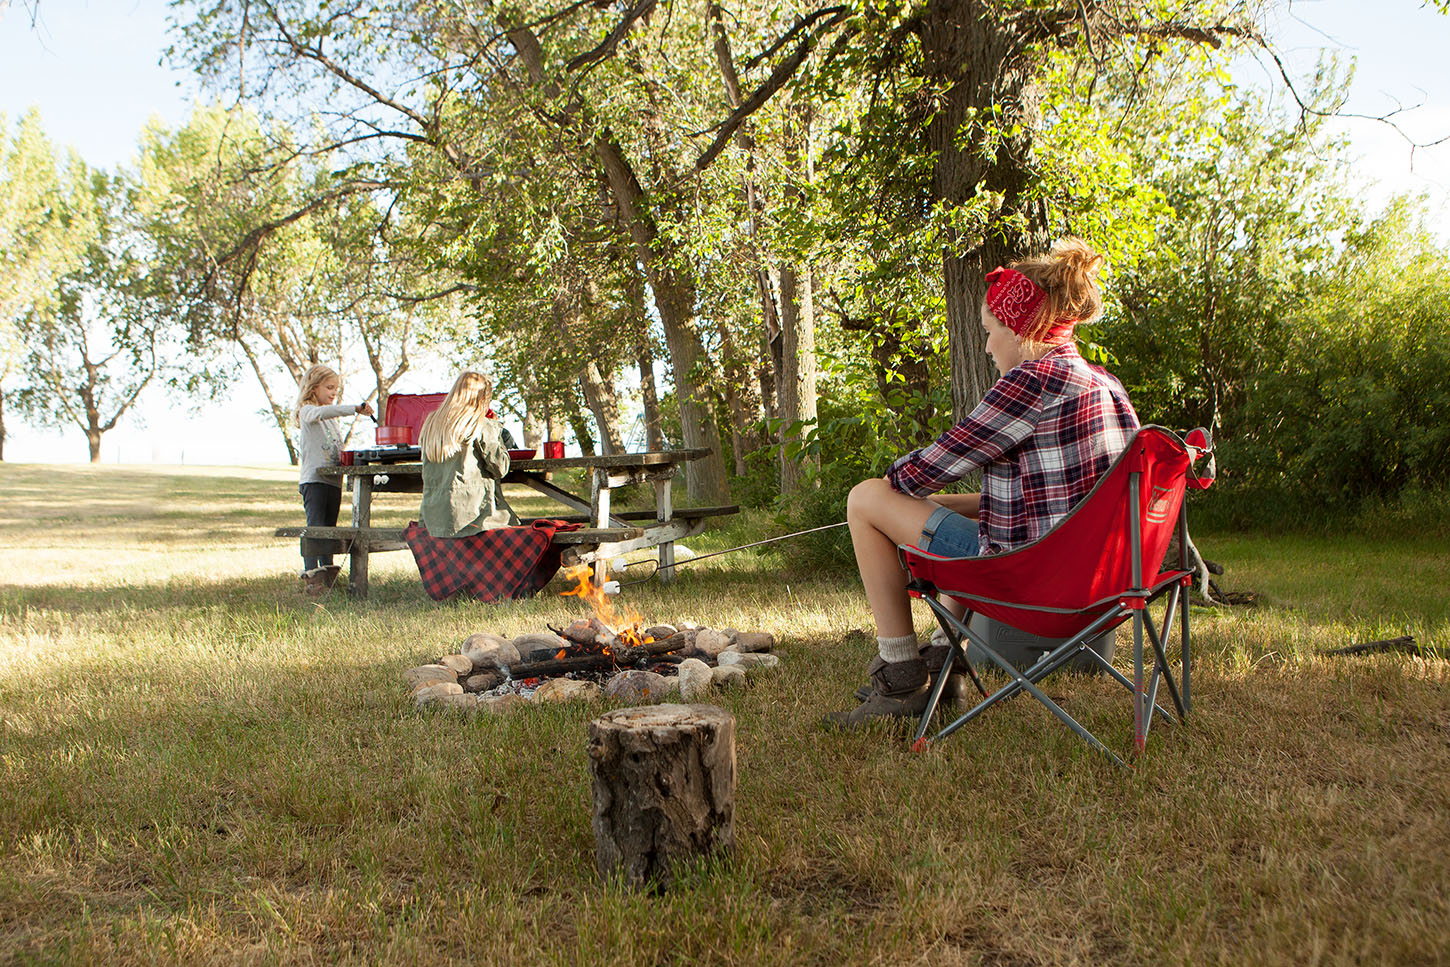
Roasted Marshmallows – It wouldn’t be a true camping trip without some marshmallow roasting, now would it. If you don’t have space for a backyard fire use the flame from the portable grill to roast your marshmallows to perfection!

Popcorn – Did you know you can cook popcorn over an open flame? All you need is some tinfoil, vegetable oil and popcorn seeds. Take a handful of popcorn seeds, place them in tinfoil with 1 tsp of vegetable oil. Fold foil in half and seal edges. Attach foil packet to a long stick and roast over hot coals or over low heat on a portable grill. Listen for kernels to start popping. Once they finish popping remove from heat, carefully open foil packet and add salt and butter.

Hot Chocolate – We enjoyed a delicious pot of hot chocolate during our backyard campout and kept it heated throughout the evening on the portable grill. It was a nice way to keep warm when the sun went down and the stars came out.

Campfire Pies – Have you tried campfire pies? Some people call them Mountain Pies or Hobo Pies. Whatever the name, they’re delicious and easy to make. All you need is a pie iron, bread, butter, your favorite canned pie filling, a brown paper bag and powdered sugar.

Butter one side of a slice of bread, place in sandwich toaster buttered side down. Put a large spoonful of your favorite pie filling on slice of bread. Top with another slice of buttered bread. Close sandwich toaster and cook over hot coals. Remove campfire pie from the pie iron and toss in icing sugar in a brown bag then enjoy this tasty treat!

backyard-campout5

Our backyard adventure was truly memorable for the kids and as a parent I appreciate that we didn’t have to spend a penny on travel or booking a campsite to get outdoors and spend time together!

With the convenience of being close to home and getting a taste of nature – backyard camping truly is the best of both worlds. Our kids can’t wait to do it again soon!

If you liked this post you might also enjoy…

  • Skillet S’mores Dip Recipe
  • 5 National Parks to Visit as a Family
  • 25 Simple and Delicious Camping Recipes
  • Life Lessons Children Learn from Hiking

Step Back in Time at the Ingalls Homestead De Smet, South Dakota

Tuesday, July 25, 2017

Looking for a truly memorable family experience? Step back in time at the Ingalls Homestead near De Smet, South Dakota! Watch history come to life while exploring the beautiful prairie homestead and learn about the rich pioneer history of the Ingalls family along the way.

Looking for a truly memorable family experience? Step back in time at the Ingalls Homestead near De Smet, South Dakota! Watch history come to life while exploring the beautiful prairie homestead and learn about the rich pioneer history of the Ingalls family along the way.

We’ve partnered with South Dakota Tourism as part of their Good Times Great Places campaign to bring you this post. All opinions are our own.

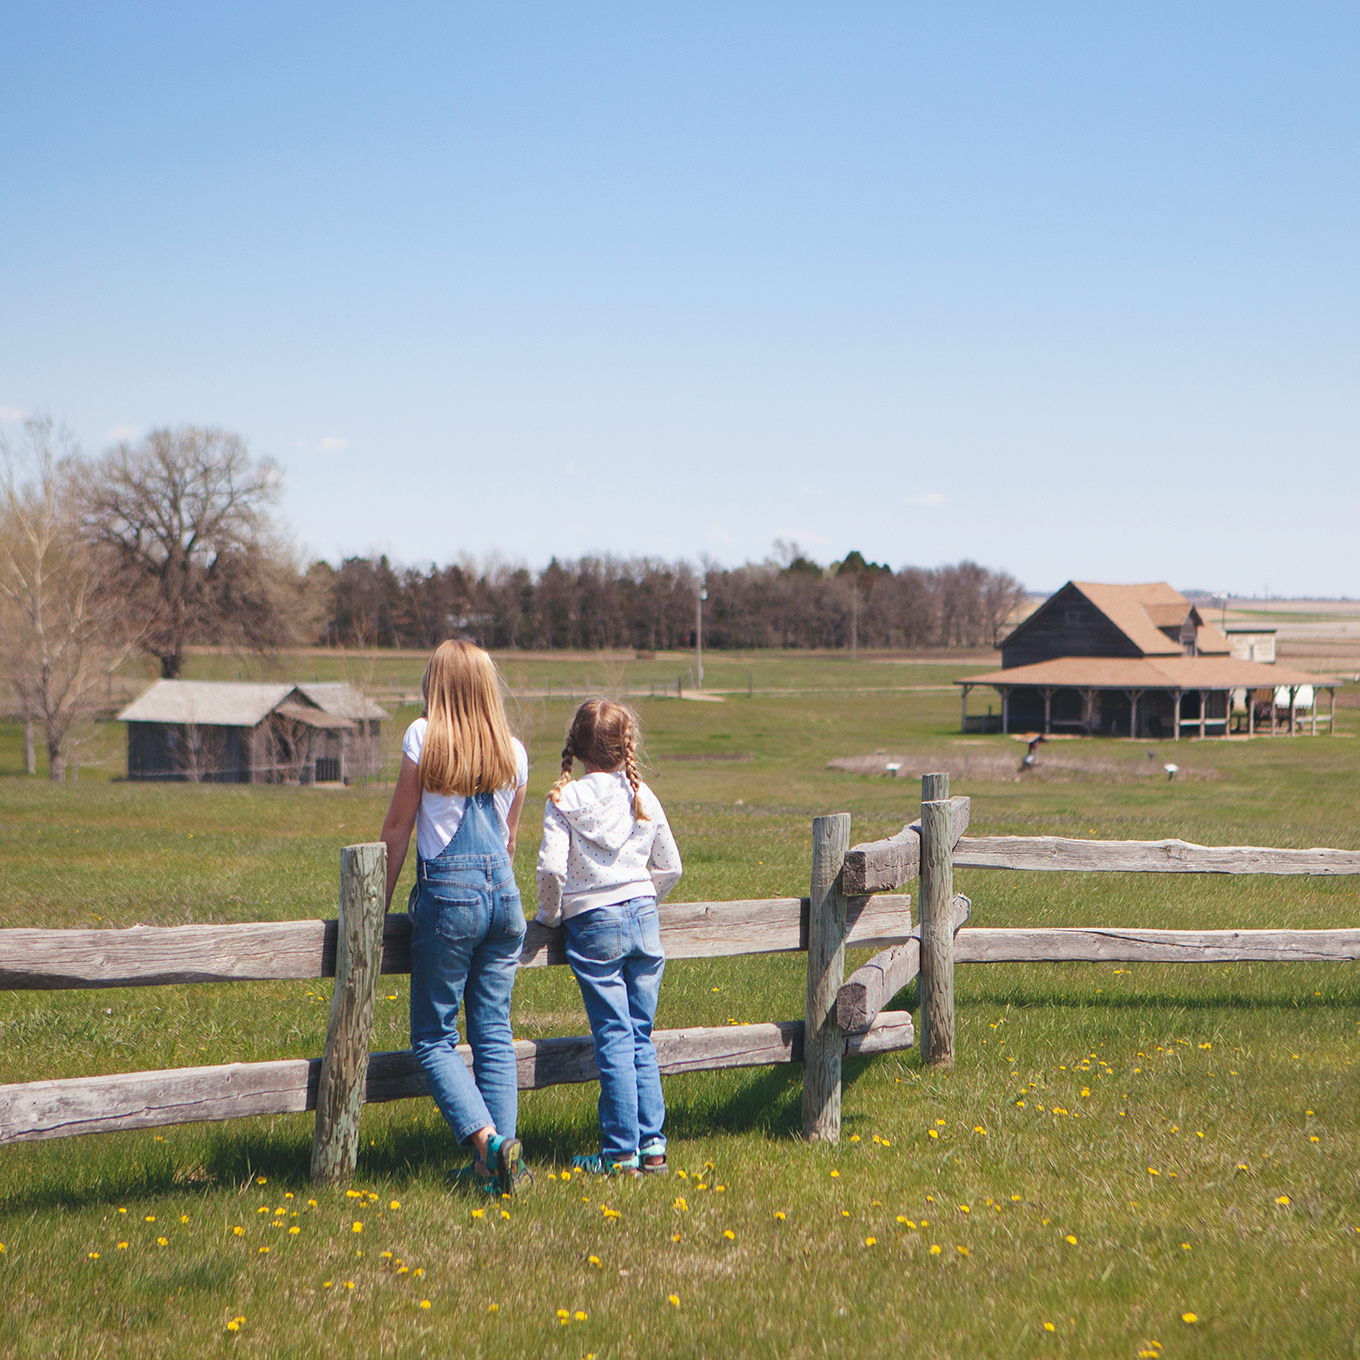
In May we had the chance to visit South Dakota and explore some of the best family-friendly attractions that the state has to offer! One of the most memorable stops on our trip was the Ingalls Homestead. It was such an amazing experience you guys – one the kids and I won’t soon forget!

Looking for a truly memorable family experience? Step back in time at the Ingalls Homestead near De Smet, South Dakota! Watch history come to life while exploring the beautiful prairie homestead and learn about the rich pioneer history of the Ingalls family along the way.

Stepping Back in Time

As a child I read all of Laura Ingalls Wilder’s Little House on the Prairie books and I ate up every episode of the 1970’s tv series. Not only do I have fond memories of reading the books myself, I also have fond recollections of enjoying them with my oldest daughter who is now 15.

Our connection to Laura Ingalls Wilder’s books is what made this place extra special to us – as it does for many visitors. To see the stories from the books pages come to life at the actual homestead where Laura lived from age 13-18 was magical.

Being able to go beyond the books and explore, touch, taste and see for ourselves what life was really like for Laura and her family was unique. My younger daughters hadn’t read the books before our visit to the homestead, but have since been drawn in by Laura’s story and it’s been a joy to start re-reading the Little House on the Prairie books with them.

Looking for a truly memorable family experience? Step back in time at the Ingalls Homestead near De Smet, South Dakota! Watch history come to life while exploring the beautiful prairie homestead and learn about the rich pioneer history of the Ingalls family along the way.

10 Things to Experience at the Ingalls Homestead

I appreciated  how welcoming all of the exhibits at the Ingalls homestead were for children! Their hands-on approach to exploring was very refreshing. The kids were encouraged to look, touch and try out much of what was on display.

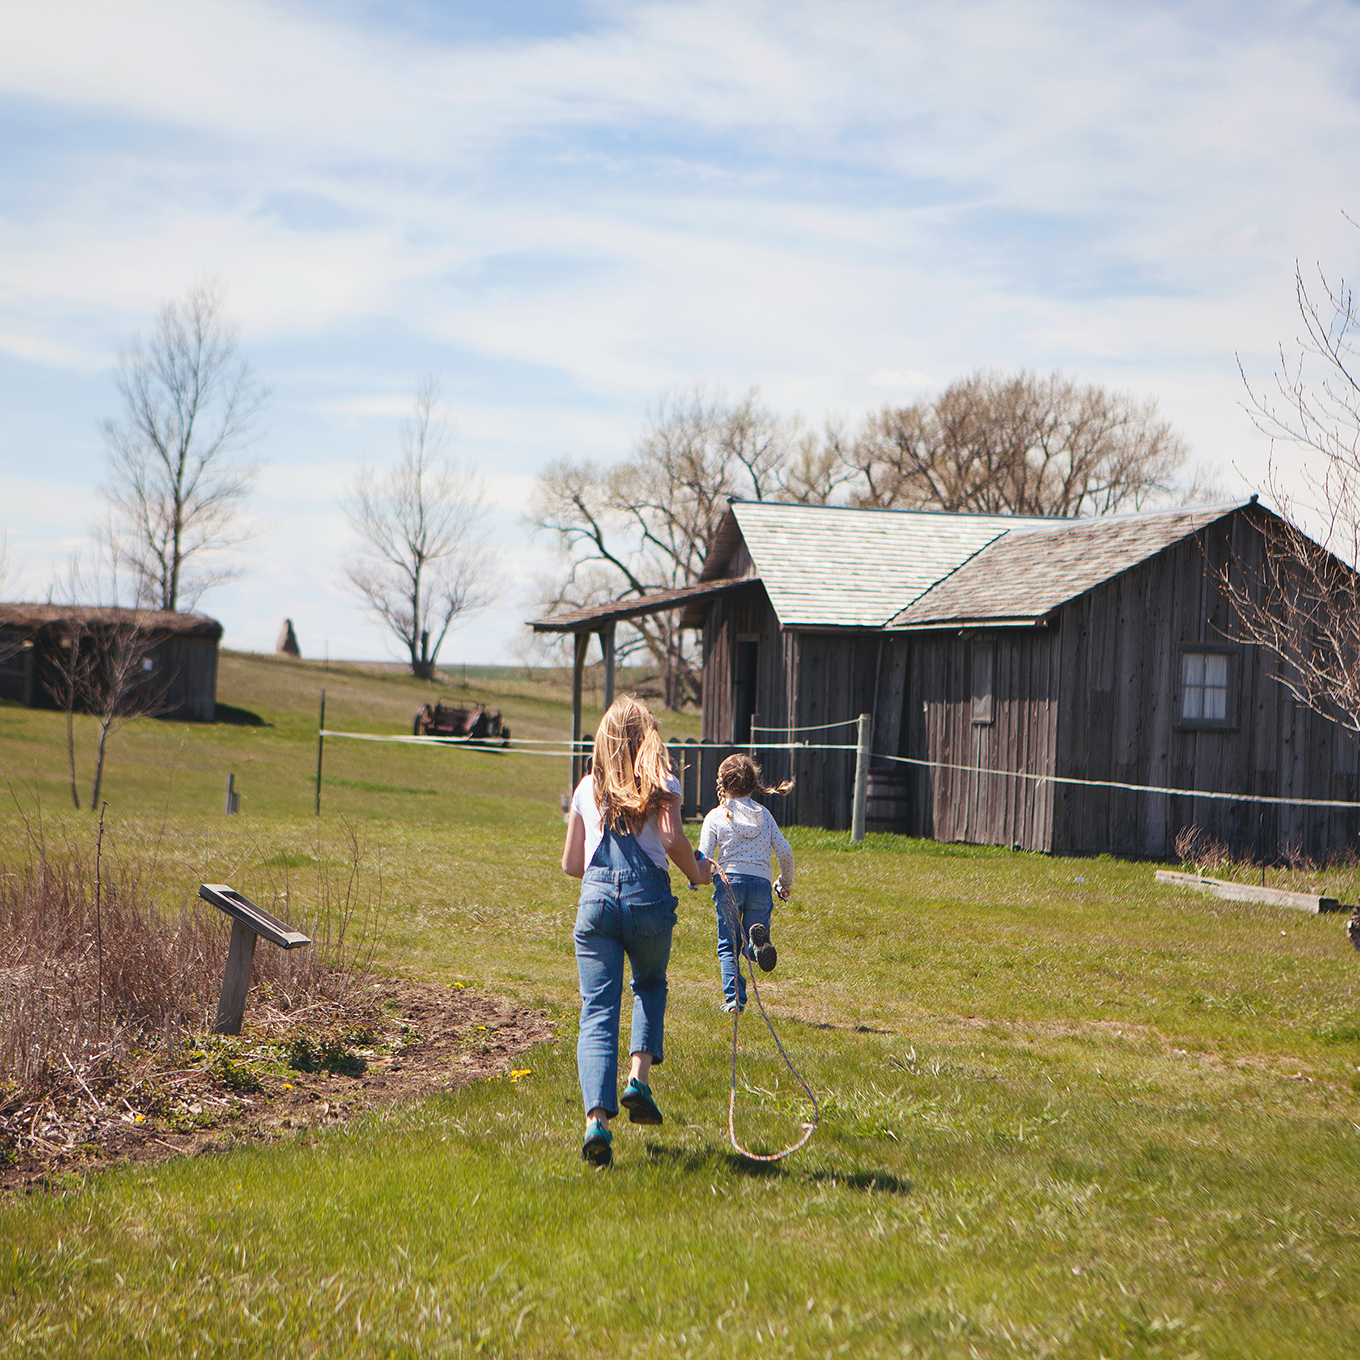
My kids ran through the tall prairie grasses, they tasted old-fashioned candy, they rode in a covered wagon, they played with handmade toys and heard the bell ringing from the one-room school house – all things that Laura experienced herself so many years ago.

If you visit the Ingalls Homestead here are a few things you need to do while you’re there.

Looking for a truly memorable family experience? Step back in time at the Ingalls Homestead near De Smet, South Dakota! Watch history come to life while exploring the beautiful prairie homestead and learn about the rich pioneer history of the Ingalls family along the way.

1. Take a Covered Wagon Ride

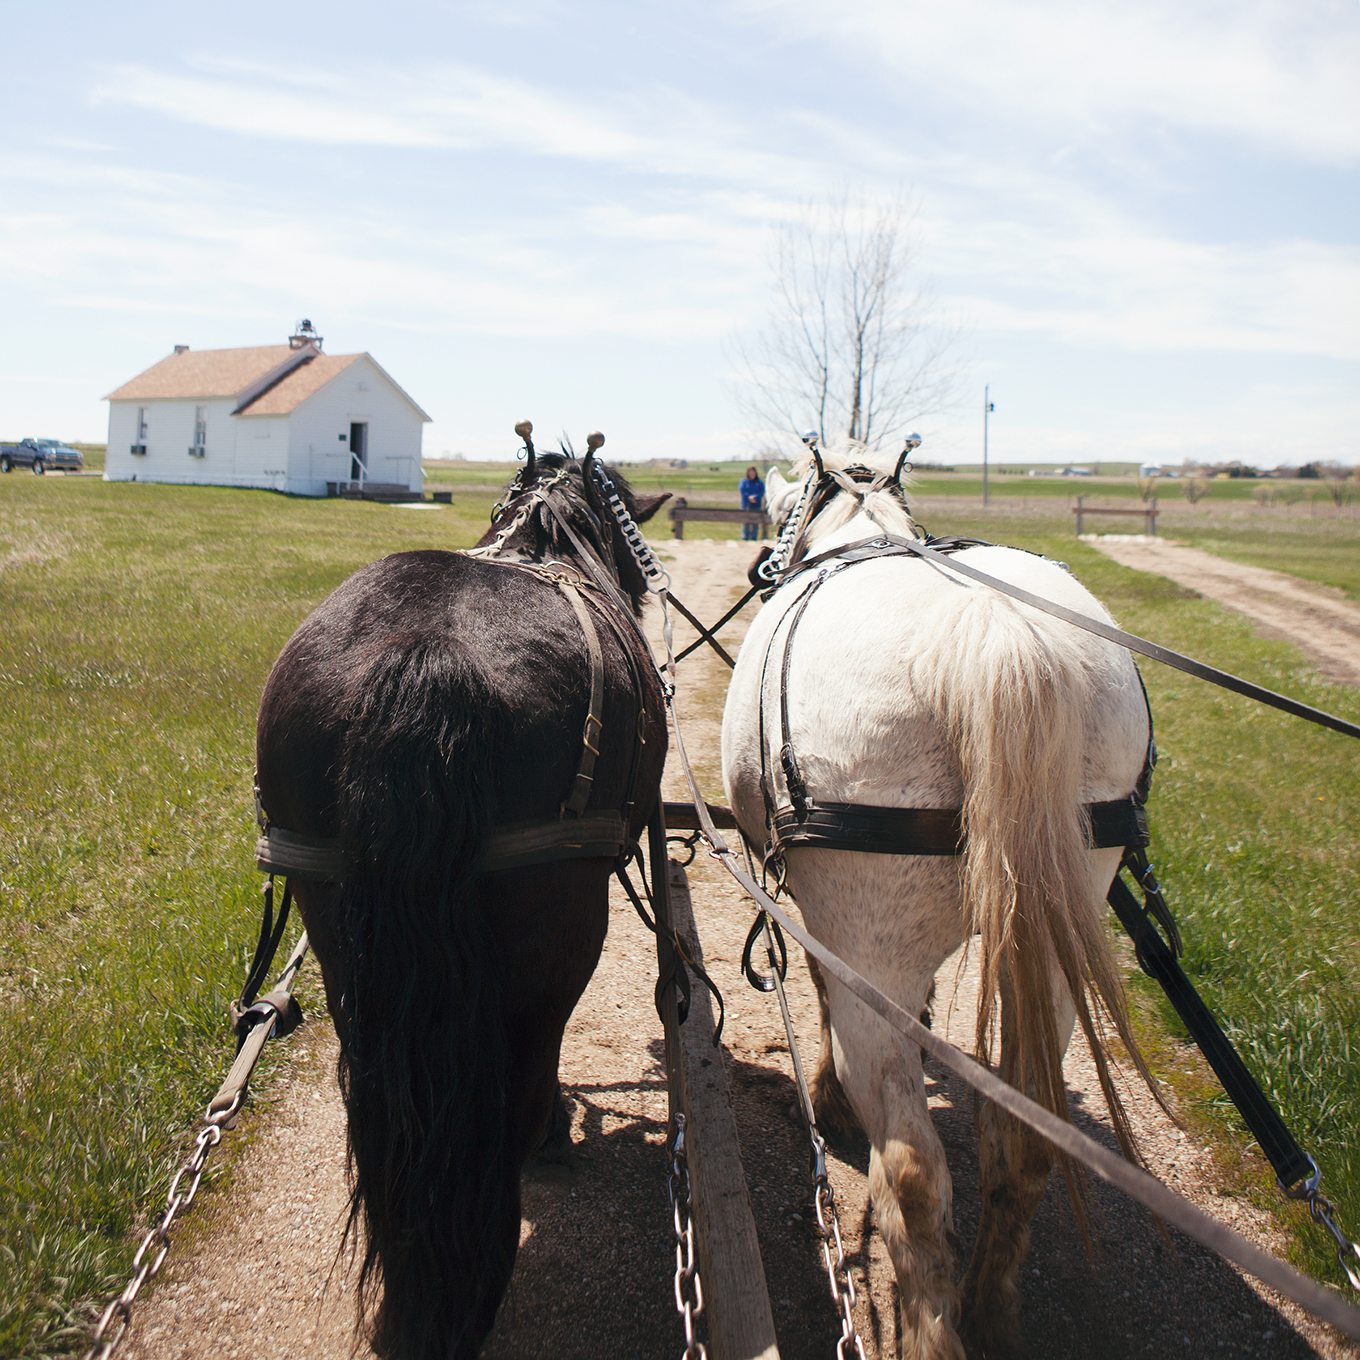
My kids were especially thrilled with the wagon ride we got to go on. Each of them got a turn to drive the team of horses. They were on a first name basis with the wagon driver and each of the horses by the time we reached the tiny school house.

Looking for a truly memorable family experience? Step back in time at the Ingalls Homestead near De Smet, South Dakota! Watch history come to life while exploring the beautiful prairie homestead and learn about the rich pioneer history of the Ingalls family along the way.

2. See What it’s Like Inside a Prairie School House

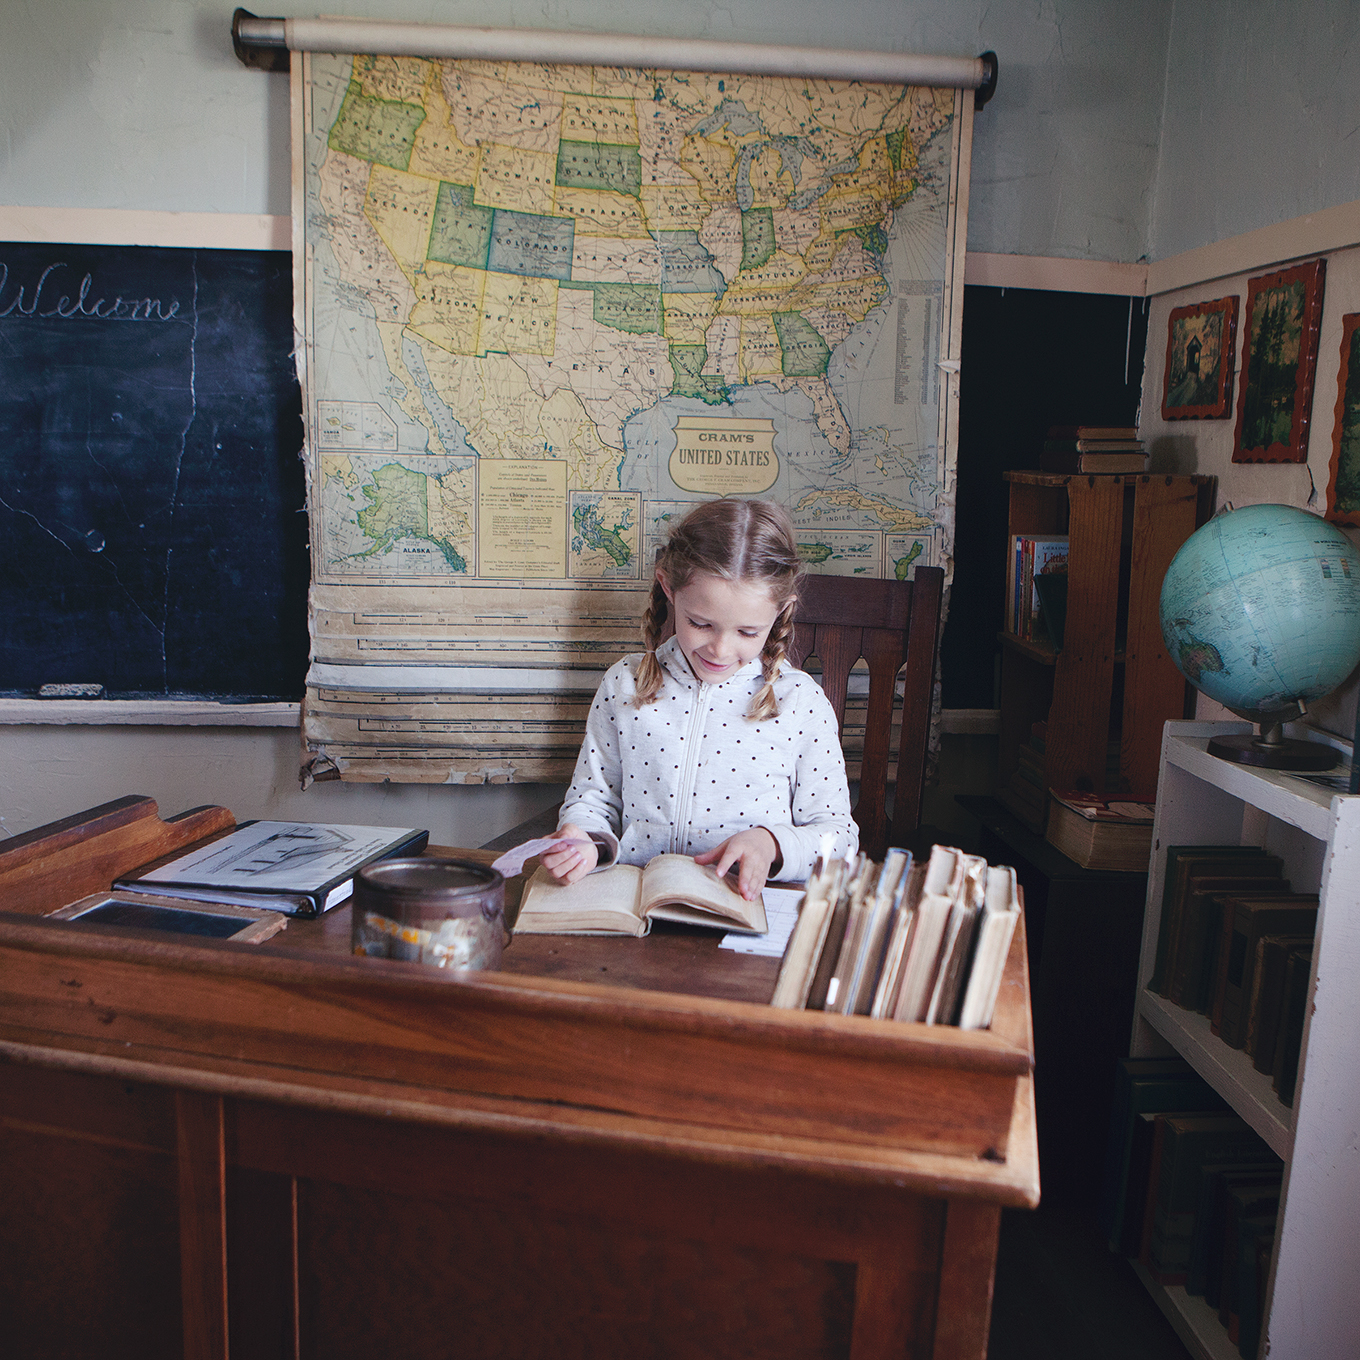
We surprisingly spent a large chunk of our time at the Ingalls Homestead inside the tiny one room schoolhouse. My kids were so interested in learning more about what school was like back in Laura’s day. They had question after question for the staff that were on hand and thoroughly enjoyed looking through the school books, learning about how the kids were taught and ringing the school bell!

Looking for a truly memorable family experience? Step back in time at the Ingalls Homestead near De Smet, South Dakota! Watch history come to life while exploring the beautiful prairie homestead and learn about the rich pioneer history of the Ingalls family along the way.

3. Make Your own Rope and Corncob Dolls

We had the chance to make our own corncob dolls just like the ones Laura played with. My girls loved doing this! We also learned how they made their own rope from bailers twine. It was neat to be involved in the process.

Looking for a truly memorable family experience? Step back in time at the Ingalls Homestead near De Smet, South Dakota! Watch history come to life while exploring the beautiful prairie homestead and learn about the rich pioneer history of the Ingalls family along the way.

4. Learn About Hay Twisting

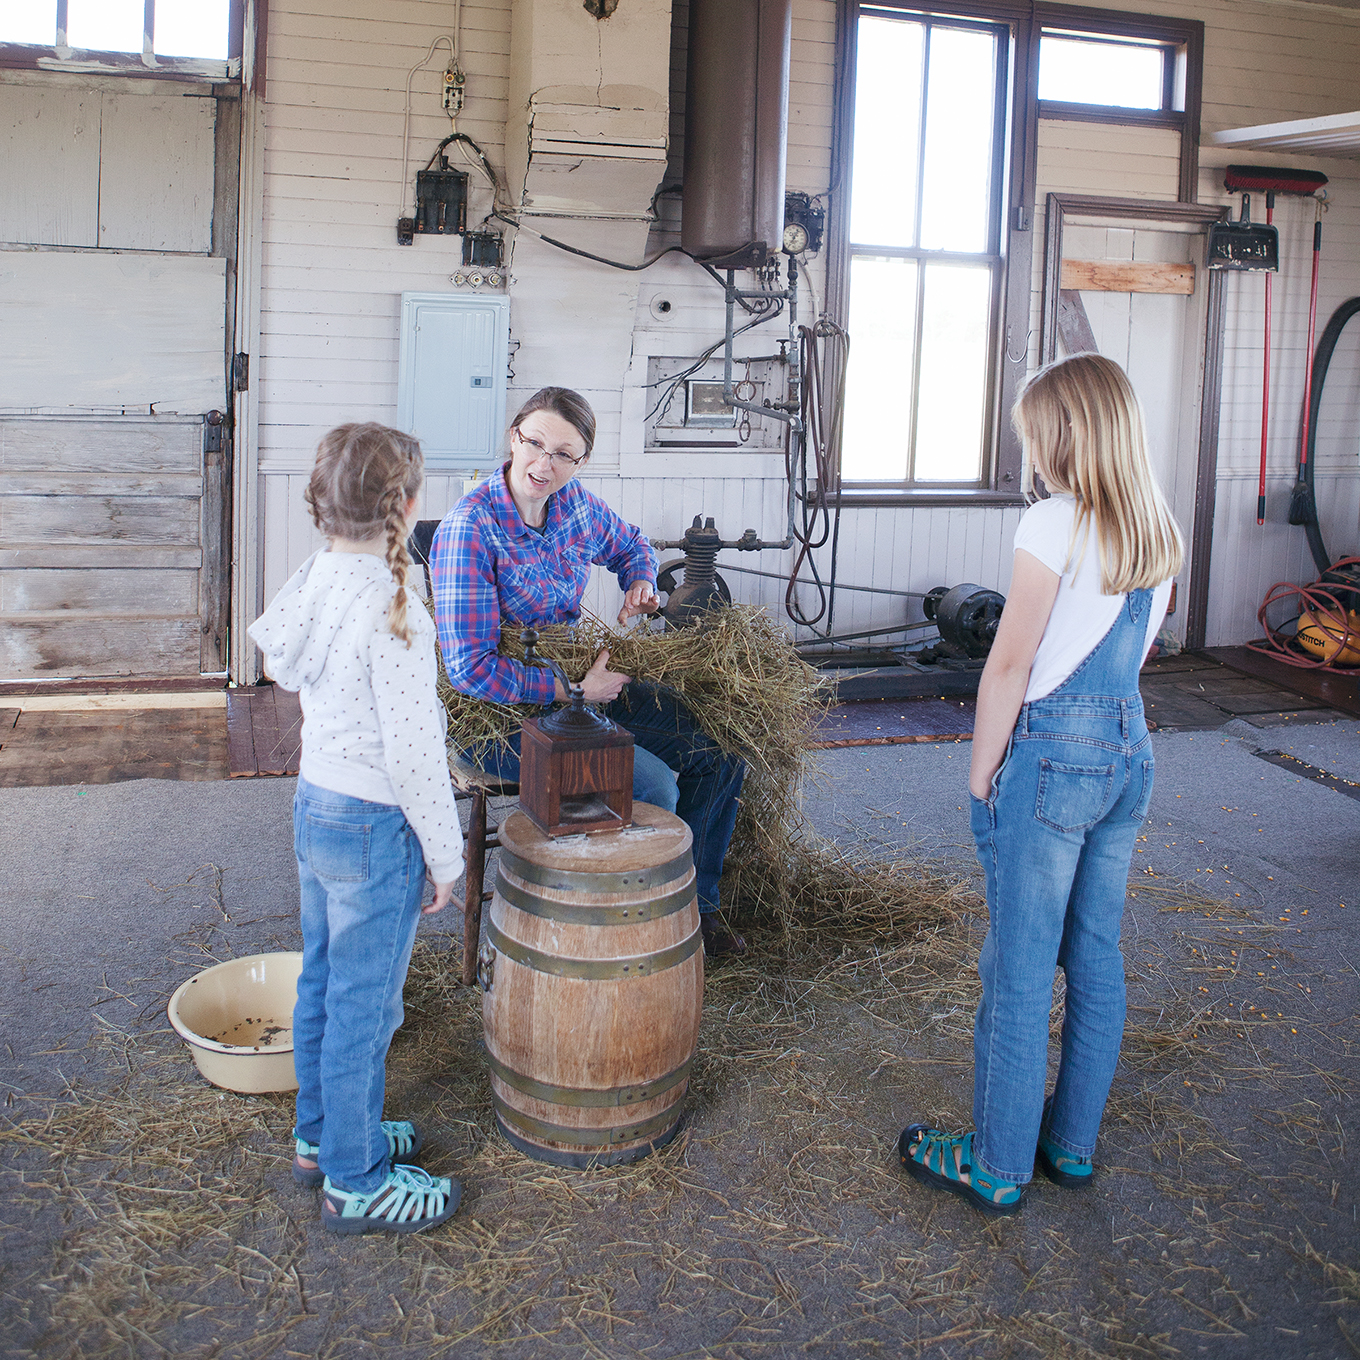
We learned about the struggles Laura’s family experienced during the harsh winter of 1880-1881 and how they survived by twisting hay into tight bricks to burn for fuel.

5. Washing Clothes

You can try out an old-fashioned washboard and wash clothes just like Laura’s Ma would have done. Wash, rinse, wring out the clothes and then hang them on the line to dry. They even make the lye soap one site at the Ingalls Homestead.

Looking for a truly memorable family experience? Step back in time at the Ingalls Homestead near De Smet, South Dakota! Watch history come to life while exploring the beautiful prairie homestead and learn about the rich pioneer history of the Ingalls family along the way.

6. Camping on the Prairie

We didn’t get the chance to camp at the Ingalls Homestead because of our timeline but I’ve heard it’s an amazing experience and we’d love to do it one day. You can camp in your own tent or RV or even stay the night in a covered wagon!

Seeing History Come to Life

I never would have guessed that of all our stops on our South Dakota road trip the kids would like the Ingalls Homestead the most. I knew that *I* would enjoy it, but it was so special to see how my kids connected with this place.

At the homestead, I loved watching the kids get taken in by the smallest details of pioneer life. They ate up every experience and were constantly asking questions.

There were so many lessons to take away from our visit to the Ingalls Homestead. To see first hand what life was like for the early settlers helped my kids gain a new appreciation for the modern conveniences we enjoy and develop empathy for the struggles Laura and her family experienced.

Looking for a truly memorable family experience? Step back in time at the Ingalls Homestead near De Smet, South Dakota! Watch history come to life while exploring the beautiful prairie homestead and learn about the rich pioneer history of the Ingalls family along the way.

You can read the books, you can watch the shows but there’s something about seeing the actual dimensions of that tiny dugout they lived in. Realizing the effort they had to go to to build a fire during an especially hard winter. Touching the books and the slate chalkboards the children used at in the one-room school house.

I anticipated we’d be at the Ingalls Homestead for a few hours but we truly could have stayed all day long. By the end of our visit Laura and her family were no longer just characters in a book, they were real-life people who we’d gotten to know and admire.

If you enjoyed this post you might also like…

  • 8 Family-Friendly Things to Do in South Dakota
  • 5 Tips to Make Your Family Travel Dreams Come True
  • 7 Ways to Encourage Family Connection on the Road

Short, Sweaty HIIT Workout for Summer Vacation

Wednesday, July 12, 2017

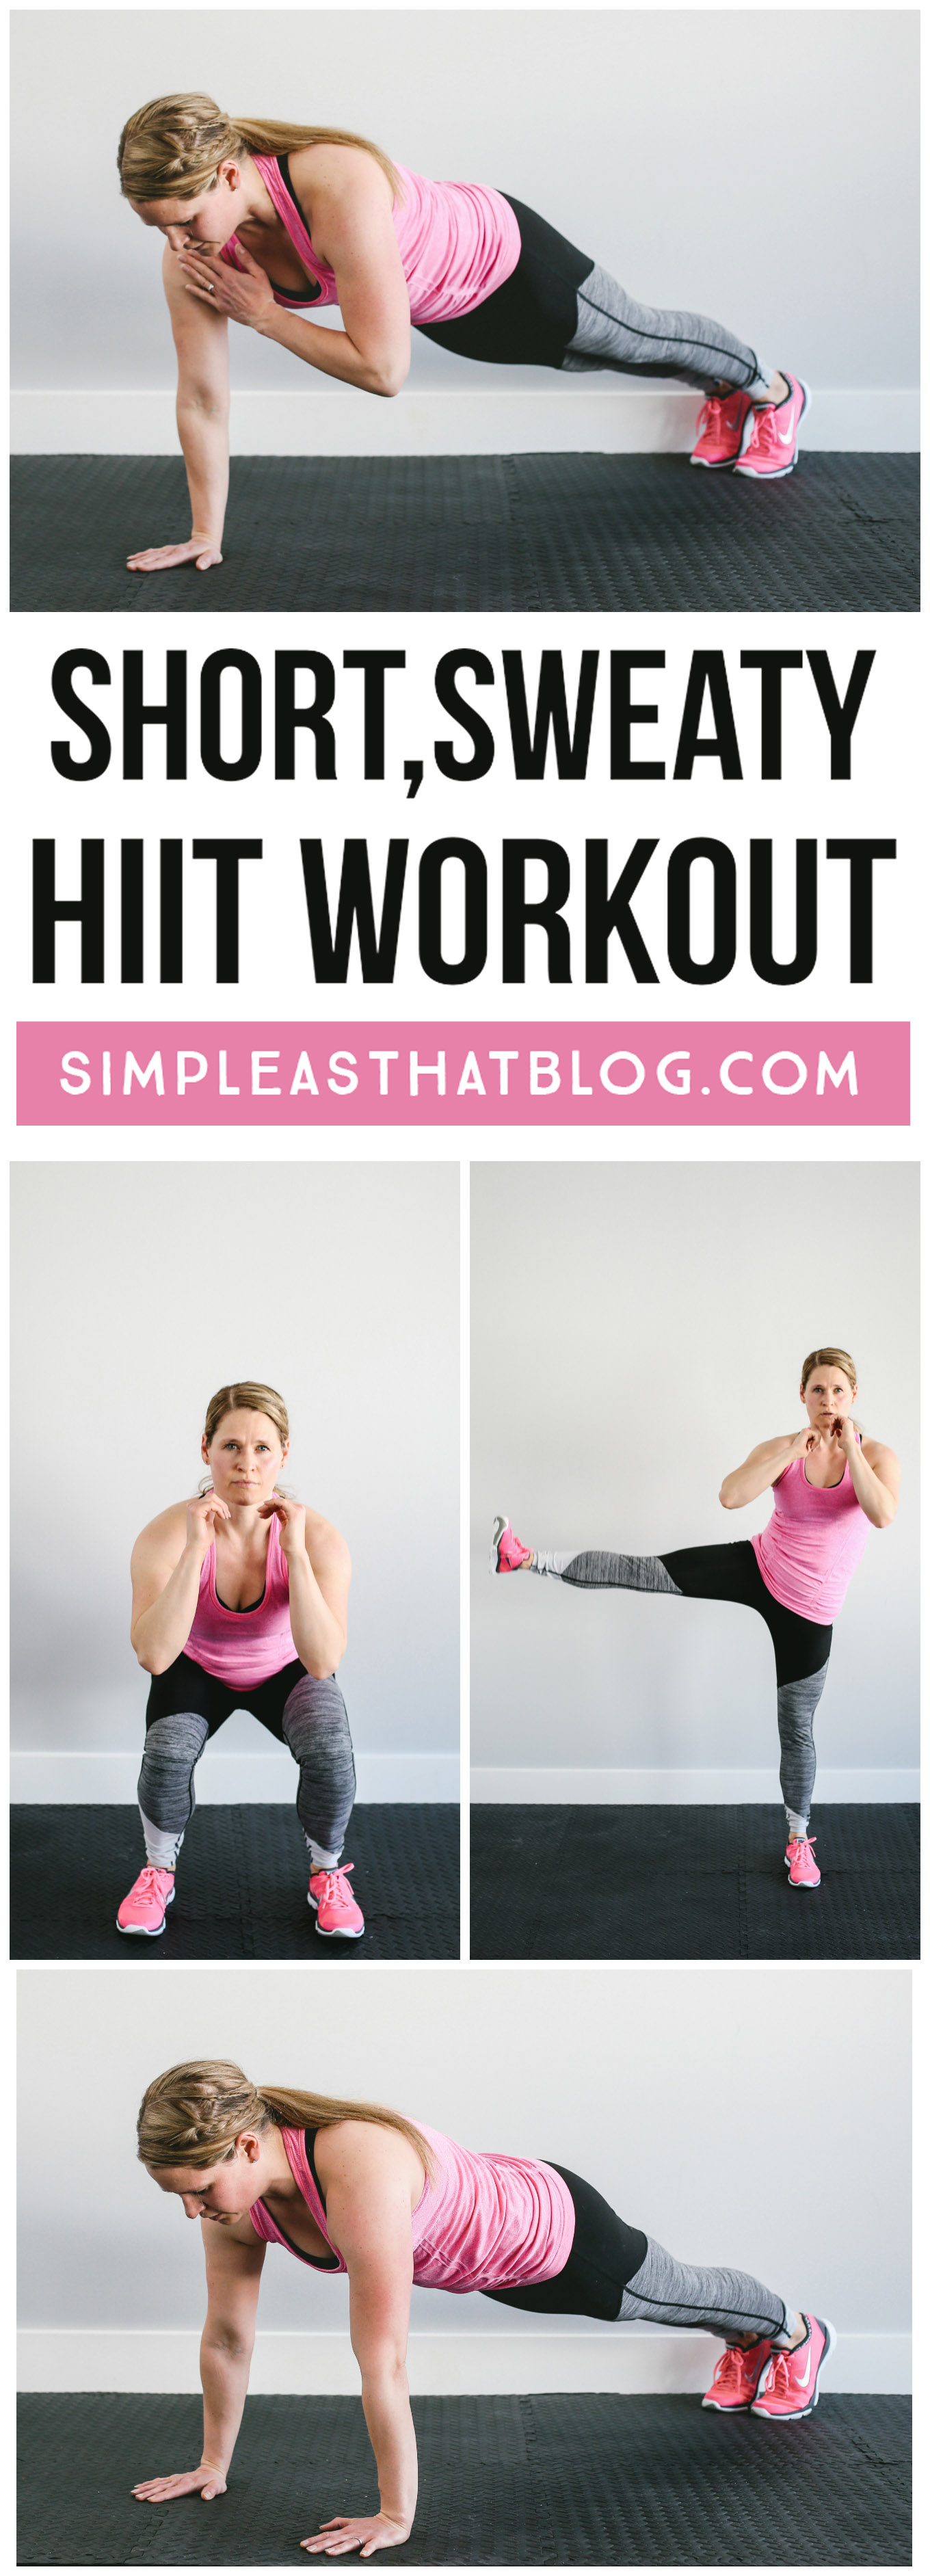
Hey, friends! It’s Rachel Gainer of RachelRebuilt.com, NASM certified personal trainer and fitness contributor here at Simple as That. This month, I’m sharing my secret to staying in shape during the busy summer months. Today’s HIIT workout is short, sweaty, and super fun, so I can get back to playing with my kids and enjoying the sunshine!

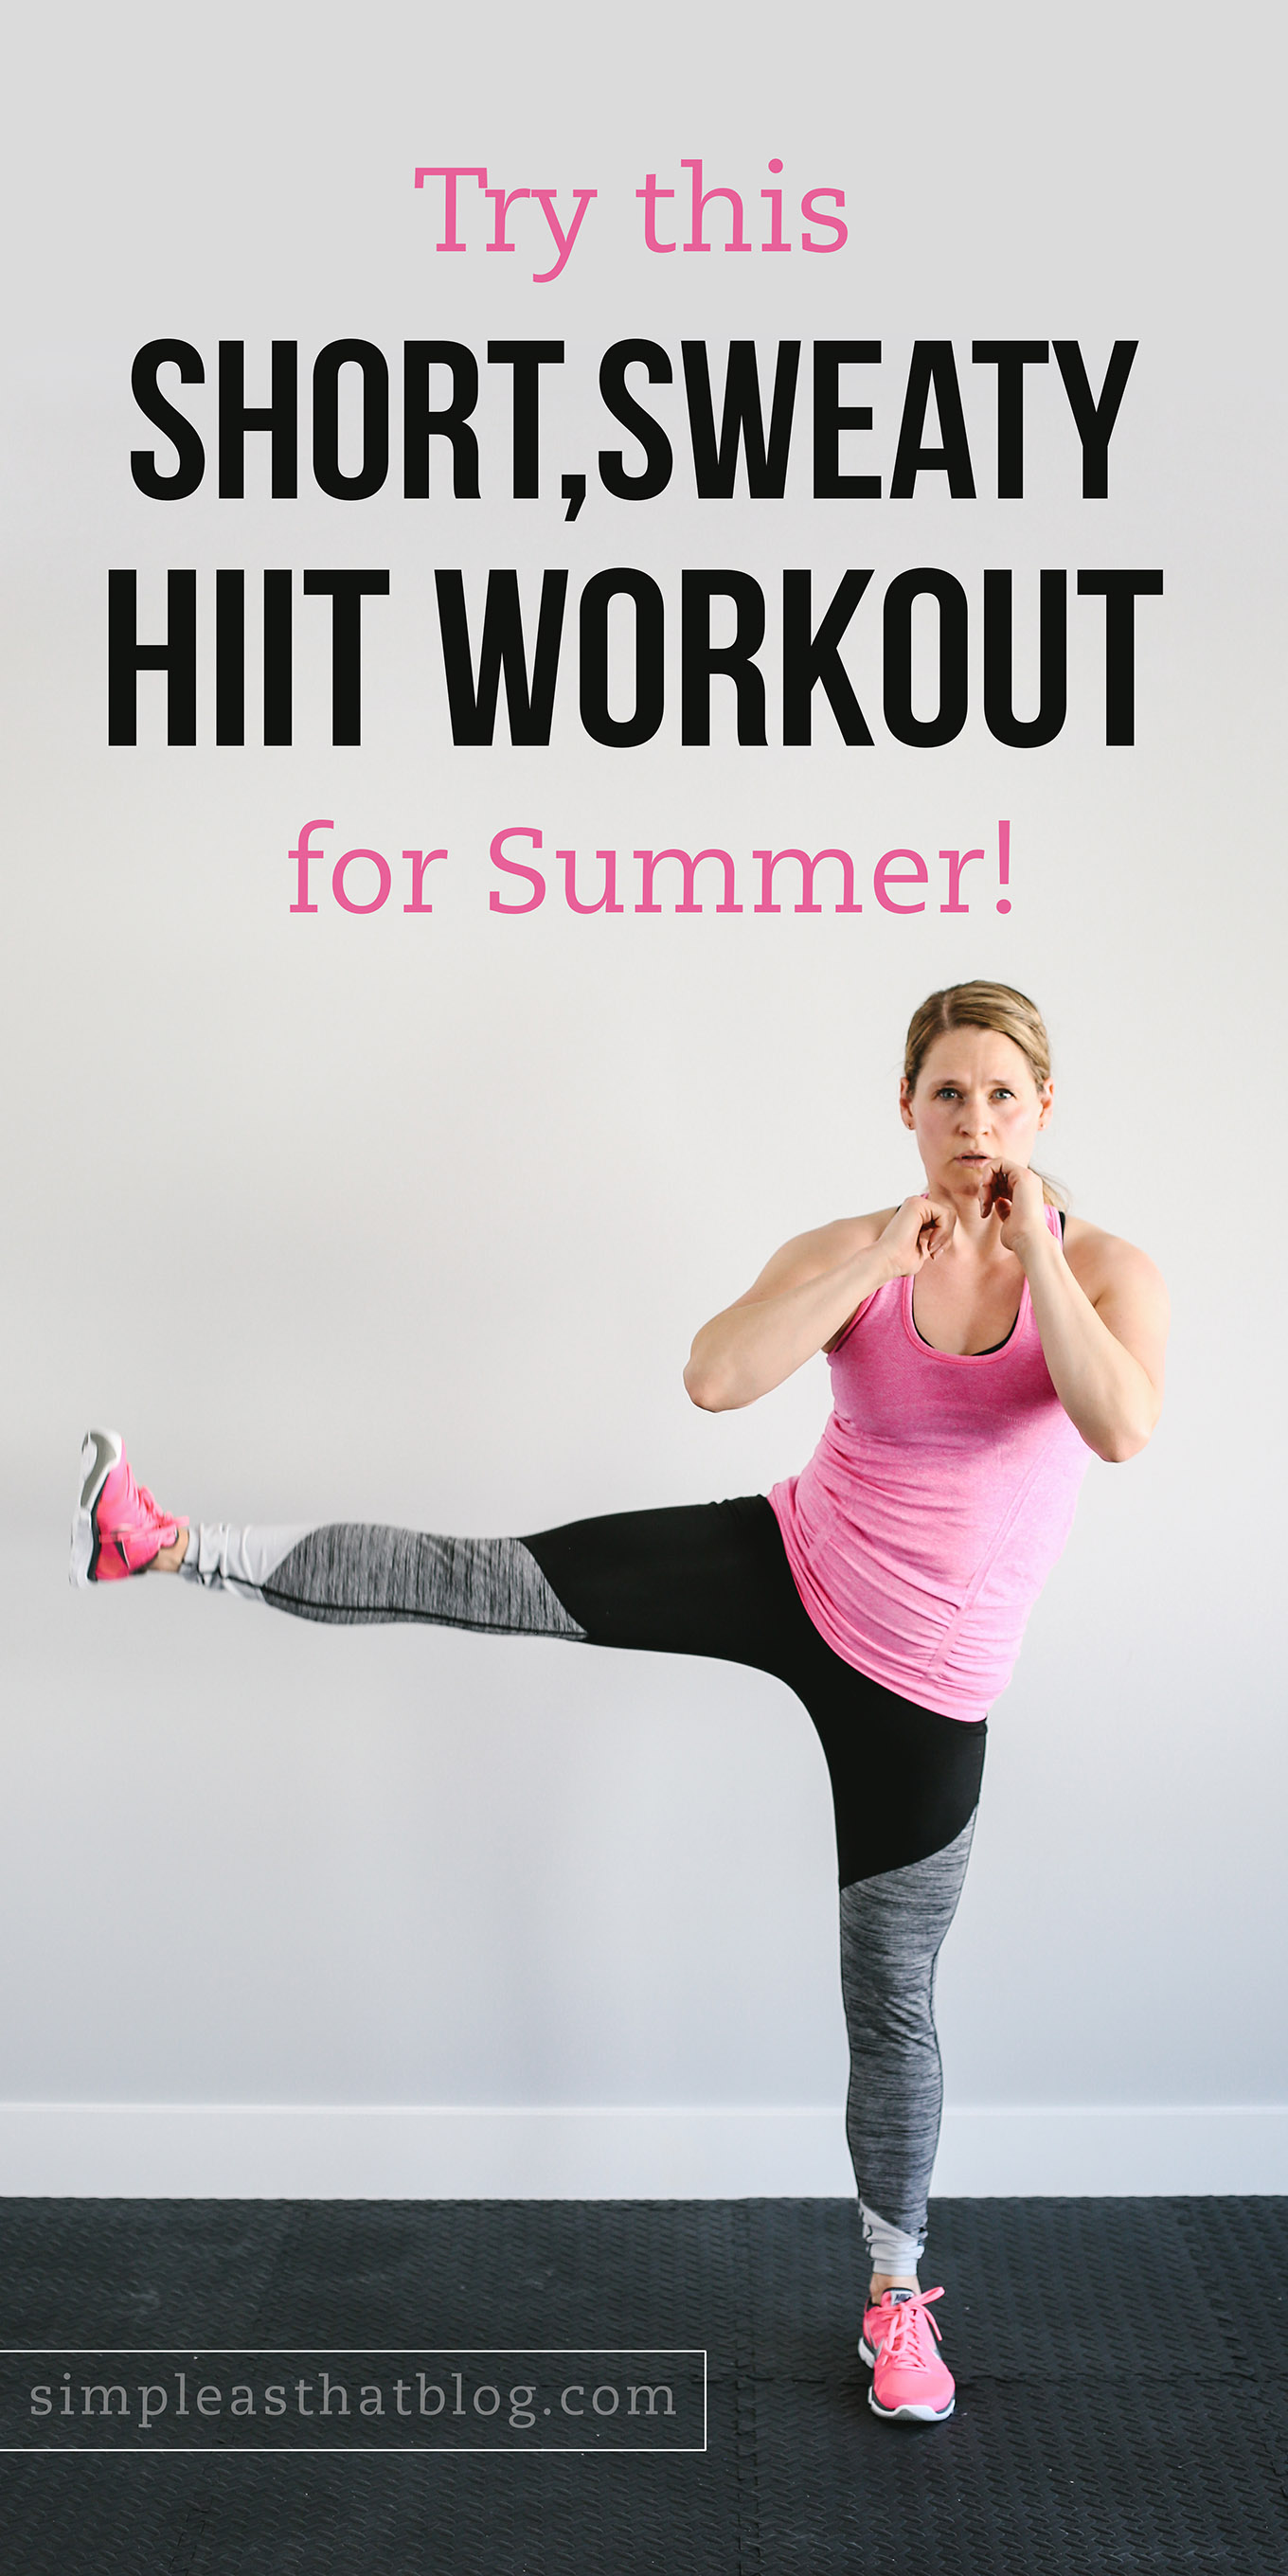
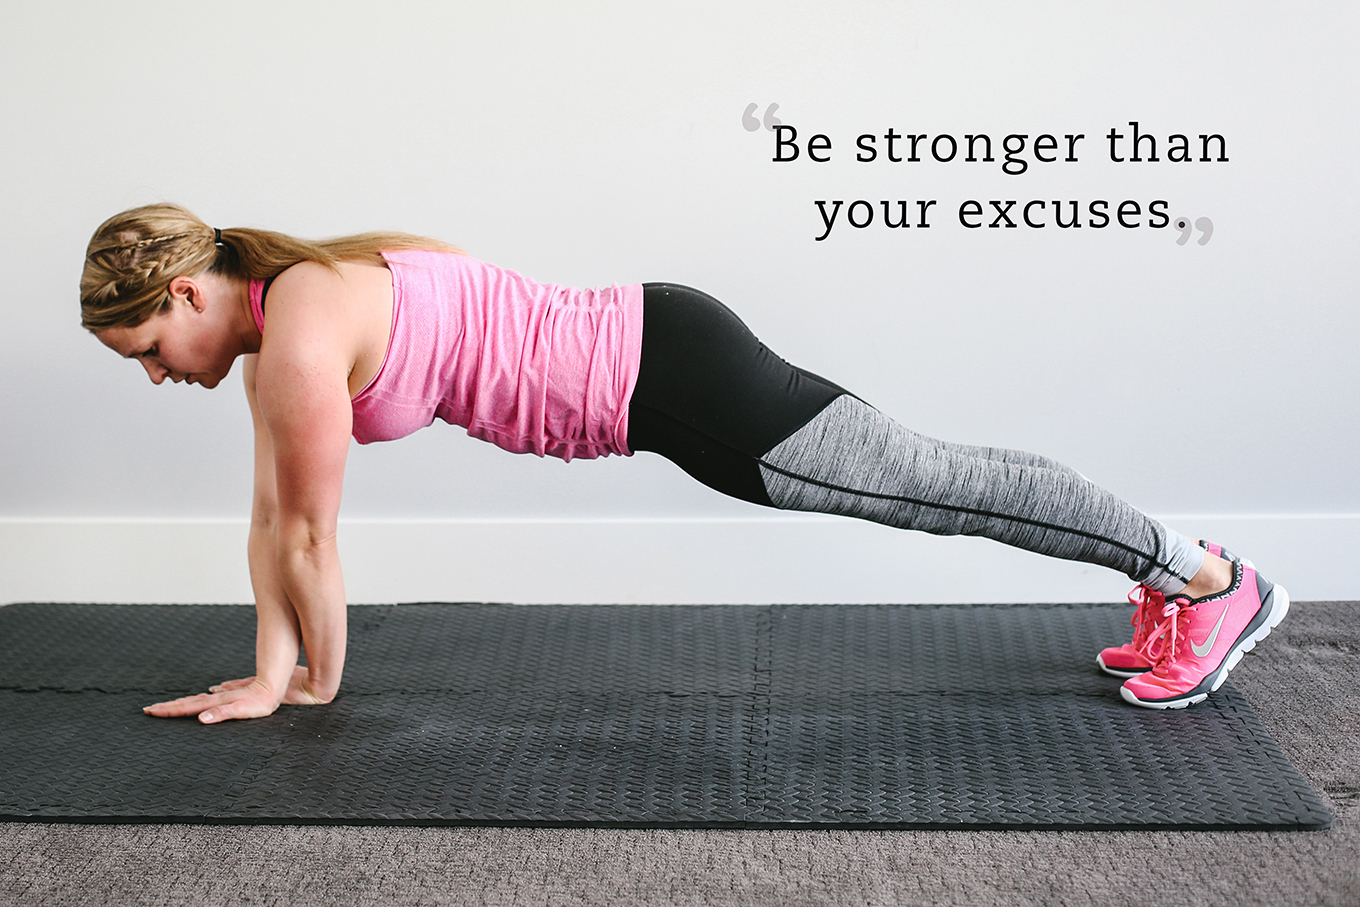
Summer is for parks, pools, and picnics. But you can still stay active and stick to healthy habits with today's 16-minute HIIT workout! It's short, sweaty and super fun, so you can get back to enjoying the sunshine with your kids!

Summer days are for swimming pools, sprinklers, and shave ice. Add in bubbles, bike rides, and BBQs, and that doesn’t leave much time for hitting the gym or enjoying a long run. But even if your summer schedule is packed from dawn to dusk, you can still stay active and stick to healthy habits by adding in a couple of short, sweaty HIIT workouts each week. Backyard to beach, today’s HIIT challenge is the perfect summer vacation workout to save your sanity and keep you moving when time is tight. No equipment required. Done in 16 minutes. Plenty of time to relax poolside!

What Is a HIIT Workout?

HIIT is an acronym for “high-intensity interval training.” It means you alternate between a short burst of high-intensity work (usually 20 seconds to 1 minute) followed by a short rest. HIIT gets your heart rate up, then brings it down. You move with maximum effort for a short period; then you get a moderate recovery so your body can restock ATP energy stores. In a HIIT workout, the resting interval is just as important as the working interval.

The best thing about HIIT is that you control the intensity by increasing your speed. To get the most out of your workout, I encourage you to move as quickly as possible with good form. Push hard and really test your limits. If you need to pause before your high-intensity interval is up, give yourself 2–3 seconds to breathe, say “go,” and jump back in. Today’s summer workout is just 16 minutes, so make it count!

Summer is for parks, pools, and picnics. But you can still stay active and stick to healthy habits with today's 16-minute HIIT workout! It's short, sweaty and super fun, so you can get back to enjoying the sunshine with your kids!

What Makes HIIT So Effective?

You may be wondering if a 16-minute workout is worth the effort. It definitely is! HIIT has been shown to increase EPOC (post-exercise oxygen uptake), which increases post-workout metabolism better than traditional steady-state cardio. So you get an intense workout in a shorter period of time.

How to Set Up a HIIT Timer

Today’s HIIT workout features 4 exercises, which you’ll repeat 4 times in 16 minutes. I recommend the Seconds Pro app to create a personalized HIIT timer. (You can create timers in the free version, but you can save them only in the full version.) Set the number of sets to 16; then choose your high/low intervals based on your experience/conditioning level:

BEGINNER: 30 seconds work/30 seconds rest

INTERMEDIATE: 40 seconds work/20 seconds rest

ADVANCED: 45 seconds work/15 seconds rest or repeat circuit 5 times (increasing duration to 20 sets)

Once you’ve set up your timer, you’re ready to tackle this no-equipment workout. It’s that simple! Learn each move by watching the summary video and reading the step-by-step instructions below. Then start your timer, and get moving! If you like this short, sweaty workout, check out my #17MinutesStronger video series on my website RachelRebuilt.com or on Instagram @rachel_rebuilt.

Summary Video

Individual Exercises

Summer is for parks, pools, and picnics. But you can still stay active and stick to healthy habits with today's 16-minute HIIT workout! It's short, sweaty and super fun, so you can get back to enjoying the sunshine with your kids!

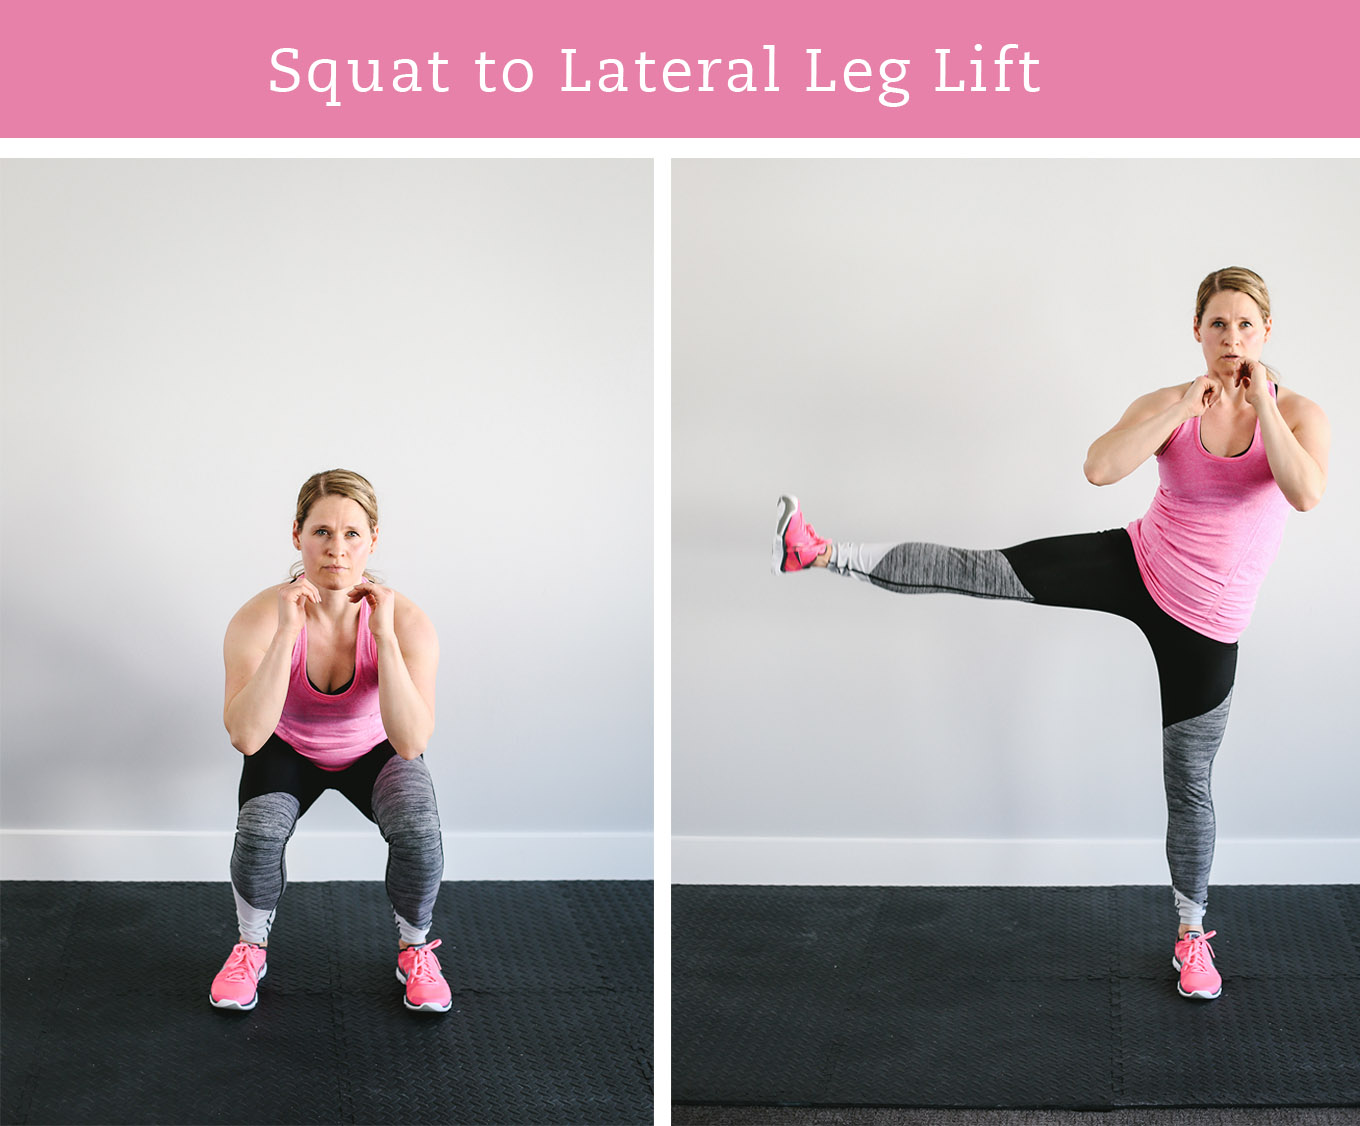
Squat to Lateral Leg Lift

  1. Start in a standing position with your feet shoulder-width apart and your toes pointing forward. Hold your arms close to your chest to improve balance throughout the movement.
  2. Bend your knees and drop your hips to lower yourself into a squatting position. Reach your bottom back to prevent your knees from drifting forward over your toes.
  3. As you stand up powerfully, lift your right leg laterally until it is parallel with the floor.
  4. In one fluid motion, return your right foot to the floor and drop into another squat.
  5. As you stand up powerfully, lift your left leg laterally until it is parallel with the floor.
  6. In one fluid motion, return your left foot to the floor and drop into another squat.
  7. Repeat alternating leg lifts throughout the working interval.

Summer is for parks, pools, and picnics. But you can still stay active and stick to healthy habits with today's 16-minute HIIT workout! It's short, sweaty and super fun, so you can get back to enjoying the sunshine with your kids!

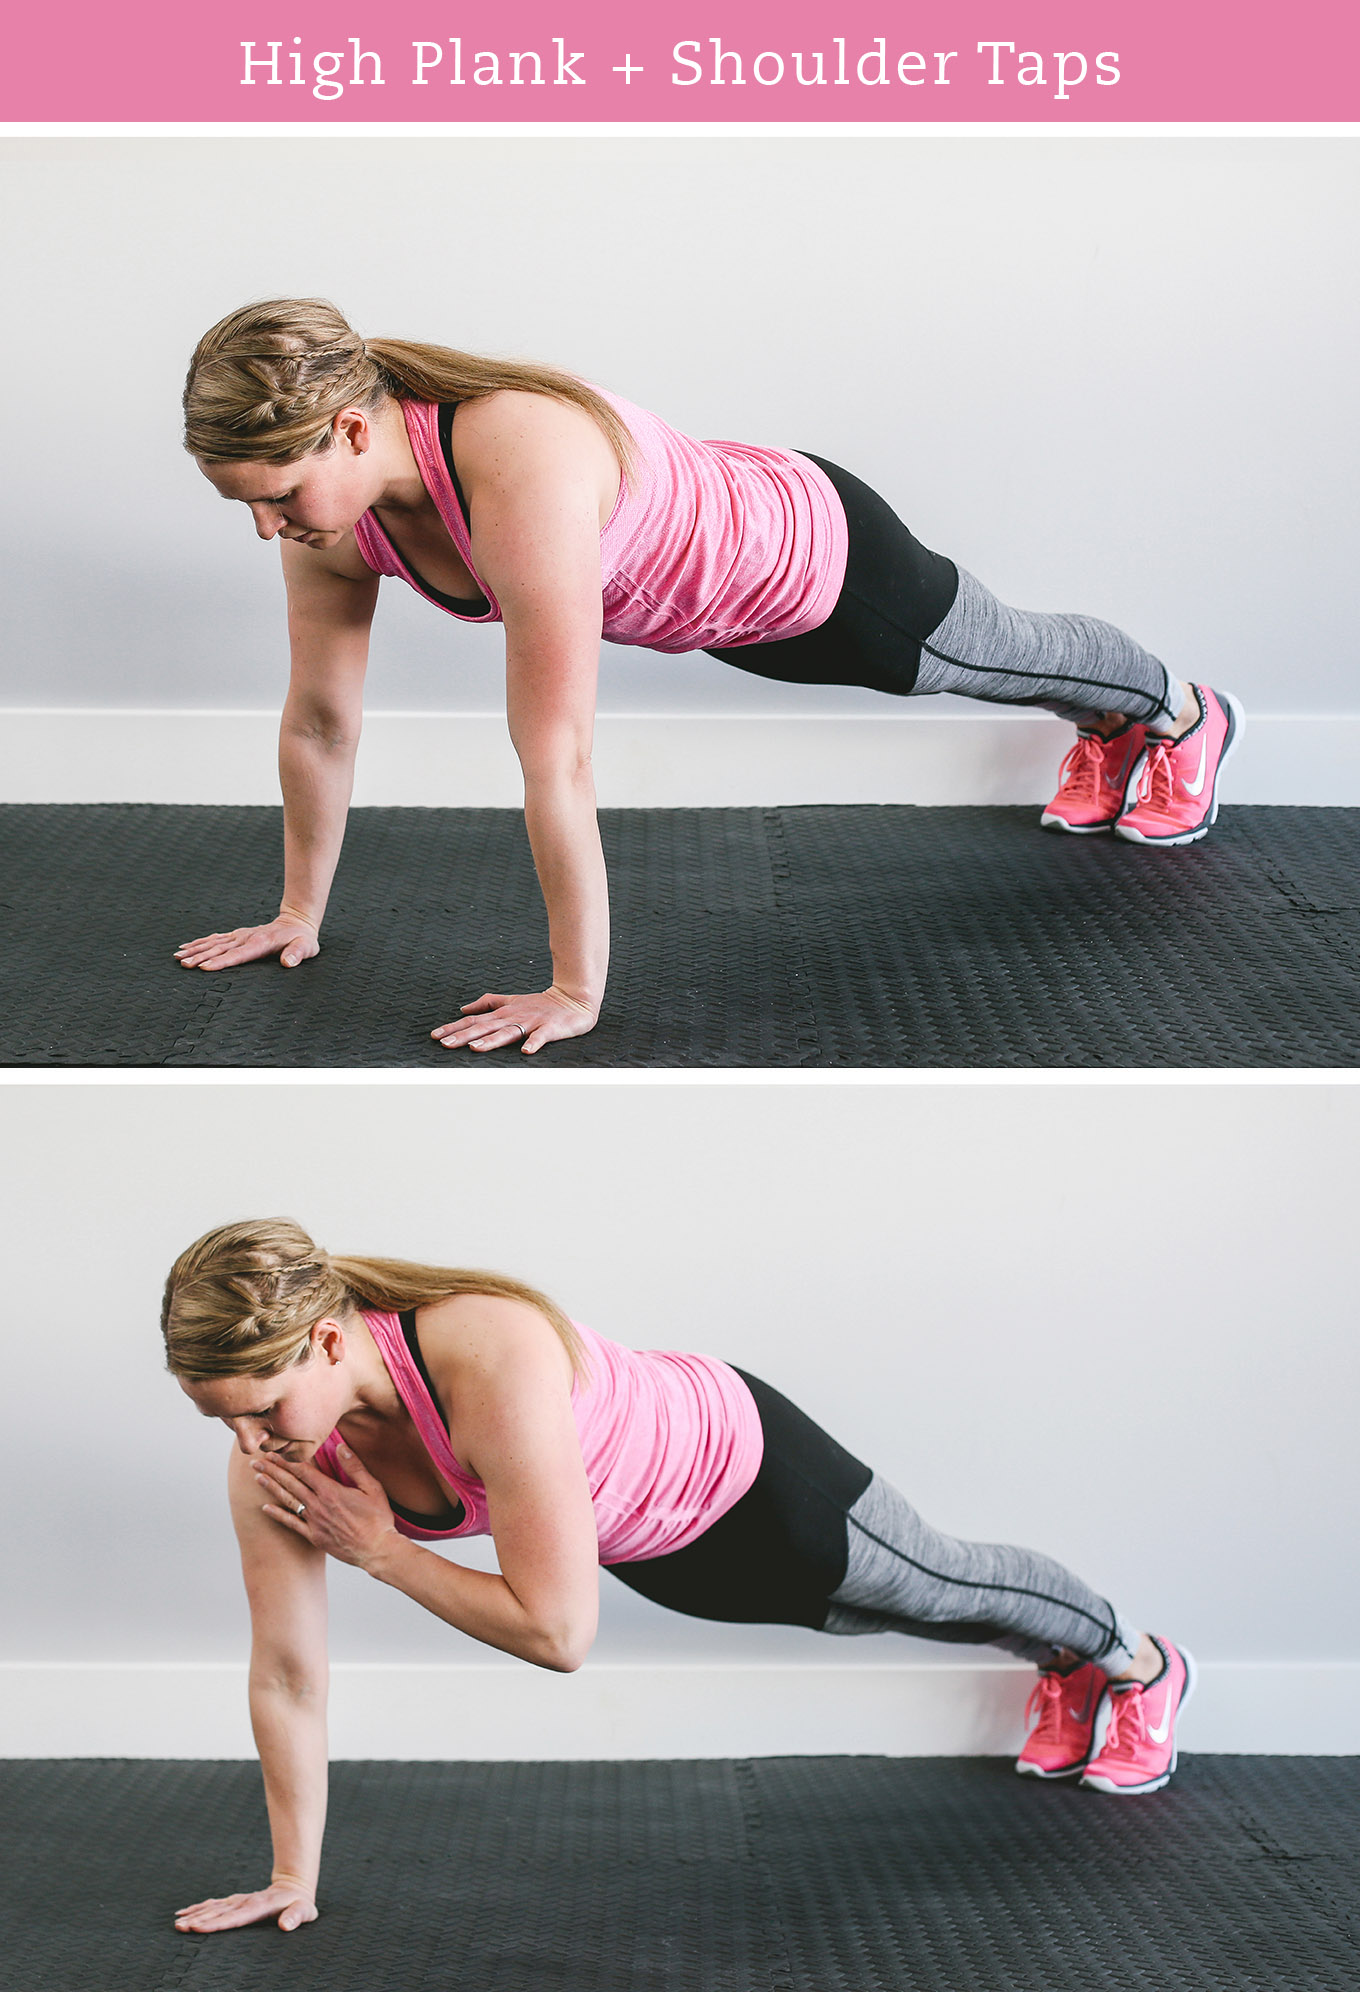
High Plank + Shoulder Taps

  1. Start in plank position with your hands shoulder-width apart and your feet close together. (This move may also be performed with your knees on the ground.)
  2. Lift your right hand off the ground, and tap your left shoulder. Work to maintain plank position and minimize core rotation. Return your right hand to the ground.
  3. Quickly lift your left hand off the ground, and tap your right shoulder. Return your left hand to the ground.
  4. Repeat alternating shoulder taps throughout the working interval.

Summer is for parks, pools, and picnics. But you can still stay active and stick to healthy habits with today's 16-minute HIIT workout! It's short, sweaty and super fun, so you can get back to enjoying the sunshine with your kids!

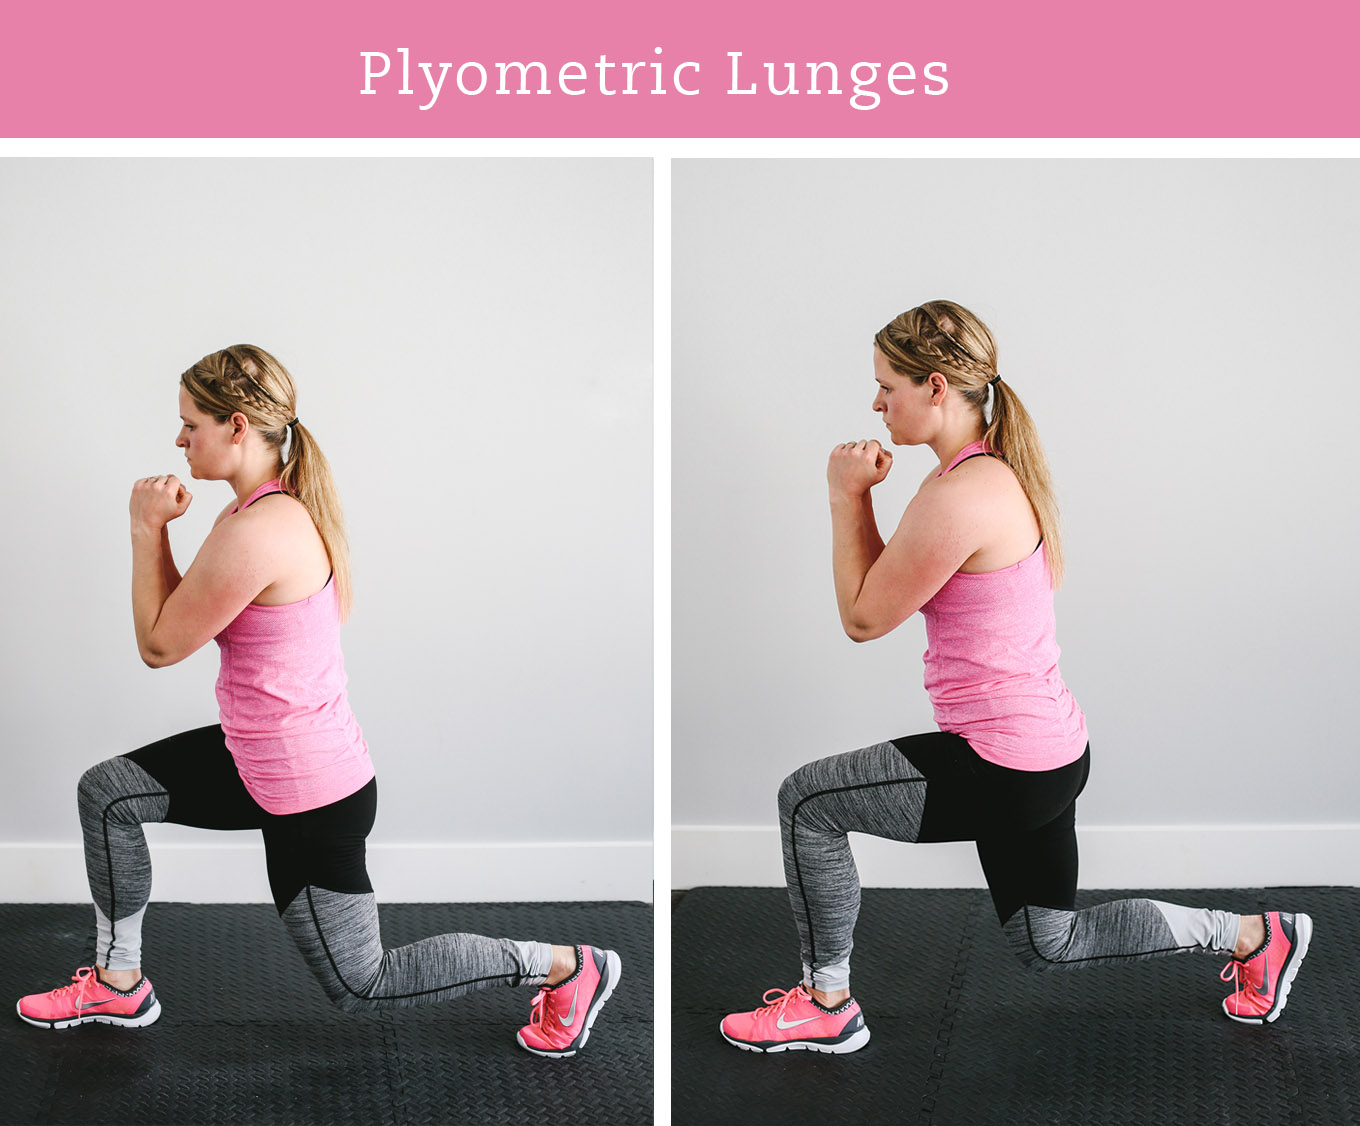
Plyometric Lunges

  1. Start in a standing position. Step forward with your right foot, and lower your body toward the ground until each leg forms a right angle.
  2. Powerfully push off your right foot and left toe, jumping into the air.
  3. While you are airborne, switch lead legs, landing in a lunge with your left leg forward and your right leg back.
  4. Repeat jumping motion, alternating lead leg, throughout the working interval.

Summer is for parks, pools, and picnics. But you can still stay active and stick to healthy habits with today's 16-minute HIIT workout! It's short, sweaty and super fun, so you can get back to enjoying the sunshine with your kids!

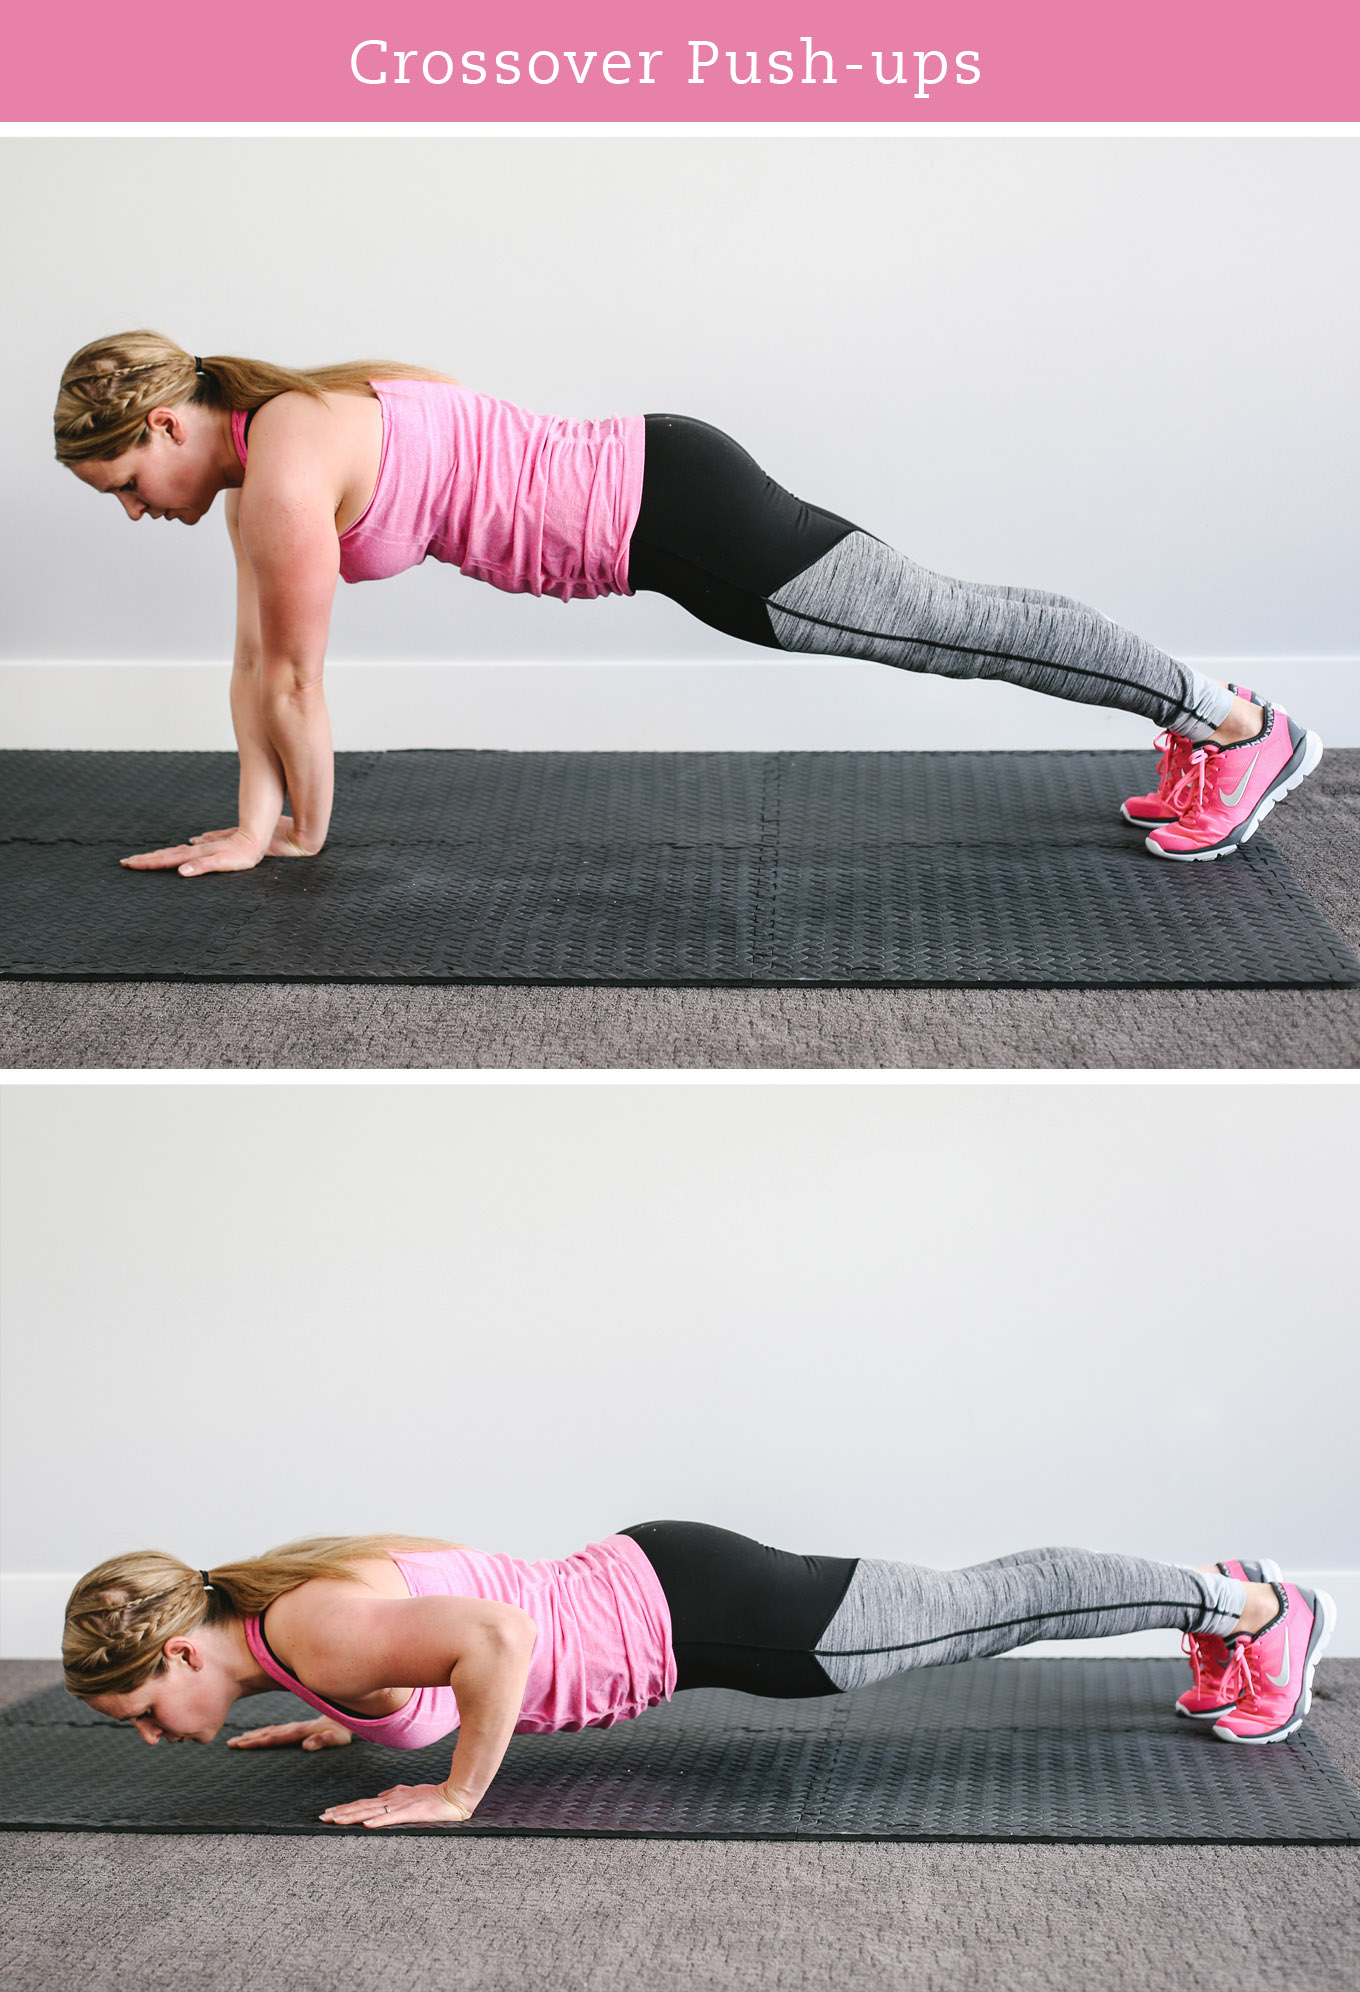
Crossover Push-ups

  1. Start in plank position with your hands wider than shoulder-width apart and your feet close together. (This move may also be performed with your knees on the ground.)
  2. Lower your body toward the ground until your elbows are bent at 90-degree angles; your chest should graze the ground but not rest there.
  3. As you push up, use your momentum to cross your right hand over your left; then uncross your left hand, moving it to the left into a new plank position. (This begins a pendulum motion that moves your push-ups from side-to-side.)
  4. Lower your body toward the ground until your elbows are bent at 90-degree angles.
  5. As you push up, use your momentum to cross your left hand over your right; then uncross your right hand, moving it to the right into the starting plank position.
  6. Repeat side-to-side push-ups throughout the working interval.

If you liked this post you might also enjoy…

  • Free Printable Fitness Planner
  • A Beginner’s Guide to Strength Training
  • Fast, Fun Park Workout

Summer is for parks, pools, and picnics. But you can still stay active and stick to healthy habits with today's 16-minute HIIT workout! It's short, sweaty and super fun, so you can get back to enjoying the sunshine with your kids!

Skillet S’mores Dip Recipe

Sunday, July 9, 2017

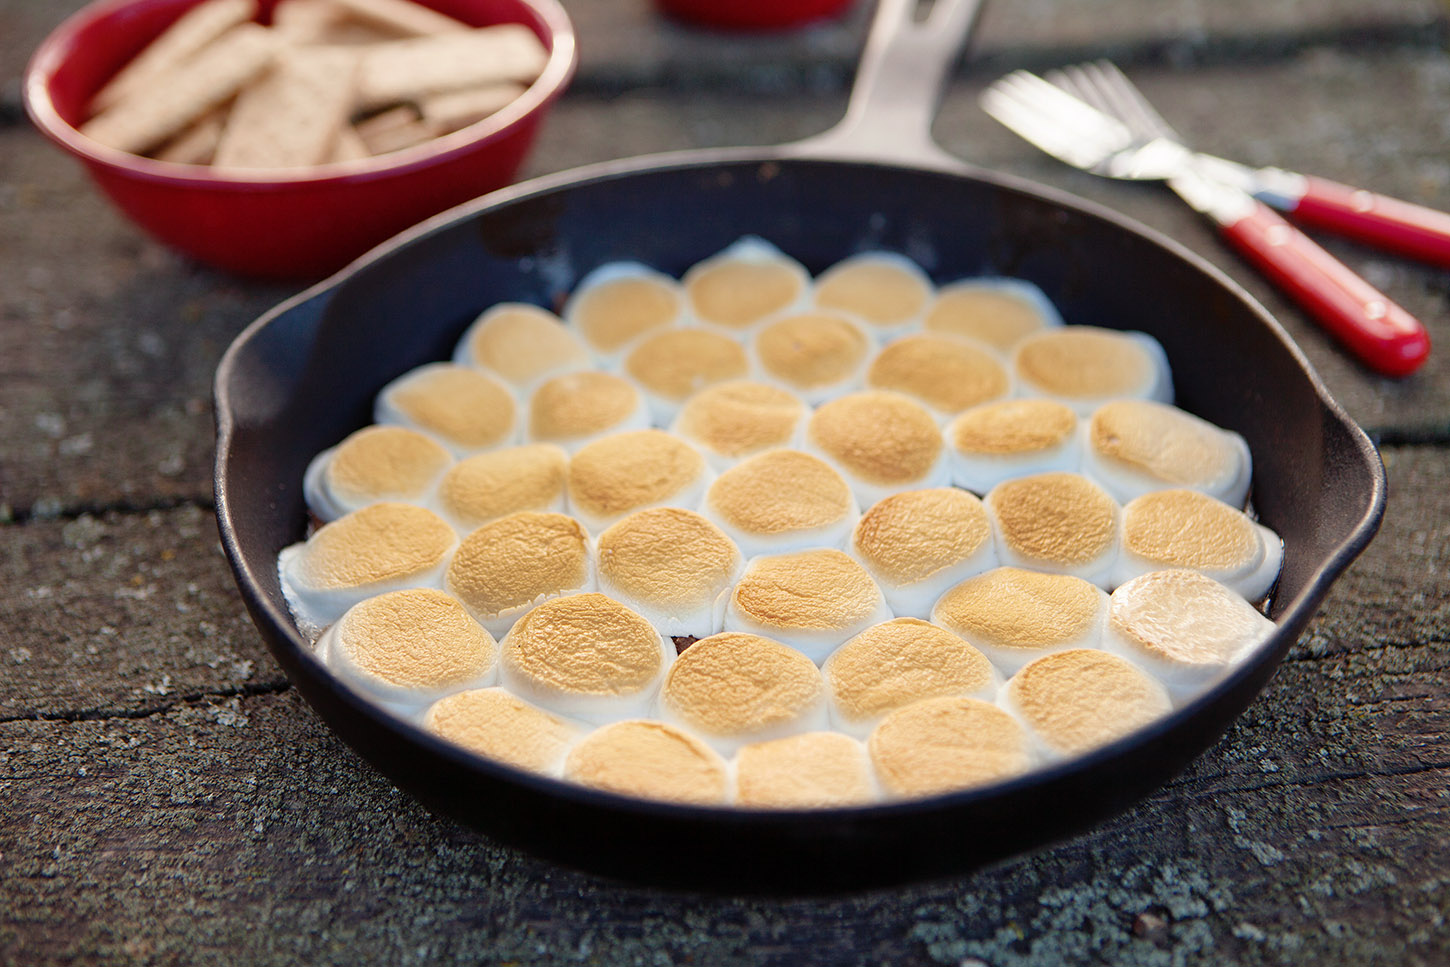
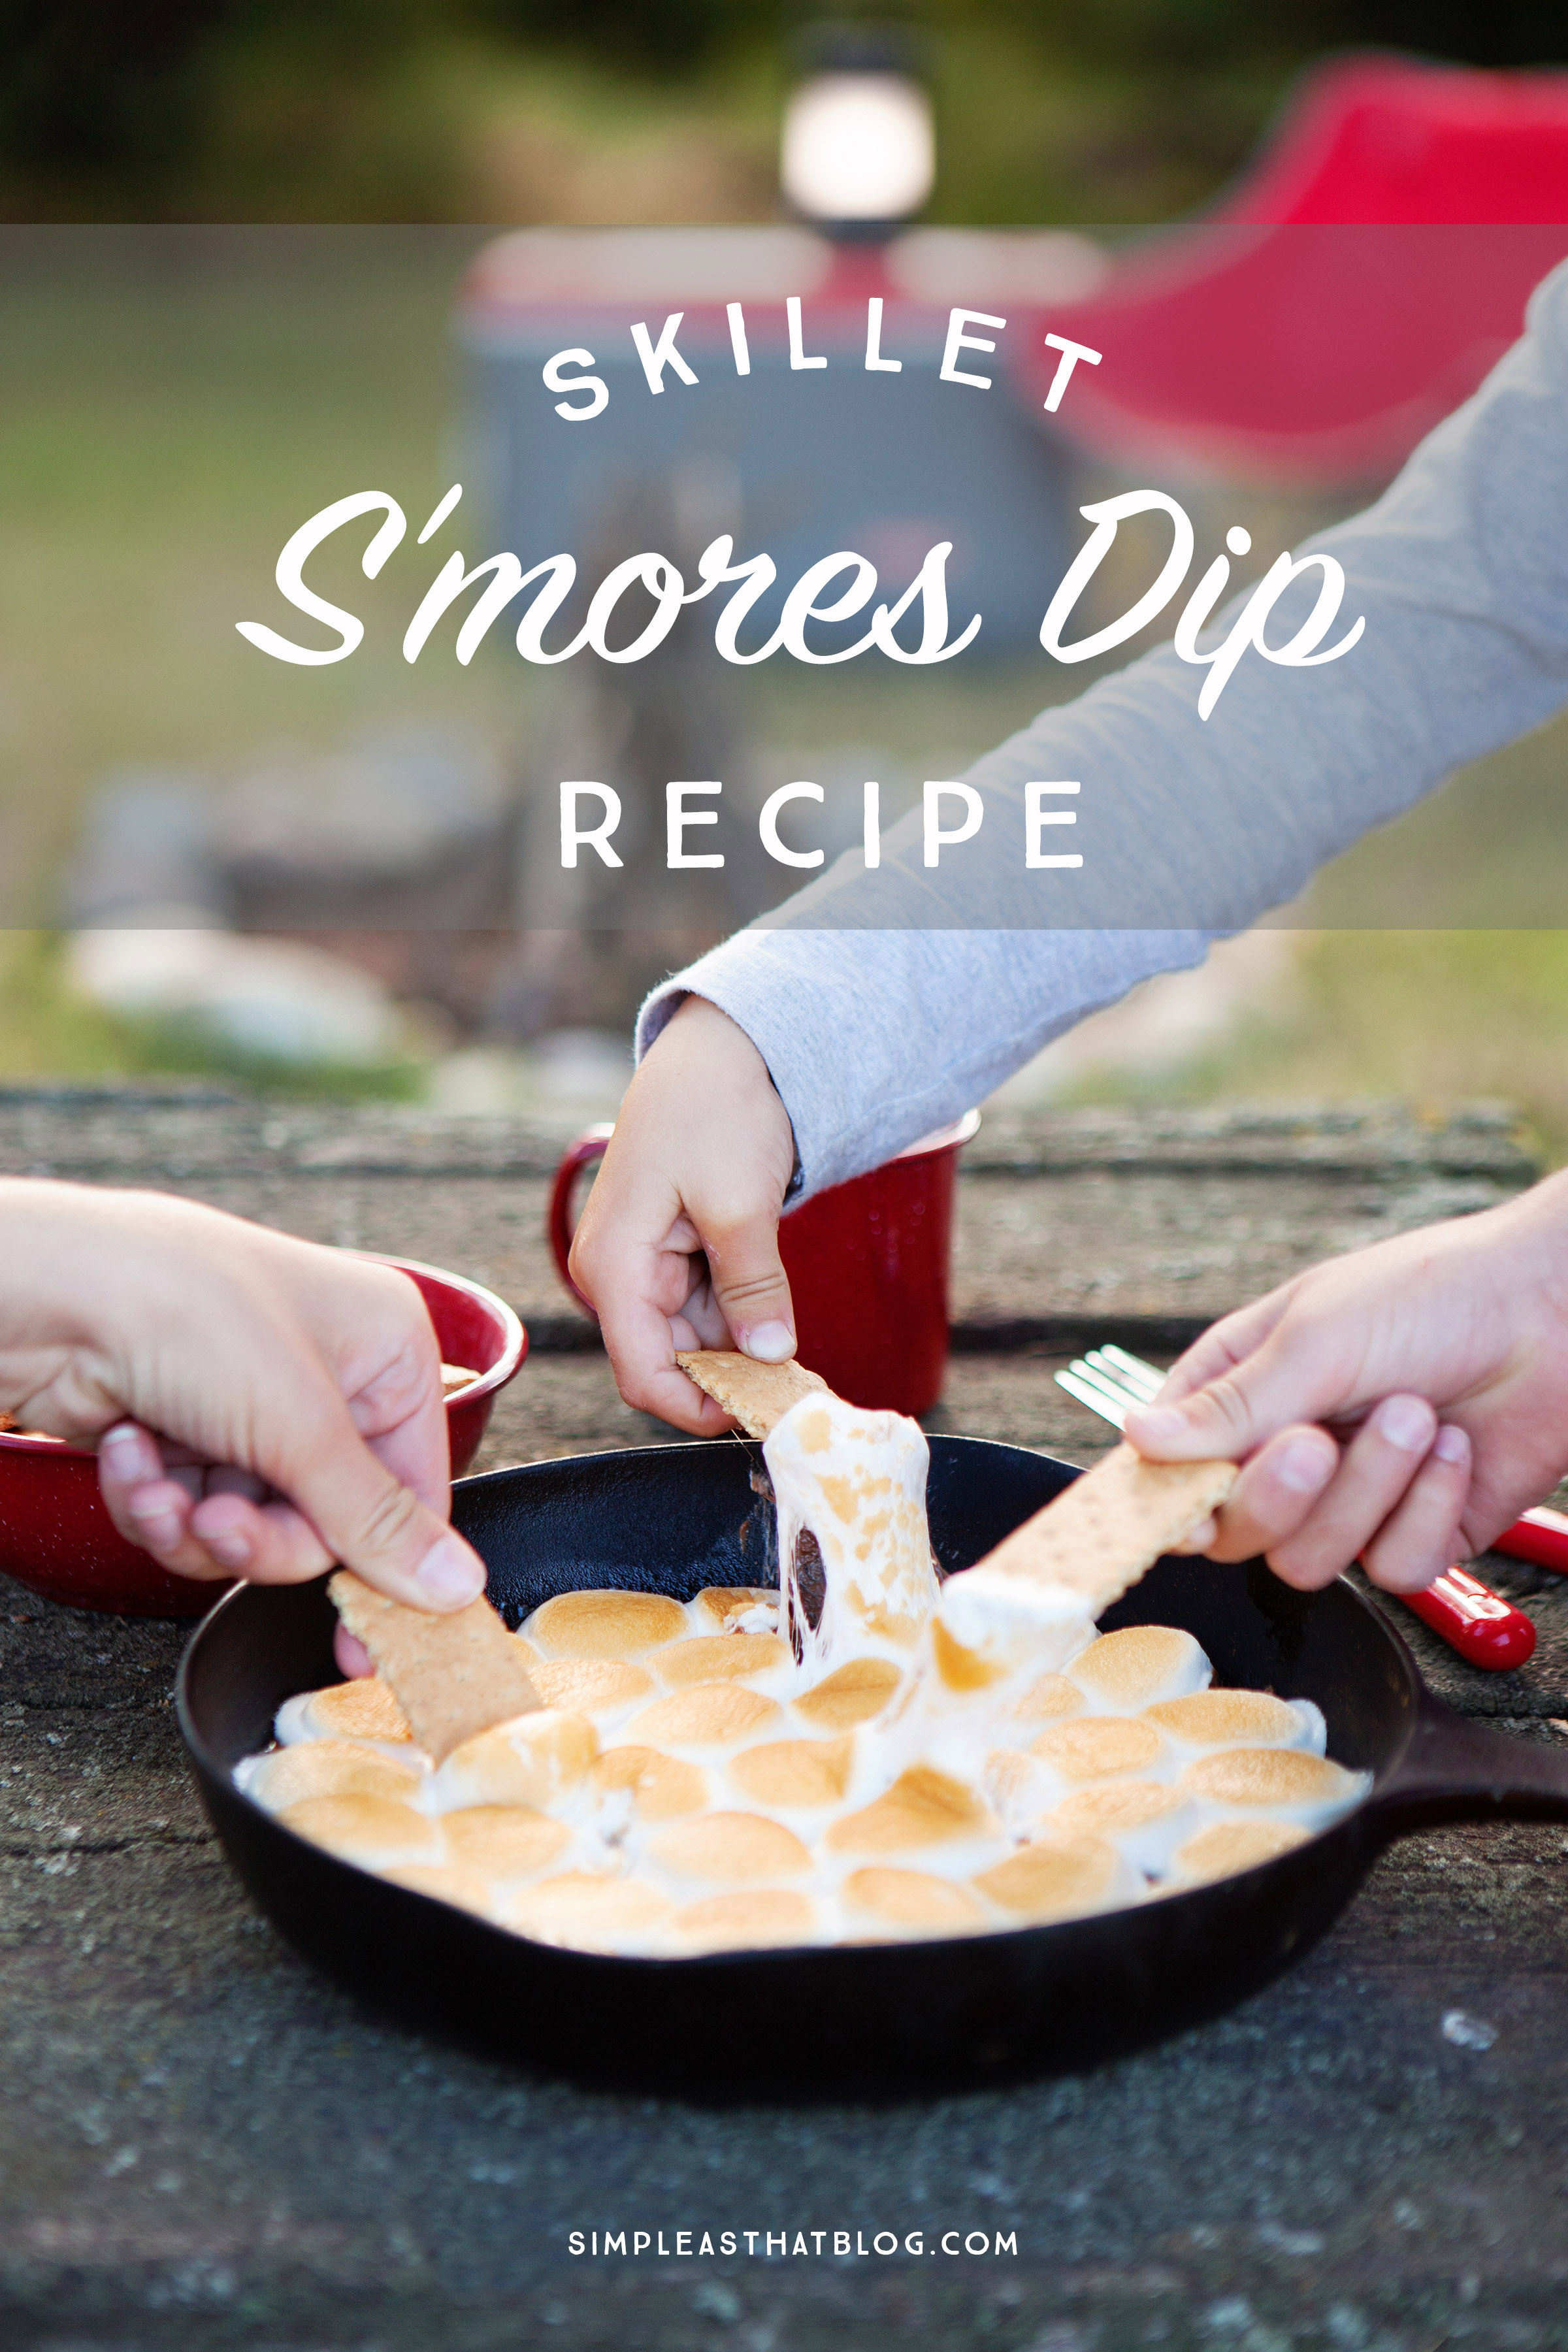
Skillet S’mores Dip – short on prep time and big on ooey-gooey taste, this simple recipe is one your family will be asking for again and again!

Spending time outdoors is a priority for our family. Sometimes getting outside means a weekend camping trip, sometimes it’s as simple as jumping on the trampoline in the backyard or exploring a local nature trail.

However small they may be, these experiences have benefited our family a great deal and that’s why we continue to make the time to get outside as a family whenever we can.

Short on prep time and big on ooey-gooey taste, this simple recipe is one your family will be asking for again and again!

Whether we’re hiking, camping or taking a trip to the park – the memories we’ve made on our adventures are that much sweeter with a special treat to enjoy together.

During a backyard campout a few weeks ago we enjoyed this delicious Skillet S’mores Dip and we’re excited to share the recipe with you.

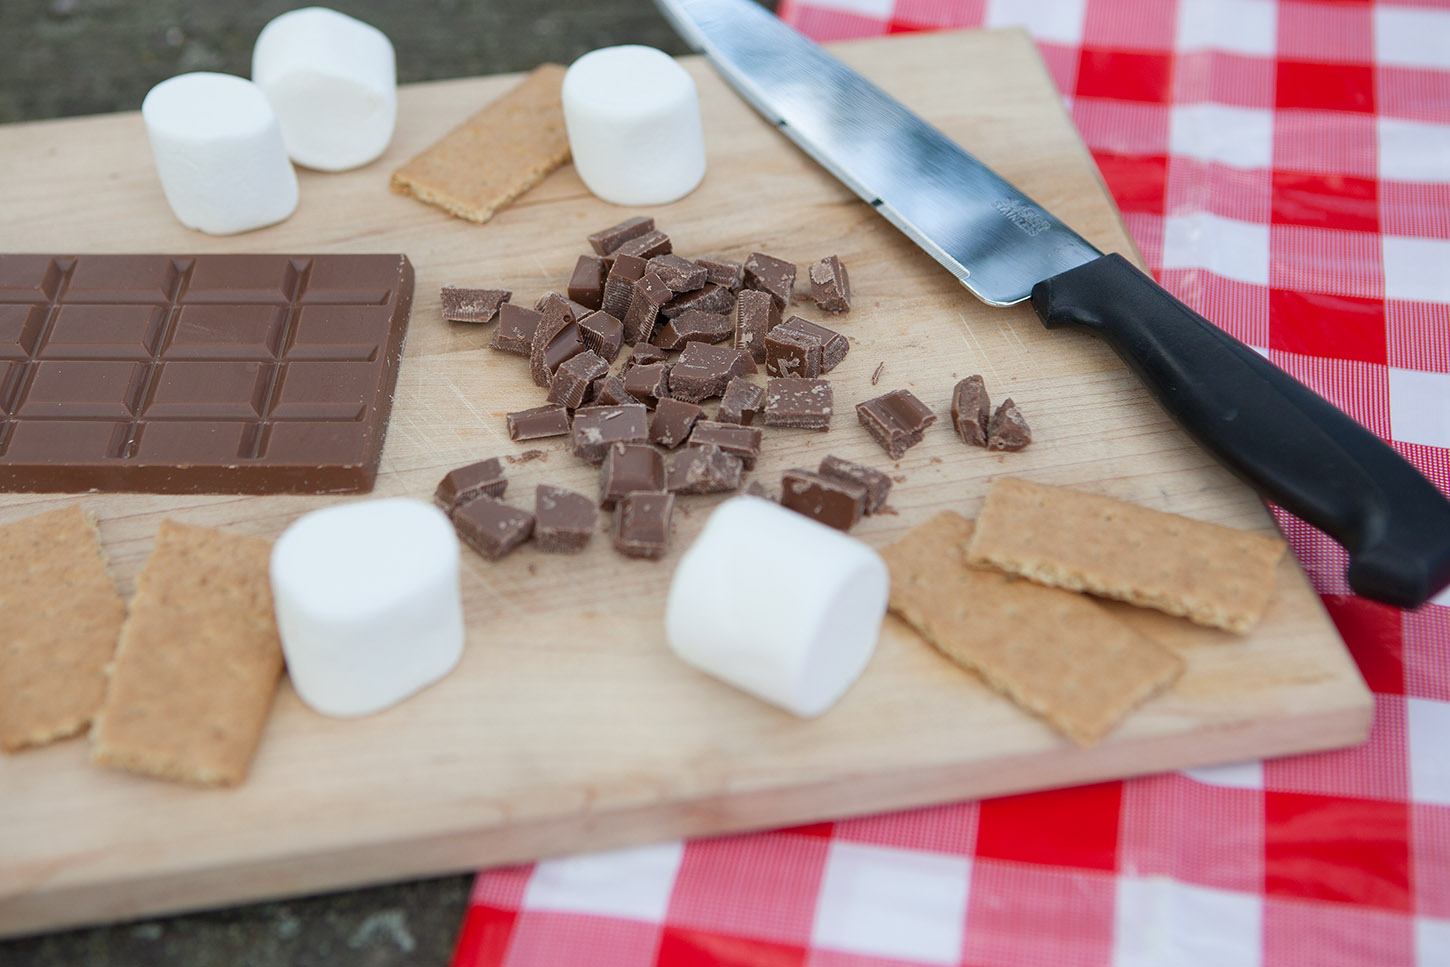
The recipe with a list of ingredients is below but you’ll also need a cast iron skillet and a portable camp stove.

short on prep time and big on ooey-gooey taste, this simple recipe is one your family will be asking for again and again!

Short on prep time and big on ooey-gooey taste, this simple recipe is one your family will be asking for again and again! It’s a hit with mom’s because it’s so easy to throw together and kids will love this delicious spin on traditional s’mores.

Short on prep time and big on ooey-gooey taste, this simple recipe is one your family will be asking for again and again!

Skillet S'mores Dip Recipe
 
Print
Ingredients
  • 18 large marshmallows cut in half
  • (4) 100g milk chocolate bars, chopped (could also use milk chocolate chips)
  • Graham Crackers
  • 1 tbsp heavy cream
  • 1 tsp butter
Instructions
  1. Melt butter in 9" skillet on Coleman 2-Hyper Flame Camp Stove & Grill.
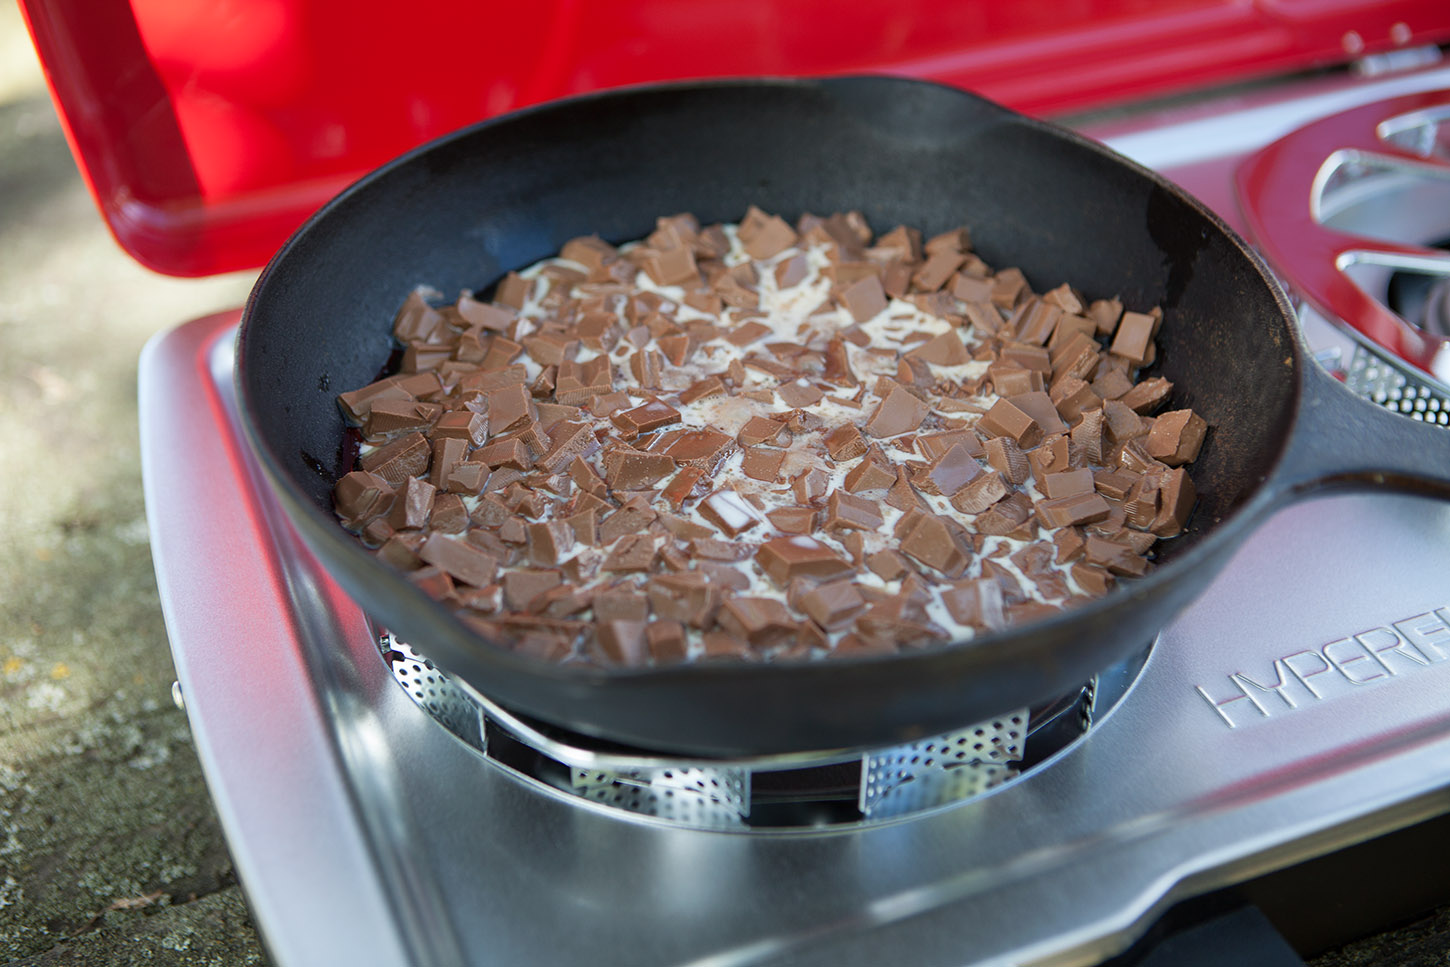
  2. Once butter is melted and spread around entire skillet to avoid sticking, add chocolate and heavy cream.
  3. Stir constantly on low heat until melted.
  4. Cover the melted chocolate with halved marshmallows.
  5. Continue to cook until marshmallows soften. Toast the top of the marshmallows with BBQ lighter.
  6. Remove skillet from heat with oven mit. Serve while warm with graham crackers for dipping.
3.5.3226

Short on prep time and big on ooey-gooey taste, this simple recipe is one your family will be asking for again and again!

One thing that makes this Skillet S’mores Dip so fun is that you can play around with chocolate flavors by adding some of your favorite candy bars.

Short on prep time and big on ooey-gooey taste, this simple recipe is one your family will be asking for again and again!

Summertime is perfect excuse to get out in the backyard and enjoy this yummy treat with loved ones.

If you liked this post you might also enjoy…

  • Freezer English Muffin Pizzas
  • 5 National Parks to Visit as a Family
  • 25 Simple and Delicious Camping Recipes
  • Life Lessons Children Learn from Hiking

Sheet Pan BBQ Chicken with Summer Squash

Friday, July 7, 2017

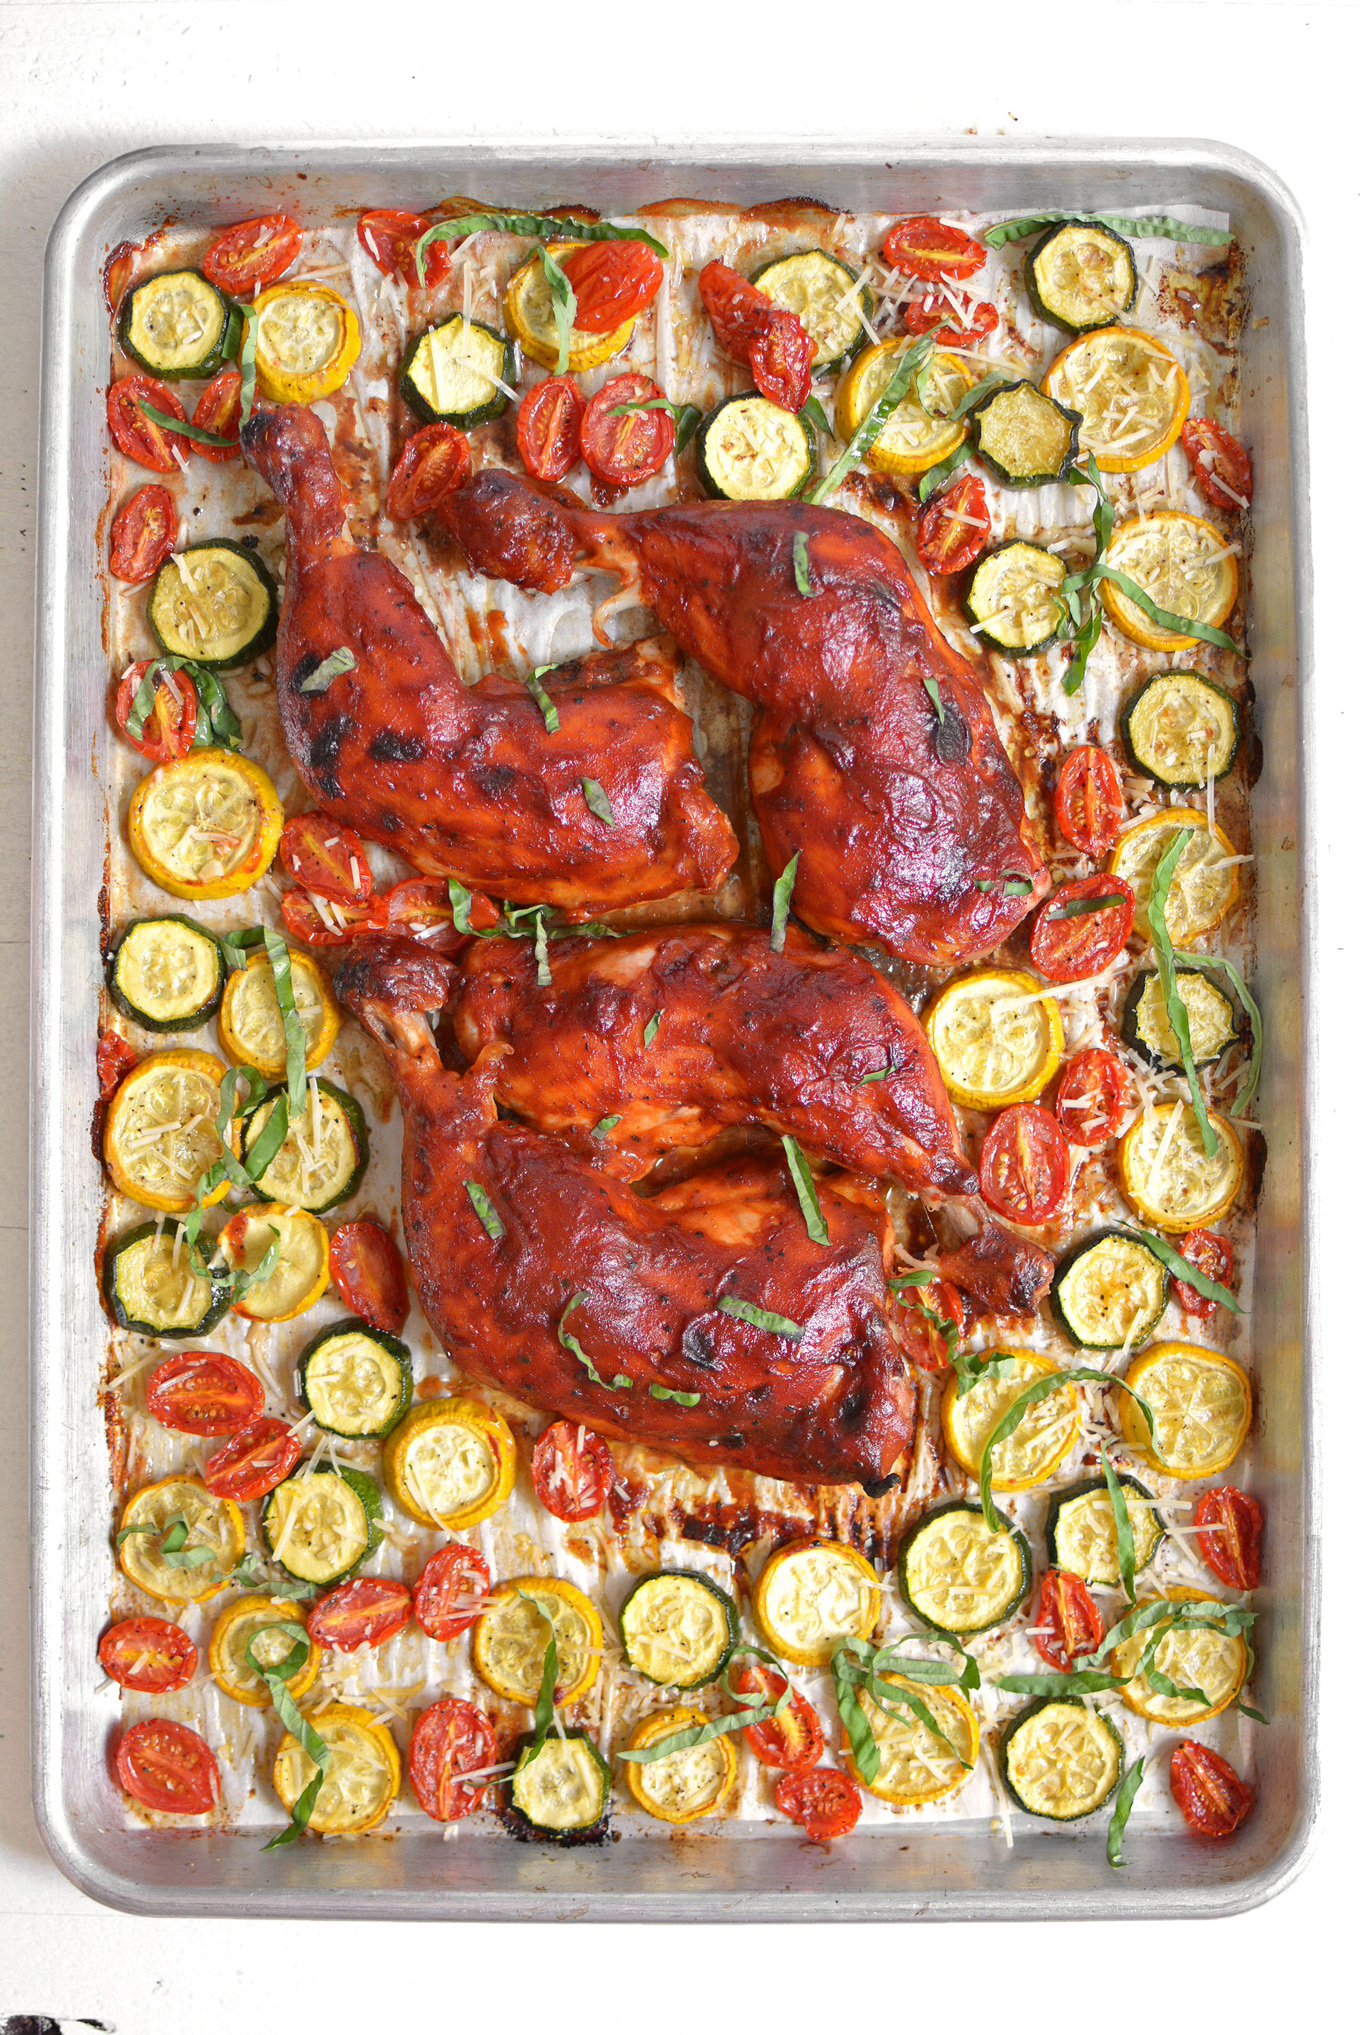
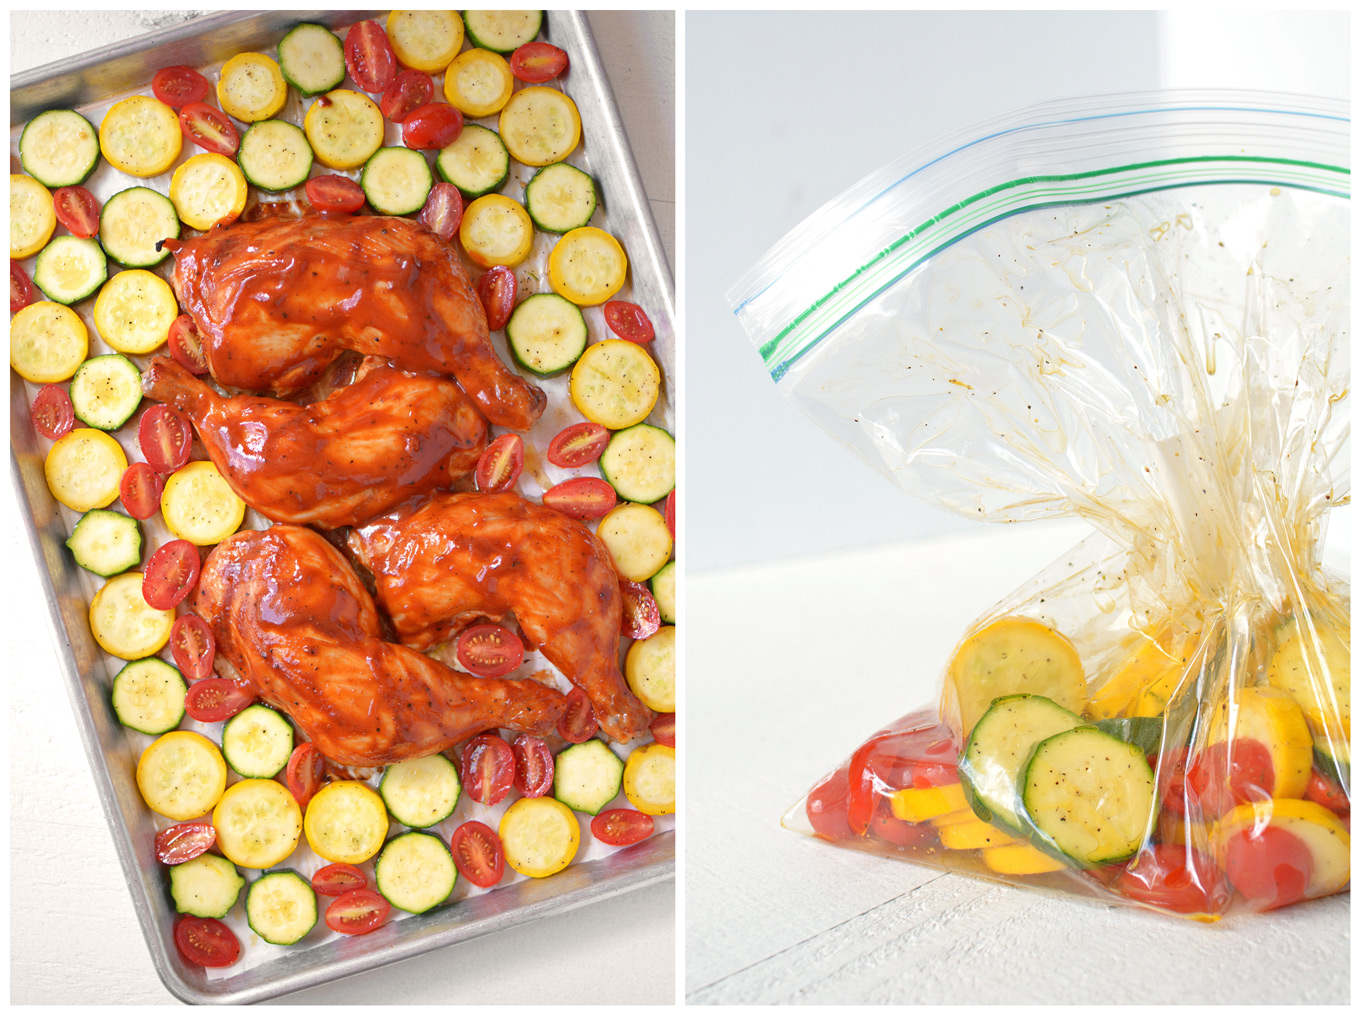
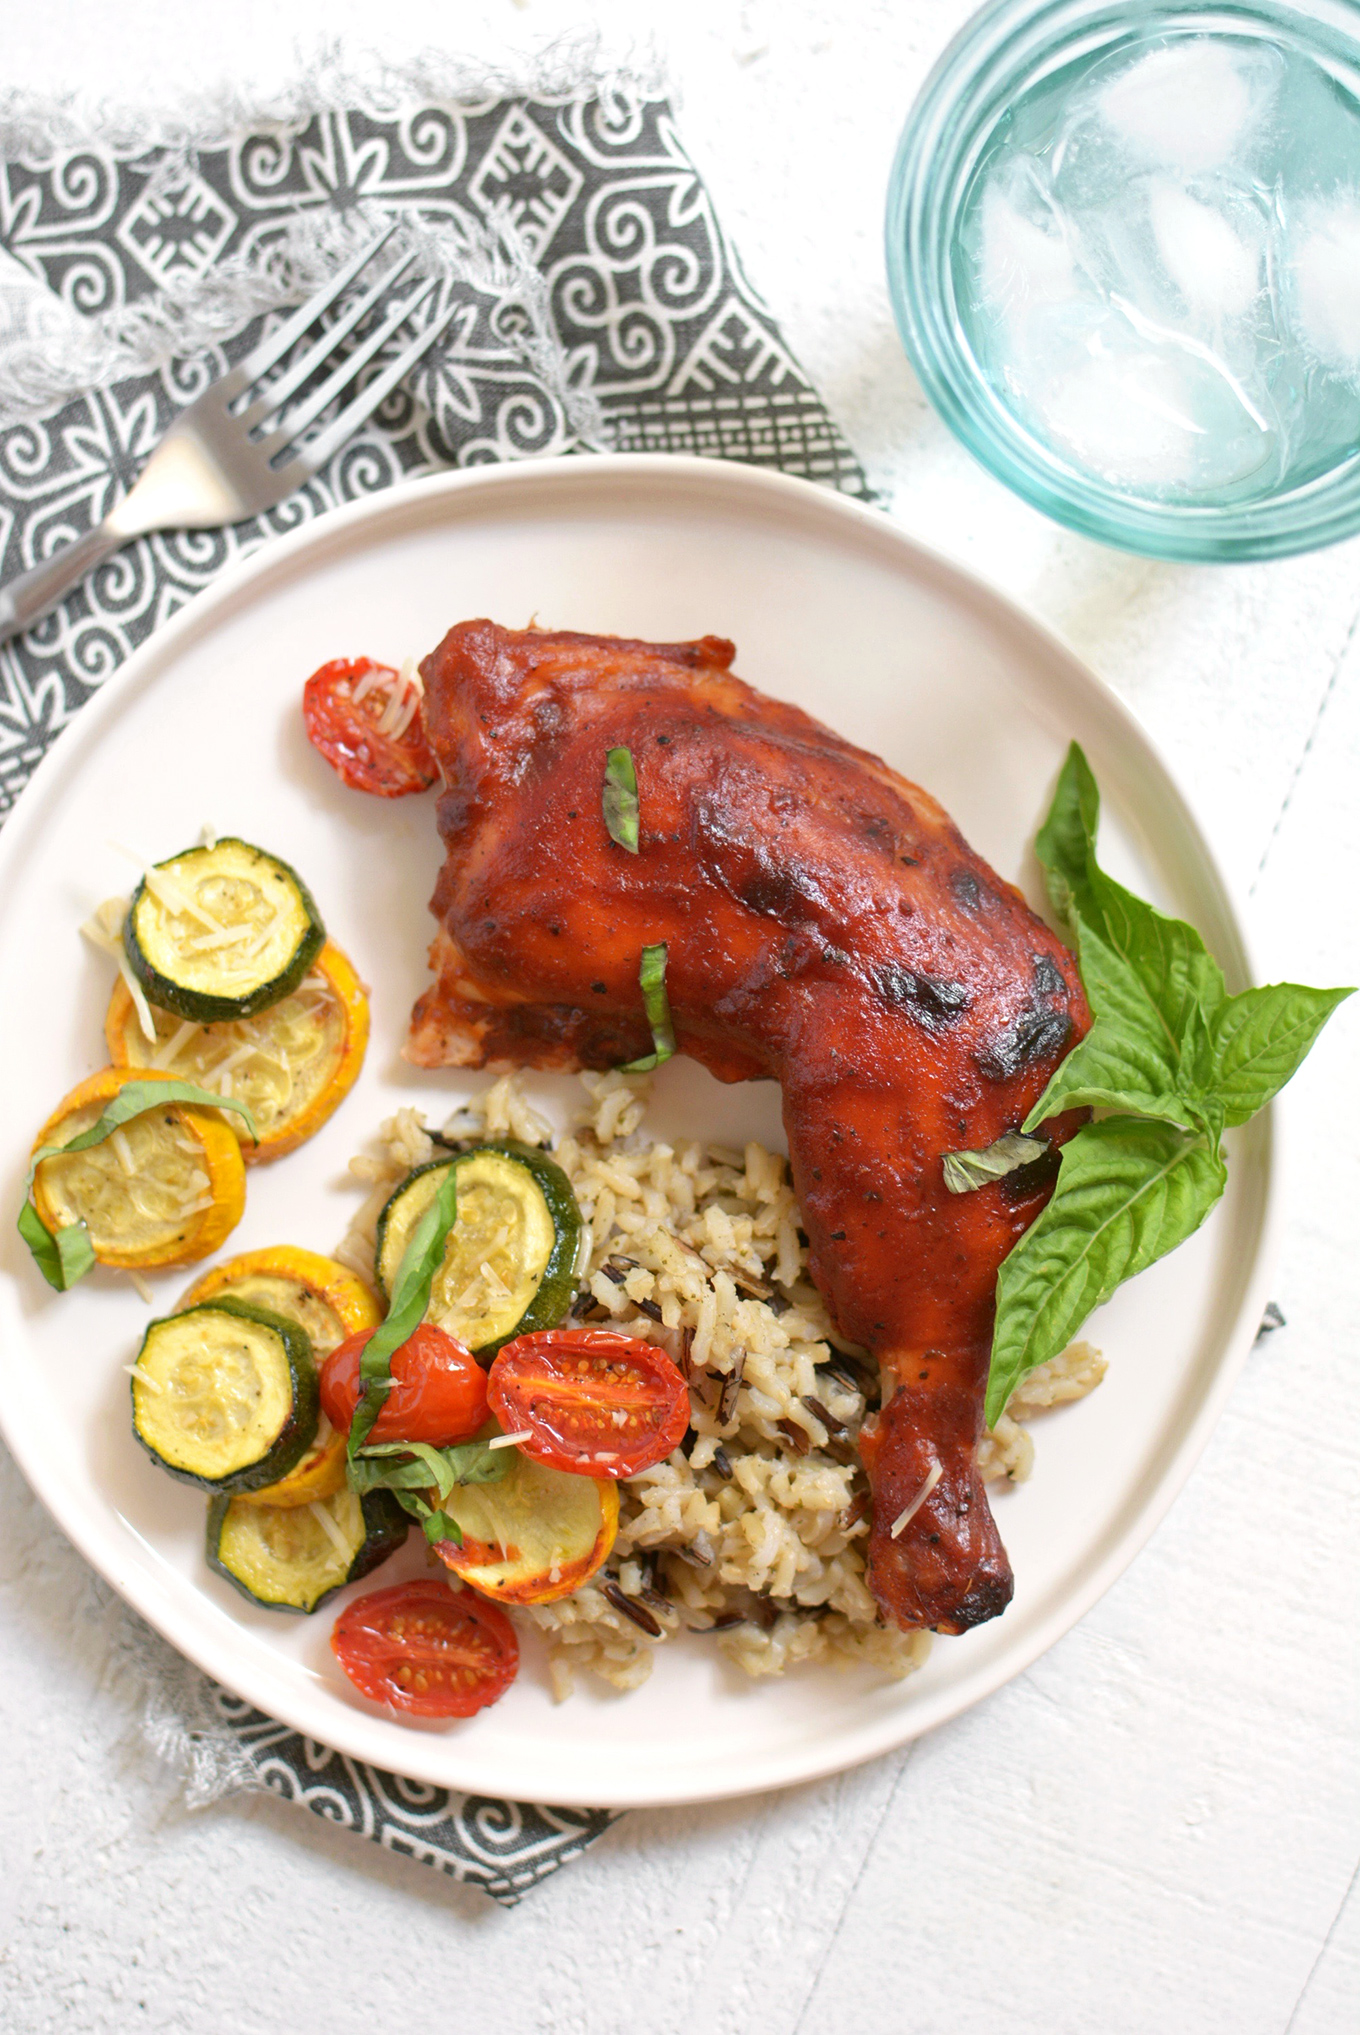
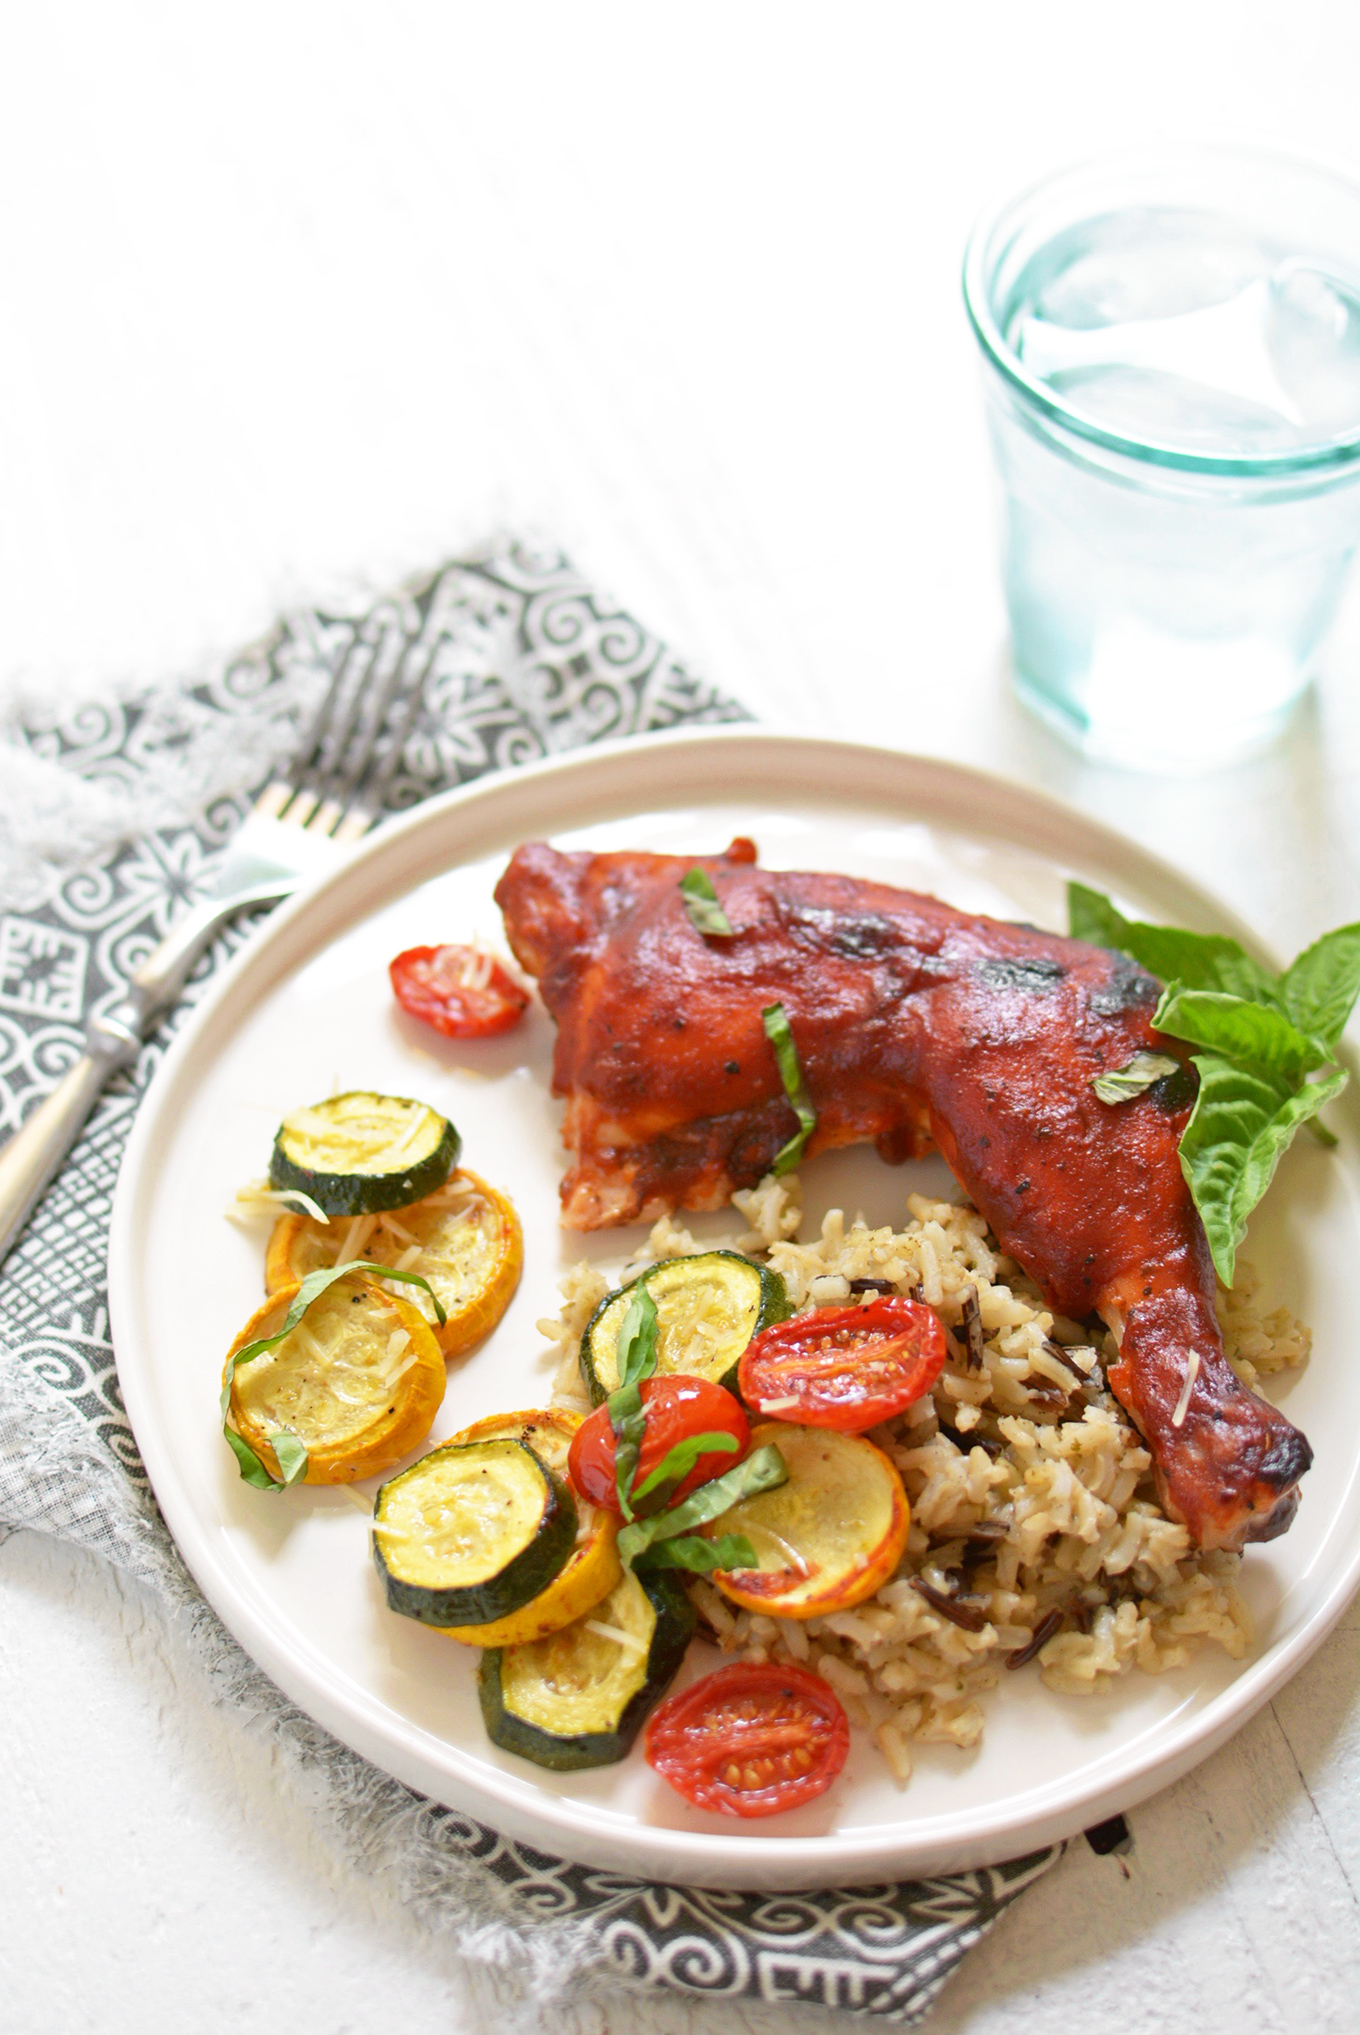
Sheet Pan BBQ Chicken with Summer Squash – Spend less time cooking and more time with your loved ones with this quick and easy all-in-one meal!Sheet Pan BBQ Chicken and Summer Squash

Hi Simple As That readers! This is Rachel, back from the food blog Simple Seasonal. Today I have a third recipe in what has become a series of easy peasy sheet pan recipes. If you’re looking for healthy no-fuss dinners, be sure to also check out my One-Pot Shrimp and Snow Pea Alfredo, Sheet Pan Mini Turkey Meatloaf Dinner, and my Sheet Pan Lemon Pepper Salmon and Vegetables.

How to Make Sheet Pan BBQ Chicken

Summertime is the best!

One of my favorite things about summer is the long days followed by warm evenings. I love serving dinner on the patio, then playing with the kids outside until it’s time to tuck them into their little beds. Sleep comes easily after an evening of bike riding, swinging, lightning bug catching, and memory making.

I also love all the fresh, local produce available to feed my family at this time of year. Some of my warm weather favorites are summer squash and little tomatoes. That’s why I knew they had to find their way into my new recipe for Sheet Pan BBQ Chicken with Summer Squash.

Sheet Pan BBQ Chicken and Summer Squash

The veggies are simply marinated in olive oil with salt and pepper, then roasted until their natural sweetness shines through. Topped with fresh parmesan and basil, they are tasty as can be.

Now, the perfect accompaniment to tasty summer vegetables is some good BBQ chicken.

That’s why I decided to put them together in this sheet pan meal. This recipe is so quick to make and clean up. It’s perfect for making on one of those fun summer nights when you want to spend your time on more important things, like making memories (and catching lightning bugs) with the people you love.

Sheet Pan BBQ Chicken and Summer Squash

Sheet Pan BBQ Chicken with Summer Squash
 
Print
Spend less time cooking and more time with your loved ones with this quick and easy all-in-one meal!
Serves: 4 servings
Ingredients
  • 4 skinless whole chicken legs
  • ½ C of your favorite BBQ sauce, divided
  • ½ lb yellow squash (about 1 small squash) cut into ¼ inch slices
  • ½ lb zucchini (about 1 small squash) cut into ¼ inch slices
  • 1 C grape or cherry tomatoes sliced in half
  • 2 Tbsp olive oil
  • ½ tsp salt
  • ⅛ tsp pepper
  • ¼ C freshly grated parmesan
  • ¼ C fresh basil cut into ribbons
Instructions
  1. Preheat oven to 425º F and line a large baking sheet with parchment paper.
  2. Arrange skinless whole chicken legs on the baking sheet. Divide the BBQ sauce, reserving about one third of the sauce to baste the cooked chicken just before serving. Baste each raw chicken leg with BBQ sauce and reserve the “raw” sauce for further basting during the cooking process. Cook the chicken for 15 minutes.
  3. Meanwhile, prep the vegetables and season them by combining with olive oil, salt, and pepper in a ziplock bag and shaking until coated.
  4. After 15 minutes have elapsed, remove the chicken from the oven. Arrange the vegetables in a single layer on the pan with the tomatoes facing up. Baste the chicken legs with BBQ sauce a second time. Return the pan to the oven and cook for another 25-35 minutes. The meat is done cooking once the vegetable are golden along the edges and the chicken reaches an internal temperature of 165º F. Note that the cooking time can vary depending on the size of your chicken legs.
  5. Remove from the oven and baste the chicken a final time with fresh BBQ sauce that hasn’t touched raw meat. Garnish the vegetables with freshly grated parmesan and the basil ribbons. Serve immediately.
Notes
Serve as-is for a low carb meal. It’s also delicious with rice or couscous.
3.5.3226


4 Photography Projects to Document Summer

Tuesday, July 4, 2017

Summer is here and with it so many photo opportunities! To make sure you capture these (fleeting) summers with your kids, why not try a photography project that will help you document your summer?

Here are four different projects you can start today that will help you capture precious memories from these lazy summer days.

#1 – Summer Bucket List

I don’t know about you, but sometimes I need a bit of motivation to pick up my camera! Working to a list of prompts can be a great way to keep yourself motivated, and to make sure you are capturing everything you want to. 

There are loads of summer photo checklists out there to help you with this particular project, and in fact you can find one a great one right here at Simple As That!  Rebecca has a free download with 50 Summer Photo Prompts: either use it as is, or create your own “bucket list” using the prompts as inspiration.

#2 – 30 or 100 Days of Summer Photography Project

Another popular photography project for summer is to capture “100 days of Summer”.  The idea is pretty simple – you take an image every day for the whole of summer. 

For many of us (myself included) it is a rather daunting task to take a photo every day for over three months, so how about 30 days of summer instead? Just pick a day, and start shooting!

#3 – Summer Scavanger Hunt Project 

A Scavanger Hunt sounds similar to a bucket list, but it is a little bit different.  There are loads of challenges to be found online (I am hosting one myself on my blog Live Snap Love – you can check it out here. I’d love for you to come and join us!)

Instead of longer prompts, a scavenger hunt just has simple one word prompts for you to capture, such as ‘Berries”, “Pink” or “Sunglasses” – when you see it, snap a picture of it!  

This can be such a fun one to do with your kids – I know my son likes to get involved and does the challenge along with me!  They can either take their own camera with them (my son has a “tough” camera that he uses for this!) or they can help by pointing out the items on the list.  If you’re really lucky, they might even model for you 🙂

#4 – A Day of Your Summer / Vacation

If some of these photography projects sound a little bit too much like hard work, how about shooting images for just one day?  Grab your camera first thing in the morning, and then take images through the day, from beginning to end. Although there is no rule to this, try to take an image at least every hour.

By the end of the day you will have captured a full day or memories, and have a varied range of pictures to look back on.

If you do decide to this one, here’s a little tip for you: make sure you get your camera ready the night before so you are ready to go in the morning. Have your camera battery charged, and a clear memory card slotted in, so you don’t get caught out when you are just about to take your first picture 🙂 

I hope you all have a great summer, and enjoy documenting the days!

DIY Chalkboard Matryoshka Nesting Dolls

Monday, July 3, 2017

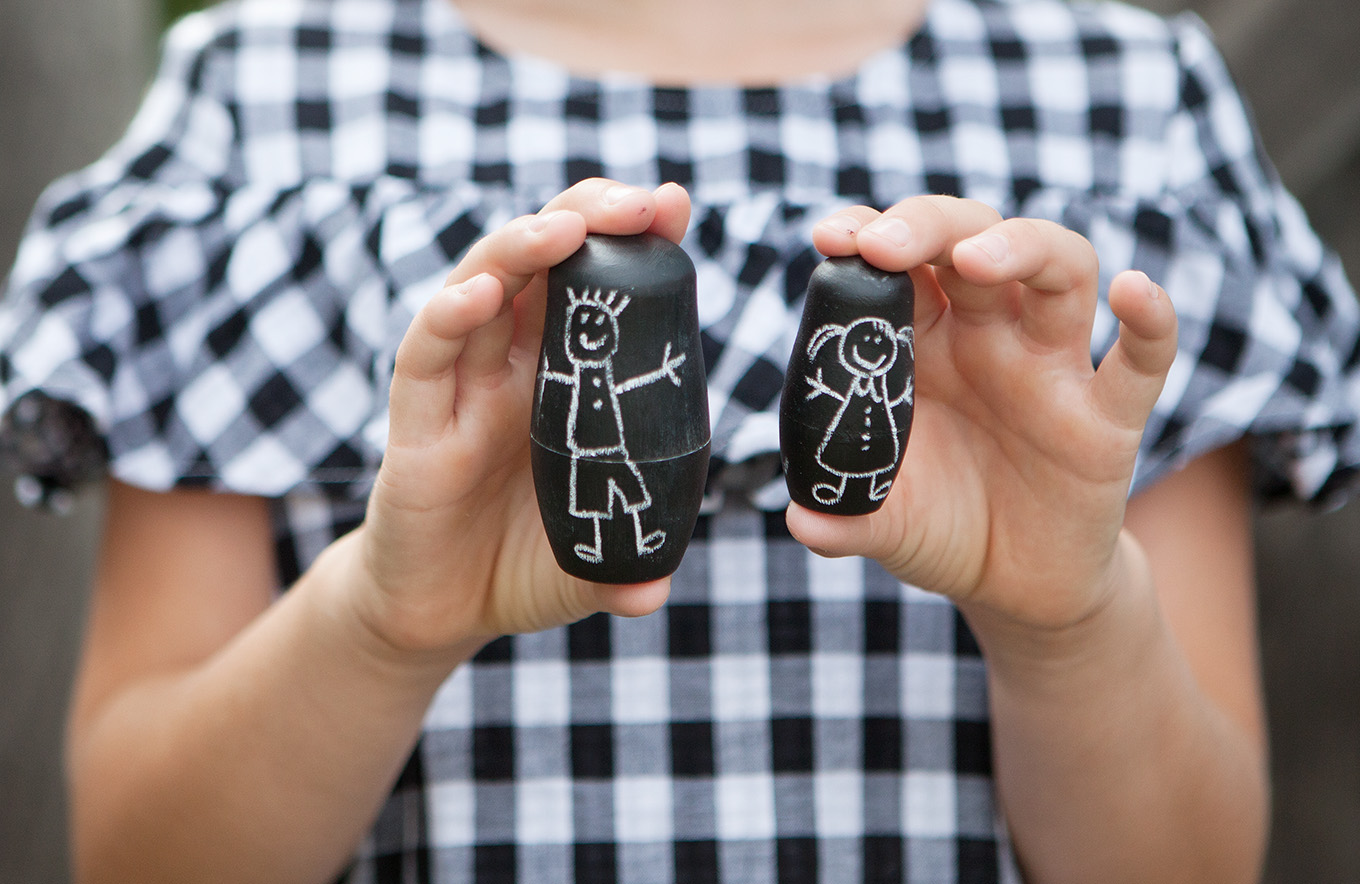
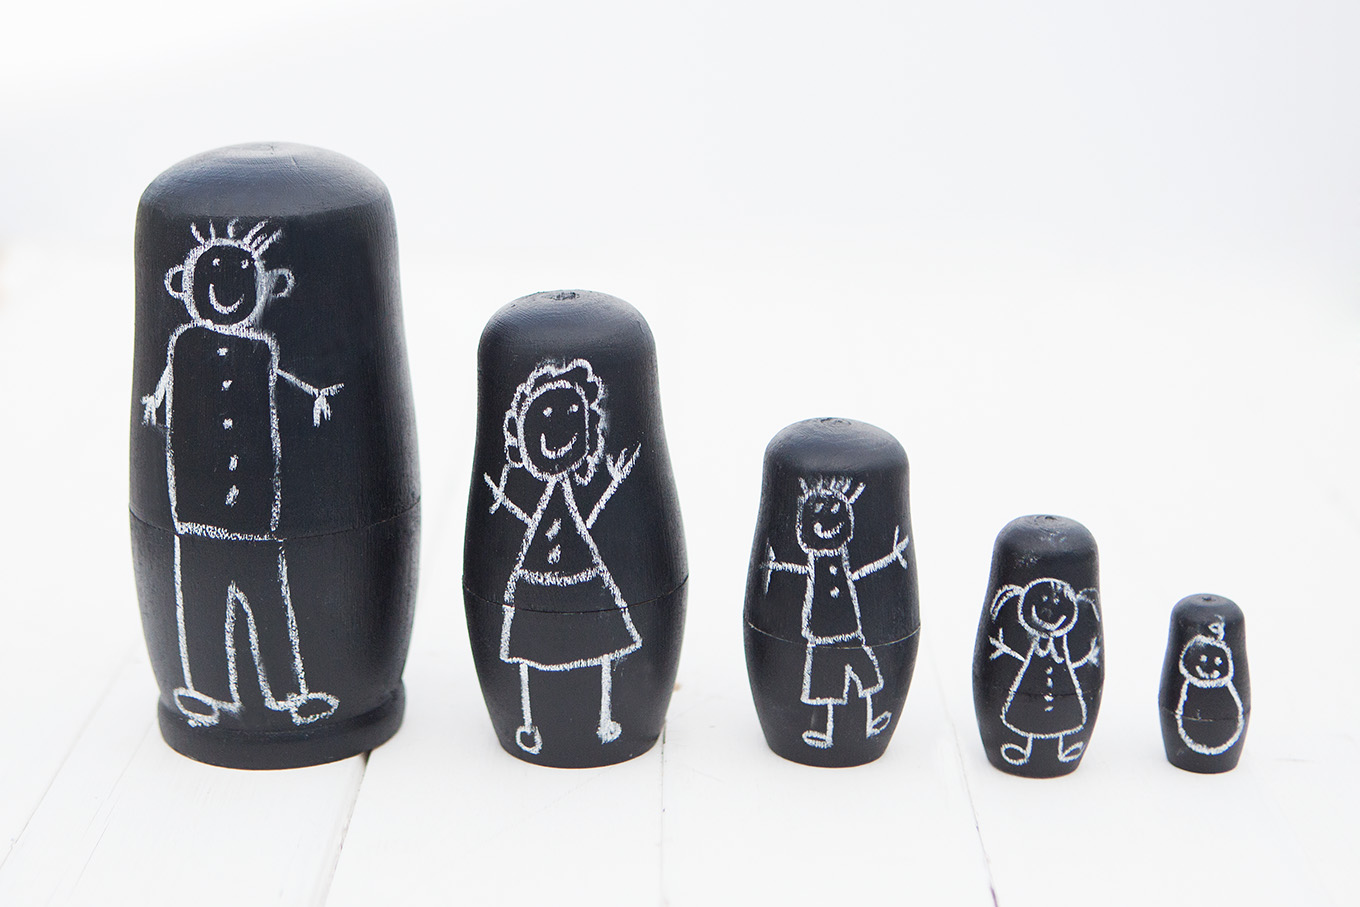
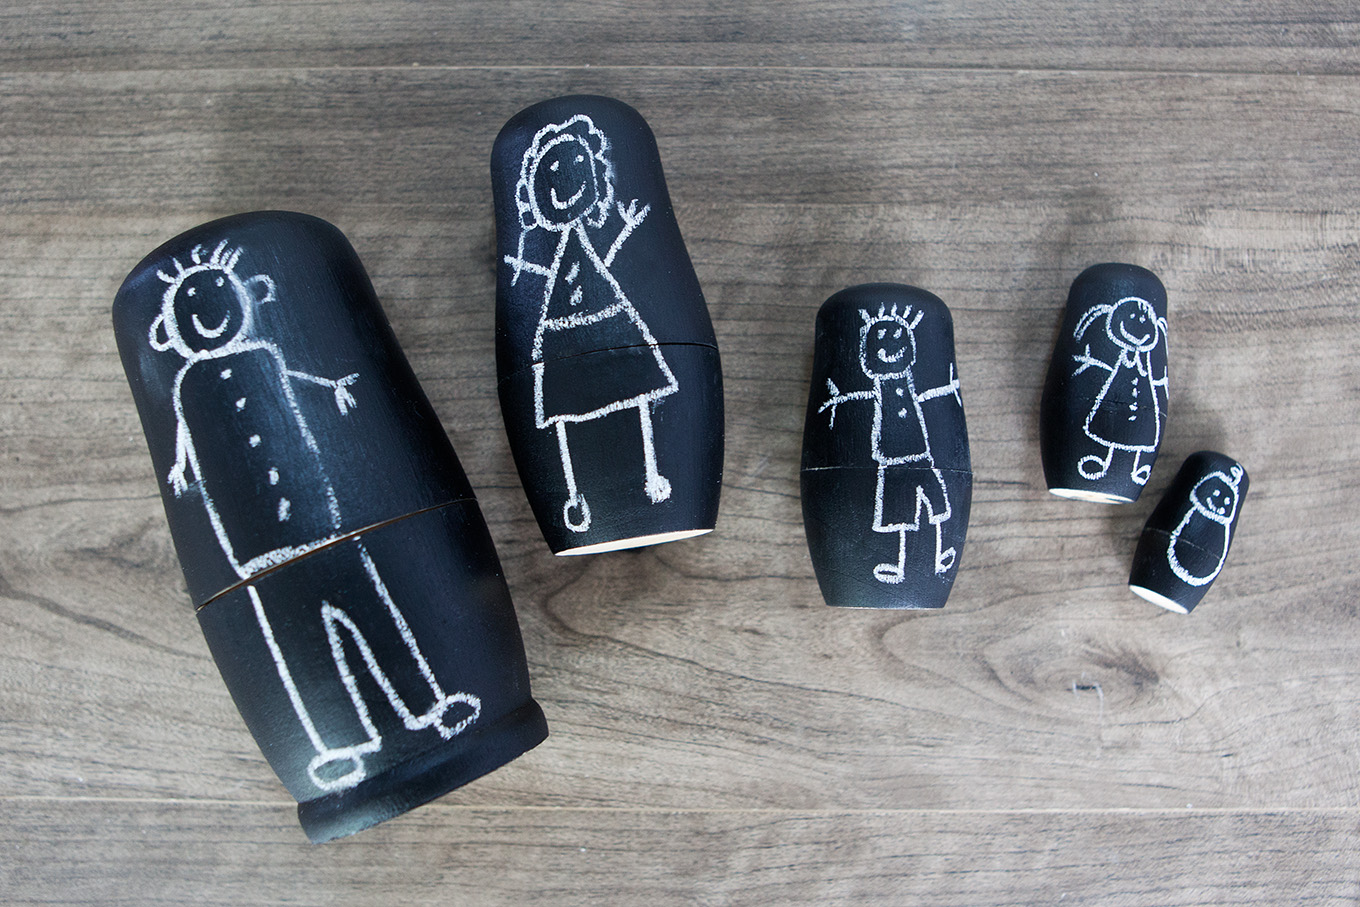
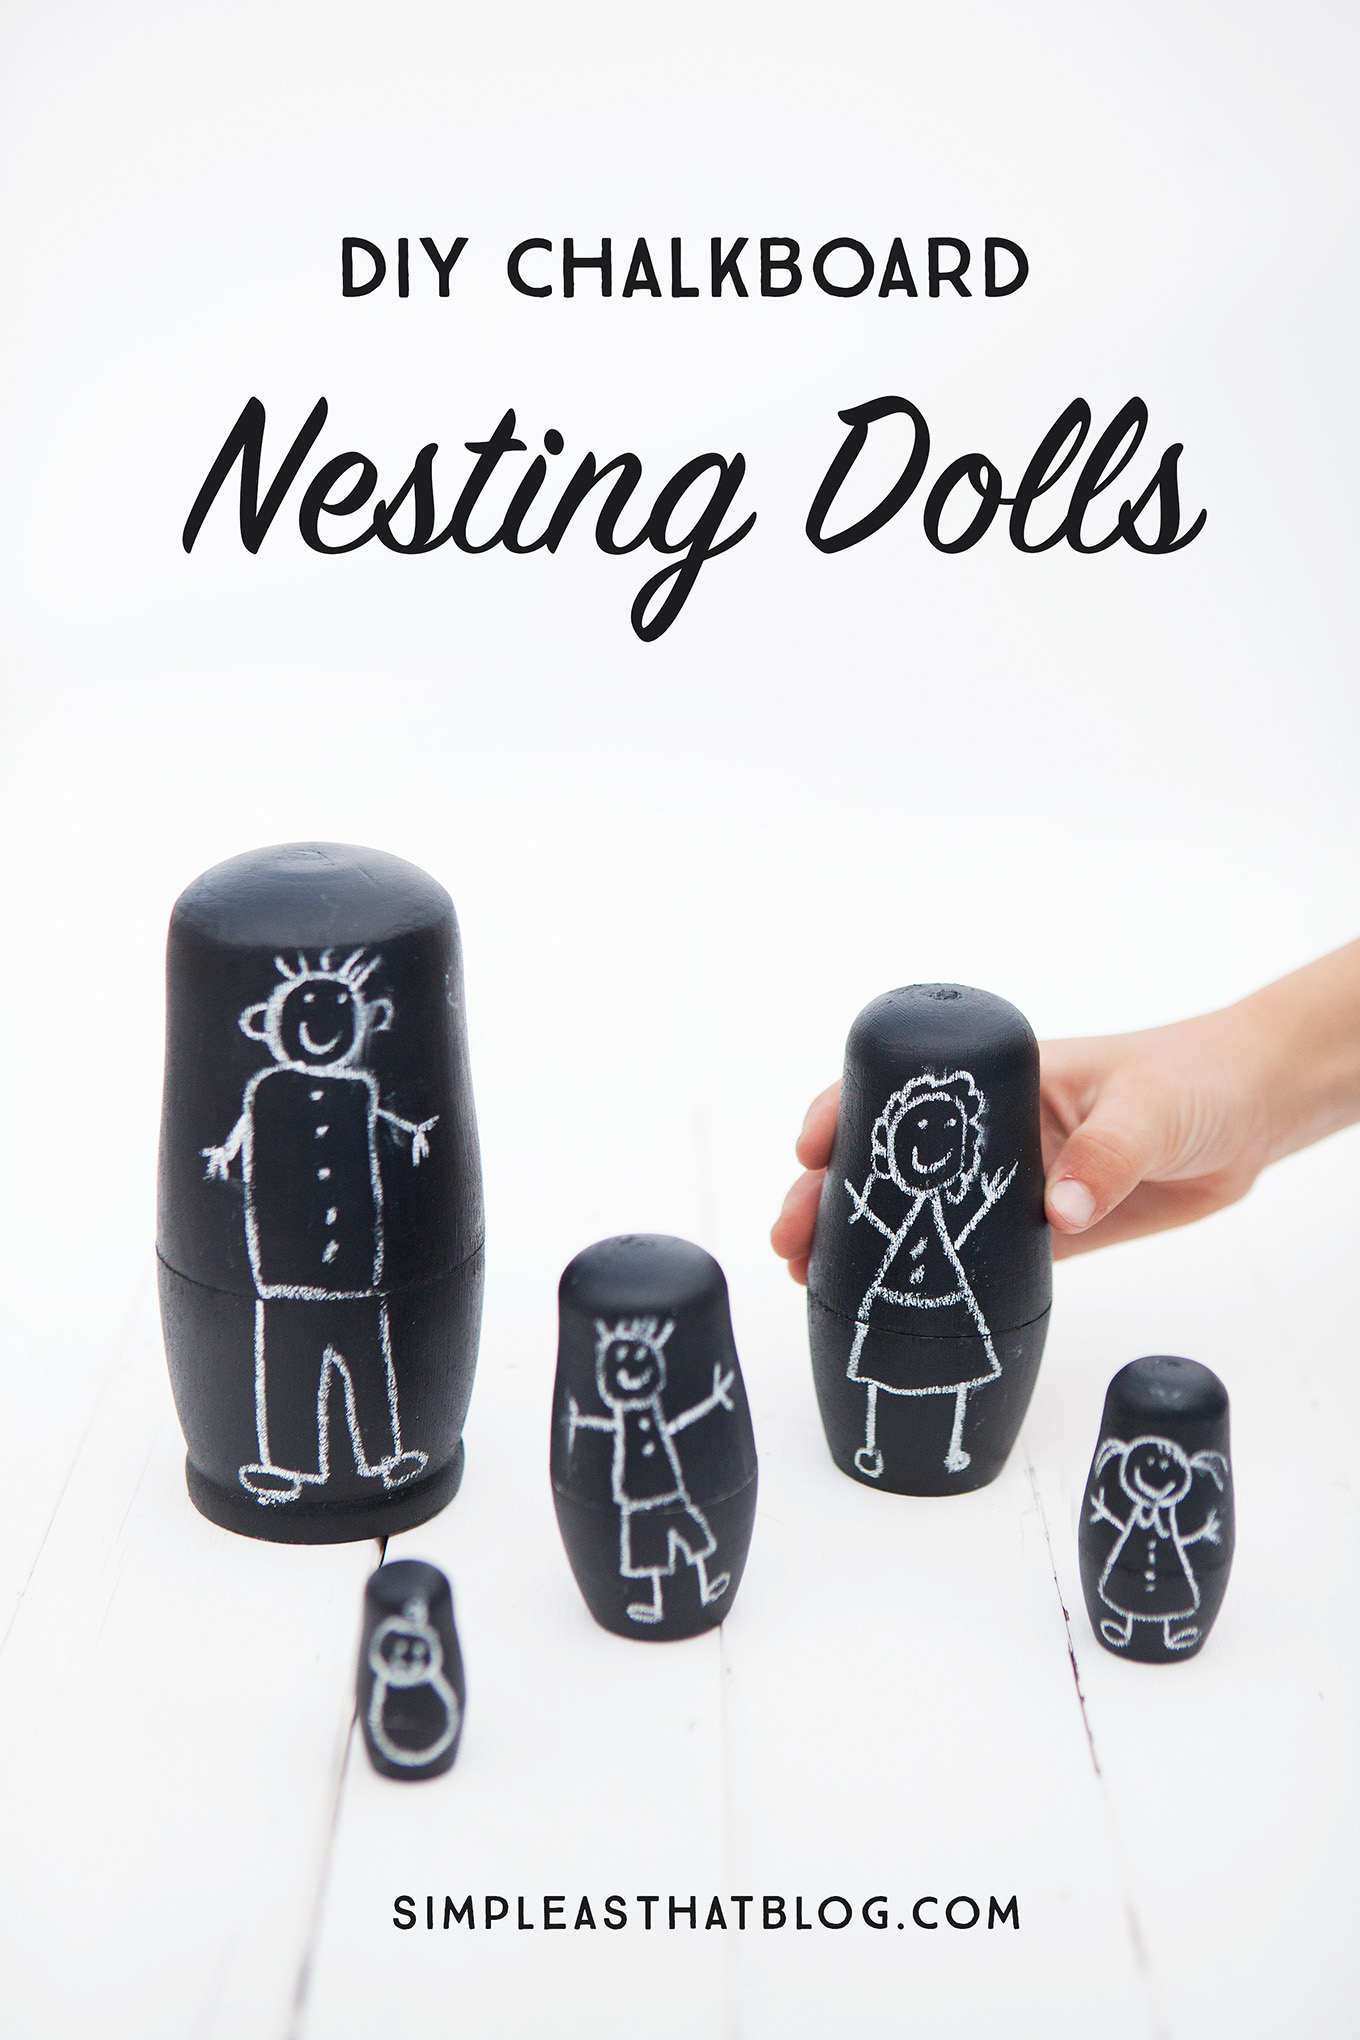
These DIY Chalkboard Matryoshka Nesting Dolls are an adorable, handmade toy your kids will love making! They can personalize the dolls again and again with nothing more than a piece of chalk.

These DIY Chalkboard Matryoshka Nesting Dolls are an adorable, handmade toy your kids will love making! They can personalize the dolls again and again with nothing more than a piece of chalk.

It feels like our kitchen table has been transformed into a makeshift craft studio on the daily this summer. We’ve been painting, making slime and coloring the afternoons away.

The mess you guys– oh the mess! But as a parent, I’ve come to realize the value of encouraging my kids creativity at home.  I tolerate the glittery, colorful messes because of the vast range of skills my kids learn from crafting – fine motor skills, concentration, problem-solving abilities, following instructions to name a few.

For me, crafting with my kids is really about strengthening bonds. Meaningful conversations and laughter seem to come about naturally when we sit down to color, paint or craft. I know that when my kids are grown, some of my favorite memories will be of the times we sat at the kitchen table crafting

These DIY Chalkboard Matryoshka Nesting Dolls are an adorable, handmade toy your kids will love making! They can personalize the dolls again and again with nothing more than a piece of chalk.

Make Your Own Chalkboard Matryoshka Nesting Dolls

Last week we did a super fun and super simple craft project together. We made our own set of nesting dolls using chalkboard paint and they turned out so cute!

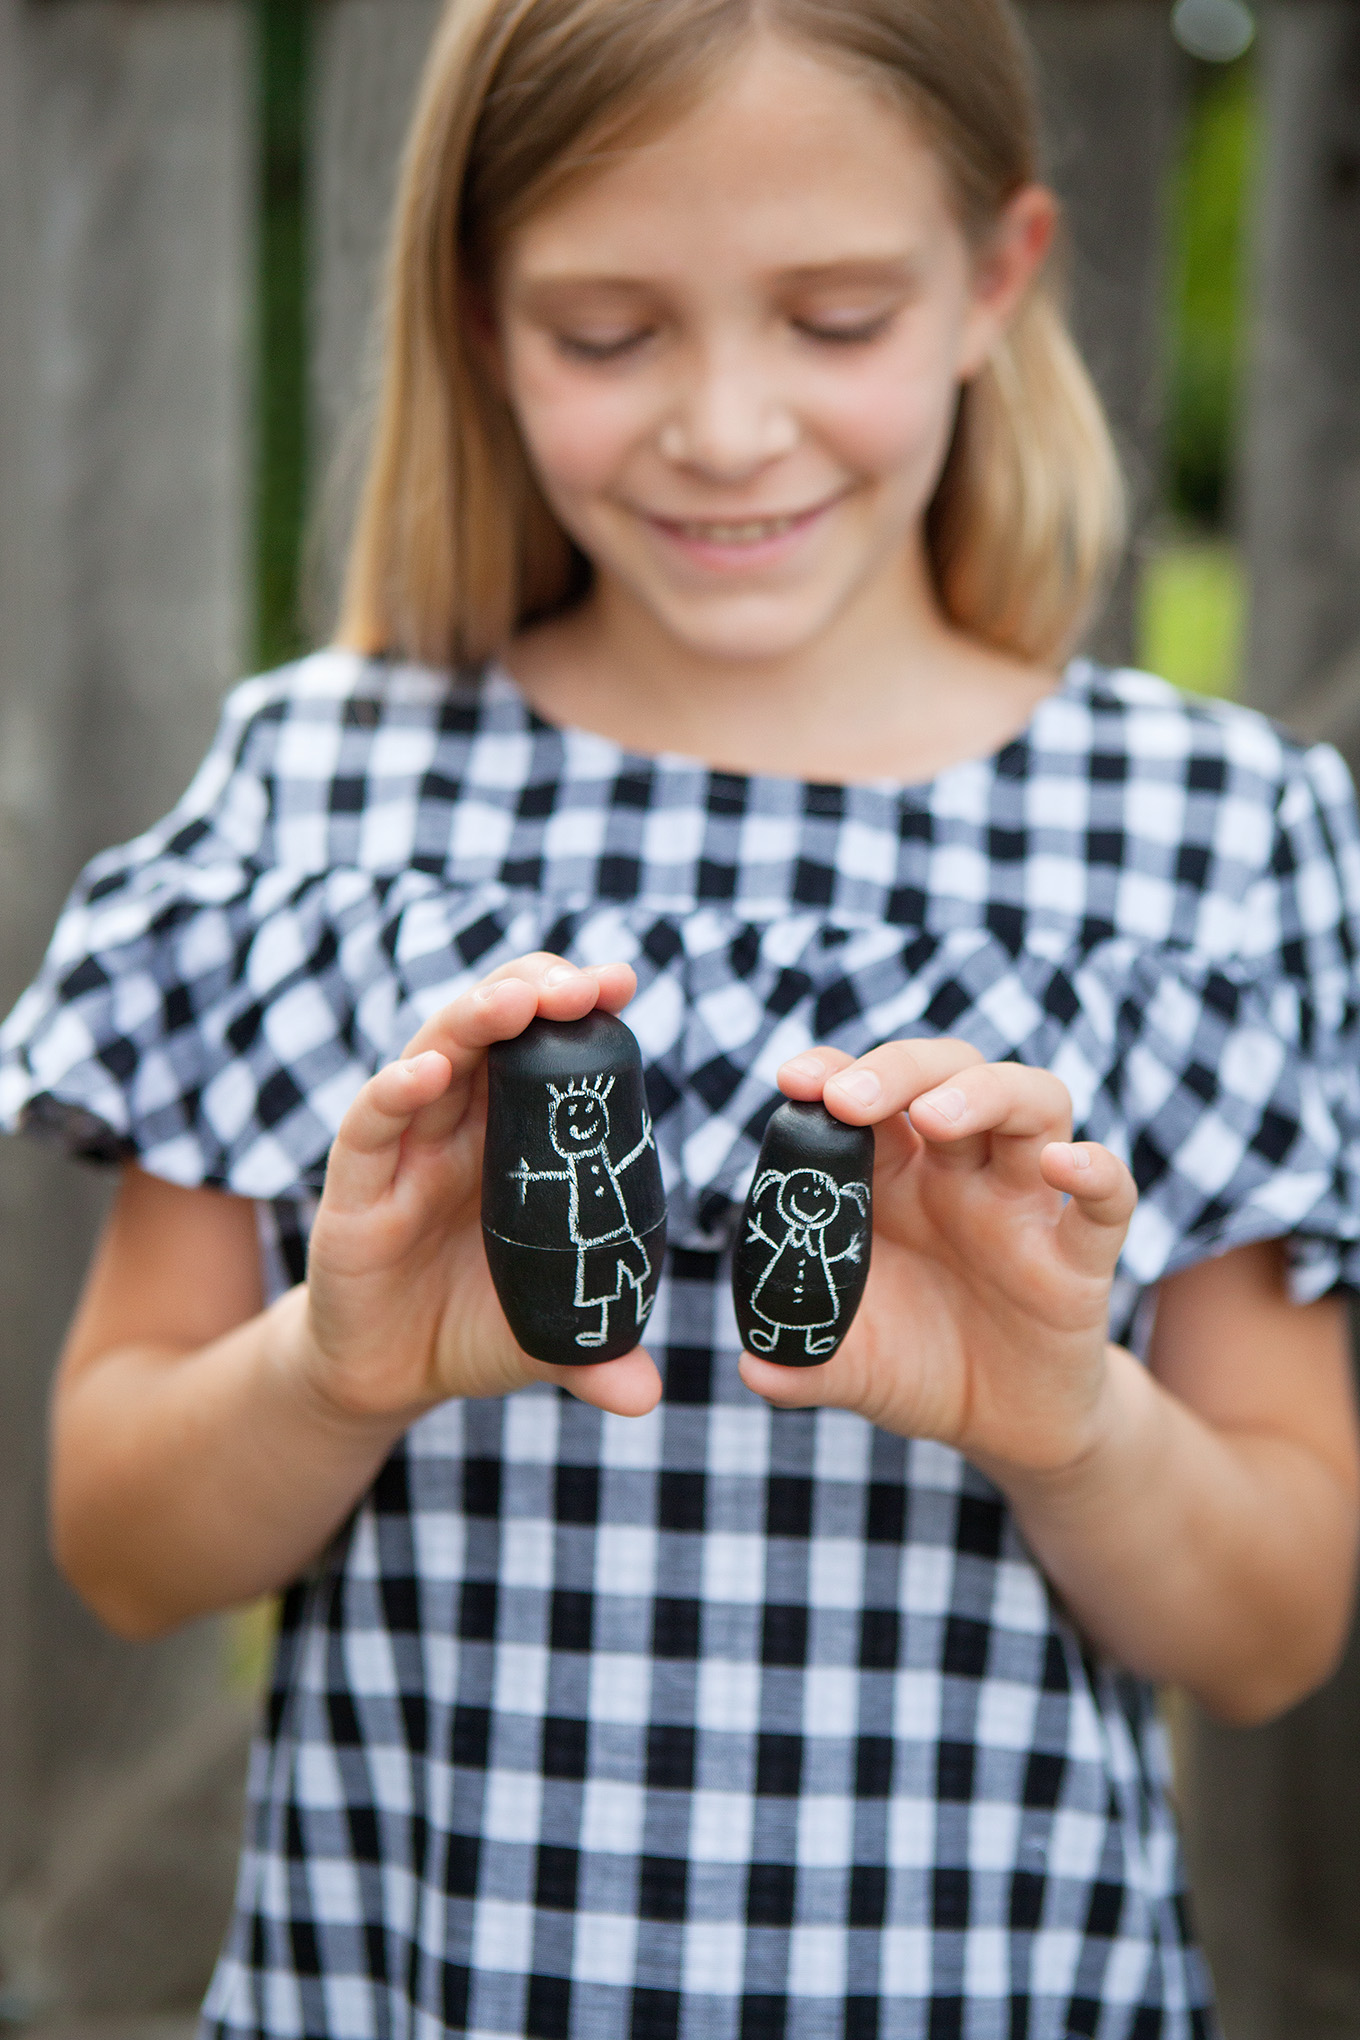
These easy to make dolls allow kiddos to create customized set of nesting dolls. Wipe clean and start again and repeat over and over again.

They really are so simple to make. Find the complete supply list below as well as step by step instruction and a short how-to video.

These DIY Chalkboard Matryoshka Nesting Dolls are an adorable, handmade toy your kids will love making! They can personalize the dolls again and again with nothing more than a piece of chalk.

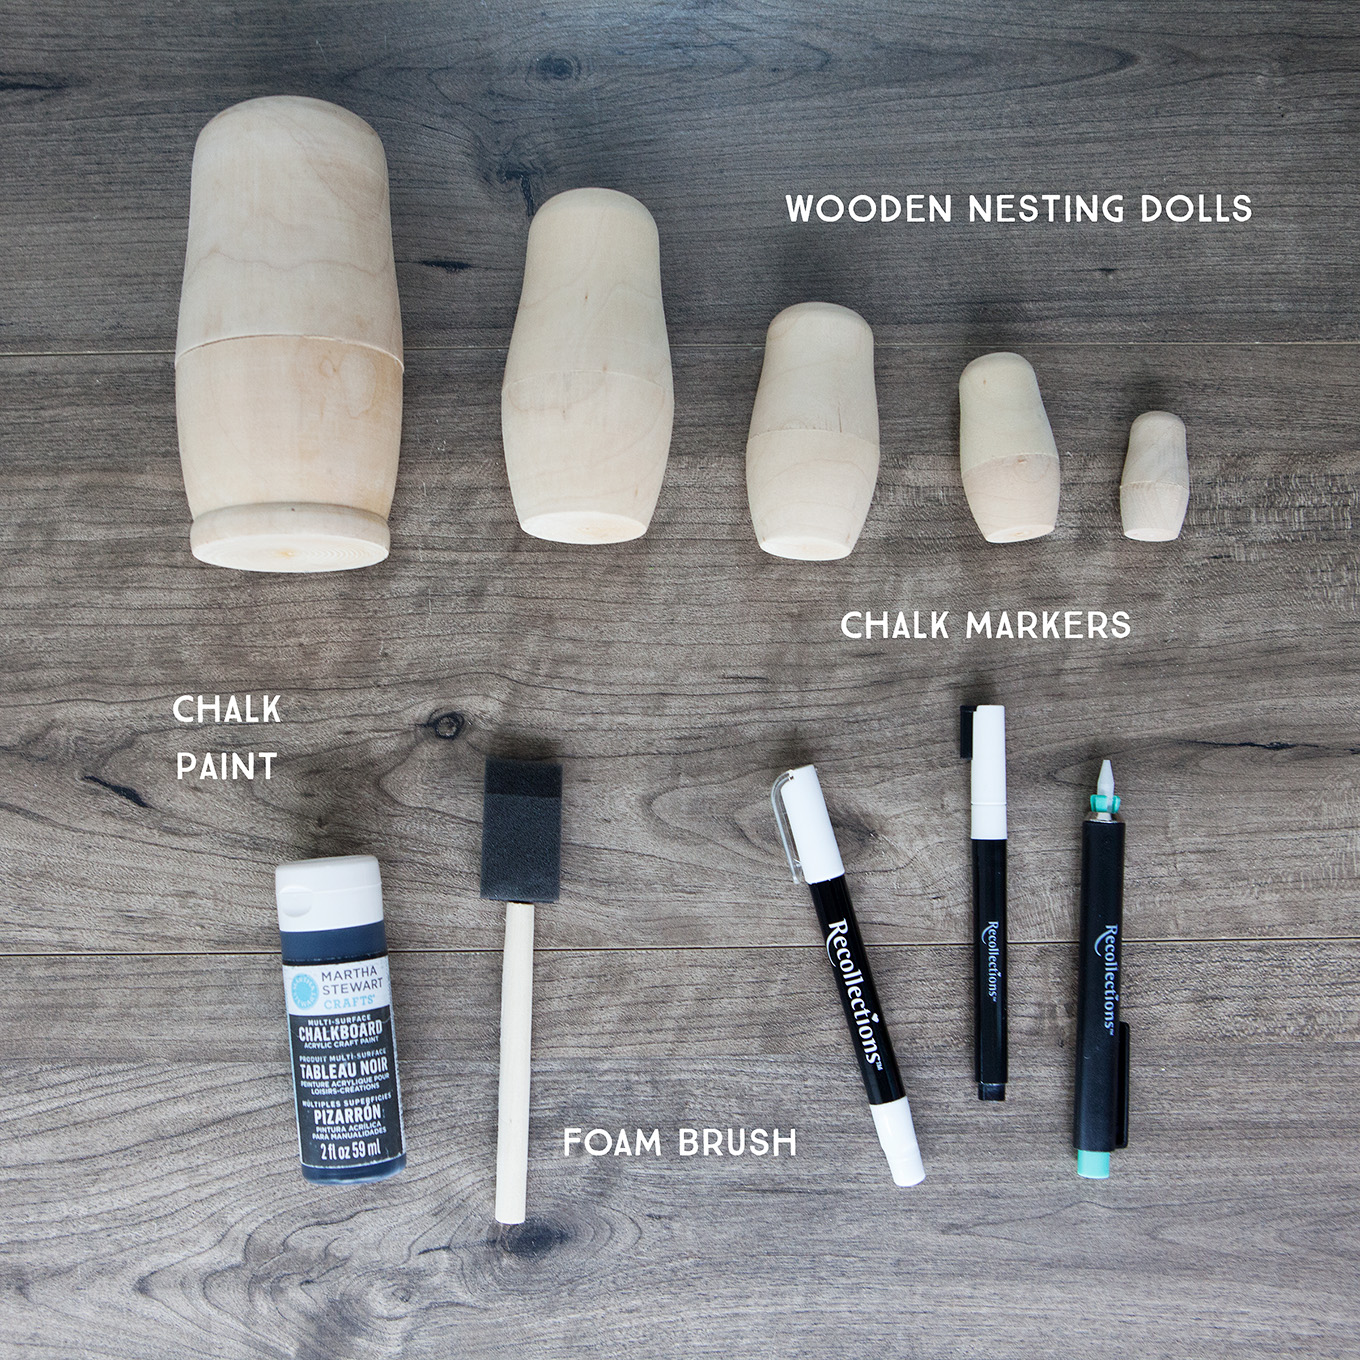
Supplies

  • Unpainted, Wooden Nesting Dolls
  • Chalkboard Paint
  • Foam Brush
  • Chalk or chalk pens

These DIY Chalkboard Matryoshka Nesting Dolls are an adorable, handmade toy your kids will love making! They can personalize the dolls again and again with nothing more than a piece of chalk.

Instructions

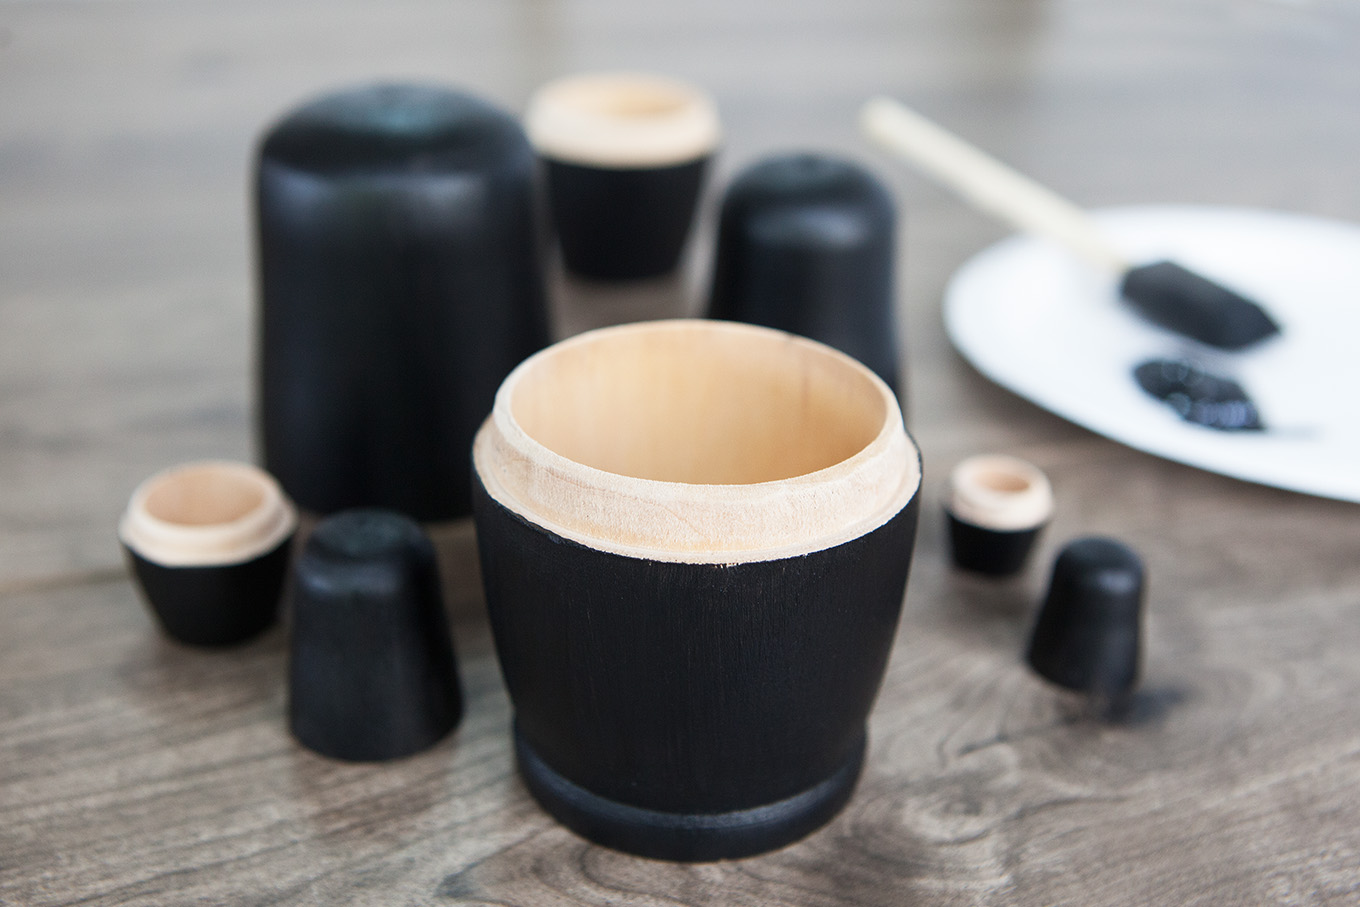
First, open all of your nesting dolls and separate the parts of each doll.

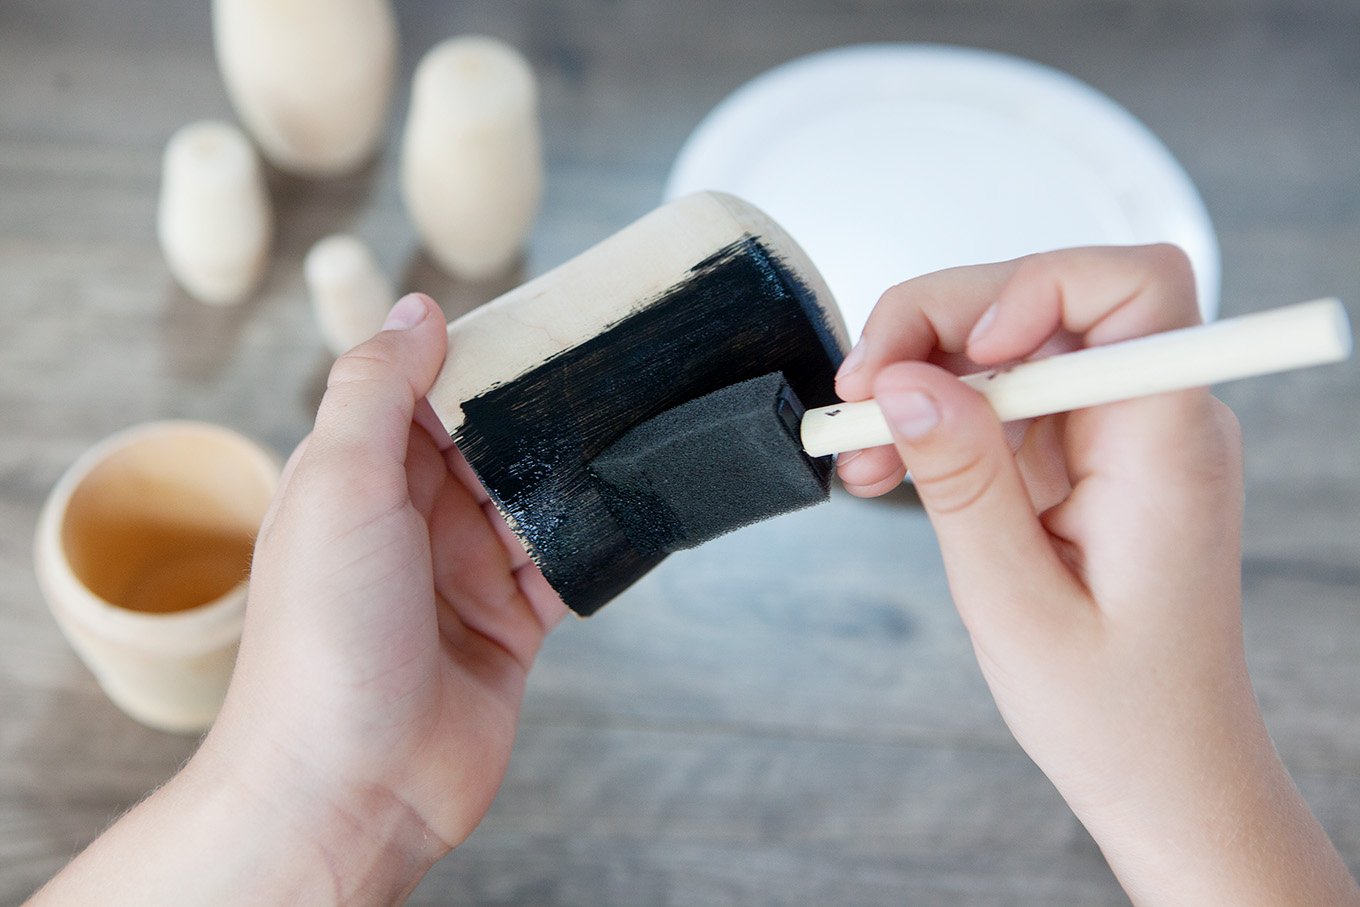
Next, squirt a little bit of chalkboard paint onto a paper plate and begin painting with a foam brush.

These DIY Chalkboard Matryoshka Nesting Dolls are an adorable, handmade toy your kids will love making! They can personalize the dolls again and again with nothing more than a piece of chalk.

Make sure you don’t get any paint on the inside seals of each doll. This would make it difficult to open and close the dolls. You could tape things off with painters tape or if you accidentally get paint on the seals simply sand it off when dry.

You will need to apply more than one coat of chalkboard paint to fully cover each doll. We did three coats of paint on each one. This Martha Stewart paint was very forgiving and went on so smoothly.

These DIY Chalkboard Matryoshka Nesting Dolls are an adorable, handmade toy your kids will love making! They can personalize the dolls again and again with nothing more than a piece of chalk.

Allow the paint to dry completely.

Customize each doll with chalk or chalkboard markers. Wipe off the chalk with a damp cloth or baby wipe and kids can customize their dolls over and over again for hours of creative play!

These DIY Chalkboard Matryoshka Nesting Dolls are an adorable, handmade toy your kids will love making! They can personalize the dolls again and again with nothing more than a piece of chalk.

If you liked this post you might also enjoy…

  • 25 Simple Screen-free Ideas for Kids
  • A List of Traditional Children’s Games
  • Printable Nature Scavenger Hunt Cards
  • Woodland Critter Paper Cup Crafts

These DIY Chalkboard Matryoshka Nesting Dolls are an adorable, handmade toy your kids will love making! They can personalize the dolls again and again with nothing more than a piece of chalk.

« Previous Page
Next Page »

Primary Sidebar

Rebecca Cooper — Founder, Simple as That Blog

Hello, I'm Rebecca. Welcome to my blog, Simple as That. Come along as we embrace simplicity in crafting, photography, travel, and family life. Read more about me.

Newsletter

Get the latest updates from Simple as That delivered to your inbox.

Join for Free

Beyond Snapshots: Mastering the Art of Mobile Photography

Connect

  • Bloglovin
  • Facebook
  • Instagram
  • Pinterest
  • Twitter

Follow On Pinterest

Visit Rebecca - Simple as That Blog's profile on Pinterest.

Categories

  • Crafts / DIY
  • Holidays
  • Motherhood
  • Organization
  • Photography
  • Printables
  • Recipes
  • Simple Living
  • Travel
  • Wellness

Our Privacy Policy

Follow on Instagram

Instagram has returned invalid data.

Printable 2023 Calendar

Our printable calendars and organizational pages have been essential in keeping our home and my life in order and I guarantee they will be a help to you too!

Click here to learn more

© Simple as That Blog, 2017 · Design by Brian Gardner

Simple as That Blog

Facebook / Instagram / Pinterest / Twitter / Contact