• About
    • About Rebecca
    • Meet the Team
    • Media Kit
    • FAQ
  • Photography
  • Holidays
  • Recipes
  • Printables
  • 2019 Calendar
  • Write for Us
  • Beyond Snapshots

Simple as That

Making Everyday Beautiful

Blog

Crock-Pot Vegetable Chili

Sunday, February 21, 2016

Crock-Pot Vegetable Chili – This thick and naturally sweet and savory chili makes for some easy, healthy weeknight comfort food! 

Crock-Pot Vegetable Chili

Hi, Simple As That readers! This is Rachel from the whole foods blog Simple Seasonal. I’m excited to be back with another healthy, family-friendly recipe that helps you get those hungry little picky eaters to eat their vegetables. Today’s chili recipe is a crock-pot one, specifically with you in mind. Don’t you just love coming home after a busy day of running here and running there to a warm and spicy-smelling house, knowing that dinner is already cooked? Really, crock-pots are kind of like having a personal cook. Unfortunately, however, they don’t do dishes…
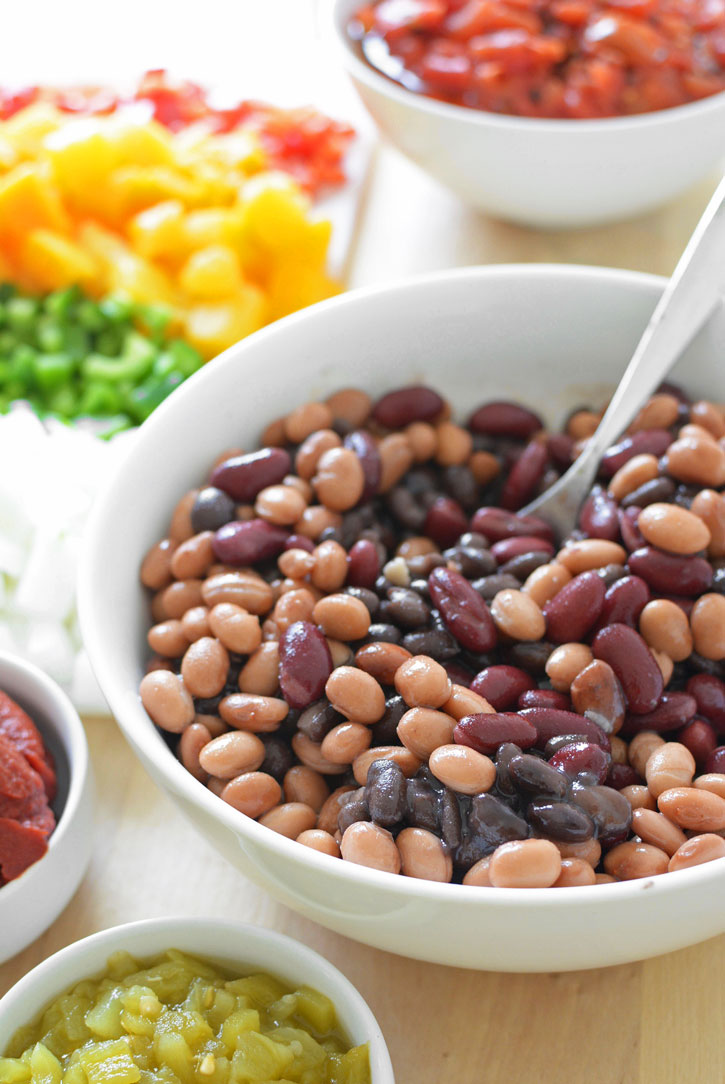
Beans for Chili

This Crock-Pot Vegetable Chili recipe is one that I’ve been playing around with for the last couple of years until my family felt that I got it right. They’re pretty tough critics, so – not to brag here – but this is a pretty tasty recipe! I’ve also experimented with ways to make this basic recipe work for different occasions. This version is vegetarian and all about the beans and the vegetables, but if your family has a more hearty appetite, it’s also delicious when you substitute the can of pinto beans with 3/4  lb of ground turkey or chicken. I’ve cooked and enjoyed it both ways!
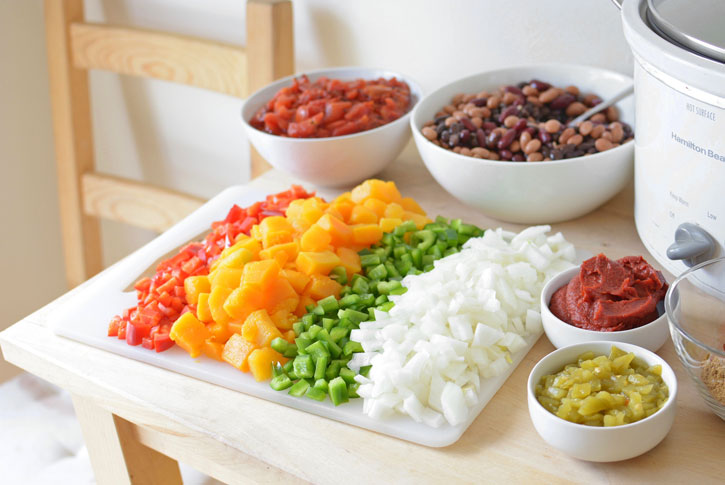
Rainbow of Vegetable Colors

Now, on to the secret ingredient: butternut squash! After it spends 8 hours in the crock-pot, it softens and blends in with the spices, making a thick, naturally sweet and savory chili. If you don’t tell them that they’re eating squash, they’ll never know it’s there… 😉 Hint: butternut squash is now sold in the freezer section of many grocery stores. Buy a bag of the frozen stuff if you want to skip the hassle of cutting a squash.
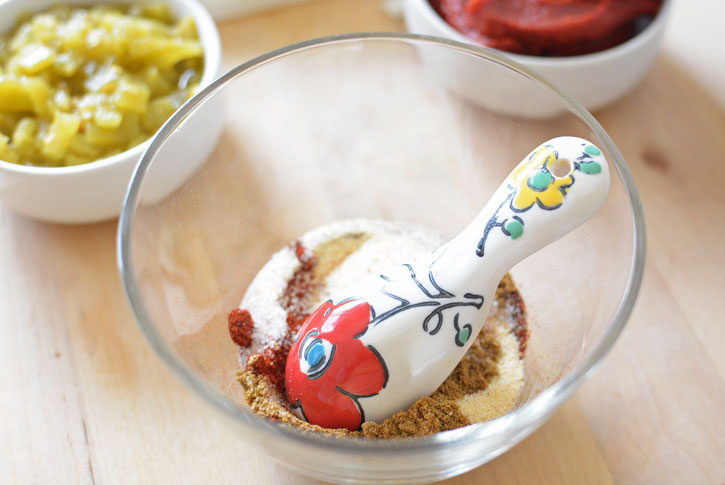
The Spice for the Chili

And what’s chili without a fantastic blend of spices? Unfortunately, in my home there is an ongoing tension about hot and spicy food. Before my son was born, my husband and I added hot peppers to just about everything. Now, if I add black pepper to a dish, I hear whiny complaints from the 4-year-old about how it’s “too ‘picy Mommy…” The way I’ve learned to contend with this is by making my chili mild. Then, about 30 minutes before dinner, I reserve some mild chili for the spice naysayer, then add more heat to rest of the pot. I add chipotle chile powder to this recipe in addition to the regular chile powder added when I first mixed up the contents of the crock-pot. Understanding that every family likes different amounts of heat, here’s a spice guide so you can get it right for your family. This is based on the whole crock-pot of chili. If, for example, you’re reserving half of the pot as mild, cut these measurements in half.

Mild: Add nothing 30 minutes before serving.

Medium: Add 1/2 Tbsp chipotle chile powder 30 minutes before serving.

Hot: Add 1 Tbsp chipotle chili powder 30 minutes before serving.

Note: if everyone in your home is on the same page about spice, feel free to add your chosen amount of chipotle chili powder at the beginning of the cooking process.
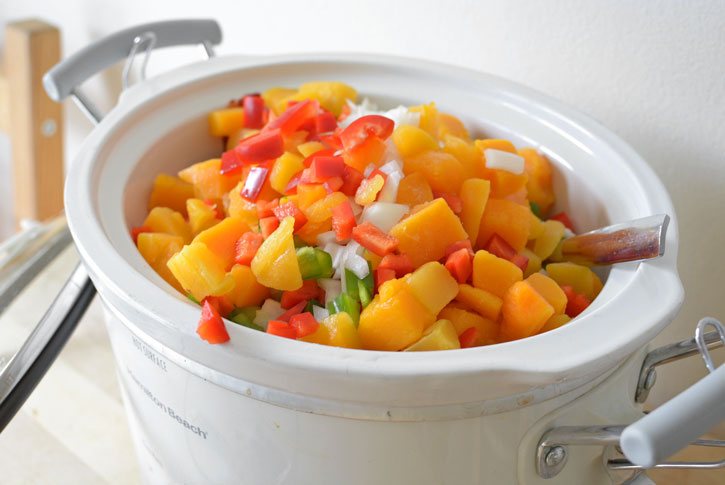
Vegetables in the Crock-Pot

Once you’ve decided whether you’re going to make this chili vegetarian or not, and how how spicy you want it to be, simply add the ingredients to the crock-pot, turn the heat on high, and let it cook away for 8 hours.
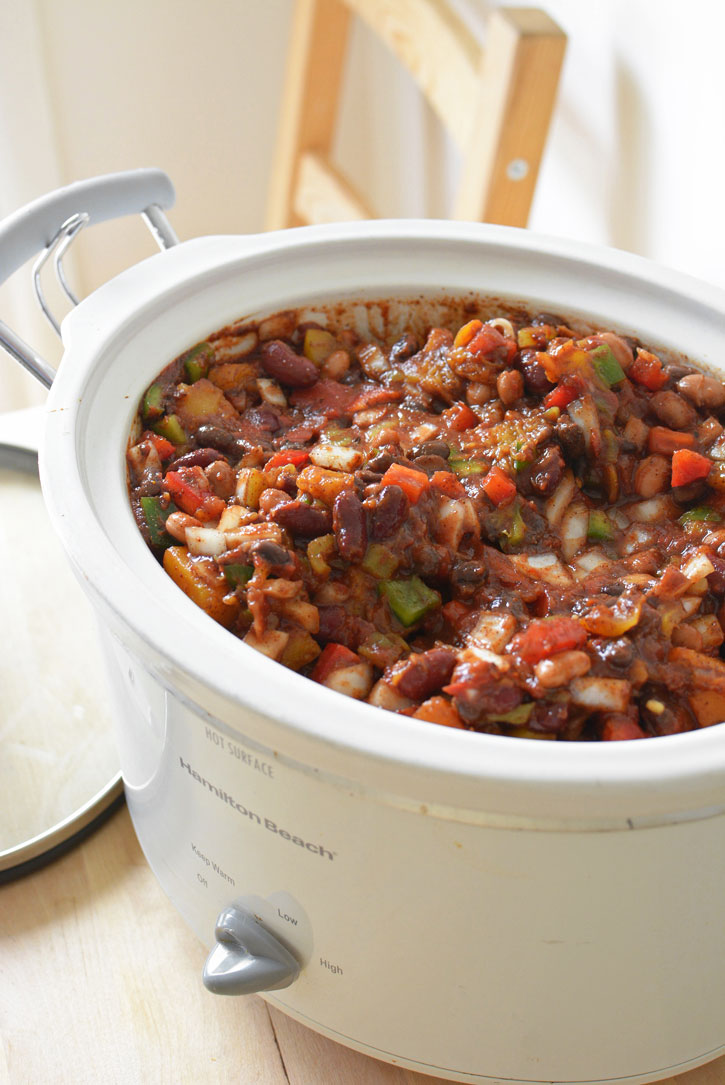
Cook Chili All Day in the Crock-Pot

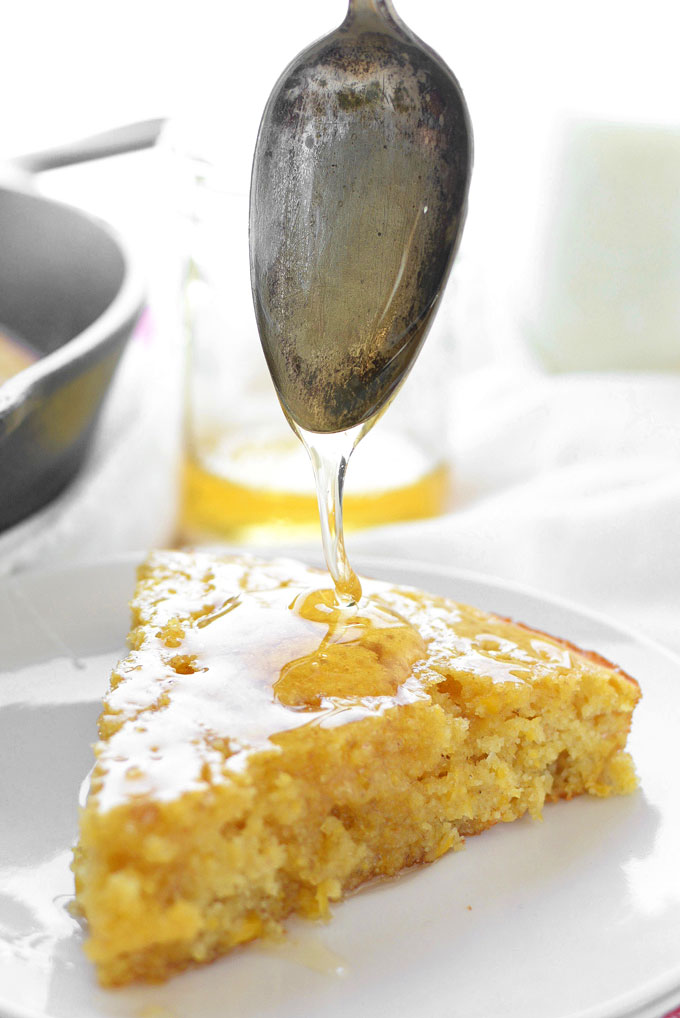
Before serving, add in the extra heat if you have some mixed mild and spicy eaters in your home. Stir in the frozen corn, molasses, and cider vinegar to give it some extra zing. Topping with freshly-shredded cheddar cheese and sour cream is always delicious, too! If you like cornbread with your chili, head over to my blog for a recipe for Skillet Honey Cornbread!

Crock-Pot Vegetable Chili

Crock-Pot Vegetable Chili
 
Print
This thick and naturally sweet and savory crock-pot vegetable chili makes for some easy, healthy weeknight comfort food!
Recipe type: Crock-Pot
Cuisine: Tex-Mex
Serves: 6 servings
Ingredients
  • 3 cups cubed butternut squash (fresh or frozen)
  • 1½ C diced yellow onion
  • 1 red bell pepper, diced
  • 1 green bell pepper, diced
  • 1 4 oz can diced green chilies
  • 1 14.5 oz can black beans
  • 1 14.5 oz can kidney beans
  • 1 14.5 oz can pinto beans (or ¾ lb ground turkey or chicken)
  • 1 28 oz can fire roasted tomatoes
  • 1 6 oz can tomato paste
  • 1 Tbsp olive oil
  • 1½ Tbsp chili powder
  • ½ Tbsp paprika
  • ½ Tbsp garlic
  • 1 tsp cumin
  • Chipotle chili powder (none for mild, ½ Tbsp for medium, 1 Tbsp for hot)
  • 1 C frozen sweet corn
  • 2 tsp apple cider vinegar
  • 2 tsp molasses
Instructions
  1. Prep all of the vegetables by dicing the onions as well as the red and green bell peppers. For the butternut squash, you can cube fresh squash or use frozen.
  2. Combine the vegetables, beans, meat (if using), tomatoes, tomato paste, olive oil, regular chili powder, paprika, garlic, and cumin in a crock-pot that's 4 quarts or larger in size. Cook on high in the covered crock-pot for 8 hours.
  3. Thirty minutes before serving, stir in the corn, molasses and apple cider vinegar.
  4. Next, decide how much heat you would like your chili to have by adding different amounts of chipotle chili powder; Mild=add none, medium=1/2 Tbsp, hot=1 Tbsp. At this point, you also have the option to reserve some "mild" chili from the pot and then add chipotle to the remaining chili if you're serving some people who like spicy food and others who do not. Just remember - if you are dividing the chili in half, cut the amount of chipotle you use in half. For example, for medium chili use ¼ Tbsp of chipotle chili powder. Cook covered for another 30 minutes.
  5. To serve, I recommend topping with shredded cheddar cheese and a little sour cream.
3.4.3177

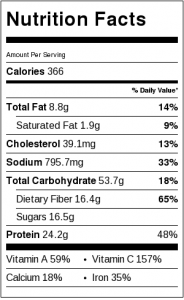
Crock-Pot Vegetable Chili Nutrition Facts


 Hungry for some more whole foods recipes? Check out these tasty ideas!

Skillet Honey Cornbread

Skillet Honey Cornbread

Sticky Chipotle Cauliflower Wings

Stocky Chipotle Cauliflower Wings

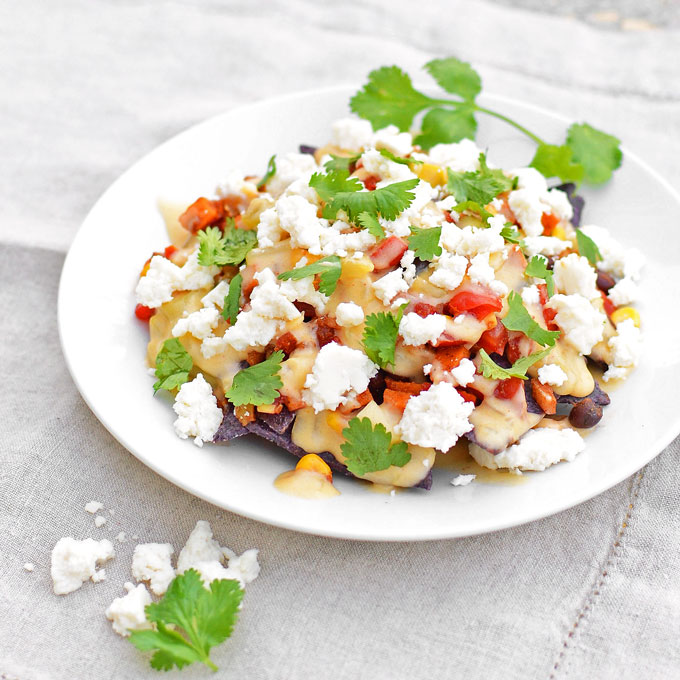
Loaded Sweet Potato Nachos 

Loaded Sweet Potato Nachos

Clover Leaf Lei for St. Patrick’s Day

Friday, February 19, 2016

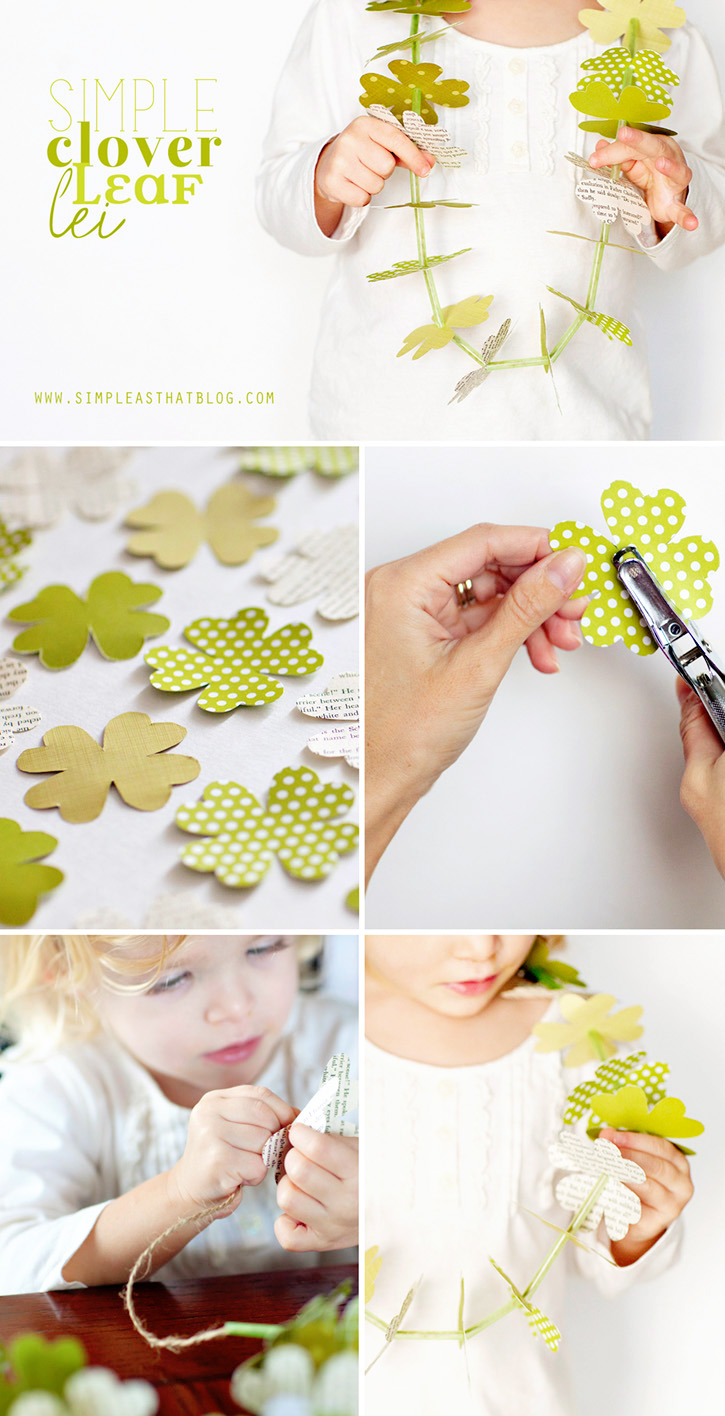
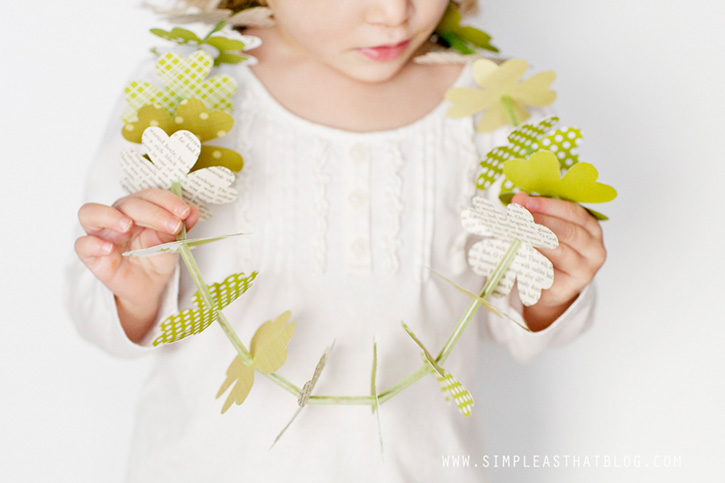
Clover Leaf Lei for St. Patrick’s Day – a quick and simple, mess-free paper craft to help get the kids excited about St. Patrick’s Day!

A quick and simple, mess-free paper craft to help get the kids excited about St. Patrick's Day!

We’ve made these quick and easy paper leis before (see our valentines day and spring versions) and the kids love to make them! They’re simple, use supplies you’re likely to have on hand and they’re just so cute!


Supplies

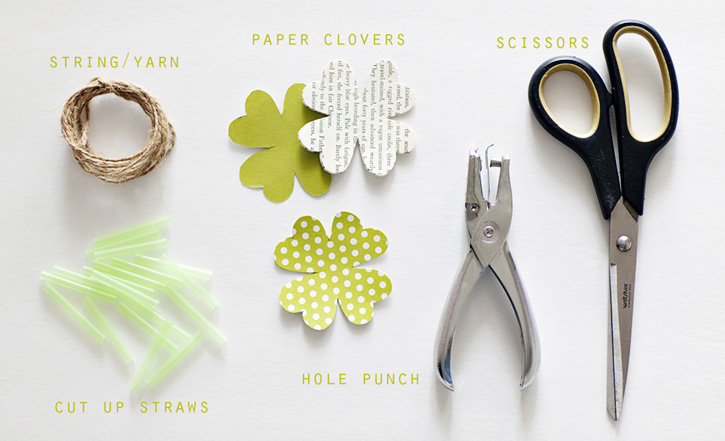
string/yarn

paper clovers

scissors

cut up straws

hole punch

A quick and simple, mess-free paper craft to help get the kids excited about St. Patrick's Day!

Instructions

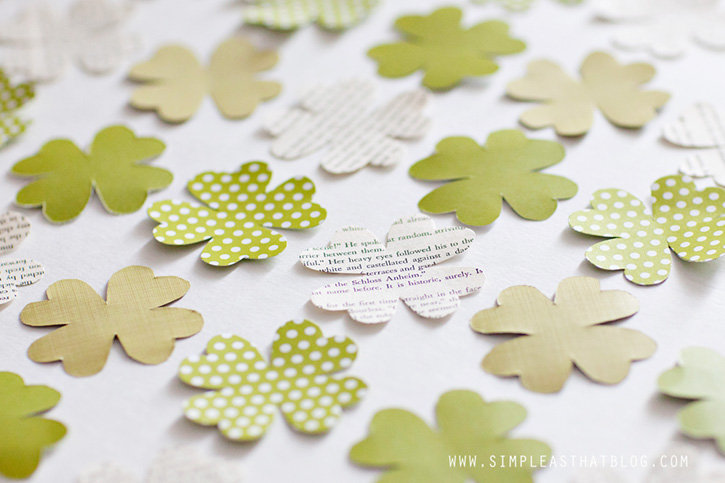
1. Cut out clover leaves in varying colours and patterns from cardstock/construction paper. I’ve created a template for the clover leaf I used and it can be downloaded here.

A quick and simple, mess-free paper craft to help get the kids excited about St. Patrick's Day!

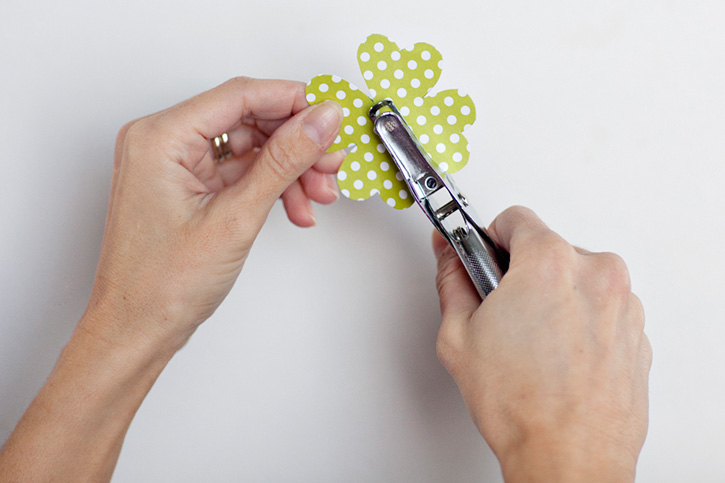
2. Punch a hole in the centre of each clover leaf. Depending on the width of your straws you might need to use a smaller than normal hole punch or poke your own holes so the straws don’t slip through.

A quick and simple, mess-free paper craft to help get the kids excited about St. Patrick's Day!

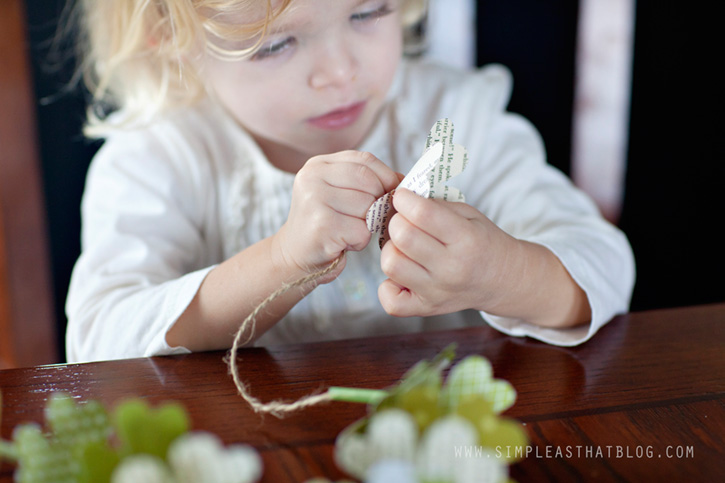
3. Next cut a length of string or yarn and alternate stringing the paper clovers + straw pieces.

A quick and simple, mess-free paper craft to help get the kids excited about St. Patrick's Day!

4. When its long enough, tie the ends of your string together and that’s it! So easy and definitely a crowd pleaser with the kids! Enjoy making your own Clover Leaf Leis!

A quick and simple, mess-free paper craft to help get the kids excited about St. Patrick's Day!

If you enjoyed this activity you might also like 17 Simple St. Patrick’s Day Ideas, Make a Clover Leaf Bouquet,  Make a Paper Plate Baby Chick or this Easter Egg Carton Craft.

Follow Rebecca – Simple as That Blog’s board St. Patrick’s Day on Pinterest.

The Role YOU Can Play in Family History—Right Now

Wednesday, February 17, 2016

Do you see yourself as a family historian? You may not spend hours at the computer searching for names, but I bet you’re documenting the lives of the people you love. The things is, there’s one more thing you can do to make your family’s history exponentially more powerful. 

One simple thing you can do to make your family's history exponentially more powerful.

I remember going as a child to my great-grandpa’s farm house Sundays after church. We’d eat green grapes and macaroon chocolates and spend whole afternoons playing in the farmyard.

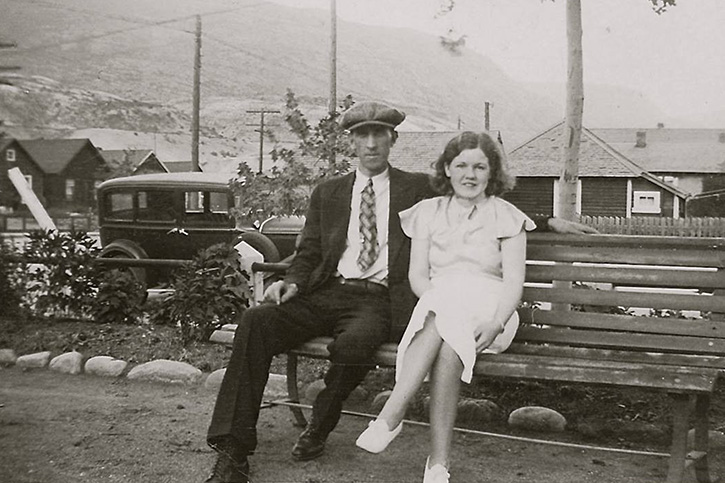
One of my favorite things to do was find a quiet corner in the living room and pull out the old photo albums, pouring over pages and pages of black-and-white photos.

I could hear the adults talking and siblings and cousins playing in the backyard as I took in all the details of the photographs, wondering about these people I’d never met and imagining what life must have been like for them.

One simple thing you can do to make your family's history exponentially more powerful.

Fast forward a dozen years and it was my love of photos that prompted within me an instinct to start documenting my children’s lives the moment they were born. I began documenting their lives, primarily through photographs, and sharing them on a little blog I called “Simple As That.”

Recording their stories—our family’s stories—as they unfolded became so important to me as I filled up blog posts, scrapbooks, and journals and as I snapped photo after photo…after photo!

I recently attended a global family history event in Salt Lake City called Roots Tech, and the message that filled my heart after days of listening to people so passionate about family history is this:

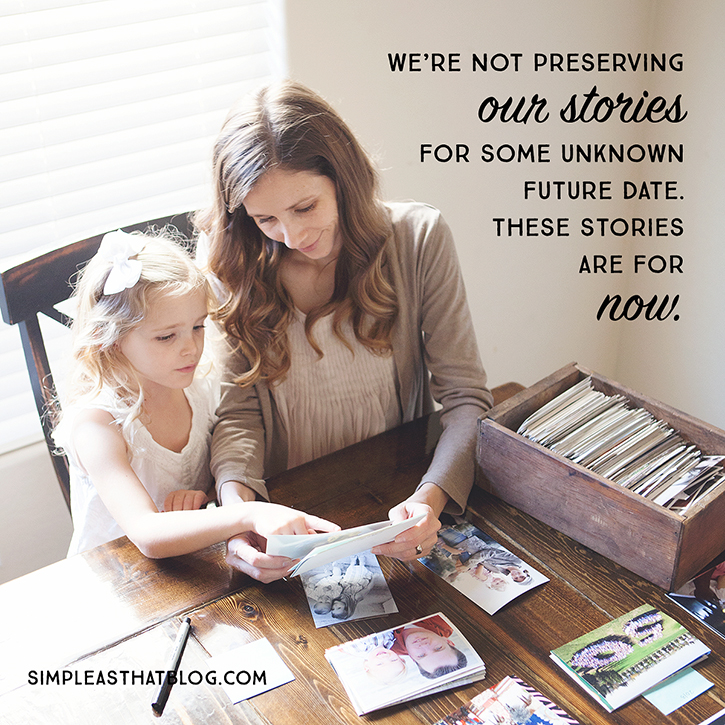
We’re not preserving our stories for some unknown future date. These stories are for NOW.

One simple thing you can do to make your family's history exponentially more powerful.

I realized that although I’ve been actively recording my family’s story, I haven’t been as active about instilling our stories in my children’s hearts.

It’s a critical but I think often missing piece of the puzzle.

Our stories bind together the past and present, give a glimpse of the soul, and help our children master the art of listening. {What Children Gain When You Open Up}

Bruce Feiler, author of The Secrets of Happy Families, asserts that “knowing more about family history is the single biggest predictor of a child’s emotional well-being.”

One simple thing you can do to make your family's history exponentially more powerful.

3 People Whose Stories Your Children Deserve to Know 

1. Yours.

Have you told your children what school was like before the Internet? Do they know what you wanted to be when you grew up—when you were their age? Do they know how you and your husband met?

I think as parents—and especially mothers—we sometimes let our stories fade deeply into the background as we help our children live out their own. But letting them know us can help deepen our relationships.

2. Your parents, grandparents, and great-grandparents.

When I think about my grandparents, I long for my children to know them. They can’t, but through me, they can know so much.

3. Their own. 

Have you ever noticed how a young child, even one who barely knows how to talk, will latch onto a story from their life and tell it over and over? There’s something to that.

By reminding them about hard things they’ve done or times when they’ve showed kindness, we can reinforce the character traits we hope they’ll take into adulthood.

One simple thing you can do to make your family's history exponentially more powerful.

Which brings me to…

The Very Best Kinds of Stories 

The best stories show children that members of their family have overcome hard things (job losses, financial troubles, health challenges, etc.), and that by extension, they can too.

I left the Roots Tech conference with a fire in me, a determination to find and share family stories with my children and relatives—not for some far-off day, but now.

If you, like me, have every wondered how to find your place in the whole spectrum of family history, I hope you’ll take this impactful step with me.

Our stories connect us.

An Action Plan for Nailing Down Your Family Vision This Year

Monday, February 15, 2016

Nailing Down Your Family Vision

“Smart parents give their children a million answers. Wise parents ask their children a million questions.” Glennon Doyle Melton

“Quit kicking each other! Hands and feet to yourself! Do I need to sit in between you two?”

Things you never imagined yourself saying while sitting on a church pew.

Until you had kids.

Sometimes at night I lie in the warmth of my bed and feel my thoughts creep up on me with a tightening grip.

They should know better than to act like that during church… 

We should have given our reminder speech in the car on the way over. 

We really, like really, need to teach our oldest to tie his shoes. 

We have so many words to learn before the spelling bee next week. 

Why didn’t Trenton stick up for his brother yesterday while playing with the neighbors? I need to talk to him about that. 

Nailing Down Your Family Vision This Year

I used to let these thoughts pull me further and further down a no-good path to nowhere. (And to be honest, sometimes I still do.) But over the years I’ve slowly become better at setting them aside and trusting in myself as a person and a parent.

When the parenting overwhelm and the negative self-talk start to encroach, I repeat some powerful words in my head: our family’s purpose statement.

The simple lines that comprise our family purpose statement remind me that I’m giving my kids the childhood, the self-confidence, and the values that I’ve always wanted to give them.

I may be terrible at remembering to schedule my kids’ pediatrician visits or teaching them to tie their shoes, but my husband and I are great at doing the few things that deeply matter to us.

That’s enough for me.

If you too would like a little more peace in your parenting, a little more confidence that despite your shortcomings, you’re on the right track, here are four steps to nail down your family vision this year—in the form of a family purpose statement.

4 steps to nailing down a family vision that represents your core values in 2016!

1. Gather your people in an environment that usually produces good conversation for you. 

Maybe you’ve noticed that conversation flows comfortably for your family while you’re hiking or while you’re gathered around a campfire or when you’re just piled onto the couch with a good dessert in your hands. Wherever it is, talk there. 

2. Ask one pivotal question: “What do we value? What matters to us?”

As a family, write down every answer you come up with.

3. Take some time to narrow it down to the values that are core to your family.

This is a part of the process that can’t be rushed. Time equals clarity. As you let your ideas ruminate in the back of your mind, I bet you’ll find certain tenants rise to the surface. Those will become your family purpose statement.

4. Let go of the idea of perfection.

You don’t have to get it right all at once. This doesn’t have to be the exact family purpose statement that you’ll have engraved on a coat of arms and pass on to your great-great-great-grandkids. Just use it as a roadmap for the time being, and be open to modifying it in the future if needed. If people can change, so can a family purpose statement. 🙂

—

All that’s left is to memorize your family’s statement and repeat it to yourself at night in bed, when those nagging insecurities creep up on you.

You’ve pinned down what matters to you—your family’s “why”—and you’re doing your best to live it.

That can be enough. 


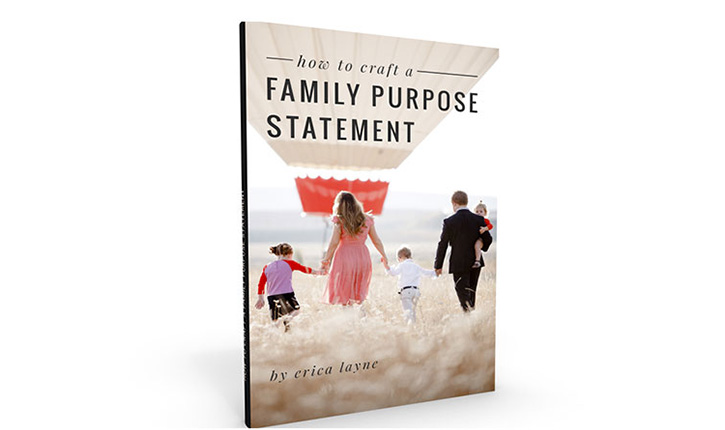
If you’d like more information, motivation, and inspiration—including examples from some awesome families—check out my ebook on Amazon (temporarily on sale for 99 cents!):

ebook - How to Craft a Family Purpose Statement

How to Craft a Family Purpose Statement: A Guide to Discovering the “Why” of Your Family and Building an Identity that Will Stay with Your Children Forever

Post photos from the beautiful and talented, Bay-area lifestyle photographer: Jen J Photo

Easy Applesauce Muffins

Sunday, February 14, 2016

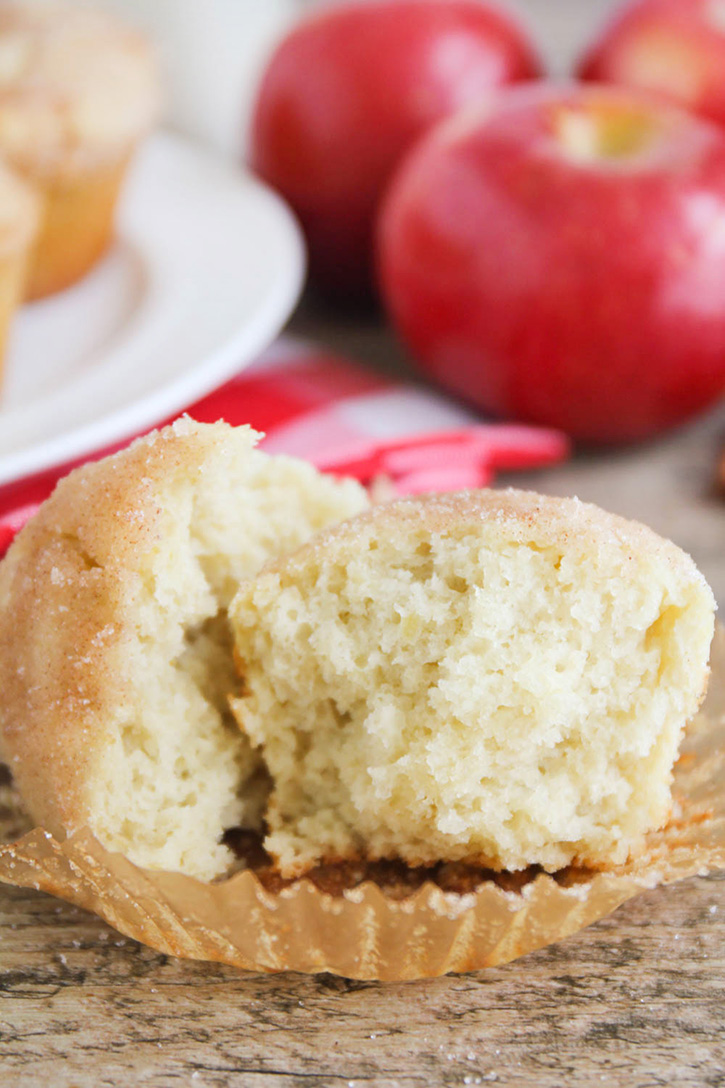
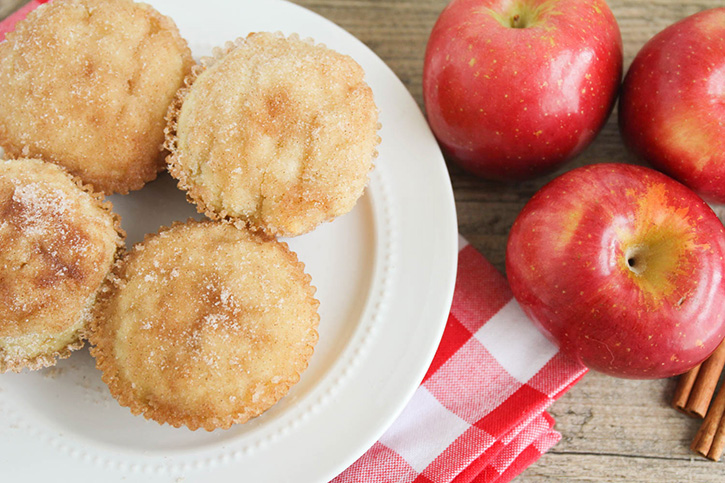
These applesauce muffins are a go-to snack in our family. My kids love it when a fresh batch of these are waiting for them after school. They’re easy to make, but that cinnamon sugar topping makes them hard to resist!

These applesauce muffins are a go-to snack in our family. My kids love it when a fresh batch of these are waiting for them after school. They’re easy to make, but that cinnamon sugar topping makes them hard to resist!

My mom used to make these delicious muffins for us when we were young and my kiddos love them just as much as I always have. When I was learning to bake, these were one of the first few recipes I mastered and I would make them often.

These applesauce muffins are a go-to snack in our family. My kids love it when a fresh batch of these are waiting for them after school. They’re easy to make, but that cinnamon sugar topping makes them hard to resist!

I love making them for my own kids now and every time I make a batch or eat one, they take me right back to my childhood.

These applesauce muffins are a go-to snack in our family. My kids love it when a fresh batch of these are waiting for them after school. They’re easy to make, but that cinnamon sugar topping makes them hard to resist!

One of the really great things about these muffins is that you can make them with ingredients you have on hand. I always keep a jar of applesauce in my pantry so I can make these muffins on a whim.

These applesauce muffins are a go-to snack in our family. My kids love it when a fresh batch of these are waiting for them after school. They’re easy to make, but that cinnamon sugar topping makes them hard to resist!

Muffins are one of my go-to after school snacks. All the kids love them and they’re perfect for filling them up between the end of the school day and dinner.

Not only do these applesauce muffins make a great after school snack, they also freeze well. I typically freeze them without the topping and add it after the muffins are defrosted.

Directions

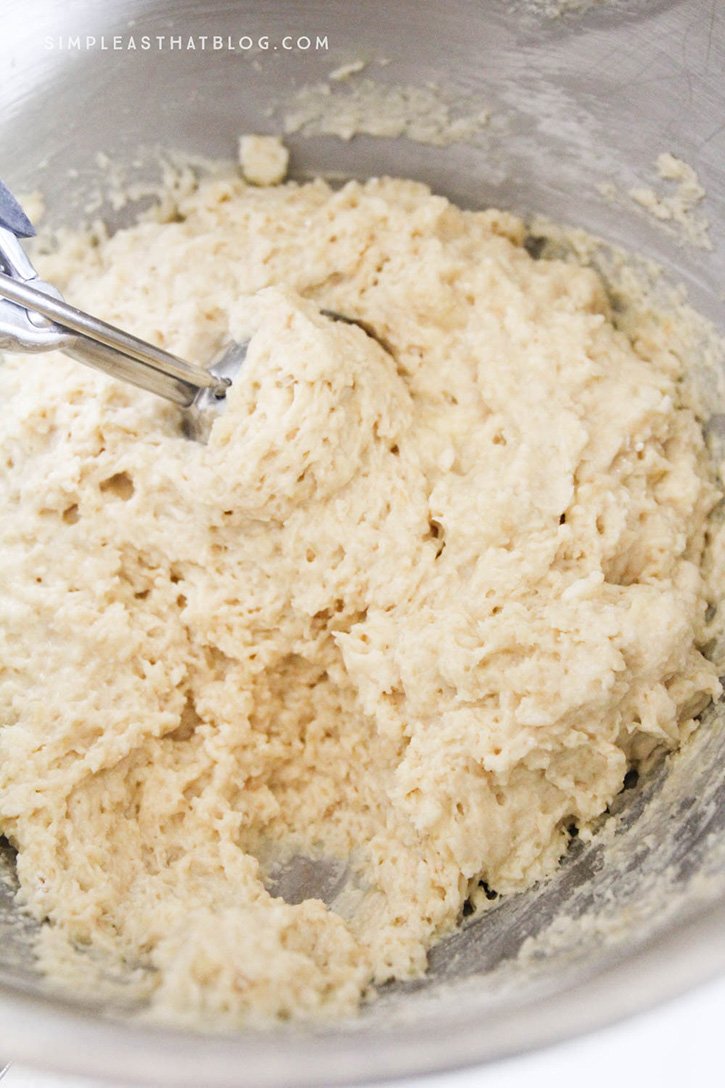
Cream butter and sugar. Beat in eggs one at a time until fluffy. Add applesauce and mix. Sift in dry ingredients.

These applesauce muffins are a go-to snack in our family. My kids love it when a fresh batch of these are waiting for them after school. They’re easy to make, but that cinnamon sugar topping makes them hard to resist!

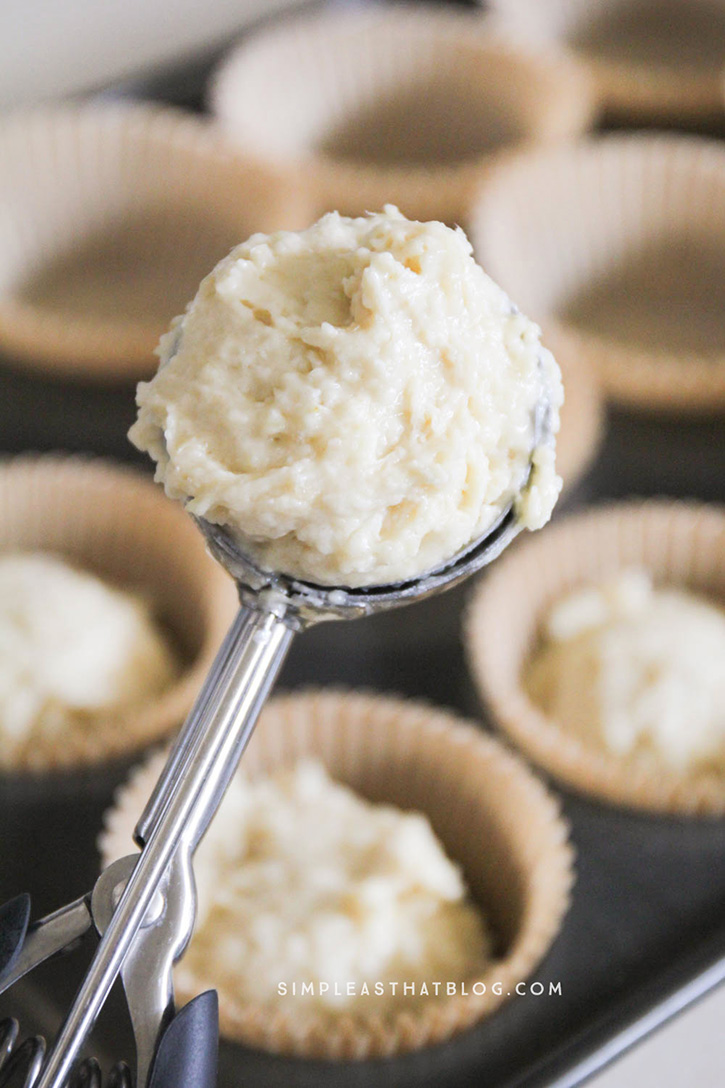
My secret for getting evenly cooked, perfectly shaped muffins every time is my trusty 2 oz Vollrath scoop.

I have several of their scoops and they’ve lasted for YEARS! I absolutely love them, they’re one of my most used kitchen gadgets!

These applesauce muffins are a go-to snack in our family. My kids love it when a fresh batch of these are waiting for them after school. They’re easy to make, but that cinnamon sugar topping makes them hard to resist!

Place in muffin tins and bake at 350 F until golden.

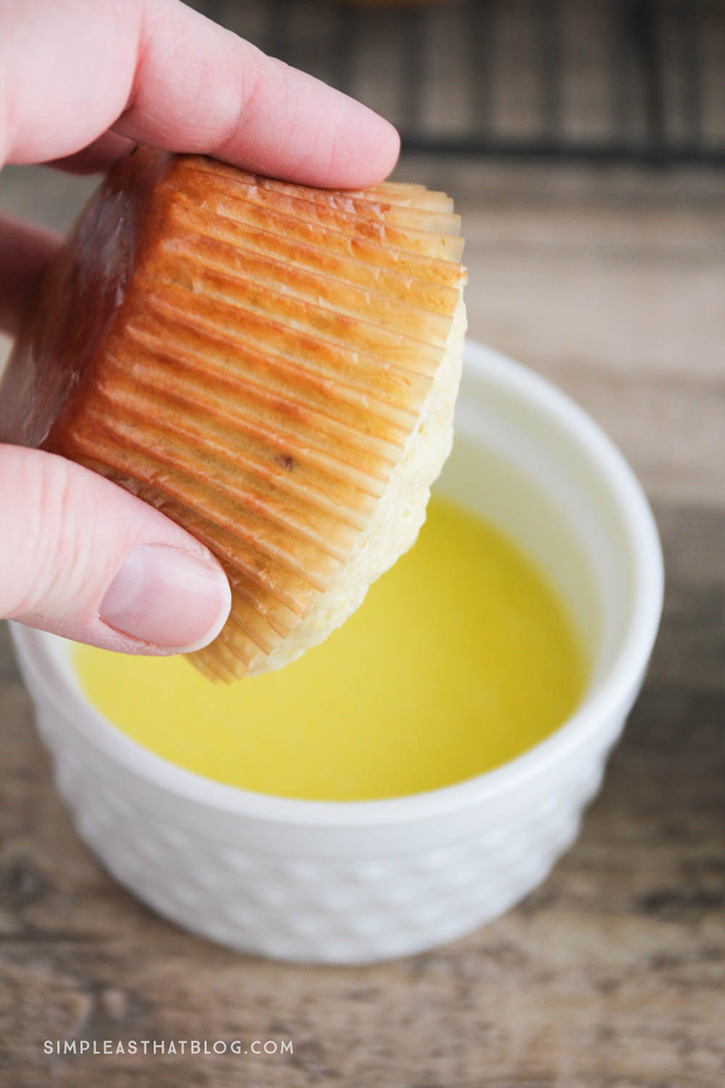
These applesauce muffins are a go-to snack in our family. My kids love it when a fresh batch of these are waiting for them after school. They’re easy to make, but that cinnamon sugar topping makes them hard to resist!While the muffins are still warm dip in melted butter and then in cinnamon sugar mixture.

These applesauce muffins are a go-to snack in our family. My kids love it when a fresh batch of these are waiting for them after school. They’re easy to make, but that cinnamon sugar topping makes them hard to resist!

4.7 from 6 reviews
Easy Applesauce Muffins
 
Print
Ingredients
  • ½ cup butter
  • ½ cup sugar
  • 2 eggs
  • ¾ cups Mott’s Natural Applesauce
  • 1 ¾ cups flour
  • 1 tbsp baking powder
  • ½ tsp Salt
  • Topping:
  • ¼ cup butter, melted
  • ½ cup sugar
  • ¼ tsp cinnamon
Instructions
  1. Cream butter and sugar.
  2. Beat in eggs one at a time until fluffy.
  3. Add applesauce and mix.
  4. Sift in dry ingredients.
  5. Place in muffin tins and bake at 350 F for 12-18 min, or until golden.
  6. While the muffins are still warm dip in melted butter and then in cinnamon sugar mixture.
3.4.3177


Dinosaur Food Art

Friday, February 12, 2016

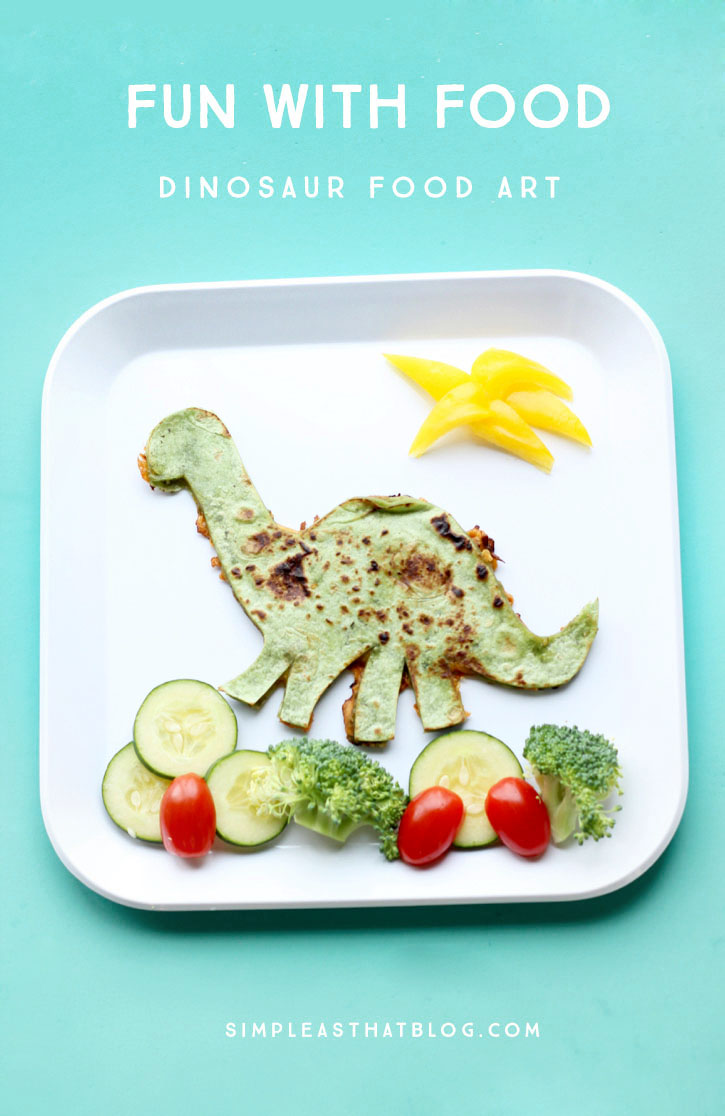
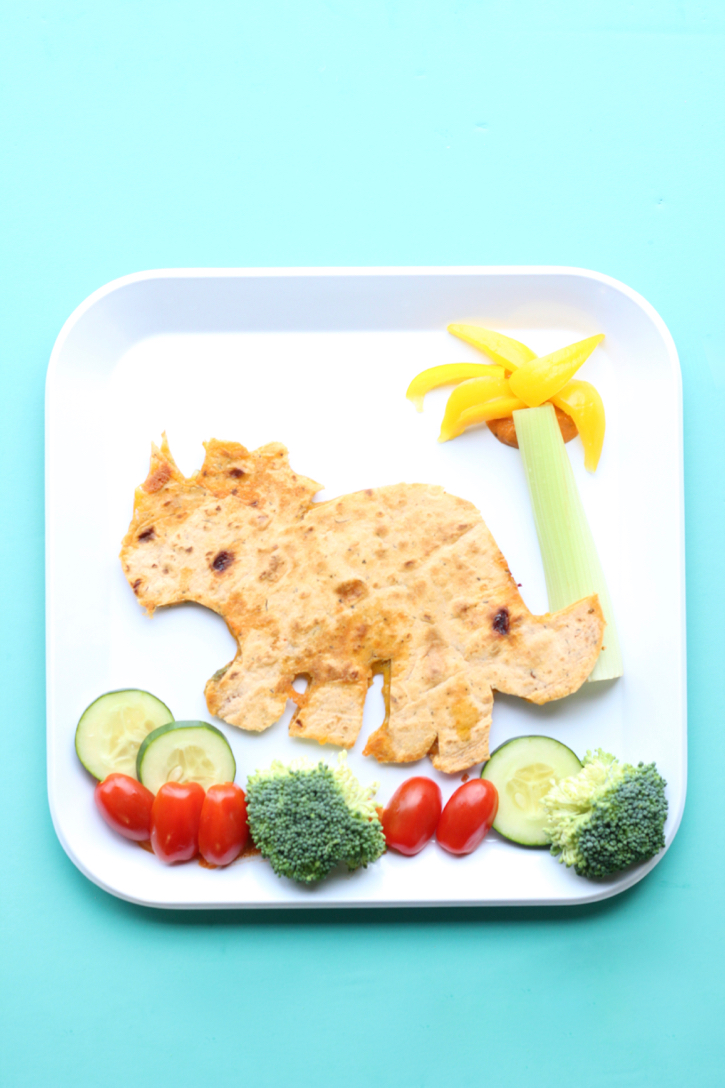
Dinosaur Food Art – this is a simple and fun way to make lunch exciting for your little dinosaur lover!

Make lunch a little extra exciting for your little dinosaur lover with this simple dino food art!


Hey there! My name is Carisa from Messes to Memories and I’m excited to be sharing some cute food art ideas in a new Fun With Food Series here on Simple As That. I am a huge fan of making learning fun so we incorporate simple food art projects into our lessons at home as often as we can!

My kids get so excited about fun food, they will eat almost anything. This is a great way to get kids to eat some delicious fruits and vegetables. In my experience, when you’re making food art, your kids will listen to everything that you say. It’s pretty great!

Make lunch a little extra exciting for your little dinosaur lover with this simple dino food art!

Supplies

Tortillas

Cheese

Assorted Veggies -Broccoli, Cucumbers, Cherry Tomatoes, Bell Peppers, Celery

Dip

Instructions

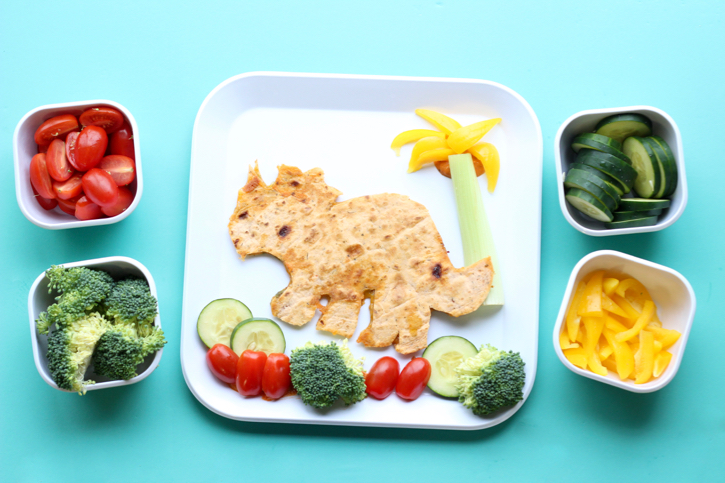
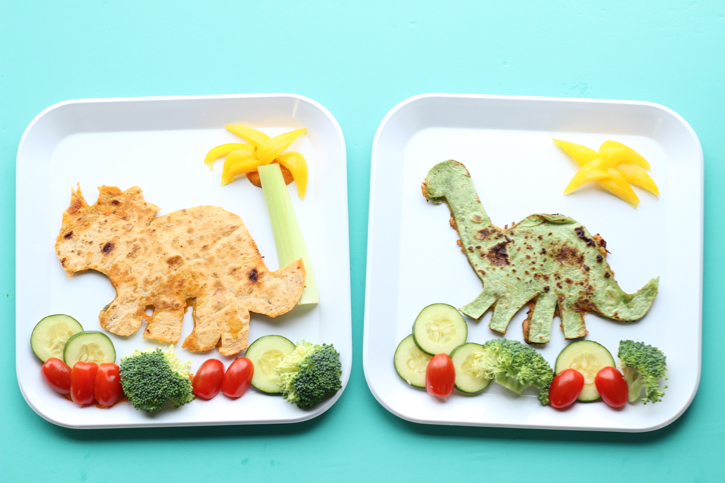
These dinosaur quesadillas are super easy. All you need to do is put one tortilla in a hot pan, top with cheese and stack another tortilla on top. Cook evenly on both sides. When the cheese is melted, remove from pan and use a sharp knife to cut out your dinosaur shape. We cut out a Triceratops and a Brontosaurus.

Make lunch a little extra exciting for your little dinosaur lover with this simple dino food art!

We had a bunch of vegetables all cut up and a little dip. I spread some dip on the bottom of the plate and then let the kids make their own rocks, volcanoes, bushes, trees and whatnot with the veggies!

Make lunch a little extra exciting for your little dinosaur lover with this simple dino food art!

If kids want to play with veggies before they eat them, I am completely on board with that. Stay tuned for more simple, kid-friendly food ideas coming in the Fun with Food series!

How to Make Time for What Matters Most

Wednesday, February 10, 2016

“Look at these pretty flowers, Mama!”

We had pulled over on the side of the road just to honor her request to explore a field of wildflowers.

The flowers were everywhere—a common weed, really—but she was mesmorized.

She is the child who is forever collecting flowers, sticks and leaves on our walks and hikes. We often have to limit her “treasures” or our backpacks would be full to overflowing. On our most recent hike, she hid rocks in her boots so she could get them home without us noticing. 

If one of your goals this year is to devote more time to the parts of your life that you most want to nurture, then here are five ways to achieve that!She’s delighted by the smallest things, and when I let myself catch her zest for living, I’m immediately brought back to what matters most to me.

Except too often I find myself distracted, unable to dwell in the moment with her and really see that flower through her eyes.

Even though I know these are the exact moments I want to treasure, it’s so easy to hustle them along, to not see them as important.

I want to change that.

If one of your goals this year is to devote more time to the parts of your life that you most want to nurture, then here are five ways to help you follow through.

If one of your goals this year is to devote more time to the parts of your life that you most want to nurture, then here are five ways to achieve that!

How to Make Time for What Matters Most

1. Identify what matters to you. 

It may be the most obvious step, but it’s also the most essential. You can’t make time for the good stuff if you aren’t crystal clear on what the good stuff is. What matters to you? A satisfying career, a life full of creativity, your faith in a higher power, the people who surround you?

You may consider writing a personal or family purpose statement to help you pin your core values down.

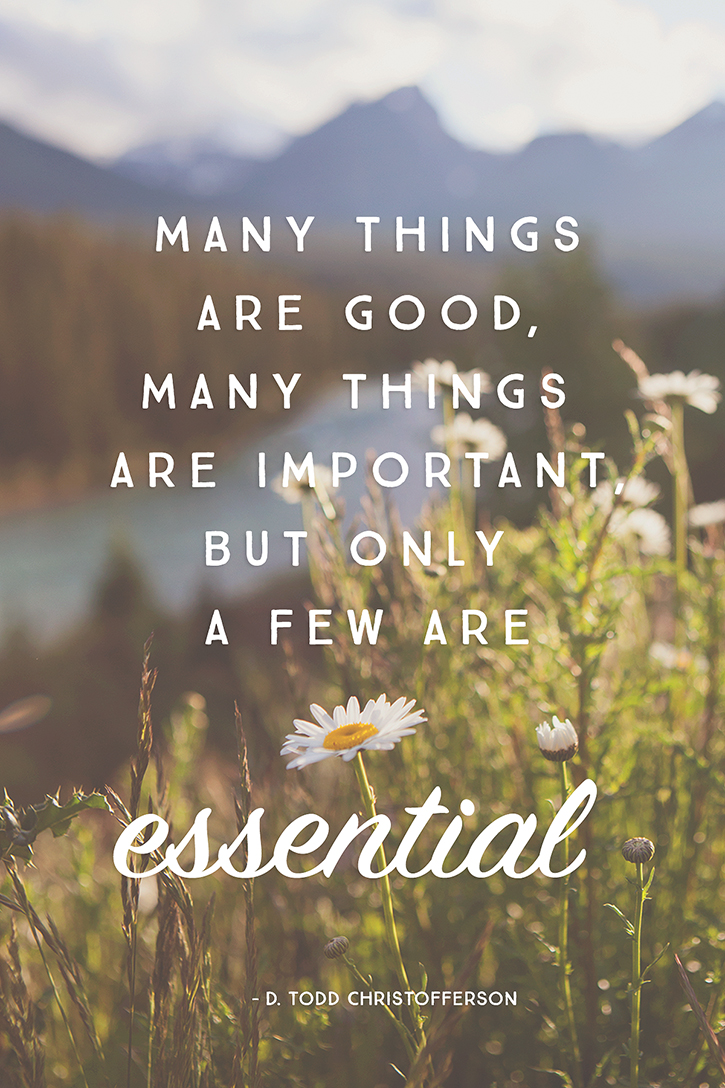
Knowing your core is essential to creating a life that reflects it.

2. Follow the rule of three.

Productivity expert and author of The Productivity Project, Chris Bailey says that our brains are conditioned to remember things in threes. At the start of each week (or every day if you’re ambitious), write down your top priorities for the week. Make sure they line up with your values, and then keep coming back to them all week long.

If one of your goals this year is to devote more time to the parts of your life that you most want to nurture, then here are five ways to achieve that!

3. Identify and re-think low-value tasks.

Look at your typical to-do list and think about which tasks aren’t contributing to the work and values that really matter to you. Consider any tasks that can be delegated, automated, overhauled, or dropped.

For example, could you make some room in the budget for a meal delivery service (like Blue Apron or Munchery)? Could your kids get by with fewer baths? Could you automate more bill payments?

If one of your goals this year is to devote more time to the parts of your life that you most want to nurture, then here are five ways to achieve that!

4. Utilize the fringe hours.

Jessica Turner, author of The Fringe Hours, encourages women to take pockets of time they already have and use them for the things that really matter to them.

For instance, before your brain is whirling with the minutia of a normal day (shuttling the kids, making it to work on time, picking up the dry cleaning…), could you take 30 minutes to yourself while the house is quiet?

Other pockets of time include your child’s quiet time or a solo outing on the weekend while your spouse holds down the fort. Even a commute or a carpool line can be made more meaningful by listening to podcasts or books on a subject you care about.

Isn't "less but better" the perfect goal for 2016? Here are 5 ways to help you get closer to living the life you really want—this year and every year!

5. Consciously let something go for a season.

Freeing space in my life often helps me see my priorities more clearly. Busyness tends to blur the line between what is important and what really isn’t. For ideas, check out this post on 12 Things to Edit from Your Life for a season.

If one of your goals this year is to devote more time to the parts of your life that you most want to nurture, then here are five ways to achieve that!


I love a quote from Jonathan Winters: “If your ship doesn’t come in, swim out to it.” 

That’s exactly how I see living a life that is full of purpose. That kind of life doesn’t often fall into our laps. It’s something we have to work for. I hope these ideas help you make strides toward living the life you really want this year!

Sweet Heart Lavender Sachets

Sunday, February 7, 2016

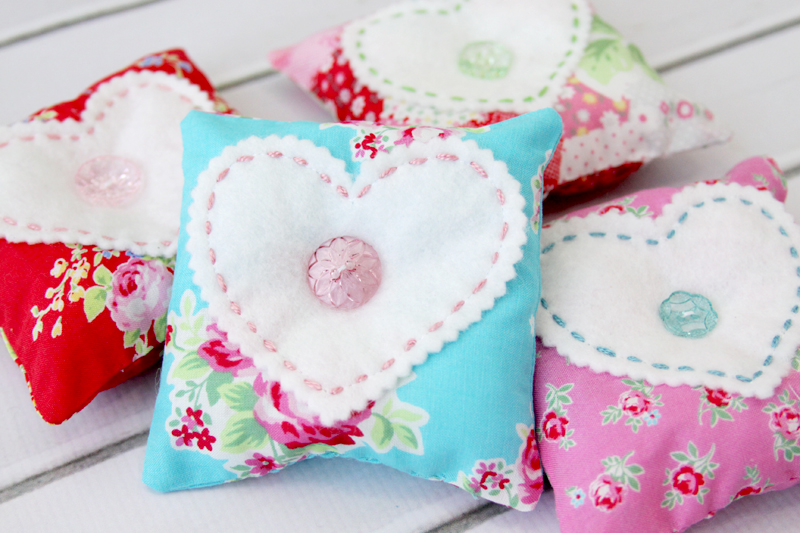
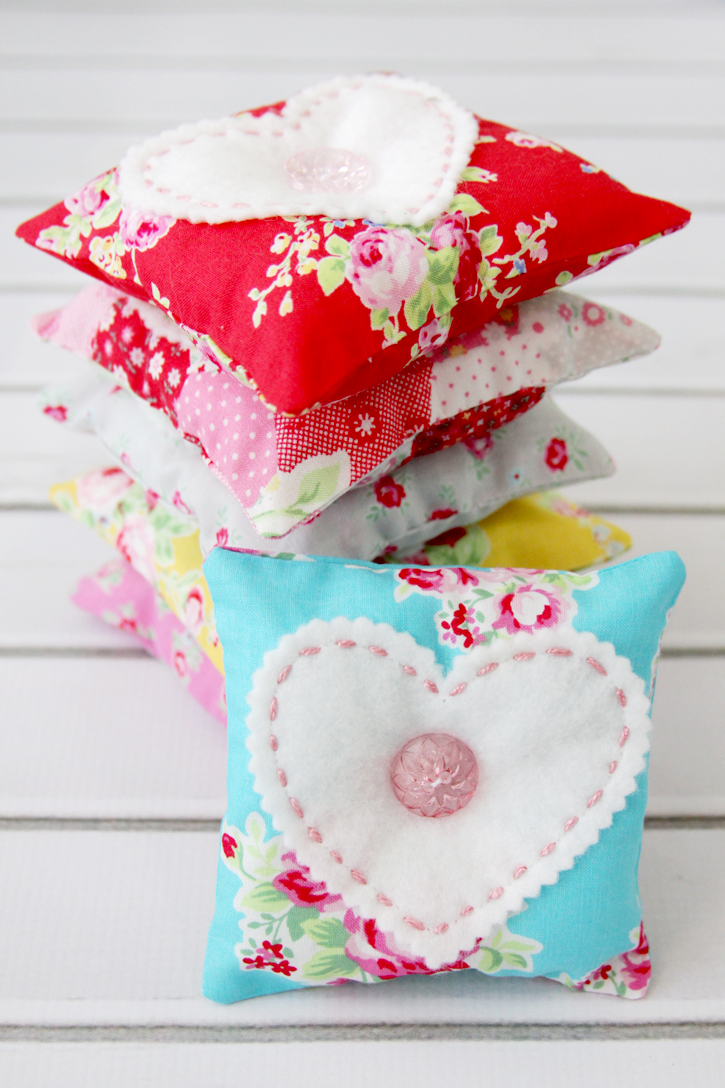
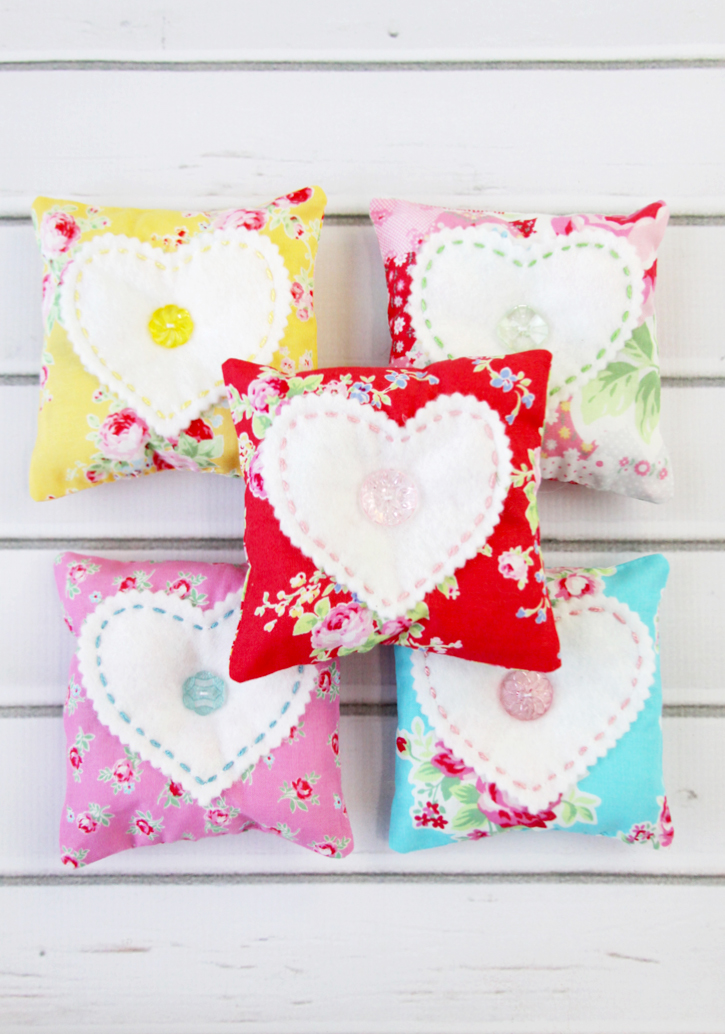
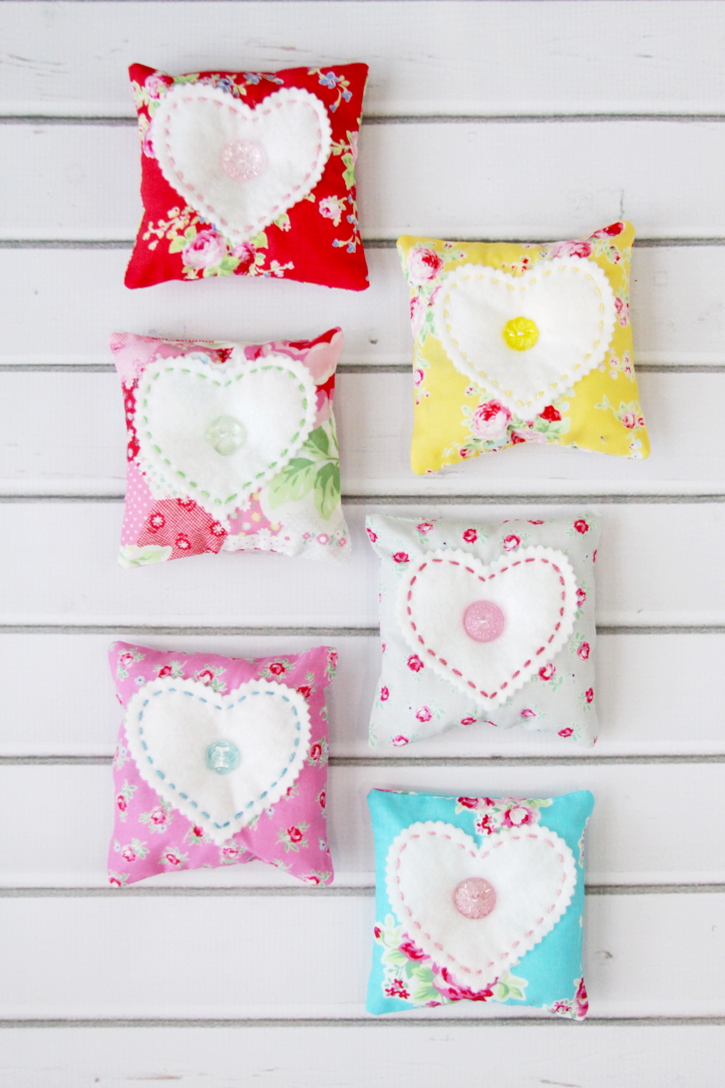
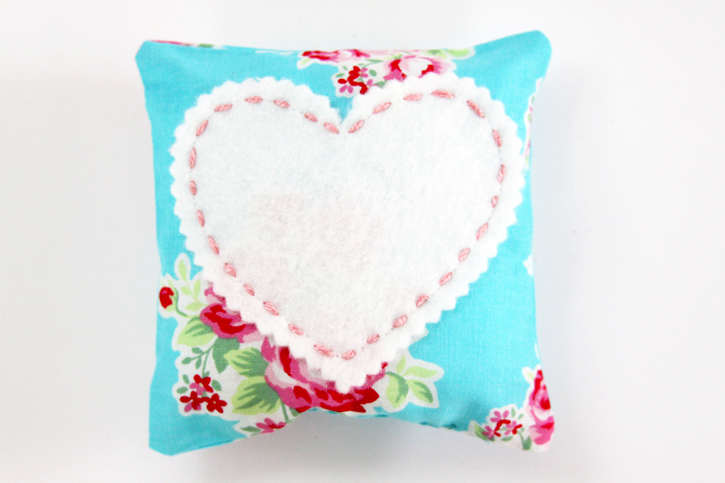
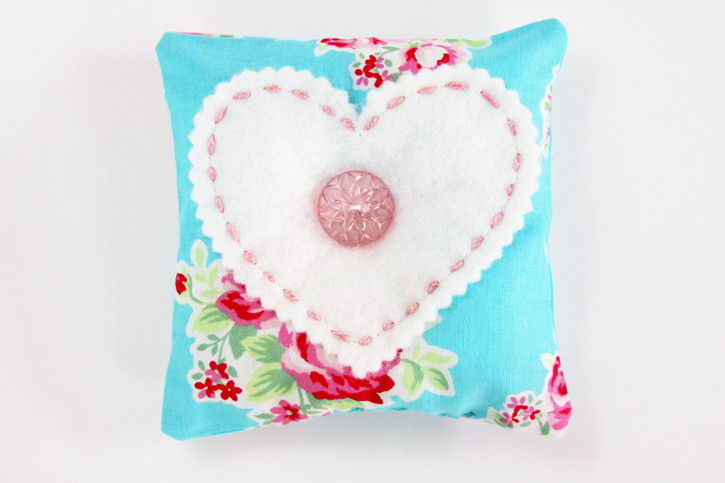
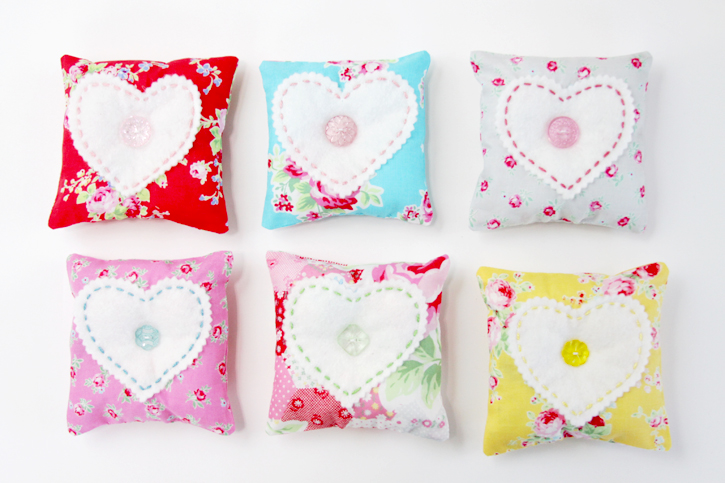
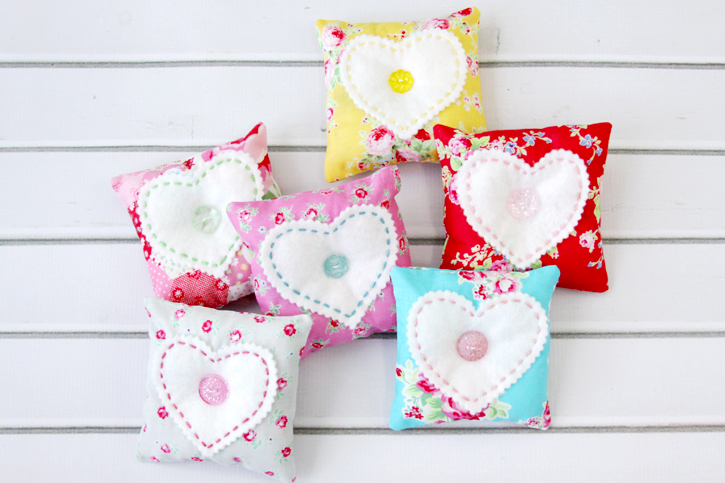
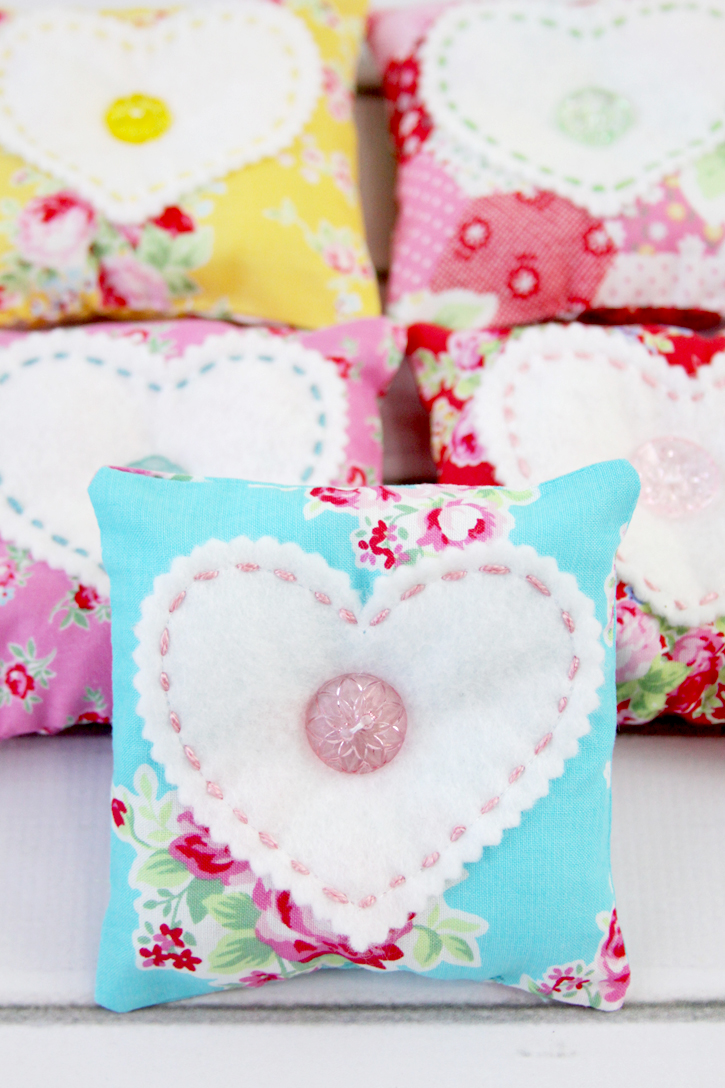
These sweet Heart Lavender Sachets make such fun gifts and they are so simple to sew up that you can make up a bunch at a time!

Hello Simple as That readers! I am so excited to be a part of the SAT Contributor team this year! My name is Bev and I blog over at Flamingo Toes.

These sweet Heart Lavender Sachets make such fun gifts and they are so simple to sew up that you can make up a bunch at a time!

Valentine’s Day is just around the corner and I love making little gifts for friends that are perfect for the holiday, but can be used any time of year too! These sweet Heart Lavender Sachets make such fun gifts and they are so quick to sew up that you can make up a bunch at a time. Perfect for holidays, or just to have on hand any time you need a little something to brighten someone’s day!

These sweet Heart Lavender Sachets make such fun gifts and they are so simple to sew up that you can make up a bunch at a time!

The lavender in these is so nice and fresh, they work great for adding to linen cabinets or dressers. If you don’t like lavender it’s super easy to change up the scent – just add dried rose petals or even some loose leaf tea in a fragrance you like.

These sweet Heart Lavender Sachets make such fun gifts and they are so simple to sew up that you can make up a bunch at a time!

How to make these Fabric and Felt Heart Lavender Sachets:

Materials:(Per Sachet)

  • 11″ x 5 1/2″ piece of fabric
  • 4″ piece of felt
  • Embroidery Floss to coordinate with fabric
  • Button
  • Fiberfill
  • 1 Tbsp Lavender
  • Pinking Shears, Embroidery Needle

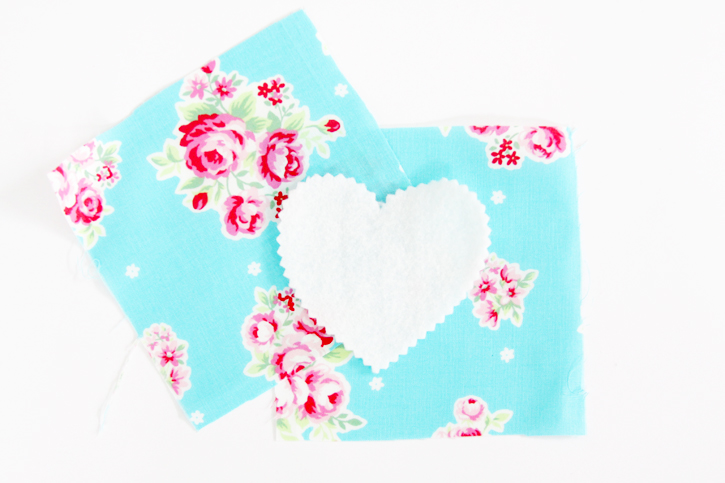
Cut your fabric into two 5 1/2″ squares. Cut a heart out of your 4″ piece of felt. Cut around your heart with pinking shears. This adds a cute edging but if you don’t have pinking shears, feel free to leave the edges straight.

Fabric and Felt for Sachets

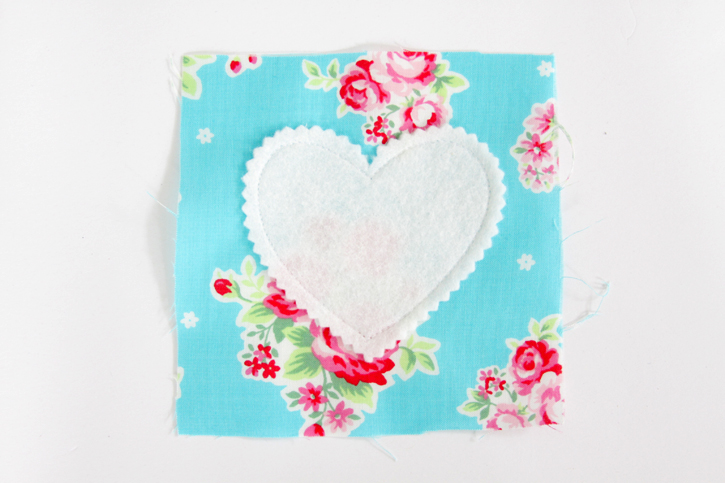
Center your heart on the right side of one of the fabric squares. Sew the heart to the fabric by stitching around the heart, 1/4″ from the edge of the heart.

Felt Sewn on Fabric Sachet

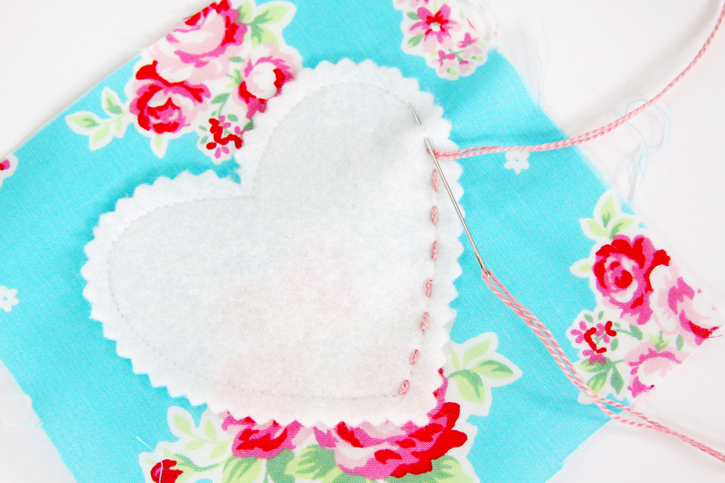
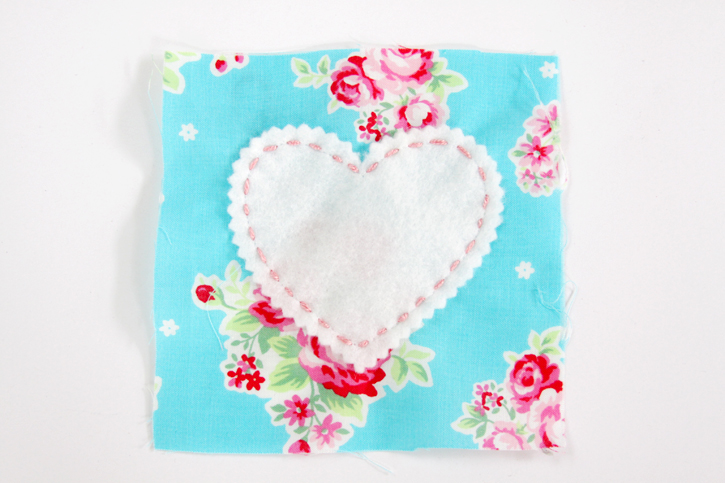
Cut a length of embroidery floss. I used pearl cotton but you can use regular floss too. Sew a running stitch over your machine stitching on the heart. A running stitch is super easy, just bring the needle in and out of the fabric, keeping the stitches the same length.

Running Stitch on Heart

Now you have a pretty stitched heart!

Embroidery Stitching on Heart

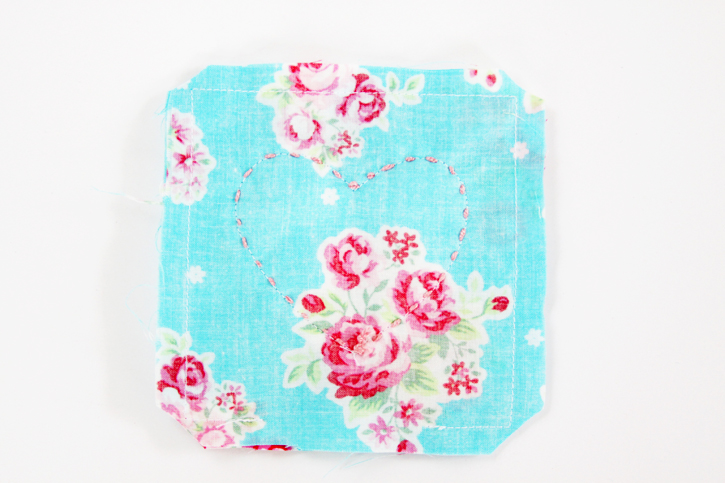
Place your fabric squares right sides together. Sew around the four sides, leaving an opening in the bottom about 2″ wide. Trim off each corner of the square.

Sew Front and Back of Sachet Together

Turn the fabric right side out and press. If you are using wool felt, you can press the felt. If you are using regular polyester felt, place a cloth over the heart so it won’t get singed.

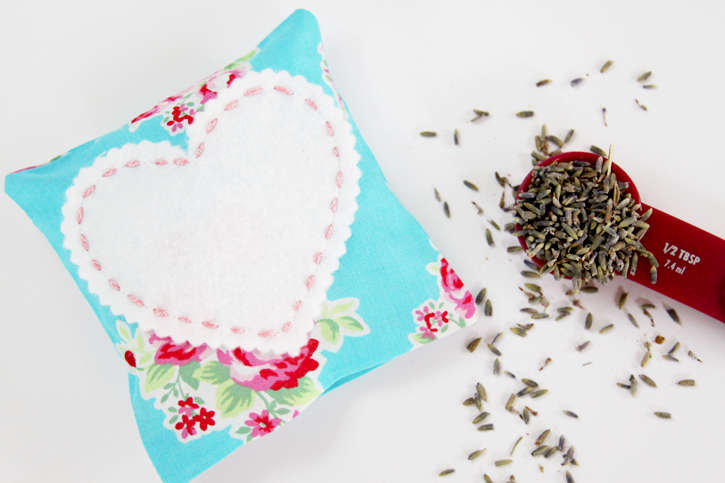
Begin stuffing your heart. Add enough to reach the halfway point in the sachet. Spoon in 1 Tbsp of lavender.

Lavender in Sachet

Finish stuffing the heart. You want it lightly stuffed, not completely full. Sew the opening of sachet closed by hand.

Pretty Fabric and Felt Sachet

Place a button in the center of the heart and sew the button in place. Keep your stitches on the back of the heart in the very center so they make a tufted look – this will keep the back looking nice too!

Vintage Style Button on Sachet

That’s it – now you can go crazy and make lots more!

Fabric and Felt Heart Sachets

I hope you have a lot of fun with these!

Cute Fabric Sachets

Sweetheart Fabric Lavender Sachets

Black Forest Overnight Oats

Wednesday, February 3, 2016

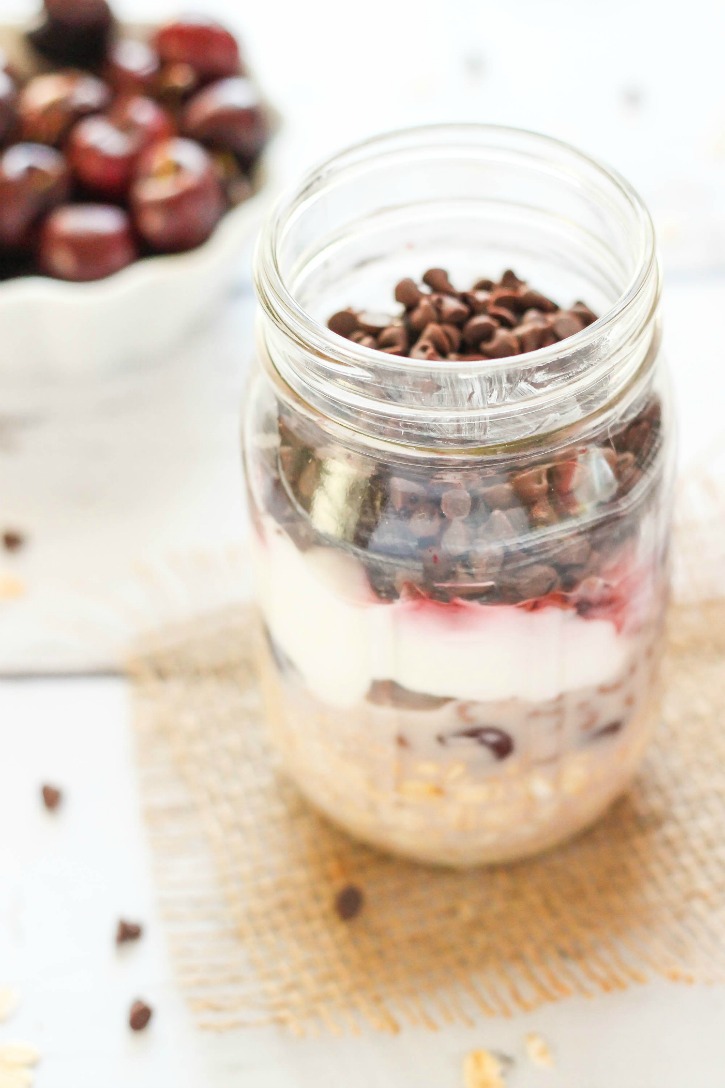
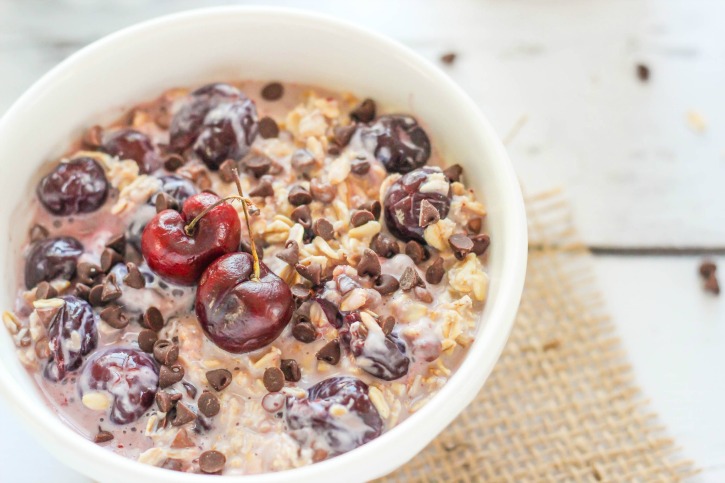
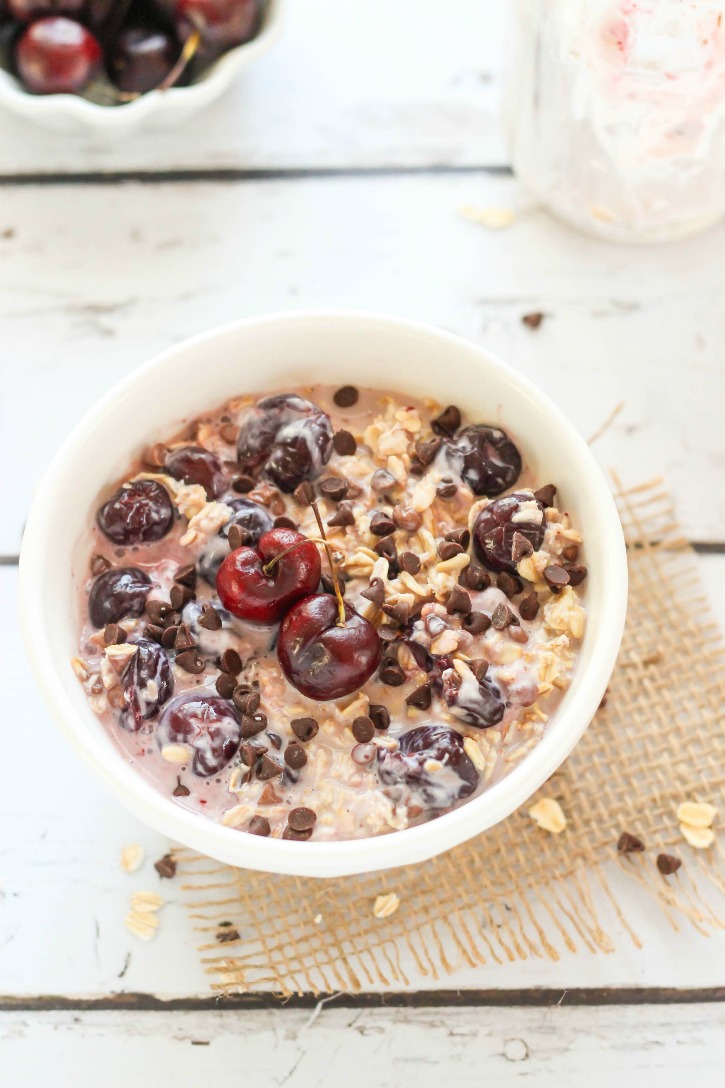
Black Forest Overnight Oats – a delicious blend of cherries and chocolate that make this cold oatmeal recipe a breakfast treat.  Made the night before in the refrigerator and ready to eat on the go! 

Black Forest Overnight Oats - a delicious blend of cherries and chocolate that make this cold oatmeal recipe a breakfast treat.  Just grab-and-go!

Hello there!  It’s Katie from The Casual Craftlete blog.  I am excited to share my first recipe post of 2016 on Simple As That.  Today I am sharing a very simple and easy recipe for Black Forest Overnight Oats.  Black Forest is a combination of cherries and chocolate and it’s one of my absolute favorite flavors.  I am a big fan of oatmeal recipes because they are heart healthy, keep you full for hours, and very inexpensive.

Black Forest Overnight Oats - a delicious blend of cherries and chocolate that make this cold oatmeal recipe a breakfast treat.  Just grab-and-go!

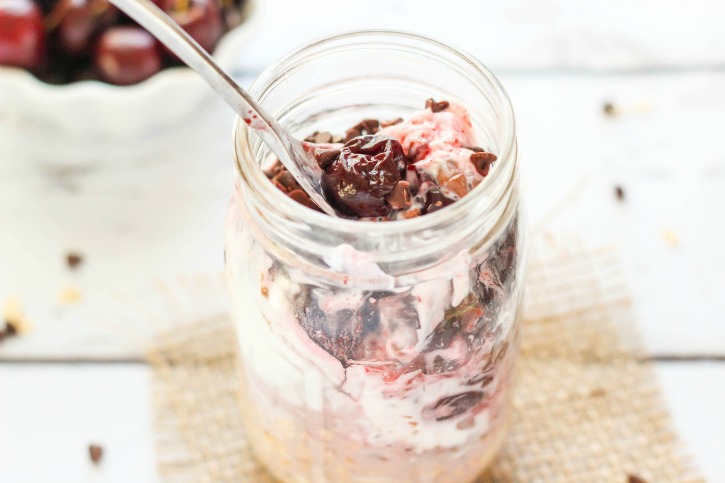
This overnight oatmeal recipe is made the night before by layering basic smoothie-type ingredients and oats in a jar.  The oats soften overnight making a ready to eat breakfast in the morning.  It’s basically a way of making oatmeal without having to cook the oats.  If you have never tried overnight oats you might think it’s crazy to eat cold oats, but they are actually delicious.  I scarfed down this jar in a matter of minutes because it was that good.

Black Forest Overnight Oats - a delicious blend of cherries and chocolate that make this cold oatmeal recipe a breakfast treat.  Just grab-and-go!

I like to use frozen cherries for this overnight oats recipe.  They are already pitted and thaw out in the refrigerator.  Also, I add lots and lots of mini chocolate chips because they are delicious and go so well with the dark cherries.  In between the layers of cherries and chocolate are low-fat Greek yogurt, milk and rolled oats.

I make this Black Forest Overnight Oats in a mason jar with a lid.  The next morning when I am in a hurry, I can just grab the jar and head out the door.  Or, you can pour the overnight oats into a bowl and enjoy.  Either way you are still getting the delicious flavors and a hearty breakfast.

Black Forest Overnight Oats - a delicious blend of cherries and chocolate that make this cold oatmeal recipe a breakfast treat.  Just grab-and-go!

Black Forest Overnight Oats
 
Print
Recipe type: Breakfast
Serves: 1
Ingredients
  • ½ cup rolled oats
  • ½ cup low-fat milk
  • ¼ cup low-fat plain Greek yogurt
  • ½ cup frozen cherries, pitted
  • ¼ cup mini chocolate chips
Instructions
  1. Add oats to the bottom of a glass mason or container of your choice and pour in milk. Alternate between layers of cherries, yogurt, and chocolate chips. Seal container with lid and place in refrigerator overnight. Enjoy in the morning.
3.4.3177

Thank you for letting me share my Black Forest Overnight Oats recipe!  I hope you enjoy it.

If you liked this recipe, you should check out my blog, The Casual Craftlete, for more recipe and craft ideas!

DIY Instax Photo Display

Tuesday, February 2, 2016

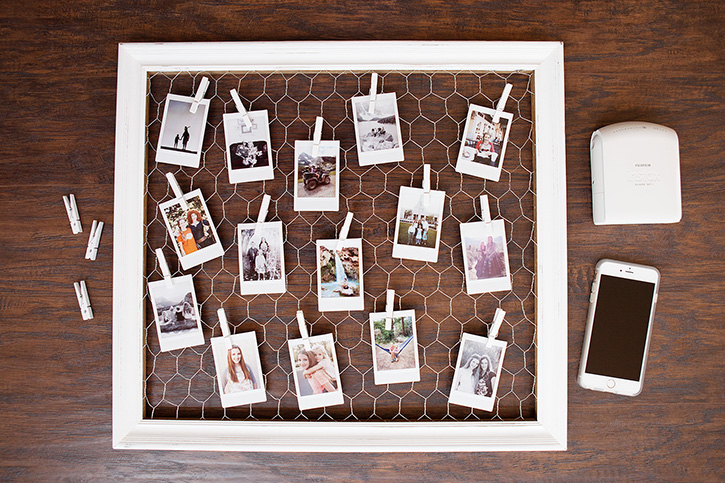
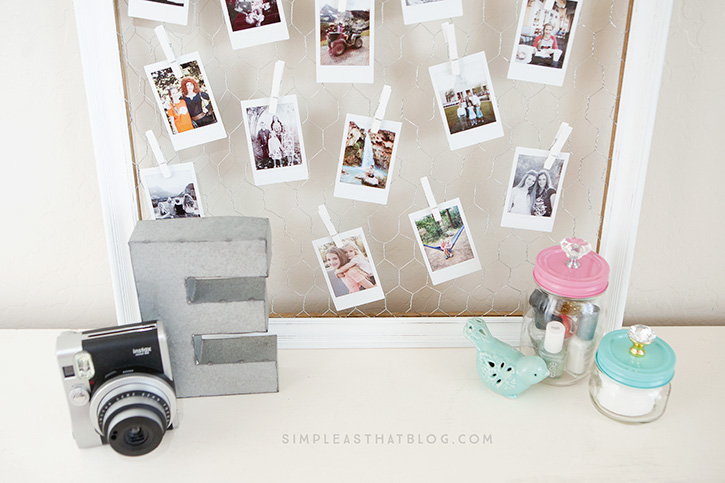
Easy DIY Instax Photo Display – create a unique, personalized display of instax photos sure to brighten up any tween or teenagers space!

Create a unique, personalized display of instax photos sure to brighten up any tween or teenagers space.

I still can’t believe I’m the mom of a teenager! My oldest daughter is 13 and entering into these teenage years is all new territory for us but so far so good! It’s been fun to work on a few projects with my daughter lately, one of them being this simple Instax photo display.

Create a unique, personalized display of instax photos sure to brighten up any tween or teenagers space.

This is a project we’ve been wanting to do since she got her cute Instax camera for her birthday. These fun little prints are snapshots of her life and she loves having them on display.

Create a unique, personalized display of instax photos sure to brighten up any tween or teenagers space.

Supplies

Wire frame

Mini clothes pins

Tin Monogram

Fancy Mason Jar Lids

Instax Mini 90 Camera

Instax Share Smartphone Printer

We used a combination of photos taken with the Instax Mini 90 Camera and photos printed from our smartphones using the Instax Share Smartphone Printer. This little printer is SO fun! You can turn any of your photos into cute insta-prints!

Create a unique, personalized display of instax photos sure to brighten up any tween or teenagers space.

We used a ready made frame from Make Market™ line that was filled with chicken wire, perfect for attaching photos to. We decided to paint the frame with white chalkboard paint. Then all we did was attach our photos using mini clothespins. We added a fun monogram and found those darling mason jar lids with fancy knobs on them to add a little more to the display on her dresser.

Create a unique, personalized display of instax photos sure to brighten up any tween or teenagers space.

The best part about crafting is putting your own spin on a project. Whether it’s decorating with marquee lights or crafting an initial that represents your family name, Michaels has made it easy with their new Alphabet Soup by Make Market™ line of products.

This collection of surfaces, letters, frames and more come in modern, eclectic or rustic styles. From natural and finished woods, to a variety of metals, resin and patterned styles, the possibilities are endless.

If you don’t know where to begin, you can always take a look at some of the fun projects on Michaels.com or the other 49 Makers’ ideas on The Glue String for to see how they personalized their crafts!

An InLinkz Link-up


Create a unique, personalized display of instax photos sure to brighten up any tween or teenagers space.

« Previous Page
Next Page »

Primary Sidebar

Rebecca Cooper — Founder, Simple as That Blog

Hello, I'm Rebecca. Welcome to my blog, Simple as That. Come along as we embrace simplicity in crafting, photography, travel, and family life. Read more about me.

Newsletter

Get the latest updates from Simple as That delivered to your inbox.

Join for Free

Beyond Snapshots: Mastering the Art of Mobile Photography

Connect

  • Bloglovin
  • Facebook
  • Instagram
  • Pinterest
  • Twitter

Follow On Pinterest

Visit Rebecca - Simple as That Blog's profile on Pinterest.

Categories

  • Crafts / DIY
  • Holidays
  • Motherhood
  • Organization
  • Photography
  • Printables
  • Recipes
  • Simple Living
  • Travel
  • Wellness

Our Privacy Policy

Follow on Instagram

Instagram has returned invalid data.

Printable 2023 Calendar

Our printable calendars and organizational pages have been essential in keeping our home and my life in order and I guarantee they will be a help to you too!

Click here to learn more

© Simple as That Blog, 2017 · Design by Brian Gardner

Simple as That Blog

Facebook / Instagram / Pinterest / Twitter / Contact