• About
    • About Rebecca
    • Meet the Team
    • Media Kit
    • FAQ
  • Photography
  • Holidays
  • Recipes
  • Printables
  • 2019 Calendar
  • Write for Us
  • Beyond Snapshots

Simple as That

Making Everyday Beautiful

Blog

Our Journey Toward a Simpler Life

Friday, November 11, 2016

In 2010 my husband decided to leave his chiropractic practice and go back to school. We took a huge leap of faith on what would turn out to be the adventure of a lifetime. We sold our newly-built home and most of our possessions and moved our family of six to a tiny island in the middle of the Caribbean Ocean. This decision was only the beginning of many changes for our family—

Our hope is that the lessons we took away from our island adventure will inspire you to live with more purpose and focus on collecting those things that are of most value – moments, not things.

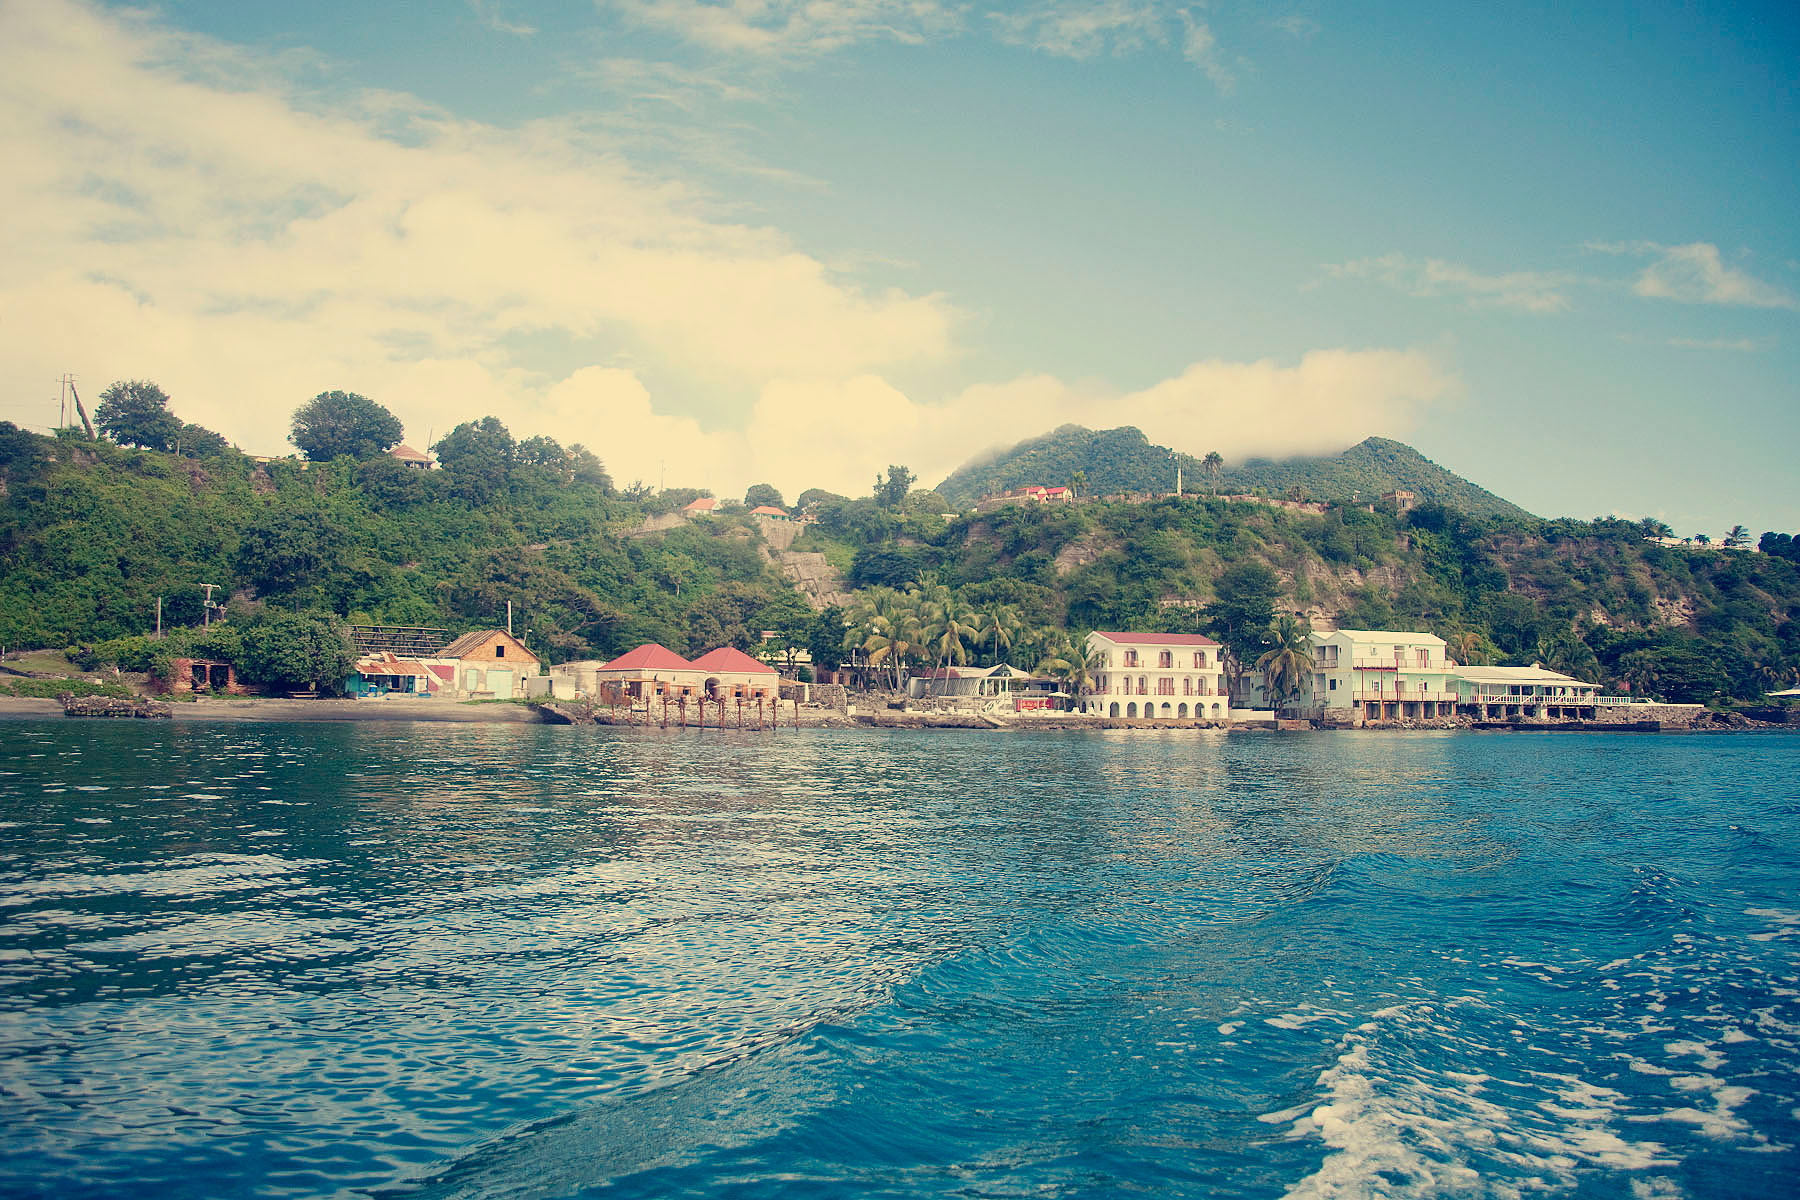
Certainly a change in location…

A change in culture…

And ultimately a change in perspective that would shape our life decisions moving forward in more ways than we could have ever anticipated.

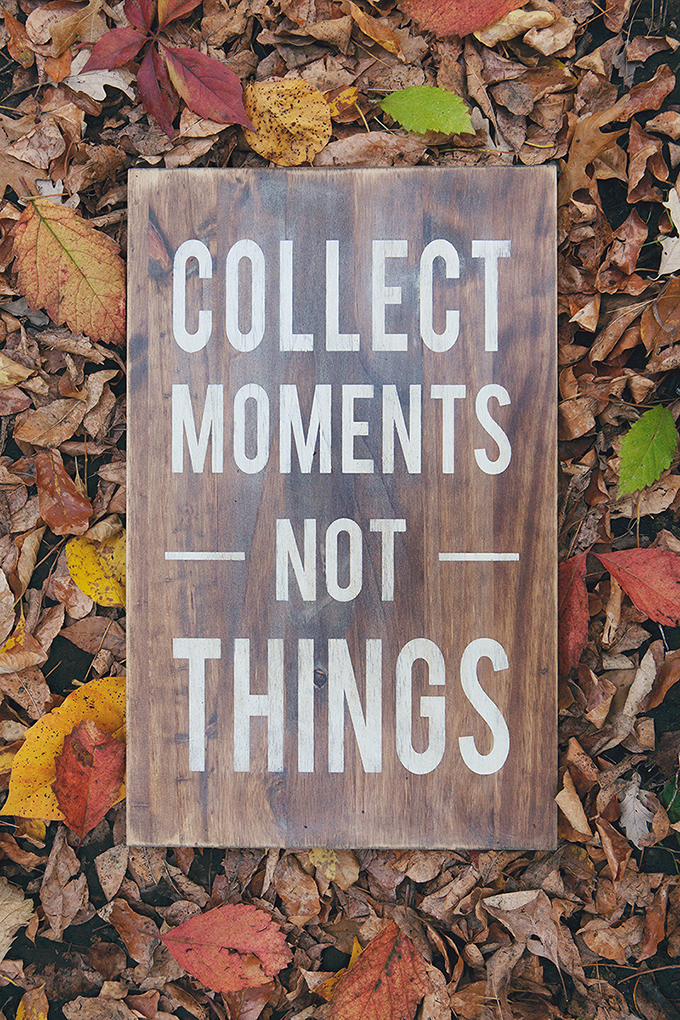
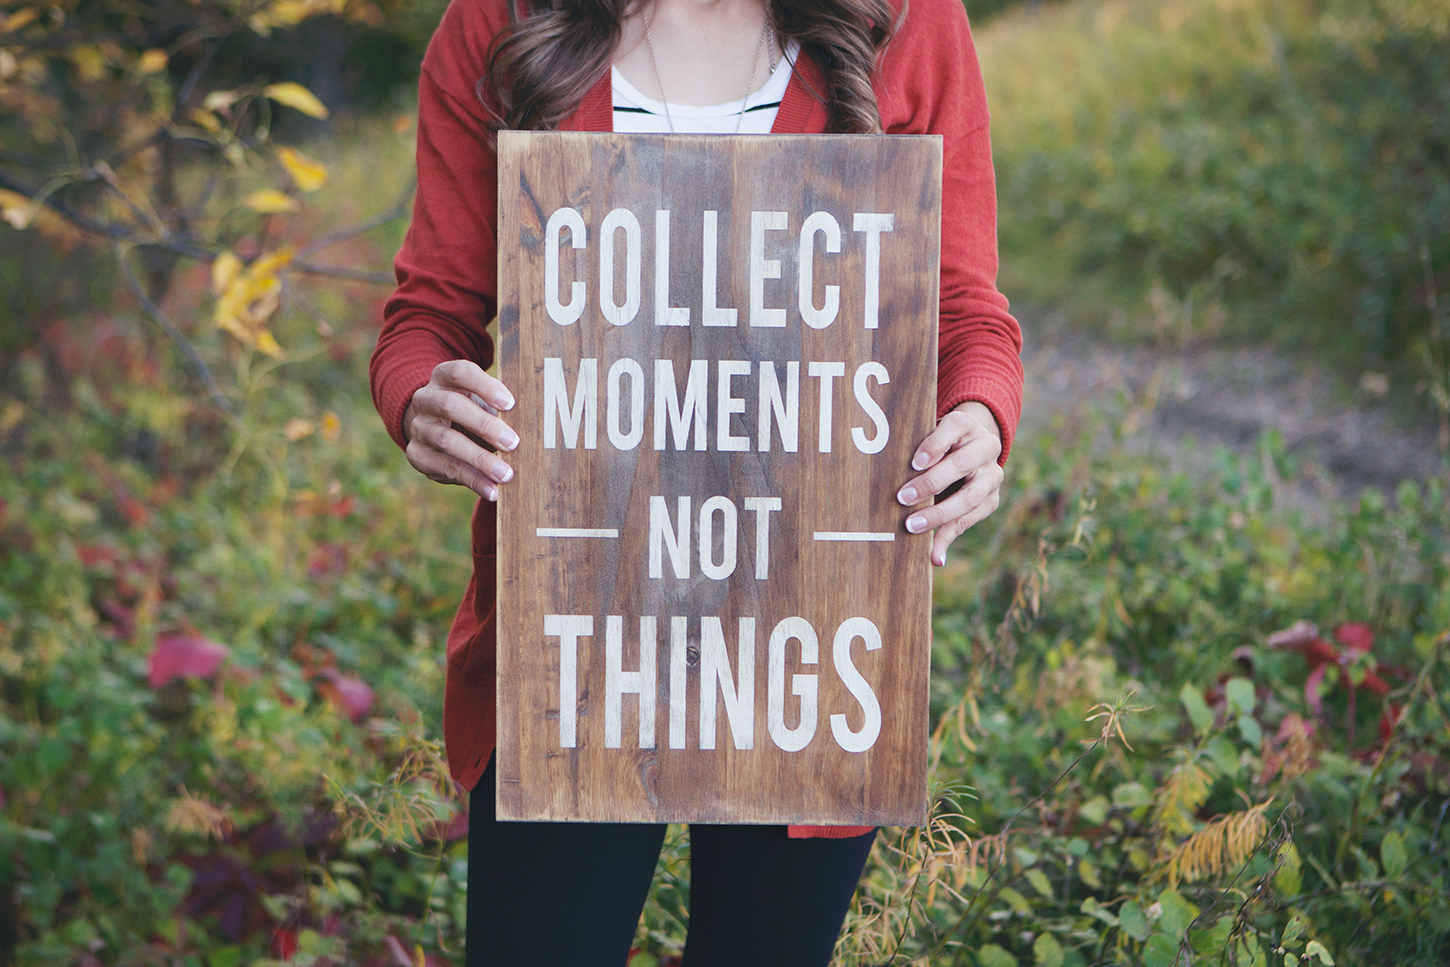
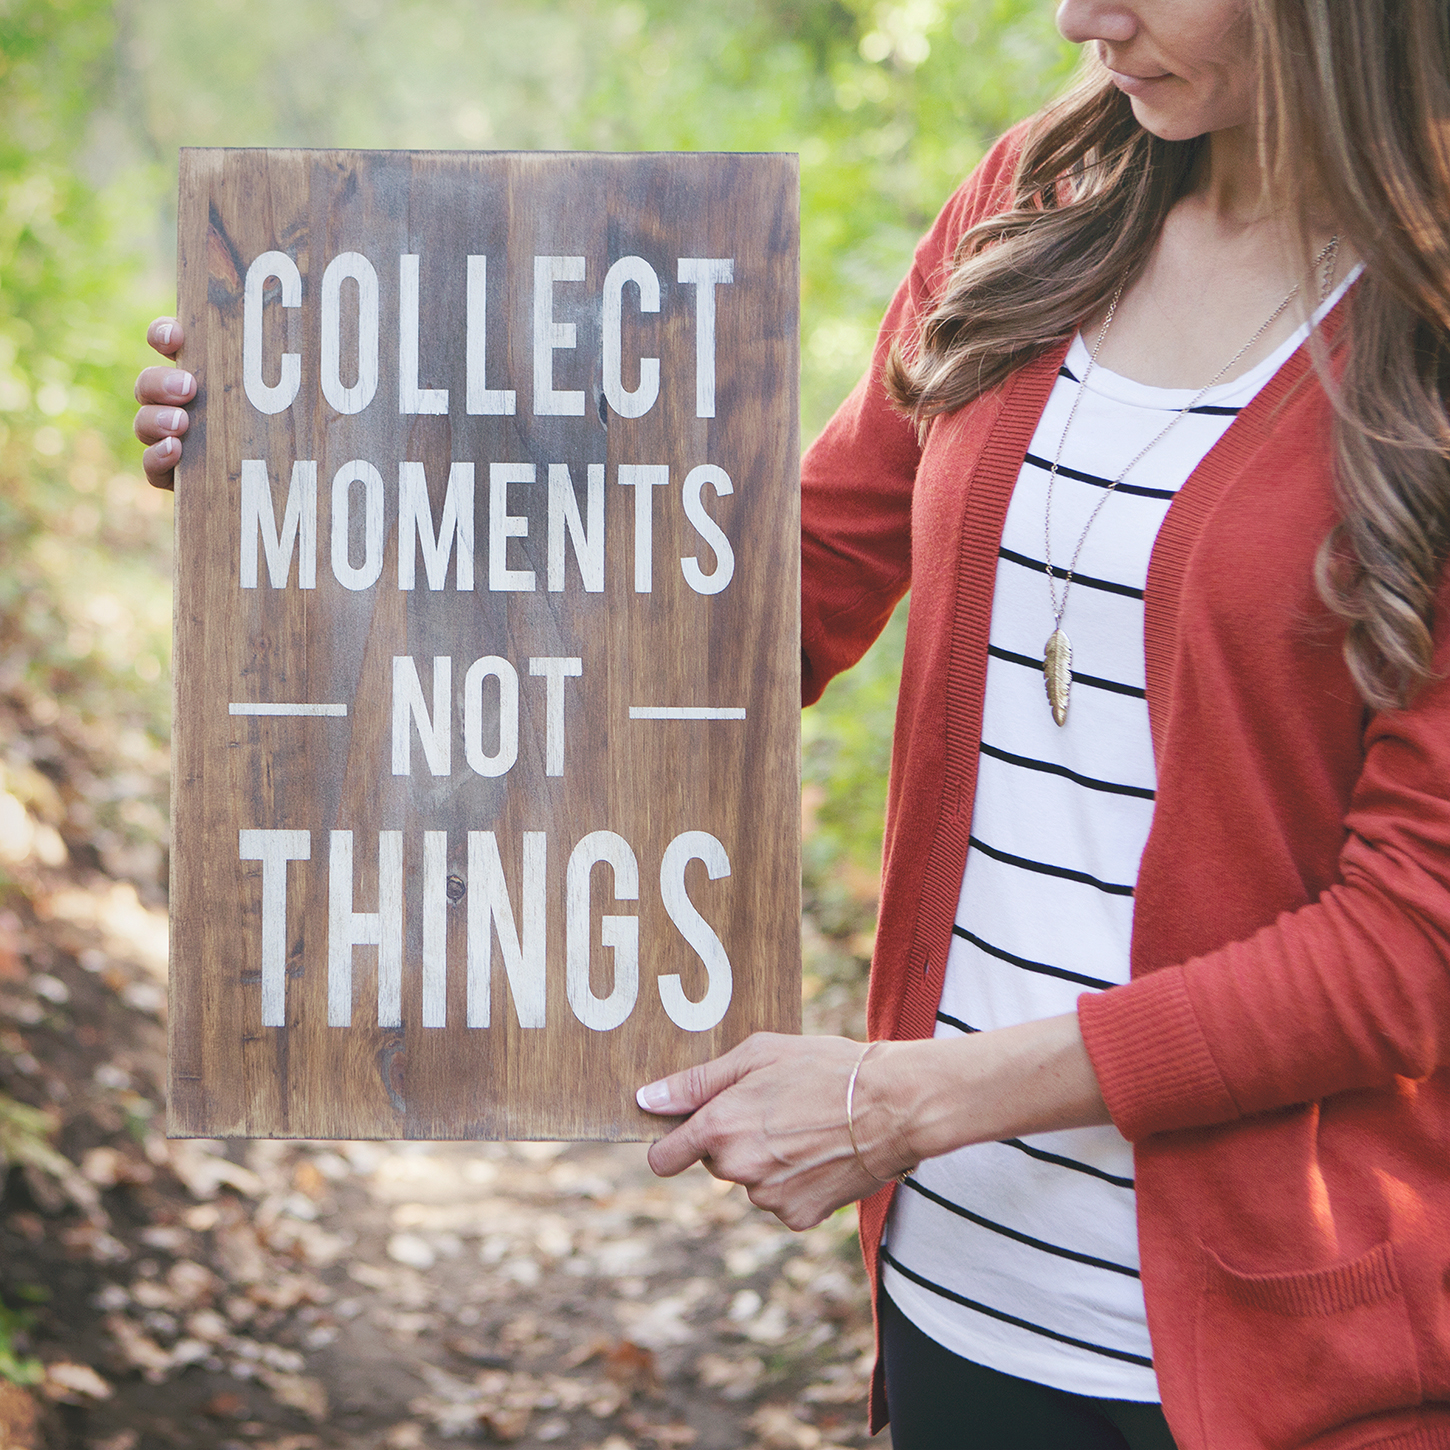
On the island, we may not have had hot water in the kitchen or access to many of the conveniences of home, but we had the makings of a million memories, and we learned to collect moments instead of things.

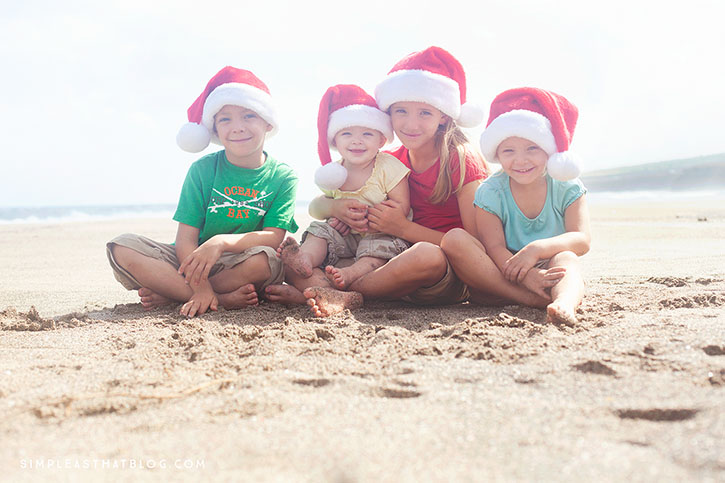
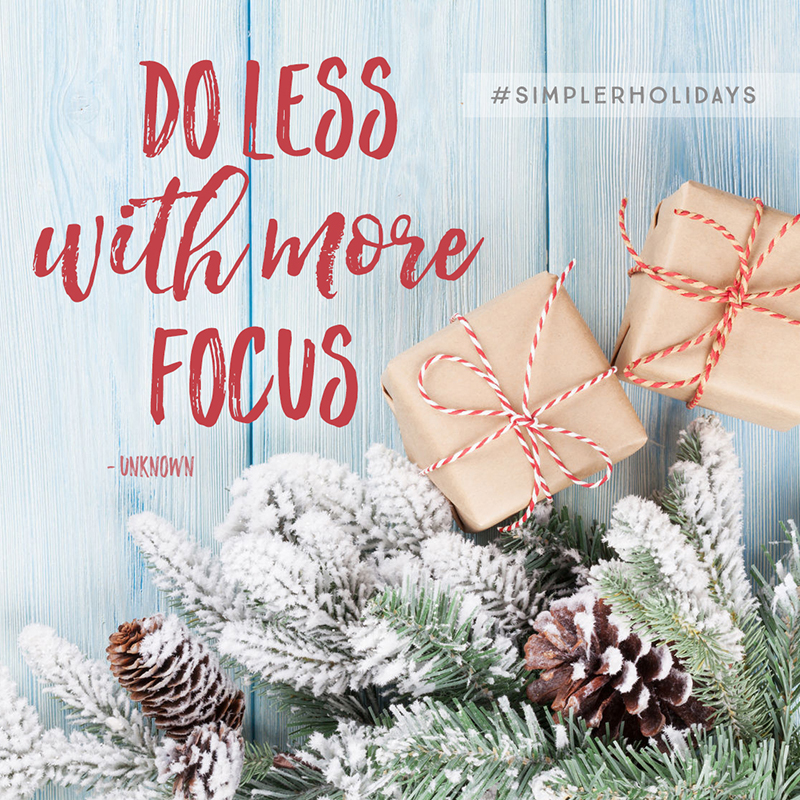
In particular, our first Christmas there was “small” in every way compared to what we were used to. A bedraggled little tree, a paltry pile of Christmas gifts, a dozen paper snowflakes as our only decorations. But it was then that we realized how little you really need to make a Christmas you’ll never forget.

Follow Our Story

We’re excited to share more of the every day details from our life on the island of St. Eustatius and to chronicle the shift in values we experienced during this season of our lives.

Our hope is that the lessons we took away from our island adventure will inspire you to live with more purpose and focus on collecting those things that are of most value – moments, not things.

We may not have set out with the goal to simplify, but we experienced the benefits firsthand, and now, years later, we could never turn back. Living with less (stuff!) is a way of life we’ve tried so hard to hold on to since returning from the island.

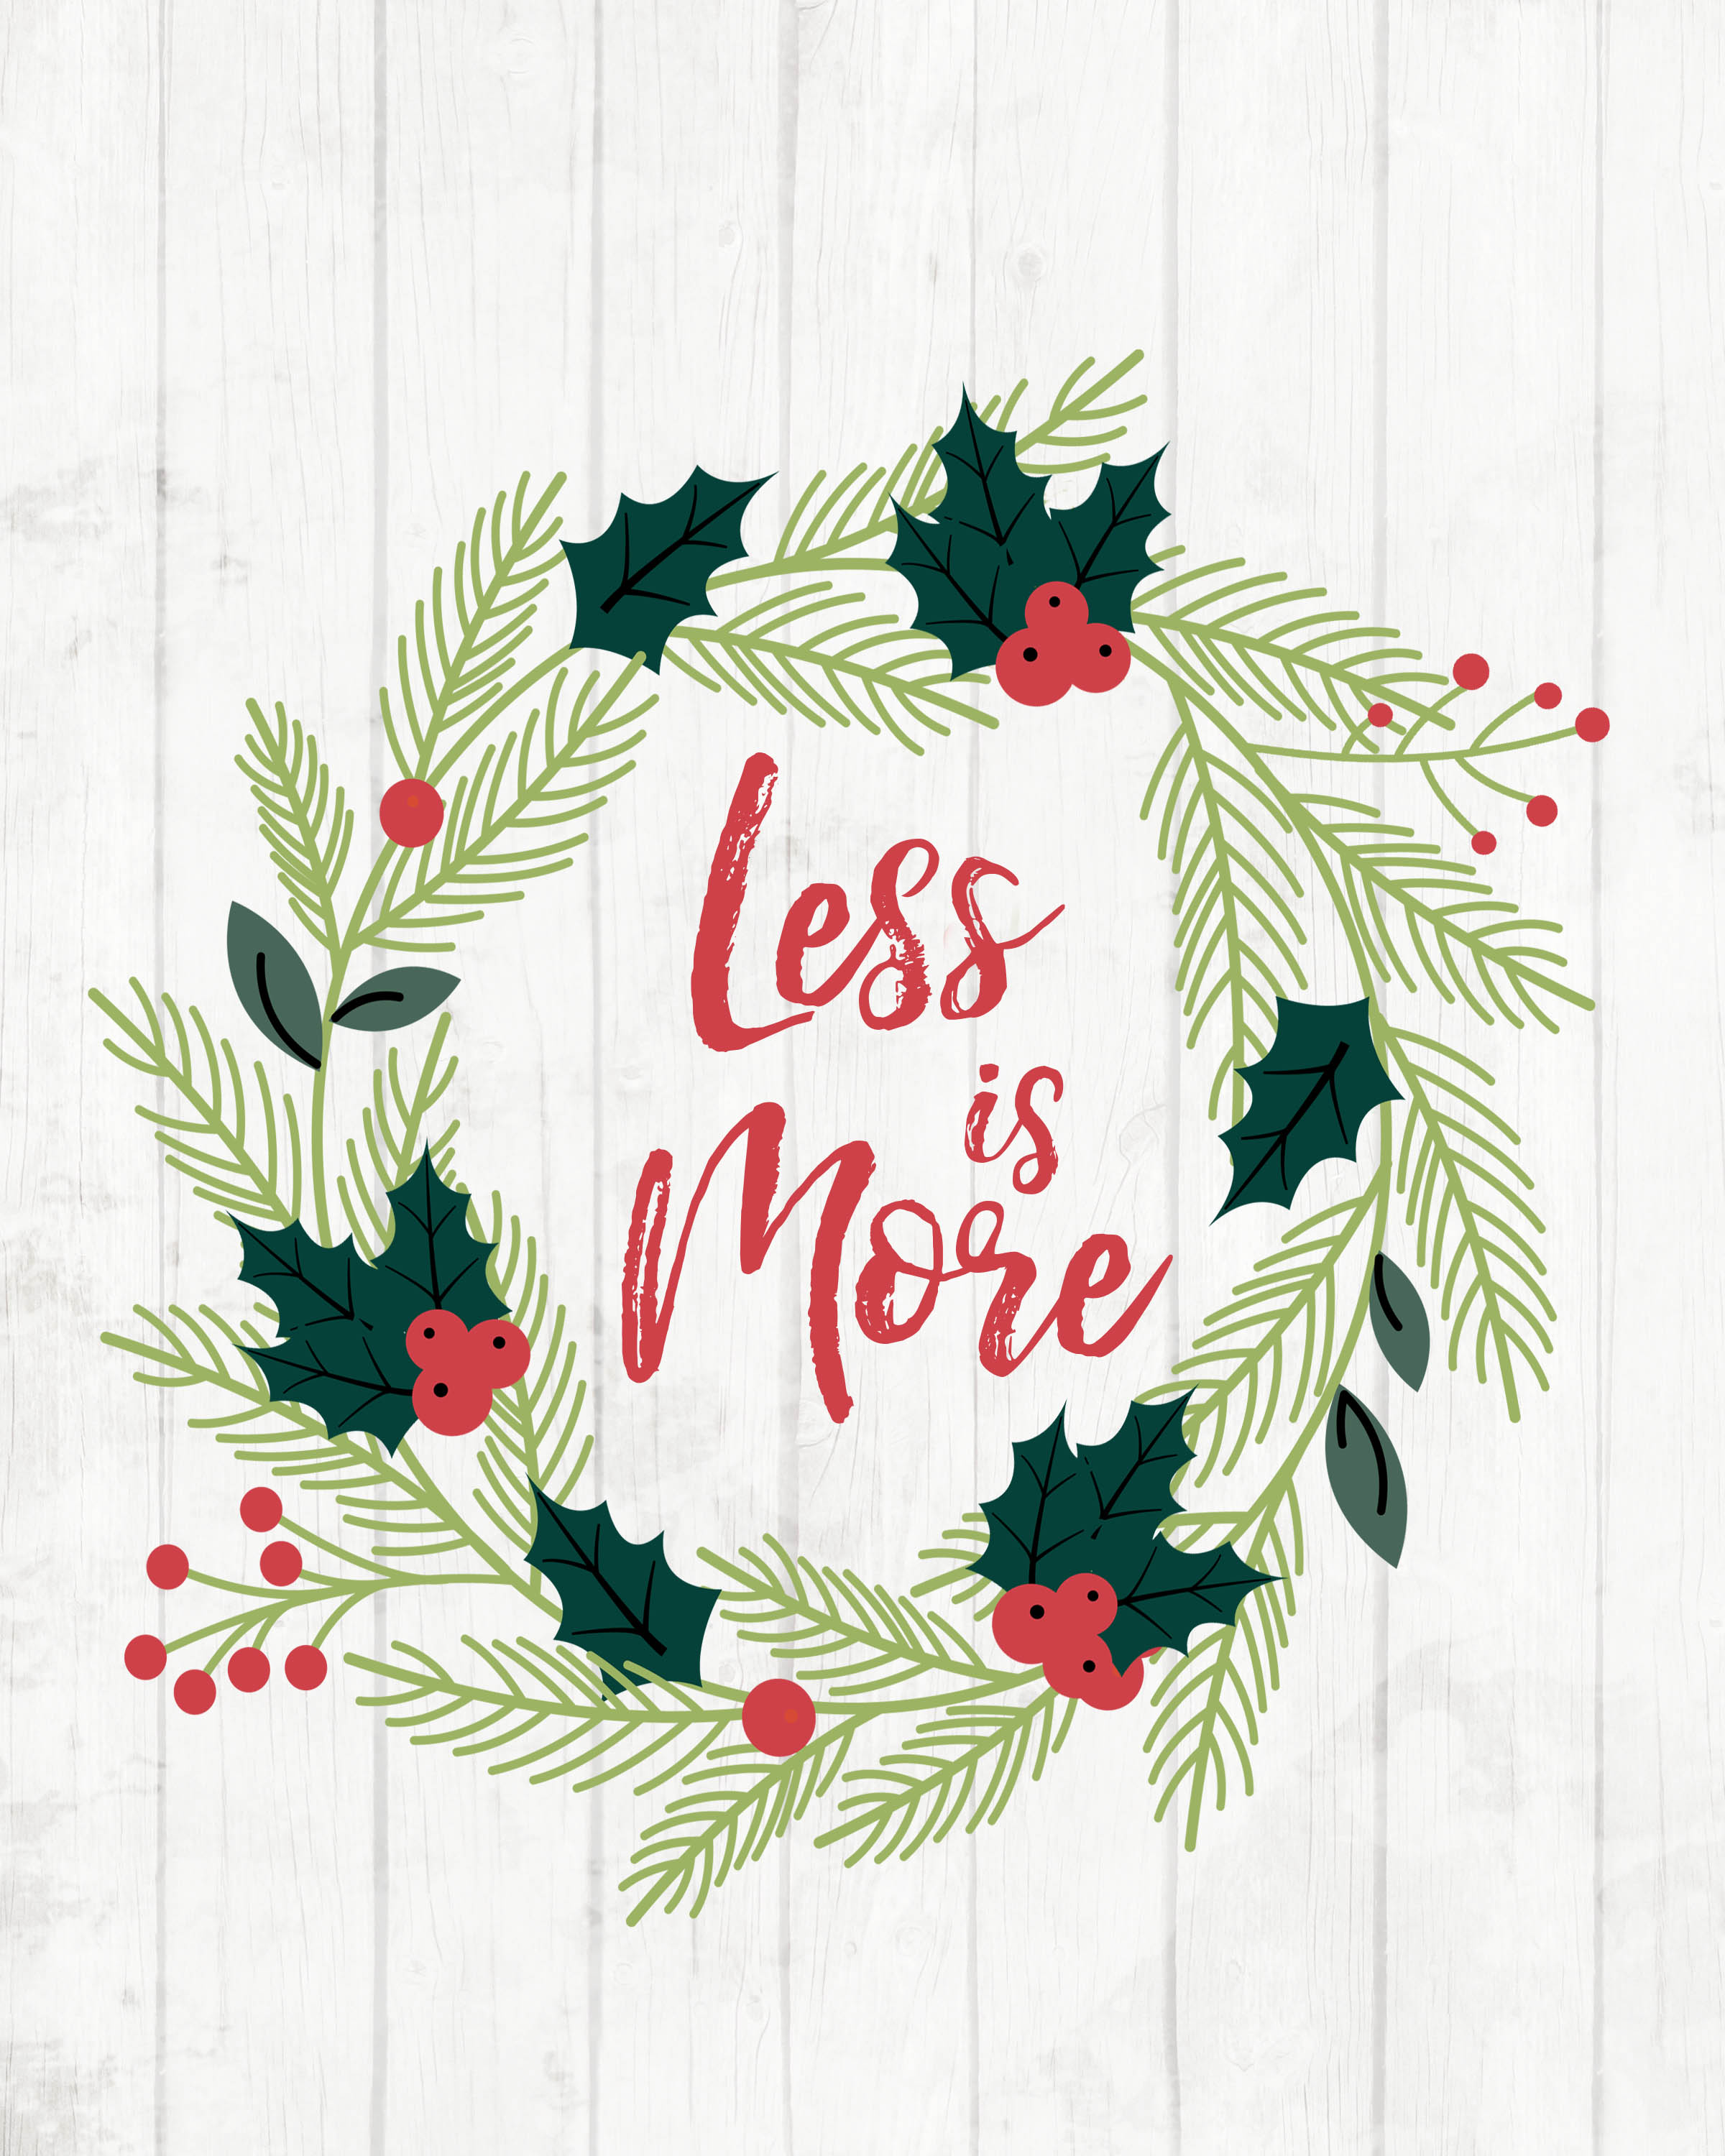
A Simple Life is a Beautiful Life

Want to learn more about us? Our family’s priorities and some of our take aways from striving to live simpler? These articles are a great places to start…

  • Living Simply so We Can Explore More
  • 14 Tips to Help You Enjoy a Slow Summer
  • Collect Moments, Not Things
  • What Families Gain from Time Spent Outdoors
  • 12 Life Lessons Children Learn from Hiking
  • Do More Things that Make Your Forget to Check Your Phone

Personalized Christmas gift: create DIY wood block photo puzzle

Thursday, November 10, 2016

simpleasthat_blog_featured_image07
Hi guys. How are you?

Are you feeling the holidays coming at you with the speed of one of those snowballs thrown when you aren’t looking?

I feel that time is flying by so fast these days.

Everything is a bit unusual in our house this season. I would love to have all sorts of things planned for Christmas and do all sorts of crafty, cozy projects throughout December, but our reality is a bit different this year. Our little girl is set to join us in late December, right between Christmas and New Years. Since you never really know how and when this will happen, I decided that December is my “relax with no plans” month.

I have told everyone that I do not want to leave my house on Christmas and if our family wants our company, they should come over and bring their own food 🙂 So all my plans for this year ends this month. Kind of a nice feeling, to have one sole purpose at the end of the year, going into a new one, filled with new adventures.

Since it’s still only November, I’m of course still crafting and I made this really cute little project, that you could make with your kids, and together create some beautiful Christmas gifts for friends and families.

The project will result in a wood block photo puzzle. There are endless ideas for what photos or images you could use. Maybe you have a stash of old photos, from when you were a kid, and maybe that would be fun for your kids to play with. It could also be vacation photos or maybe you have a stack of paper or wallpaper leftovers with patterns. Anything or theme could work, depending on who you are making it for.
I chose to use a selection of my illustrations and photos, turning them into a girly theme.
So let’s start and get an overview of what you’ll need for this project.

simpleasthat_blog_featured_image01
MATERIALS:

-WOODBLOCKS

I went to my hubby’s garage and made 12 square wood blocks from scrap-wood, measuring 2x2x2 inches. This will give me a 4×3 block puzzle.  If you don’t feel like making your own, hobby stores like Michaels will have square wood blocks.

-PRINTOUTS / WALLPAPER / PHOTOS

You need 6 images matching the size of your finished puzzle. In my case, my images measured 8×6 inches. (4×2 inch block on long side, 3×2 inch block on short side)
Prepare your images by drawing out a grid on the images with a pencil matching the size of your puzzle. You should end up with 12 identical squares in that grid.
If you like working with graphic software like Photoshop or Elements, then you can draw this grid directly onto your images in the program, and have it printed onto your photos to size.

-All in one DECOUPAGE GLUE(LIKE MODPODGE)

-SCISSORS

-BRUSHES

-PEN AND RULER

simpleasthat_blog_featured_image02
STEP 1:

Cut your images along the grid you drew on them. Stack the individual images and keep them separate from each other. Start by placing one cut up image on top of your blocks to get an overview of your image.

simpleasthat_blog_featured_image03
STEP 2:

Take a brush and start painting the glue directly onto the wood and attach one cut up piece of the image to each block.

simpleasthat_blog_featured_image04
STEP 3:

Go through the above step for each image and side of the blocks. You can finish about 3-4 images/sides of the puzzle and then let it sit to dry, before adding the last 2-3 images.

simpleasthat_blog_featured_image05
STEP 4:

When all your images are attached and dried, it’s time to give the blocks a final finish with the glue. Again, work with 3 sides, let dry and then finish the last three. When you set them off to dry, make sure you use a plastic surface or something smooth that the glue won’t stick to. Newspaper will leave marks on your images.

simpleasthat_blog_featured_image06
When the blocks are dried, you have yourself a finished puzzle 🙂

Since I started out by saying that this would be a lovely gift, a good way to top it off, is by creating some packaging for the puzzle. I’m not going to show you step-by-step on how I did. I think there are so many fun cute ideas to store a puzzle, like fabric bags, jars or just a cardboard box, that this is your choice entirely. I’ll explain what I used and maybe this will inspire you.

simpleasthat_blog_featured_image10
CARDBOARD BOX:

I went to TemplateMaker where they have a cute selection of box templates. I used, specifically, this one template.
You can print it out and then you have your measurements and layout for your box. Then you trace this onto cardboard and cut out your box. I used simple staples to assemble the box.

To finish it off, I created a cover graphic to print and added to the top of the box. It made it look really cute and gave it sort of a retro look.
If you are not into making graphics, then some cool text or maybe just a printed image, will definitely make your box stand out.

simpleasthat_blog_featured_image08
There’s no gift without a ribbon 🙂 Since the packaging is so cute in and of itself, I decided that I only needed a ribbon and no wrapping. Turned out pretty nice, don’t you think?

simpleasthat_blog_featured_image09
I hope you enjoyed this project and that it inspired you to create some personalized Christmas gifts of your own this year.

Have a beautiful November.
Annika

12 Days to a Simpler Holiday Season

Tuesday, November 8, 2016

What if you could enjoy a calm, unhurried holiday season filled with more memories and less overwhelm?

I’d say yes please, but how!?

I think as moms we feel an urgency to make the holidays special for our children. We want to squeeze in all the magic we can in these few, fleeting years.

The problem is that we sometimes fall into this idea that packing our schedules with activities and filling our homes with new toys will give us the Christmas we envision.

When the season is over—when the storm of wrapping paper is in the recycling bin and the Christmas lights have been packed away —we wonder if we really experienced the kind of season we set out to create.

This year, let’s change things!

I’ve looked for magic in the wrong places. It wasn’t in a beautifully decorated home, in elaborate Christmas traditions, or under a big pile of gifts. It was found in the small moments between all the holiday rush.

Our journey toward simplifying our lives began 5 years ago when our family sold most of our belongings and moved to a tiny island in the Caribbean ocean. I’ve held the lessons I learned that Christmas close to my heart and have been waiting for just the right opportunity to share with others.

less-christmas3

12 Days to a Simpler Holiday Season

Because I genuinely want you to find more awe and wonder (and less stress and overwhelm!) this December, I wrote a 12-day email course designed specifically for busy moms: 12 Days to a Simpler Holiday Season.

I would LOVE to have you join our community of women who are dedicated to re-making the holidays.

Let’s learn together, plan together, and support each other.

Let’s design a holiday season unlike any we’ve had since becoming moms, and remember….

12-days-free-prints

Whole Wheat Cinnamon Swirl Bread

Monday, November 7, 2016

A whole wheat cinnamon swirl bread that is delicious on its own, makes the best toast imaginable, and excellent french toast and bread pudding.

whole wheat cinnamon swirl bread recipe

Now that it is dark before the kids get home from school, I want nothing more than to make my house warm and wintery. This time of year is when I want my house to be super cozy and welcoming. And having a fresh loaf of homemade whole wheat cinnamon swirl bread does the trick. This bread makes your house smell like heaven while it is rising and baking, and even when you toast it. This makes the BEST toast. (Be generous with the butter, it is so worth it.) If you should have any leftovers, it is also incredible in a bread pudding or used in french toast.

This bread has a few steps, but it is a very simple recipe, and a great one for young bakers wanting to try baking bread. Most of the heavy lifting is down either in an electric mixer or bread machine. I got this recipe from King Arthur Flour and it uses white whole wheat flour. If you have kids that are not quite there with you on the whole wheat bread, this must be the way to get them there. You would never know that this is a 100% whole wheat bread.

whole wheat cinnamon swirl bread recipe

Whole Wheat Cinnamon Swirl Bread

Starter:

  • 1/2 cup cool water
  • 1 cup whole white wheat flour
  • 1/4 teaspoon instant yeast

Filling:

  • 1/3 cup sugar
  • 2 teaspoons cinnamon
  • 1 Tablespoon all-purpose flour
  • 1 egg, beaten

Dough:

  • 2 1/2 teaspoons instant yeast
  • 1/2 cup lukewarm milk
  • 1/2 cup orange juice
  • 5 Tablespoons melted butter
  • 1 1/2 teaspoons salt
  • 3 Tablespoons sugar
  • 1/4 cup dry milk
  • 1/4 cup instant mashed potato flakes
  • 2 3/4 cups white whole wheat flour

whole wheat cinnamon swirl bread recipe

The night before:

Make the starter. Mix the water, flour, and yeast until combined in a mixing bowl. (I like to use the bowl I am going to make my bread in, usually the bowl of my electric mixer.) Let sit overnight or up to 16 hours.

The next day:

Add the dough ingredients to the bowl. Knead until the dough is cohesive. I use the dough hook and my mixer on low speed. It takes about 7 minutes. It will not be as smooth as a dough made with all white flour.

whole wheat cinnamon swirl bread recipe

Place the dough in a lightly greased bowl. Cover, and place in an extra large zip top bag. (This is my favorite way to rise dough. It creates an environment perfect for dough to rise in my super cold, drafty house.) Allow to rise until it has expanded and is puffy, about 90 minutes. (If you knead by hand, it might take longer than 90 minutes.)

whole wheat cinnamon swirl bread recipe

While the dough is rising, make the filling by combing the sugar, cinnamon, and flour. Set aside.

whole wheat cinnamon swirl bread recipe

Gently deflate the dough and transfer to a lightly oiled surface. Roll the dough out to a thin rectangle, about 16”x9” inches long.

whole wheat cinnamon swirl bread recipe

Brush with beaten egg and sprinkle cinnamon sugar all over the surface.

whole wheat cinnamon swirl bread recipe

Using the short end, roll the dough into a log. Pinch the end and side seam closed.

whole wheat cinnamon swirl bread recipe

Pat until smooth and place in a greased 9”x5” loaf pan.

whole wheat cinnamon swirl bread recipe

Put the dough back into the extra large zip-top bag (or cover with lightly greased plastic wrap or a shower cap.) Let rise for another 90 minutes or until it comes about 3/4” over the rim of the loaf pan. During the end of this proof, preheat the oven to 350°. Brush with egg wash.

whole wheat cinnamon swirl bread recipe

Bake for 10 minutes, then tent with foil and bake for another 40 to 45 minutes. The center should be 190°. Remove from the oven, turn out of the pan and let cool on a rack.

whole wheat cinnamon swirl bread recipe

Slice and serve with lots of butter.

whole wheat cinnamon swirl bread recipe

Whole Wheat Cinnamon Swirl Bread
 
Print
A whole wheat cinnamon swirl bread that is delicious on its own, makes the best toast imaginable, and excellent french toast and bread pudding.
Author: King Arthur Flour
Ingredients
Starter:
  • ½ cup cool water
  • 1 cup whole white wheat flour
  • ¼ teaspoon instant yeast
Filling:
  • ⅓ cup sugar
  • 2 teaspoons cinnamon
  • 1 Tablespoon all-purpose flour
  • 1 egg, beaten
Dough:
  • 2½ teaspoons instant yeast
  • ½ cup lukewarm milk
  • ½ cup orange juice
  • 5 Tablespoons melted butter
  • 1½ teaspoons salt
  • 3 Tablespoons sugar
  • ¼ cup dry milk
  • ¼ cup instant mashed potato flakes
  • 2¾ cups white whole wheat flour
Instructions
  1. The night before: Make the starter. Mix the water, flour and yeast until combined in a mixing bowl. (I like to use the bowl I am going to make my bread in, usually the bowl of my electric mixer.) Let sit overnight or up to 16 hours.
  2. The next day, add the dough ingredients to the bowl. Knead until the dough is cohesive. I use the dough hook and my mixer on low speed. It takes about 7 minutes. It will not be as smooth as a dough made with all white flour.
  3. Place the dough in a lightly greased bowl. Cover, and place in an extra large zip top bag. (This is my favorite way to rise dough. It creates an environment perfect for dough to rise in my super cold, drafty house.) Allow to rise until it has expanded and is puffy, about 90 minutes. (If you knead by hand, it might take longer than 90 minutes.)
  4. While the dough is rising, make the filling by combing the sugar, cinnamon, and flour. Set aside.
  5. Gently deflate the dough and transfer to a lightly oiled surface. Roll the dough out to a thin rectangle, about 16”x9” inches long. Brush will beaten egg and sprinkle cinnamon sugar all over the surface.
  6. Using the short end, roll the dough into a log. Pinch the end and side seam closed. Pat until smooth and place in a greased 9”x5” loaf pan. Put the dough back into the extra large zip top bag (or cover with lightly greased plastic wrap or a shower cap. Let rise for another 90 minutes or until it comes about ¾” over the rim of the loaf pan. During the end of this proof, preheat the oven to 350°. Brush with egg wash.
  7. Bake for 10 minutes, then tent with foil and bake for another 40 to 45 minutes. The center should be 190°. Remove the oven, turn out of the pan and let cool on a rack.
  8. Slice and serve with lots of butter.
3.5.3218


Free Printable Holiday Planner: Design the Season You Really Want

Saturday, November 5, 2016

Planning early for the holidays is my secret to a calmer December. Whether it’s gift giving, meal planning, or making time for your most meaningful traditions…

Creating the holiday season you really want starts with planning now using this Free Printable Holiday Planner.


Planning early for the holidays is my secret to a calmer December. Whether it's gift giving, meal planning, or making time for your most meaningful traditions...  Creating the holiday season you really want starts with planning now using this Free Printable Holiday Planner.

Click here to download the free printable Holiday Planner

The free printable holiday planner I’ve created has space for just what you need and not much more. While it WILL help you stay organized and work ahead of the holiday rush, its main purpose is to help you simplify and hone in on your vision for this holiday season.

When designing the planner, I carefully considered what to make room for, keeping in mind my belief that the holidays aren’t about doing more—but about doing less.

Planning early for the holidays is my secret to a calmer December. Whether it’s gift giving, meal planning, or making time for your most meaningful traditions… Creating the holiday season you really want starts with planning now using this Free Printable Holiday Planner.

It’s not about DOING ALL THE THINGS; it’s about doing the most important things.

That said, no matter how purposeful we are about our holidays, some to-do’s are inevitable. I hope you find that this planner helps you get things done WHILE staying focused on the kind of season you’re craving this year.


Click here to download the free printable Holiday Planner

Because I genuinely want you to find more awe and wonder (and less stress and overwhelm!) this December, I wrote a 12-day email course designed specifically for busy moms: 12 Days to a Simpler Holiday Season.

I would LOVE to have you join our community of women who are dedicated to re-making the holidays this year.

Let’s learn together, plan together, and support each other.

And let’s design a holiday season unlike any we’ve had since becoming moms.

Want to enjoy a holiday season of LESS overwhelm, MORE stillness and MORE time with those you love most? Join us for 12 Days to a Simpler Holiday Season! 13h

25 Healthy No-Bake Energy Bites Recipes

Thursday, November 3, 2016

25 Healthy No-Bake Energy Bites Recipes – Energy bites make the perfect healthy snack to give you an energy boost and keep you feeling full between meals. Plus,  just enough sweetness to satisfy your dessert cravings. From chocolate and peanut butter to pecan pie and cake batter, this list of energy bites recipes is sure to have a flavor to satisfy any craving!

Energy bites make the perfect healthy snack to give you an energy boost and keep you feeling full between meals.

Hi! It’s Tiffany from Feel Great in 8 and I am beyond excited to share this huge collection of healthy energy bites recipes with you today!

Energy bites have been my go-to healthy afternoon snack for years. I make big batches on the weekend and then grab one or two from the fridge every afternoon when hunger or cravings for sweets hit. They are perfect for satisfying those craving, and keeping me feeling full until dinner time. They are a big hit with all of my kids and my husband too.

Healthy Eating Starts with a Plan

Taking a few minutes each week to plan your meals can go a long way in helping you save money, time and eat healthier!

Click to Download –> Our Printable Meal Planner


25 Healthy Energy Bites Recipes

I’ve collected the very best 25 healthy energy bites recipes from around the web, so no matter what you are craving or what flavors your family loves, you’re sure to find a few favorites you’ll make over and over again!

Oh, and did I mention they are all no-bake?

No Bake Chocolate Energy Bites | Simple As That Blog

No Bake Chocolate Energy Bites - The perfect healthy, high protein, low sugar snack that tastes like dessert!

Healthy Cake Batter Energy Bites | Desserts with Benefits

healthy-cake-batter-energy-bites3

Pumpkin Pie Energy Bites | Simple As That Blog

pumpkin-pie-energy-bites-1-683x1024

No Bake Apple Cinnamon Bites | Simple As That Blog

No Bake Apple Cinnamon Bites

Peanut Bitter Pretzel Energy Bites | Pinch of Yum

energy-bites-1-600x900

Coconut Lime Energy Bites | Simple As That Blog

Coconut-Lime-Energy-Bites-1-683x1024

Cinnamon Caramel Apple Energy Bites | Cupcakes & Kale Chips

Cinnamon Caramel Apple Energy Balls

Cranberry Vanilla Energy Bites | Recipe Runner

cranberry-vanilla-energy-bites1

Dark Chocolate Peanut Butter Energy Bites | Feel Great in 8
energybites22-682x1024

Cherry Energy Balls | Bless This Mess

cherry-pie-energy-bites

Chocolate Truffle Energy Bites | Sally’s Baking Addiction

brownie-truffle-energy-bites-by-sallysbakingaddiction-com-4

Cinnamon Vanilla Breakfast Protein Bites | Cotter Crunch

cinammon-pb-protein-bites-4-of-1

Healthy Strawberry Shortcake Energy Bites | Desserts with Benefits

healthy-strawberry-shortcake-energy-bites3

Pecan Pie Energy Bites | Gluten Free Vegan Pantry

pecan-pie-energy-balls-vegan-gluten-free-6

Blueberry Almond Energy Bites | Recipe Runner

blueberry-almond-energy-bites

No Bake Chocolate Banana Energy Bites | Julie’s Eats & Treats

no-bake-chocolate-banana-energy-bites-main

Sweet and Salty Energy Bites | Gimme Some Oven

sweet-and-salty-energy-bites-5

Cashew Dark Chocolate Energy Bites | Gimme Some Oven

cashew-dark-chocolate-energy-bites-6

Mint Chocolate Energy Bites | Sally’s Baking Addiction

mint-chocolate-energy-bites-2

Chocolate Orange Energy Bites | My Fussy Eater

chocolate-orange-energy-bites1

Lemon Blueberry Energy Bites | Recipe Rebel

lemon-blueberry-energy-bites-www-thereciperebel-com-7-of-7-600x900

Raspberry Coconut Energy Bites | Cooking on the Front Burner

raspberry-almond-energy-balls

Coconut Chia Protein Quinoa Bites | Simply Quinoa

coconut-chai-quinoa-energy-bites-6

Brownie Cookie Dough Swirl Protein Balls | Fit Foodie Finds

brownie3

Pink Chocolate Chip Cookie Dough Balls | Super Healthy Kids

pink-cookie-dough-balls-tall-nosh


Homemade Kettle Corn

Monday, October 31, 2016

Homemade Kettle Corn – Shorter days and chilly weather are the perfect conditions for homemade kettle corn. Gather the family, put on a movie, and dig into this deliciously simple snack!

Homemade Kettle Corn

I’m about to pop. And not from munching on too much of this tasty, fresh, homemade kettle corn… Yes, the kettle corn may be a contributing factor, but it’s the little one that’s been filling my tummy these past 9 months that’s brought me to the popping point.

Homemade Kettle Corn

I can’t wait to meet my little man (it’s a boy!), but until then I’m enjoying a few more days of the “pregnancy cravings” excuse to enjoy some of my favorite foods before having to focus on taking off those post-pregnancy pounds. Homemade kettle corn definitely falls into this category of crave-worthy foods with its crunch and sweet-and-salty flavor. The best thing is that it’s ridiculously easy to make, with only four ingredients, and it’s arguably healthier than pickles and ice cream.

Homemade Kettle Corn

Kettle corn isn’t just good for hungry Mamas-to-be. With shorter days and chilly weather, the whole family is beginning to spend more time indoors. I find the cold weather brings with it family game and movie nights – a classically perfect time for popping some popcorn and enjoying some laughs with the kids. Why not sweeten things up a bit more with this easy recipe for kettle corn?

Homemade Kettle Corn

Homemade Kettle Corn
 
Print
Shorter days and chilly weather are the perfect conditions for homemade kettle corn. Gather the family, put on a movie, and dig into this deliciously simple snack!
Author: Rachel Hanawalt
Recipe type: Snack
Cuisine: American
Serves: 4 servings
Ingredients
  • ¼ C vegetable oil
  • ½ C popcorn kernels
  • ¼ C white sugar
  • 1 tsp salt or to taste
Instructions
  1. Place the vegetable oil and the popcorn kernels in a medium saucepan. Shake the pan so that the popcorn kernels and oil are evenly spread out over the bottom.
  2. Heat covered over medium heat until you notice the first kernel of popcorn pop. Next, evenly pour the sugar out over the popcorn kernels and cover the saucepan again. Every few seconds slide the saucepan back and forth over the burner to keep the kernels and sugar moving in order to prevent burning. The popcorn kernels will soon begin popping at a fast rate. Continue to cook and slide until the popping has slowed down to a few seconds between each pop, then remove from the heat.
  3. Season with salt and serve immediately. Once cool, store for up to 3 days in a sealed ziplock bag at room temperature.
3.5.3217

Homemade Kettle Corn

Some more fall inspiration you may also like…

Savory Stuffed Mini Pumpkins

Savory Stuffed Mini Pumpkins

No Fuss Apple Wrapper Pie

No Fuss Apple Wrapper Pie


Quick and Easy Tomato Tortellini Soup Recipe

Thursday, October 27, 2016

If you’re short on time and looking for a warm, hearty meal to serve your family this week, you need to try this Quick and Easy Tomato Tortellini Soup Recipe! 

If you're short on time and looking for a warm, hearty meal to serve your family this week, you need to try this Quick and Easy Tomato Tortellini Soup Recipe!

When I woke up this morning it was foggy and cool. So cool in fact, that I could see my breath. I think it’s safe to say that winter is officially on it’s way in our little corner of the world. When the temperatures start to drop this time of year all I feel like making for dinner is soup. Warm and comforting, soups make the perfect winter meals, wouldn’t you agree?

Short on time and need a hearty meal on the table? This Quick and Easy Tomato Tortellini Soup is your go-to for dinner!

This easy to make Tomato Tortellini is one of my favorite soups to make. It takes very little time to prepare and it’s heaven in a bowl I tell you! I usually serve this soup with salad and a fresh baguette or homemade rolls.

If you're short on time and looking for a warm, hearty meal to serve your family this week, you need to try this Quick and Easy Tomato Tortellini Soup Recipe!


Quick and Easy Tomato Tortellini Soup Recipe
 
Print
Cook time
30 mins
Total time
30 mins
 
Author: Rebecca Cooper
Recipe type: Soup
Cuisine: Italian
Serves: 8-10
Ingredients
  • 1 pound Italian Sausage
  • 1 small onion, chopped
  • 1 cup carrots, chopped
  • ½ cup celery, chopped
  • 1 24 ounce jar Fresh Mushroom Prego Sauce
  • 1 14.5 ounce can Italian herb diced tomatoes, blended
  • 1 10 ounce can condensed tomato soup
  • 4 cups water
  • 2 teaspoons Club House Garlic and Red Pepper Seasoning
  • 1 package (19 ounces) tortellini noodles
Instructions
  1. Peel, chop into small pieces and cook sausage in large pot until browned.
  2. You can use a sausage link or ground Italian sausage.
  3. Next added the onion, carrots, and celery, and sauté until the vegetables are softened.
  4. Next add the pasta sauce, diced tomatoes, tomato soup, water, and seasoning.
  5. Let simmered for 10-15 minutes, until the vegetables are fully cooked.
  6. Lastly added the tortellini (I used frozen) and cooked about 5 minutes, until they float.
  7. If using raw tortellini noodles, boil in water first. Drain and then add to soup.
3.5.3217

The ingredients for this Tomato Tortellini Soup Recipe call for a 14.5 ounce can of Italian herb diced tomatoes. If you have picky eaters that turn their nose up at chunky tomatoes like my kids, then do what I do and put the tomatoes in the blender and pulse for a few seconds before adding to the soup.

Short on time and need a hearty meal on the table? This Quick and Easy Tomato Tortellini Soup is your go-to for dinner!

I hope you enjoy this Tomato Tortellini Soup Recipe! There’s no doubt it will be one of those recipes you pull out again and again just like I do!

If you liked this post you might also enjoy:

Slow Cooker Apricot Chicken

This delicious Apricot Chicken can be made in the slow cooker or in our new favorite kitchen gadget – the Instant pot. With just 4 ingredients, this dish is both easy and tasty! It’s the perfect solution if you need dinner in a pinch.

Quick and Easy Taco Soup

This quick and easy taco soup recipe is a favorite in our family! Perfect for warming up on a cold day, this soup is easy to prepare with ingredients you can keep on hand for those times when you need dinner in a pinch!

Southwest BBQ Chicken Salad & Creamy Lime-Cilantro Dressing

This Southwest BBQ Chicken Salad with Creamy Lime-Cilantro Dressing is a quick dinner option that's full of healthy ingredients and so packed with flavor your family will asking for it again and again!

Chicken & Stuffing Casserole

This creamy and cheesy casserole is comfort food at it's best and it's so easy to throw together!


Oven Roasted Turkey and Cheese Sandwich

Wednesday, October 26, 2016

This Oven Roasted Turkey and Cheese Sandwich is a delicious and easy recipe made with wholesome, all-natural ingredients.

This is a sponsored conversation written by me on behalf of Sargento® Sliced Cheese. The opinions and text are all mine.

oven-roasted-turkey-and-cheese-sandwich

There is just something about a fresh and all-natural sandwich that is pleasing to the palate and warm to the soul.  Everything tastes better when it is crisp.  This Oven Roasted Turkey and Cheese Sandwich is made with organic turkey breast, beef steak tomato, lettuce, whole-grain bread, and 100% real natural Sargento® cheese.

easy-oven-roasted-turkey-breast-recipe

This sandwich recipe starts by oven roasting a 3 to 6 pound thawed turkey breast.  If you have never cooked a turkey in the oven, don’t be scared.  This recipe is so easy and is made with simple, real ingredients.  All you need is a roasting pan with a wire rack.  Season the turkey breast with salt, pepper, and butter.  Follow the cook time on the package but it usually takes 2 to 2:30 hours to cook a 6 pound turkey breast.

turkey-and-cheese-sandwich

Once the turkey breast is cooked, you can start building a sandwich.  I use organic whole-wheat bread, beef steak tomatoes, lettuce, and Sargento® cheese slices.  Some favorite condiments are mustard, mayonnaise, and horseradish.  I like to buy the ingredients at my local farmers market or neighborhood co-op because I like to support local farmers and I know that the produce and goods are fresh.  It is important to me to feed my family wholesome meals.

sargento-cheese-recipes

Sargento® Slices are always 100% real, natural cheese.  Pasteurized Process Cheese Food (PPCF), sometimes know as American singles, is only required to contain 51% real cheese.  I don’t know about you but I prefer the better tasting real cheese slices.  Sargento® cheese comes in many varieties and some of my favorites are:  Swiss, Sharp Cheddar, Provolone and Pepper Jack.

easy-turkey-and-cheese-sandwich

This Oven Roasted Turkey and Cheese Sandwich is perfect to make anytime of year for a healthy and wholesome lunch or dinner.  Since the Thanksgiving holiday is coming up soon, this recipe would be perfect for leftover turkey too.  A turkey breast will provide one weeks worth of sandwiches.  A 6 pound turkey breast will serve 6 to 8 people.

oven-roasted-turkey-and-cheese-sandwich-recipe

Oven Roasted Turkey and Cheese Sandwich
 
Print
Prep time
15 mins
Cook time
2 hours 45 mins
Total time
3 hours
 
A wholesome sandwich made with oven roasted turkey and 100% all natural cheese slices.
Recipe type: Main
Cuisine: American
Serves: 6 to 8
Ingredients
  • turkey breast:
  • 3 to 6 pounds thawed, bone-in, skin-on turkey breast (1 half-breast or 1 whole turkey breast joined at the breast bone)
  • 1 tablespoon butter
  • 1 tablespoon kosher salt
  • ½ teaspoon black pepper
  • sandwich ingredients:
  • Sargento® cheese slices
  • whole-grain bread
  • lettuce
  • beef steak tomato
  • Condiments: mustard, mayonnaise, horseradish
Instructions
  1. Transfer the turkey breast to the rack inside a roasting pan. Let the breast warm on the counter while the oven heats.
  2. Preheat the oven to 450°F. Place an oven rack in the bottom third of the oven.
  3. Pat the skin of the turkey breast dry with a paper towel. Rub the turkey breast all over with butter. Sprinkle the breast all over with salt and pepper.
  4. Place the prepared turkey breast in the oven and immediately lower the heat to 350°F. Roast for 1 hour, then begin checking the temperature.
  5. The turkey is done when it reaches 165°F in the thickest part of the breast meat. Start checking after 1 hour of roasting and continue checking every 10 to 15 minutes until the breast is cooked through.
  6. If the skin over the breast meat begins to brown too darkly toward the end of cooking, cover it with aluminum foil to prevent burning.
  7. Remove the turkey from the oven and cover it loosely with foil. Rest the turkey for 15 to 20 minutes.
  8. Carve the turkey from the bone. Cut the breast into slices.
  9. Assemble sandwich using sandwich ingredients.
3.5.3217

Follow Sargento® on Instagram and Facebook for more recipe inspiration using 100% real, natural cheese.

Visit Sponsors Site

Collect Moments – Not Things Home Decor Giveaway

Wednesday, October 26, 2016

Today we’ve teamed up with one of our favorite wooden sign shops, Barn Owl Primitives, to bring you something exciting! Take a look at our new Collect Moments – Not Things home decor and scroll down for details on how to enter to win one of these beautiful signs!

Collect Moments – Not Things Home Decor Collect Moments – Not Things

It’s a mantra our family has tried to live by ever since our island experience 6 years ago prompted a monumental shift in our priorities. These words have come to hold so much meaning as we’ve journeyed towards simplifying our lives and making the moments count through outdoor adventures together, family travel experiences and simple traditions.

collect-moments3

A Visible Reminder of What Matters Most

Focusing on moments vs. things is not always an easy thing to do. That’s why I’m so excited to hang this sign in our new home. It serves as a visible reminder to make the moments count, to stifle the urge to collect more “stuff” and to make time for what matters most.

It’s an especially poignant reminder this time of year as we prepare for the holidays. As parents we want so much for our kids, and it’s hard to remember in today’s world that our love for our children is not measured in how much we give them.

Focus on Moments for a Simpler Holiday Season I feel strongly about creating a simpler holiday season so that our family can really focus on making memories, but it is a conscious effort I have to make each day throughout December. Are you tired of keeping up with the holiday hustle? Would you like to *enjoy* the holidays, not just endure them? Take a peek at my new 12-day course for women who want to simplify the demands on their time and energy so they can focus on what the holidays are really about.

Collect Moments – Not Things Home Decor

When I commissioned Kristi of Barn Owl Primitives to create this sign for our home she totally caught the vision of what I wanted. It’s simple, beautiful and really leaves an impression.

If you’d like to hang one of these signs in your home too you can find them here in the Barn Owl Primitives Shop or enter to win one in today’s giveaway!

Enter to Win a $150 Gift Card to Barn Owl Primitives Sign Shop Follow the prompts in the widget below to enter. Good luck everyone! The giveaway will close Sunday 10/30 at midnight CST.

a Rafflecopter giveaway

« Previous Page
Next Page »

Primary Sidebar

Rebecca Cooper — Founder, Simple as That Blog

Hello, I'm Rebecca. Welcome to my blog, Simple as That. Come along as we embrace simplicity in crafting, photography, travel, and family life. Read more about me.

Newsletter

Get the latest updates from Simple as That delivered to your inbox.

Join for Free

Beyond Snapshots: Mastering the Art of Mobile Photography

Connect

  • Bloglovin
  • Facebook
  • Instagram
  • Pinterest
  • Twitter

Follow On Pinterest

Visit Rebecca - Simple as That Blog's profile on Pinterest.

Categories

  • Crafts / DIY
  • Holidays
  • Motherhood
  • Organization
  • Photography
  • Printables
  • Recipes
  • Simple Living
  • Travel
  • Wellness

Our Privacy Policy

Follow on Instagram

Instagram has returned invalid data.

Printable 2023 Calendar

Our printable calendars and organizational pages have been essential in keeping our home and my life in order and I guarantee they will be a help to you too!

Click here to learn more

© Simple as That Blog, 2017 · Design by Brian Gardner

Simple as That Blog

Facebook / Instagram / Pinterest / Twitter / Contact