• About
    • About Rebecca
    • Meet the Team
    • Media Kit
    • FAQ
  • Photography
  • Holidays
  • Recipes
  • Printables
  • 2019 Calendar
  • Write for Us
  • Beyond Snapshots

Simple as That

Making Everyday Beautiful

Blog

Strawberry Peach Smoothie

Wednesday, July 20, 2016

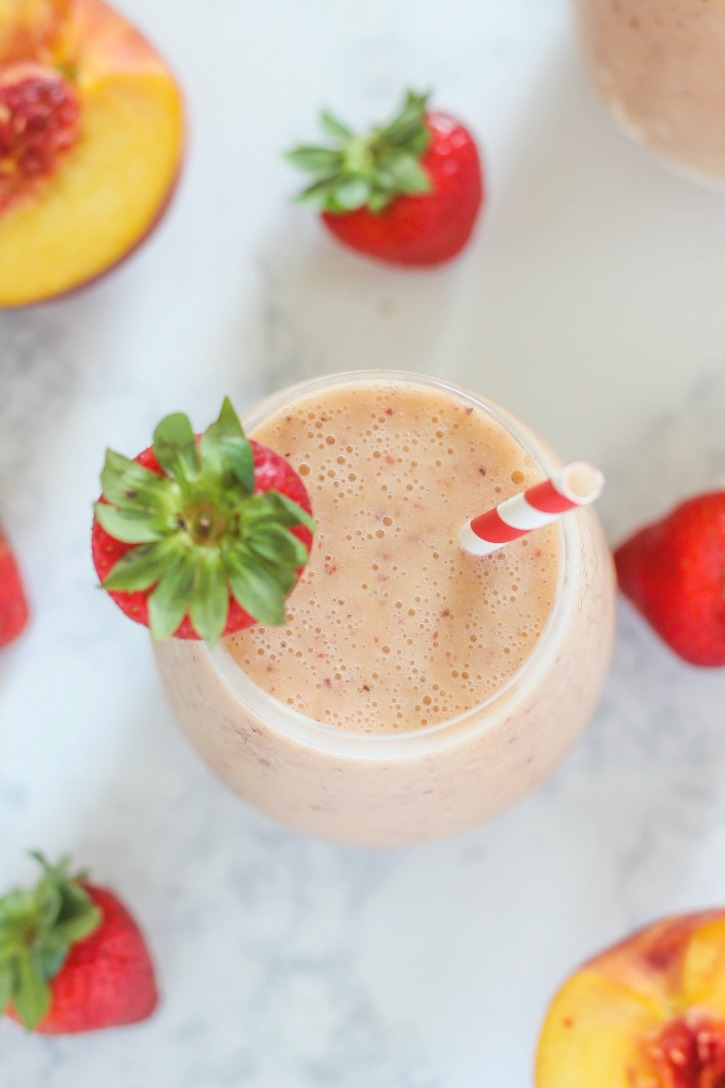
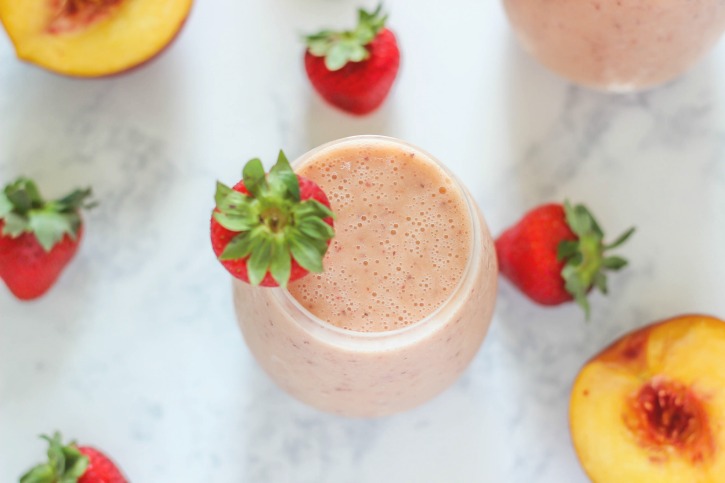
Strawberry Peach Smoothie – a healthy and delicious dairy-free smoothie recipe made with summertime fruits.

Strawberry Peach Smoothie - a healthy and delicious dairy-free smoothie recipe made with summertime fruits.

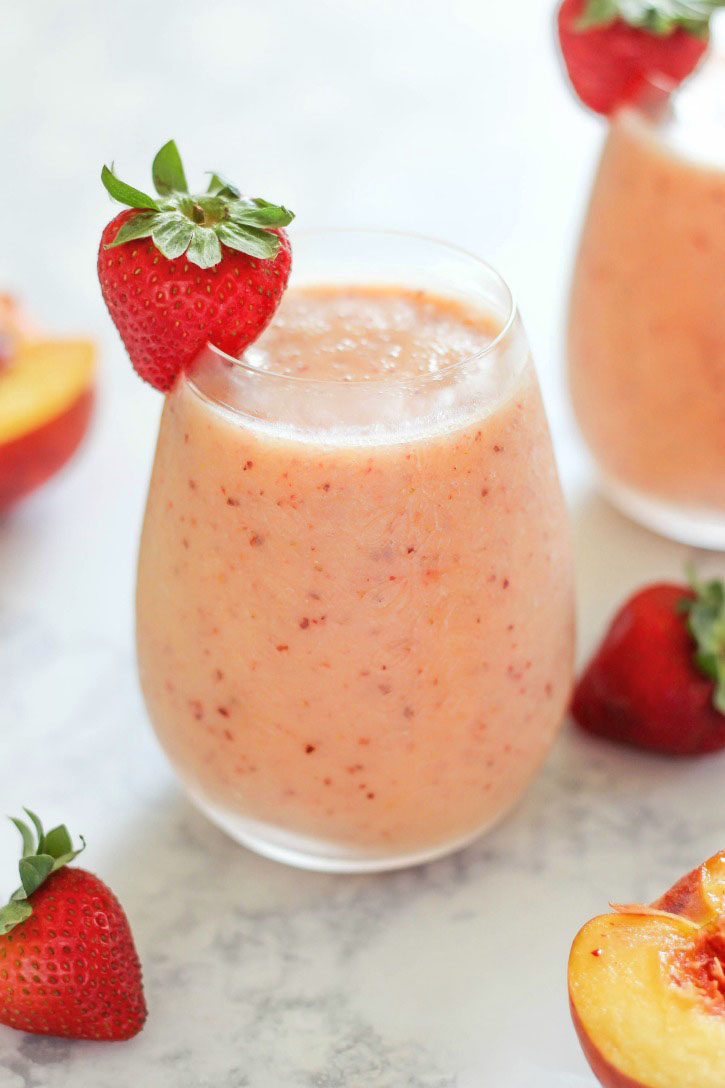
Hello there Simple As That readers.  It’s Katie from The Casual Craftlete blog.  Last month I shared a tasty Mango Orange Green Smoothie recipe and today I am back with this amazing Strawberry Peach Smoothie.  This smoothie recipe is not only pretty pink but it is filled with some of my favorite sweet summertime fruits.  It’s incredibility easy to make in my new Blendtec blender!

Strawberry Peach Smoothie - a healthy and delicious dairy-free smoothie recipe made with summertime fruits.

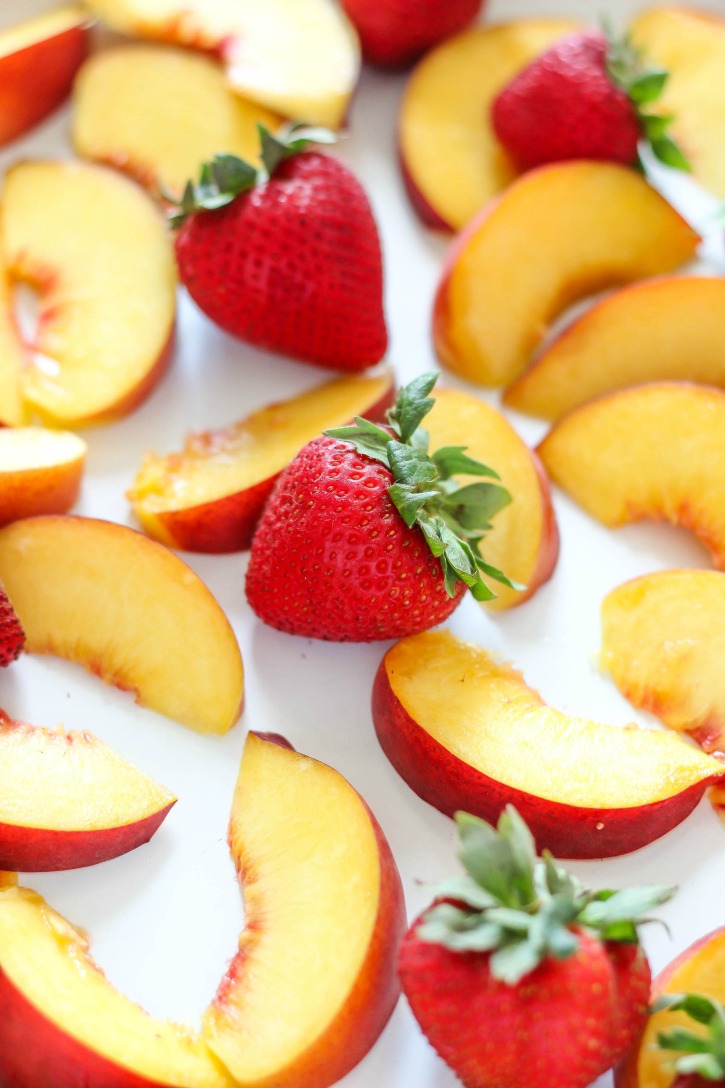
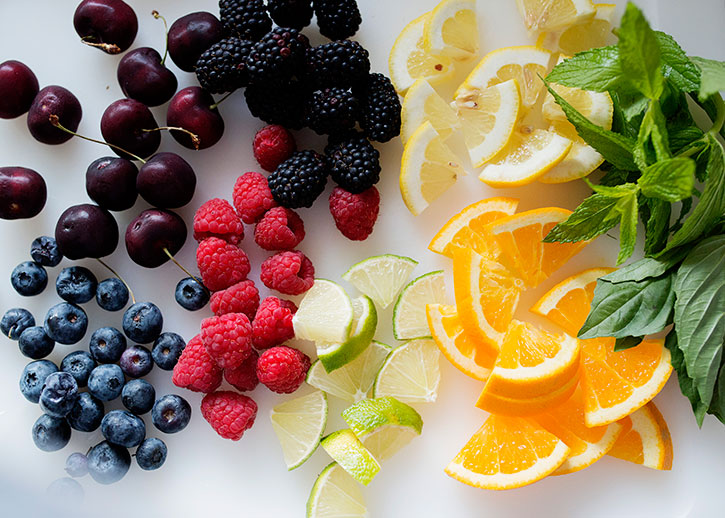
I absolutely love summer because of all the fresh fruits available.  This combination of strawberries and peaches is just perfect.  They are so juicy and sweet together.  If you have never tried this flavor combo before, I highly recommend it.

Strawberry Peach Smoothie - a healthy and delicious dairy-free smoothie recipe made with summertime fruits.

Strawberry Peach Smoothie - a healthy and delicious dairy-free smoothie recipe made with summertime fruits.

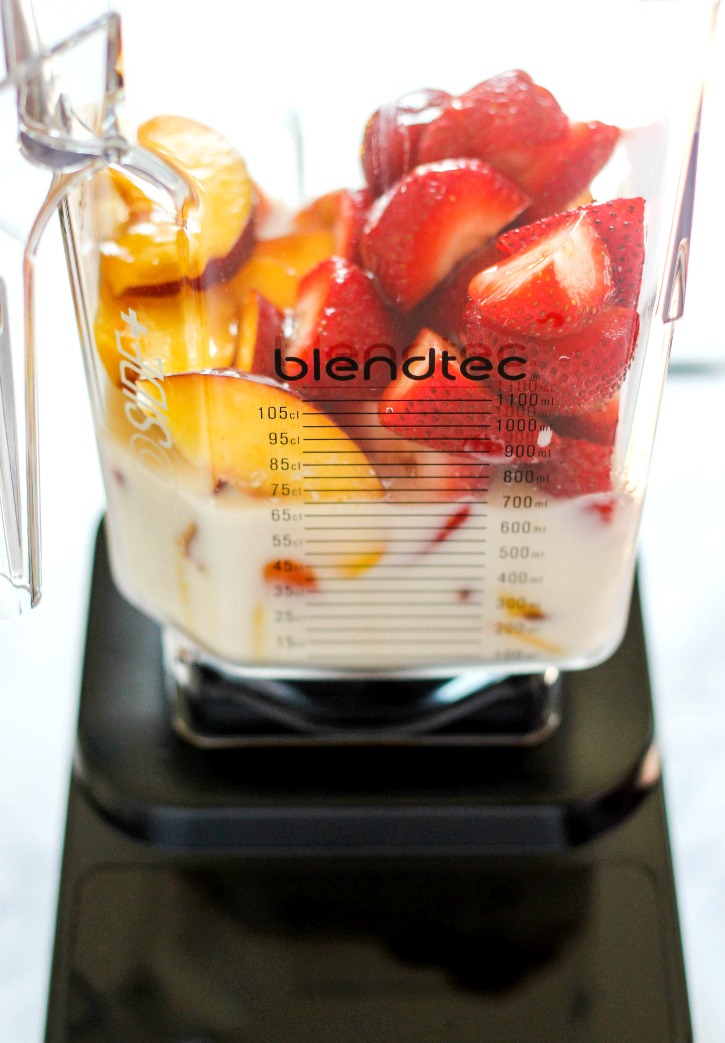
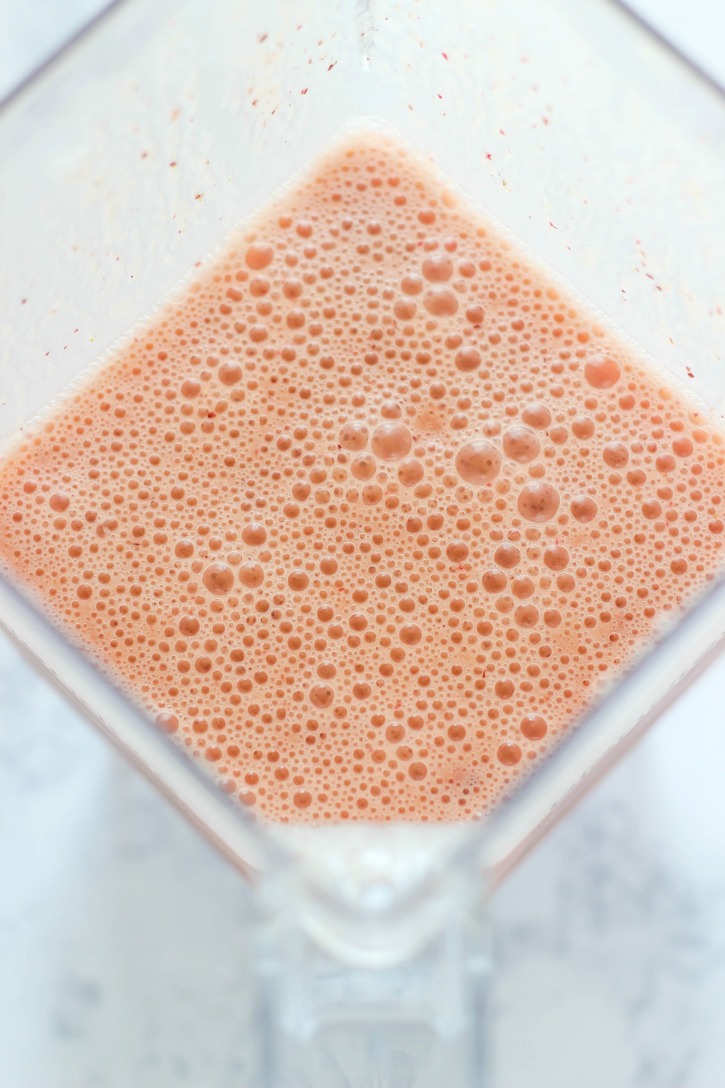
I am so in love with my new Blendtec blender!  I have had a cheap blender for a long time and have wanting for a Blendtec forever.  Let me just tell you it was definitely worth the wait.  This blender is a life changer.  It blends and purees so fast and the texture is so smooth.  It crushes ice like a dream too.  After the first time I used my Blendtec I immediately threw my other blender away.  I will never turn back.  The clean up is so incredibly easy too.  You just add 8 oz of water and a drop of dish soap into the blender and pulse for 1o seconds.  Just rinse out and boom you’re done.

Strawberry Peach Smoothie - a healthy and delicious dairy-free smoothie recipe made with summertime fruits.

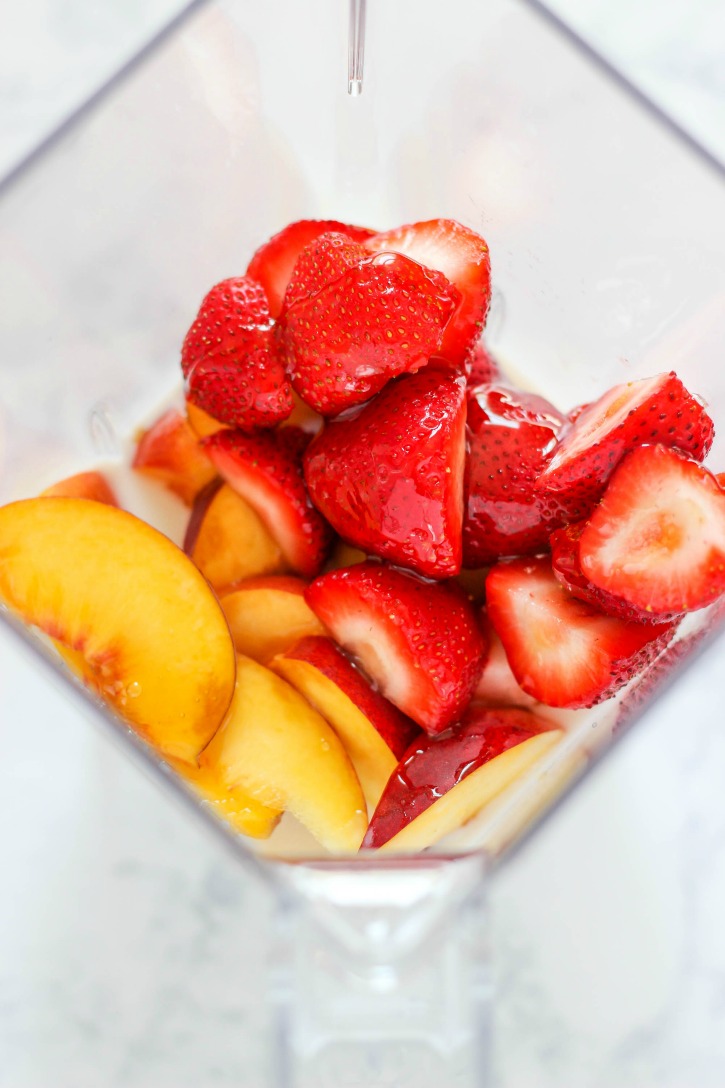
For this recipe I am using unsweetened almond milk, frozen banana, honey, fresh peaches and strawberries.  This is a dairy-free smoothie but you can use your favorite milk of choice. Other great smoothie ingredients are flax seeds, chia seeds, almond butter, protein powder and so much more.  I love making smoothies because you can change up the ingredients to create a different tasting smoothie each time.  Not to mention smoothies take very little time and prep, making my life so much easier.

Strawberry Peach Smoothie - a healthy and delicious dairy-free smoothie recipe made with summertime fruits.

Strawberry Peach Smoothie
 
Print
Author: Katie @ The Casual Craftlete for Simple As That
Recipe type: Breakfast
Cuisine: American
Serves: 2
Ingredients
  • ⅔ cup to 1 cup unsweetened almond milk
  • 2 cups strawberries, hulled and quartered
  • 4 peaches, pit removed and roughly chopped
  • 1 frozen banana
  • drizzle of honey
  • handful of ice cubes
Instructions
  1. Place all ingredients into a high speed blender and blend until smooth and creamy. Serve cold.
  2. a healthy and delicious dairy-free smoothie recipe made with summertime fruits.
3.5.3208

Strawberry Peach Smoothie - a healthy and delicious dairy-free smoothie recipe made with summertime fruits.


25 Simple and Delicious Camping Recipes

Wednesday, July 20, 2016

25 Simple and Delicious Camping Recipes – One of the best parts about being outdoors is enjoying what nature has to offer and cooking over a campfire! There is something truly magical about food made with fire! Here are some easy and delicious dishes that will make you want to go camping!

A list of easy AND delicious dishes that will make you want to go camping!

Skillet S’mores Dip Recipe

Short on prep time and big on ooey-gooey taste, this simple recipe is one your family will be asking for again and again!

Camping Mac N’ Cheese | Lauren’s Latest

Campfire Mac and Cheese

Campfire French Toast | This Lil Piglet

Campfire French Toast

Campfire Cones | The Girl Who Ate Everything

Campfire Cones

Chili Campfire Bake | Six Sister’s Stuff

Chili Campfire Bake

Skillet S’mores Dip | Coleman

Ooey-Gooey Skillet S'mores Dip Recipe

Campfire Tarts | Cooking Classy

Tarts on Fire Sticks

Campfire Philly Cheesesteak Sandwich | Twin Dragonfly Designs

Campfire Philly Cheesesteak Sandwich

Pizza Nachos | Inspired Dreamer

Pizza Nachos

BBQ Dutch Oven Chicken and Potatoes | Clarks Condensed

Dutch Oven BBQ Chicken

Banana S’mores | Andrea’s Notebook

Banana S'mores Recipe

Campfire Cinnamon Rollups | Almost Supermom

Campfire Cinnamon Rolls

Dutch Oven S’mores Cake | Polka Dot Chair

Dutch Oven S'mores Cake

Grilled Parmesan Ranch Chicken Foil Packs | Betty Crocker

Parmesan Chicken Packet

Perfect Camp Pancakes | Backpacker

Tips for Perfect Camping Pancakes

Campfire Bacon | Zestuous

Campfire Bacon

Breakfast Burritoes Campfire Style | Taste and Tell Blog

Campfire Breakfast Burritoes

Campfire Pies | Andrea’s Recipes

Campfire PIes

Easy Dutch Oven Potatoes | Camp Chef

Cheesy Dutch Oven Potatoes

Dutch Oven Chicken Rolls | Rhodesbread

Chicken Stuffed Rolls

Campfire Chili Cheese Fries | The Kitchen Magpie

Chili Cheese Fries

Egg Sausage Breakfast Taquitoes | Tastes Better From Scratch

Egg Sausage Breakfast Taquitoes

Southern Baked Beans | Add a Pinch

Southern Baked Beans

Dutch Oven Apple Crisp | Eat It and Say Yum

Dutch Oven Apple Crisp

Hawaiian Chicken Stack in Tin Foil | One Sweet Appetite

Hawaiian Stack Tin Foil Dinner

Kielbasa Tinfoil Dinner | Cook’n

Kielbasa Tinfoil Dinner

Woodland Creatures Spoon Puppets

Sunday, July 17, 2016

Woodland Creatures Spoon Puppets

Hey everyone, this is Jennie from The Lovely Little Nest, and I’m so excited about sharing how to make these adorable wooden spoon puppets with all of you.  Aren’t they such cute little woodland creatures?

1V6A5969

1V6A6003-2

It’s been really rainy around here the last month, and so we’ve been sticking to mostly indoor activities.  We had everything around the house to make these little puppets and it turned into a great rainy day activity – one that my two year old keeps asking to do again and again.  Let’s hope I don’t come downstairs one day to her painting every spoon in the kitchen!

1V6A5837

Supplies:

Wooden Spoons

Paint

Paint Brushes

Permanent Marker

Spray on Clear Coat

Glue and Accessories if you wish (googly eyes, pom poms, feathers, etc.)

1V6A5850

Instructions:

1.  Paint all of the spoons.  We stuck to one solid colour of paint for each spoon to make it simple for my little one to participate (and easy for me, let’s be honest!).  Once she got bored of painting with that colour, I touched up the spoon nice and quick and gave her another spoon and colour to work with.

1V6A5858

1V6A6020

2.  Once all of the spoons are dry, draw your designs on them with pencil.  I decorated these ones, since my little ones are too young to draw anything but scribbles, but if you have children who can draw, they will love this part.

Get creative, the puppets can look however you want them to.  I drew my designs on paper before transferring them over so that I didn’t mess up the paint job.  If you really love the ones that I designed, go here and get the free download of the pattern, then use the classic tracing paper transfer trick to get them on the spoons with a pencil.

1V6A5872

1V6A5892

3.  Next, I grabbed my collection of permanent markers and metallic pens and went to town decorating these little woodland creatures.  I had a white permanent marker on hand, which was so much easier than trying to use white paint for the little details. The metallic pens I used to add lots of shiny details.  I love the way they shimmer!

1V6A5957

1V6A5974

4.  I dipped the ends of the wooden spoons in gold paint to finish decorating them.1V6A5946

5.  Once I had all of my painting and drawing done, I gave them a clear coat to protect these little forest friends from too much wear and tear.

1V6A5937

6.  If you want to glue on any accessories, go to town!  We put a little cotton tail on the back of the bunny.

1V6A5979

1V6A5983

And you’re done!  Aren’t they the cutest little wooden spoon puppets?

1V6A5943

1V6A5951

All you have to do now is make a puppet theater and watch your little ones put on a show.  We used some string and clothespins we had around the house to hold up a blanket for a makeshift theater.  Enjoy the show!

1V6A5995

1V6A6001

1V6A6016

1V6A6006

12 Life Lessons Children Learn From Hiking

Sunday, July 17, 2016

Because few things have such direct applications to life—12 life lessons children learn from hiking. 

Because few things have such direct applications to life—12 life lessons children learn from hiking.

From spotting wildlife to taking in the view to the thrill of reaching our destination, our family loves spending time together on the trail.

Over the years we’ve watched our kids learn about ecosystems and plant life, seasons and weather.

But the real learning goes so much further than those things.

Because few things have such direct applications to life—12 life lessons children learn from hiking.

The Hike – Peyto Lake, Banff National park

What we really want them to take away are the life lessons that they wouldn’t absorb from a textbook or in a classroom or even by listening to our finest speeches as parents. 😉

We want our kids to push through, to overcome their tiredness and their feelings of self-doubt. We want them to practice encountering obstacles and figuring out how to get around them. We want them to experience the sense of accomplishment from conquering something difficult.

If you haven’t already picked up hiking as a family pastime, I hope this list of life lessons your children will learn convinces you that there is so much more to hiking than putting one foot in front of the other on the trail.

Because the fact that our family ENJOYS hiking is only a small part of WHY we do it.

The Hike – Bertha Falls, Waterton Lakes National Park

12 Life Lessons Children Learn from Hiking

1. Hard work pays off.

2. Even though it’s uncomfortable, you have to leave your comfort zone in order to grow, reach your goals, and arrive at your destination.

3. The world is a beautiful place. Time and again I’ve watched my children’s eyes fill with wonder as they see the amazing creations around them and grow in their appreciation for nature.

Because the fact that our family ENJOYS hiking is only a small part of WHY we do it.

The Hike – Bertha Falls, Waterton Lakes National Park

4. There are so many better things to do with your time than spend it on a screen.

5. There is value in following a guide who knows the way (i.e., their parents, grandparents, mentors, and church leaders).

6. You are capable of solving hard problems.

If you haven't already picked up hiking as a family pastime, I hope this list of life lessons your children will learn convinces you that there is *so much more* to hiking than putting one foot in front of the other on a trail.

The Hike – Virginia Falls, Glacier National Park

7. Trust yourself.

8. Push your limits; you’ll be surprised at what you can handle.

9. It’s easy to get focused on the climb—the hard parts. But don’t forget to look up and take in the view. It will remind you what you’re doing it for.

Because few things have such direct applications to life—12 life lessons children learn from hiking.

The Hike – Bear’s Hump, Waterton Lakes National Park

10. Take care of yourself. Drink water, bring snacks, think positively, and take breaks to stay refreshed.

11. Learn the importance of setting your pace. We’re not designed to run faster than we have strength. A sustainable pace makes all the difference.

12. You can get up when you fall.

Because few things have such direct applications to life—12 life lessons children learn from hiking.

The Hike – Virginia Falls, Glacier National Park

The fact that our family enjoys hiking is only a small part of WHY we do it. 

Hiking is a bit like life: The journey only requires you to put one foot in front of the other… Again and again and again. And if you allow yourself opportunity to be present throughout the entirety of the trek you will witness beauty every step of the way not just at the summit.

– Unknown


For more about spending quality time outdoors, I think you might enjoy these posts:

  • Everything You Need to Know about Hiking to Havasupai with Kids
  • 30 Simple Ways to Immerse Your Kids in Nature
  • What Families Gain from Time Spent Outdoors
  • 5 National Parks to Visit as a Family

National Get Outside Day

Thursday, July 14, 2016

Get Outside with friends and family Friday July 15th and help make Get Outside Day a National Holiday!

We spent the past week exploring beautiful Banff National Park in the heart of the Canadian Rockies and had such an amazing time hiking, dipping our toes in ice cold glacial lakes and taking in the most amazing views! Being out in nature in this truly majestic landscape has reaffirmed to me what a privilege it is to call this beautiful country home.

As a nation defined by its incredible landscapes, I was surprised to learn that nearly two thirds of Canadians (63 per cent) spend less than two hours per week outside. This is something we need to remedy….and fast!

There is no app for this // Get Outside with friends and family Friday July 15th and help make Get Outside Day a National Holiday!

As a family that is passionate about spending time outdoors we’re thrilled to partner with Coleman Canada and Canadian Tire in the Get Outside Day movement! I believe that getting outside is important for our health, overall well-being and for building strong family connections.

I urge you to visit getoutsidecanada.com for inspiration to help you and your family get outside this summer and be sure to sign the petition to help make Friday, July 15th National Get Outside Day – a national holiday providing friends and family with a little more time to get outdoors together!

Short on prep time and big on ooey-gooey taste, this simple recipe is one your family will be asking for again and again! It's a hit with mom's because it's so easy to throw together and kids will love this delicious spin on traditional s'mores.

During my partnership with Coleman Canada I’ll be sharing tips, ideas and delicious recipes to help inspire you to get outside. I hope you’ll enjoy a simple meal or quick snack on your next outdoor adventure and make some fun memories along the way!

In our first post we’re sharing is this yummy Skillet S’mores Dip! You can find the recipe here.

Brown Sugar Vanilla Crumb Cake

Wednesday, July 13, 2016

Brown sugar keeps this simple vanilla crumb cake extra soft!
brown-sugar-vanilla-crumb-cake

It’s Julie from Tastes of Lizzy T sharing with you a classic recipe for Brown Sugar Vanilla Crumb Cake. Over on our little side of the world wide web we focus on sharing classic, comforting recipes. Think soups, barbecue side dishes, sweet little cookies and old-fashioned pies. Often we take those Amish-style recipes and make them just a little healthier for you. But sometimes we leave sweet treats as they are. Because every now and then you need a little happy with your healthy. 🙂

I got this vanilla crumb cake recipe from a new-to-me, old Amish cookbook that I found at a bookstore. If there’s ever a lazy day around our house (which doesn’t happen often with nearly three teenagers), you can find me under a warm blanket on the living room couch, flipping through cookbooks. This vanilla crumb cake recipe popped out at me immediately. Because really, who doesn’t love crumb cake?!

brown-sugar-vanilla-crumb-cake

I often switch up those old-fashioned recipes just a tad. I swap out the shortening for butter, add a hint of vanilla and this time added dark brown sugar to replace the regular brown sugar. You can use either, but dark brown sugar has an extra touch of molasses which just deepens the flavor of recipes. So fantastically delicious.

What’s fun about this recipe is that you make the sweet crumb topping first, separate out 1 cup of crumbs for the actual topping, then use the remaining crumbs to create the rest of the cake. It’s almost a 1-bowl cake.

brown-sugar-vanilla-crumb-cake

You’ll love this simple, moist vanilla crumb cake. It’s delicious fresh from the oven, but we enjoyed it even more the second day when the flavors had time to deepen.

Grab your favorite hot drink and a slice of this crumb cake for a sweet escape!

Brown Sugar Vanilla Crumb Cake
 
Print
Brown sugar keeps this simple vanilla crumb cake extra soft!
Author: Julie
Recipe type: Dessert
Serves: 9
Ingredients
  • 2½ cups all-purpose flour
  • ½ cup cold salted butter, cut into cubes
  • 1½ cups dark brown sugar*
  • 2 teaspoons vanilla extract, divided
  • 1 teaspoon baking soda
  • 1 cup buttermilk
Instructions
  1. Preheat the oven to 350 degrees.
  2. In a bowl, use a pastry blender (or two knives) to cut together the flour, cold butter cubes, sugar and 1 teaspoon of vanilla extract. Cut together until the mixture is coarse crumbs.
  3. Measure out 1 cup of crumbs and set aside so you can use them for the topping.
  4. To the remaining crumbs, add 1 teaspoon baking soda, buttermilk and the remaining teaspoon of vanilla.
  5. Mix just until combined.
  6. Spray a 9x9 pan with cooking spray.
  7. Pour the batter into the prepared pan, spreading to cover the entire bottom of the pan evenly.
  8. Sprinkle the reserved crumbs on top of the cake batter.
  9. Bake for 25-30 minutes or until a toothpick inserted in the center comes out clean.
Notes
*You can also use light brown sugar.
3.5.3208

Other recipes using dark brown sugar:

Mocha Chocolate Chip Cookie Pie

Chocolate Chip Butterscotch Bars

Oatmeal Pie Crust

DIY Rustic Photo Mobile

Sunday, July 10, 2016

Happy summer to all you fine people. I hope you are having a wonderful time and enjoying the holidays with your families. Things have been pretty exciting here lately, both business-wise and on a more personal plan, too. I’m developing some really fun products for the kids room, but I’m even more excited about us expanding our little family this year. This will be our first, so it feels very special. We haven’t had the best of luck on the baby front the last couple of years, but 2016 do seem to have scattered some fairy dust on our family. So you can only imagine all the fun and creative things I’m planning to make for our nursery the coming months.

For today’s project, I wanted (again) to create an easy and fun way to display photos, so I decided to make a rustic looking photo mobile with pictures on both sides of the hanging frames.  Since it’s summer I always find it fun to incorporate materials I have found in nature.  It’s also a fun way to spend time with your kids as well, collecting things during one of your field trips. For this particular project, we need branches or twigs, or maybe beach wood, if you like to collect that.


rustic photo mobile tutorialMATERIALS:
1) Branches, twigs, beach wood
2) Small, sharp knife for stripping bark
3) Pruning shears
4) Twine & scissors
5) Printed photos
6) Double sided tape
7) Hole punch

STEP 1:
Go out and collect a handful of branches/twigs. Mine were approximately 3/4 of an inch in thickness.

branch_frame-mobile_find_branches-compressor
STEP 2:
Decide how many frames you want on your mobile and what size photos they should hold. I used a 6×4 piece of paper to reference my photo sizes. Cut the branches with the shears, so they line up with the 6×4 piece of paper, but leave a margin around the paper like in the picture below. Also, the branch corners should overlap.

Keep a couple of longer branches for the mobile cross handle.

branch_frame-mobile_find_branches_01-compressor
STEP 3:
My branches had bark on them, and to get a cleaner look, I stripped them all from bark with a sharp knife. This is, of course optional, and probably not necessary if you are using beach wood. I just like the clean look, and I know the wood, once indoor and drying up, will not make a mess from bark loosening, if they have been stripped.
If you are doing this step with your kids, promises me that you’ll supervise them and teach them how to handle a knife properly.

branch_frame-mobile_find_branches_02-compressor
STEP 4:
Now it’s time to make the frames by using twine to bind each branch corner together. I just went up, down and around(tightly) with the twine a couple of times and secured with a knot. You’ll easily feel when it’s enough. The corner will feel stable. Do this with all four corners of each frame and cut off excess twine.

branch_frame-mobile_find_branches_03-compressor

STEP 5:
If you don’t know which photos to use yet, go find them and print them in your chosen sizes. You’ll be needing two photos for each frame, like pairs. Just make sure you choose either horizontal of vertical ones for both images for each pair.

NOTE ON CHOOSING PHOTOS:
You can use very random photos if you like, but it can also be a personalized photo display. Like in my example; I will be hanging the mobile in our upcoming nursery and I wanted it to be filled with familiar faces, like photos of the hubby and I, our dogs and those people we spend the most time with. To me, that creates a comforting and happy atmosphere.
You could choose to make a theme for yours maybe; summer holiday, kids favorite pet, flowers or maybe just a favorite color. The ideas are endless.

branch_frame-mobile_find_branches_04-compressor
STEP 6:
Add double sided tape to the back of one of the photos for each frame and stick the other one on top. Do this for all photo pairs.

branch_frame-mobile_find_branches_05-compressor
STEP 7:
Punch holes in the corner of each taped photo pair and use twine to fasten each hole to the frame corner.
It should look like in the picture below.

branch_frame-mobile_find_branches_06-compressor
STEP 8:
Now you should be sitting with a bunch of frames, that have a double sided photo. To hang these, we need to create a cross handle for the mobile. We do this by taking the two longer branches from step 2 and tie them together in the middle with twine. Tie a second piece of twine to the middle, so you can hang the cross handle as well.

Now tie a piece of twine to the top of each frame and connect that to one of the cross bars. Do this for all frames, but keep them at different lengths, to make the frames able to turn. You’ll probably notice that the mobile is off balance, but if you slide the knots, where the frames are connected to the cross bars, then you can fix the balance.

branch_frame-mobile_find_branches_08-compressor
I really love the result and look of this rustic mobile. I also think it’s a fun way to personalize a photo display for different rooms. I think you could even make one for the living room and it would look pretty awesome. Either way, it is a nice way of using a bunch of photos, because of the double display and a great reason to get those photos printed 🙂

I hope you liked this project. You can follow along on my blog for more kids room and nursery related decor over the coming months.

See you soon.
/Annika

DIY Summer Memories Box

Friday, July 8, 2016

We are smack dab in the middle of summer and with all the activities and summer memories being made, it is high time you let your kids decorate their own DIY summer memories box to help hold all the treasures they have been collecting since school let out.

Hey everyone! It’s Kara from A Kailo Chic Life and I want to share how easy it is to have your kids make a their own summer memory box to hold sea shells from your summer beach trip, instant photos of family fun, and any thing else they deem important.

DIY Summer Memories Box

DIY Summer Memories Box

The Supplies:

  • Plain wood jewelry box
  • Acrylic craft paint
  • Paint brushes
  • Photo
  • Decoupage medium
  • Stickers

Begin by letting your kids paint their wooden box however they like. This is a great summer activity to keep their hands busy for a bit.

DIY Summer Memories Box

Once the box has been painted, cut your photo to size and use the decoupage medium to paint the lid of the memory box. Then lay your photo on top of the decoupage medium coated lid and add a second layer of decoupage glue over the top of the photo to seal it into place.

DIY Summer Memories Box

Once the decoupage glue has dried, let the kids add stickers (such as the year or their name) to the box. Then it is time to fill the box with all their summer memories!

DIY Summer Memories BoxDIY Summer Memories BoxThis is really a project that even the youngest crafter can make and they will love having their own special box for all their treasures. Now it’s just time to go take that walk at the local park so they can pick a few flowers, or take a trip to the splash pad for some fun water play photos. I can just see this becoming a yearly tradition. How fun would it be to look back through the past summers at all the fun that was had and trips that were taken?!

I hope you enjoyed this tutorial for the DIY summer memories box. Feel free to check out my blog, A Kailo Chic Life,  for even more fun crafts and DIY ideas!


Save

How to Make Fruit Ice Cubes

Monday, July 4, 2016

How to make fruit ice cubes that the kids and adults will all like. Add some color and flavor to water, iced tea, or lemonade. 

fruit-cubes_8

I make a lot of delicious things at my house. It’s the nature of what I do. My kids are unimpressed with my culinary feats 99% of the time. They are so over my cookies and cupcakes that it takes a lot to get them to even pay attention at all. (It’s starting to really hurt my feelings.) I was working on this post and all three of my kids separately walked into the kitchen, saw what I was working on and were blown. away.

Who knew that all I had to do was freeze some fruit in some water and my kids would finally ooh and ahh?

My children loved these fruit cubes so much. Every time they opened the freezer door they would ask if they could have the ice cubes in their water. I should also mention that these kids do not eat fruit at all.

how to make fruit ice cubes

My daughter had a friend over and I put some fruit cubes into a fancy glass with some seltzer and a straw. They felt so grown up and special.

how to make fruit ice cubes

We are just making ice cubes here, so this is not rocket science.

We had guests in town and I had a lot of fruit leftover from their visit. (I love when people that do eat fruit spend time at our house; look how gorgeous these colors are.) I shopped my fridge and had cherries, raspberries, blackberries, blueberries, limes, lemons, oranges, basil, and mint leftover. I cut the citrus into small pieces and washed the berries and herbs really well.

how to make fruit ice cubes

When I was making these, I was thinking about what flavors naturally went together and made cubes based on that. I ended up with 5 different combinations. I was also thinking about how I wanted them to look when they were un-molded.

how to make fruit ice cubes

All citrus – lemon, lime, orange

Cherry – I left the stems on so that it would look really pretty in a glass

Lemon and mint – lemon and basil would also be really good. Or lavender.

Triple berry – raspberry, blueberry, and blackberry

Blackberry Lime – my personal favorite in a lemonade – blackberry, lime, and basil

how to make fruit ice cubes

Pour water over the ice cube tray and freeze solid.

how to make fruit ice cubes

You could make these in any kind of mold you like. I’ve done this in small bowls and used them in my beverage canisters to keep the drink cold (lemonade and iced tea is perfect with these) without watering it down. I make a few and float them in the jar and it looks so pretty on a buffet table.

I’ve also made them in silicone baking trays and square ice cube trays. The more fruit there is, the more colorful and pretty.

Simple as that!

how to make fruit ice cubes


Open-face Swiss Bagels

Sunday, July 3, 2016

Topped with swiss cheese, avocado, bacon (and more!) these open-face swiss bagels are perfect for breakfast, lunch or snacktime!

Topped with avocado, bacon, red onion (and more) these open-face bacon and swiss bagels are perfect for breakfast, lunch or snacktime!

I love the fact that bagels are perfect for breakfast, lunch or a snack and there are so many ways to dress them up.

Topped with avocado, bacon, red onion (and more) these open-face bacon and swiss bagels are perfect for breakfast, lunch or snacktime!

I first tried these scrumptious bagels when my sister-in-law served them at a baby shower. With a short list of healthy toppings, quick prep time and great taste, these swiss bagels have since become a regular at our house!

Topped with avocado, bacon, red onion (and more) these open-face bacon and swiss bagels are perfect for breakfast, lunch or snacktime!

The sliced avocado just might be what seals the deal for me, I love avocado with everything….including in my morning smoothie!

Topped with avocado, bacon, red onion (and more) these open-face bacon and swiss bagels are perfect for breakfast, lunch or snacktime!

I wanted to share this recipe with you today, if you can consider it a recipe! These bacon and swiss bagels are a breeze to prepare but they’re absolutely delicious and filling.

Bacon and Swiss Bagels
 
Print
Ingredients
  • Multigrain bagels
  • cream cheese spread
  • tomato
  • red onion
  • avocado
  • bacon
  • swiss cheese
Instructions
  1. Cut desired amount of bagels in half and toast lightly. Spread with cream cheese. Layer tomato, avocado, bacon, red onion and a slice of swiss cheese. Place in low temp broiler just until cheese melts. 2-3 minutes. Serve.
3.5.3208

Topped with avocado, bacon, red onion (and more) these open-face bacon and swiss bagels are perfect for breakfast, lunch or snacktime!

These open-face swiss bites are my absolute favorite way to eat bagels! I hope you enjoy this quick and easy meal inspiration.

Do you like bagels for breakfast, lunch or a snack? What’s your favorite bagel topping?

For more easy meal inspiration check out these recipes…

Slow Cooker Apricot Chicken

One-Pot Italian Chicken and Rice

Easy Chicken and Stuffing Casserole

« Previous Page
Next Page »

Primary Sidebar

Rebecca Cooper — Founder, Simple as That Blog

Hello, I'm Rebecca. Welcome to my blog, Simple as That. Come along as we embrace simplicity in crafting, photography, travel, and family life. Read more about me.

Newsletter

Get the latest updates from Simple as That delivered to your inbox.

Join for Free

Beyond Snapshots: Mastering the Art of Mobile Photography

Connect

  • Bloglovin
  • Facebook
  • Instagram
  • Pinterest
  • Twitter

Follow On Pinterest

Visit Rebecca - Simple as That Blog's profile on Pinterest.

Categories

  • Crafts / DIY
  • Holidays
  • Motherhood
  • Organization
  • Photography
  • Printables
  • Recipes
  • Simple Living
  • Travel
  • Wellness

Our Privacy Policy

Follow on Instagram

Instagram has returned invalid data.

Printable 2023 Calendar

Our printable calendars and organizational pages have been essential in keeping our home and my life in order and I guarantee they will be a help to you too!

Click here to learn more

© Simple as That Blog, 2017 · Design by Brian Gardner

Simple as That Blog

Facebook / Instagram / Pinterest / Twitter / Contact